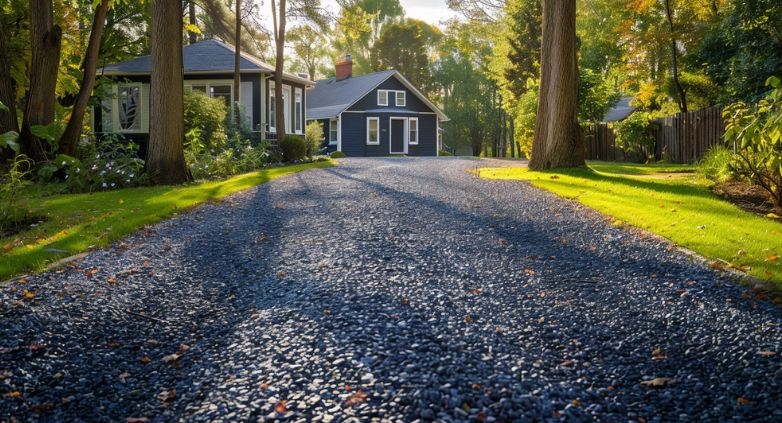
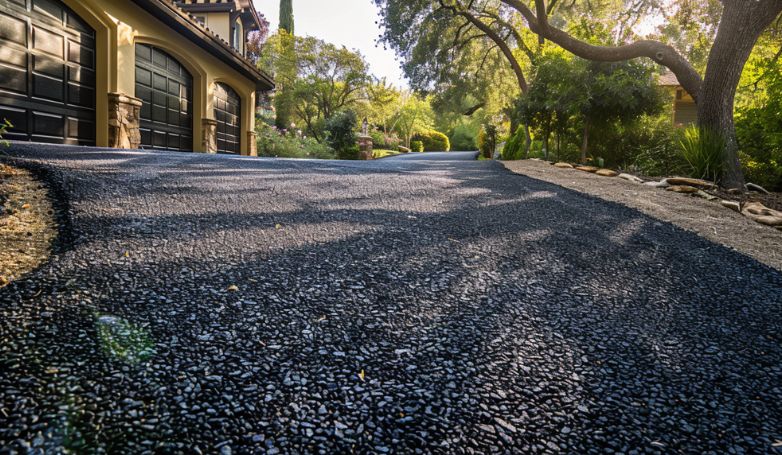
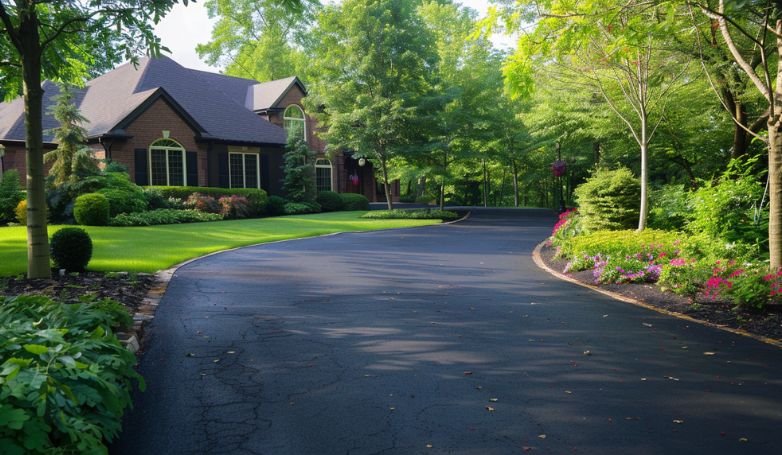
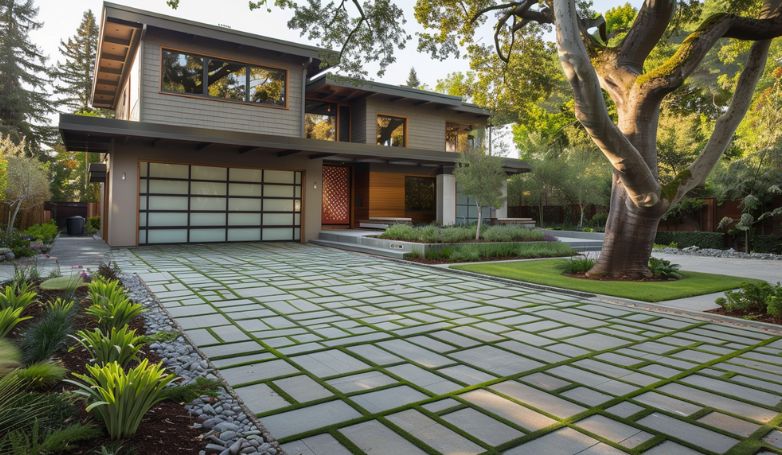
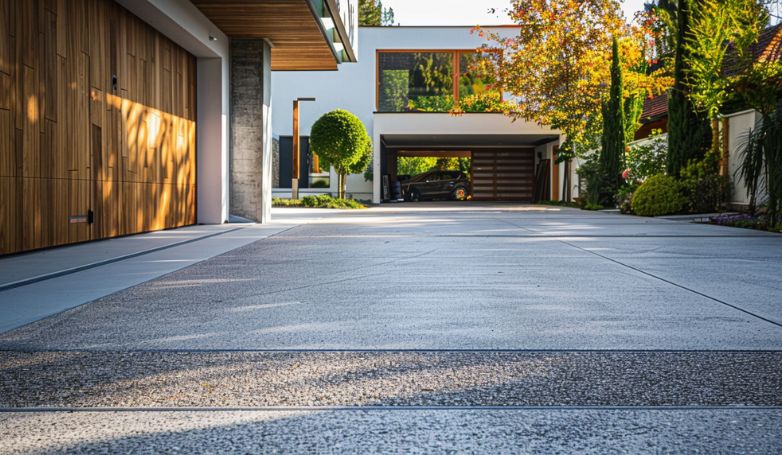
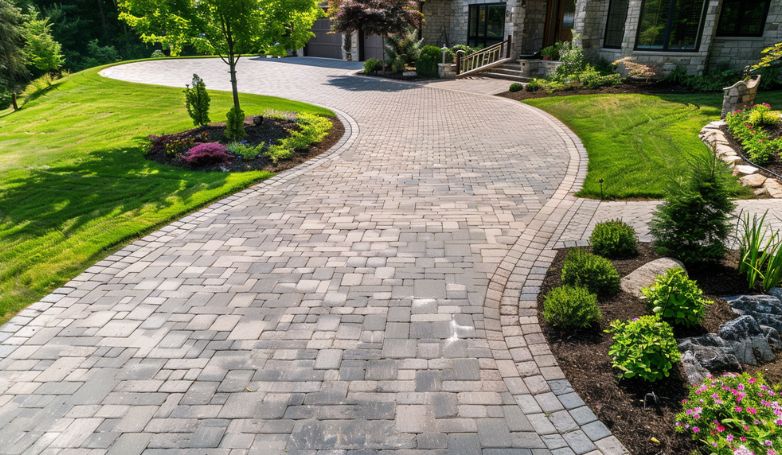
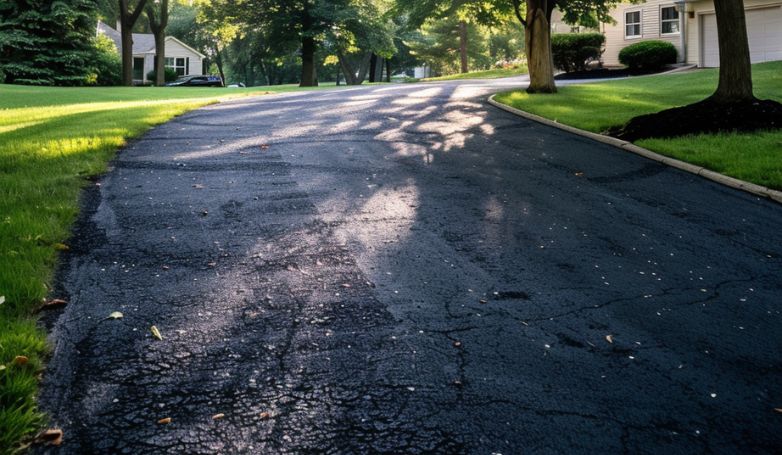
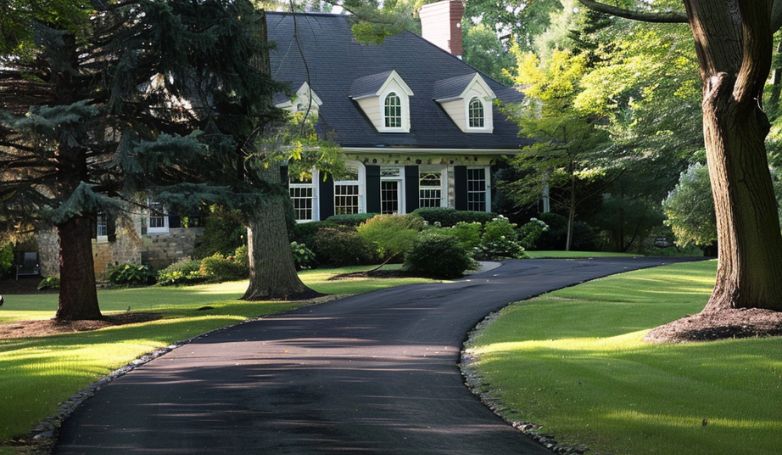
A crushed asphalt driveway is a cost-effective way to pave your way. It’s environmentally friendly because it uses recycled materials for a smooth finish. It combines durability with sustainability, providing you a robust alternative to traditional concrete or gravel driveways.
Here are 7 steps to install it:
Clear the area
Level the surface
Take care of drainage issues
Pick the right material
Spread and compact the asphalt
Create an even surface
Inspect and maintain regularly
Learn more about how to get started on installing it.
7 Steps Crushed Asphalt Driveway Installation
To make sure that your crushed asphalt driveway installation is a success, you need to follow a process.
Here are the 7 essential steps:
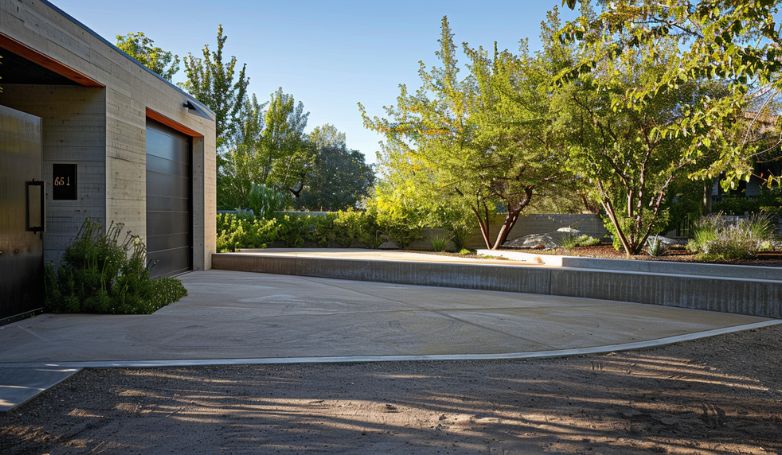
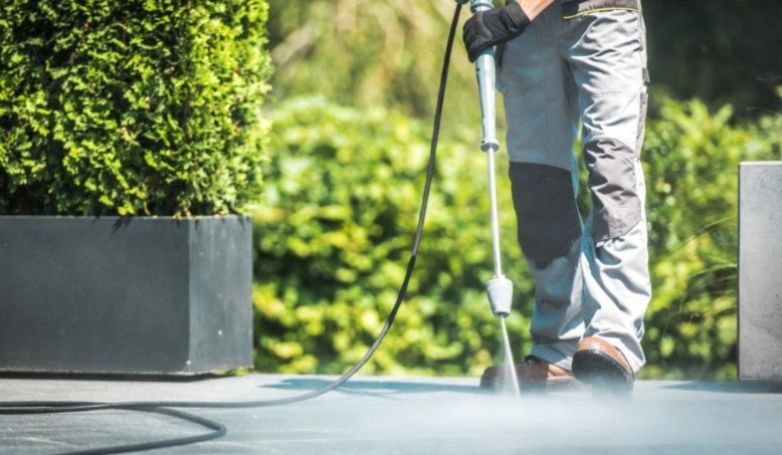
1. Clear the installation area
When getting ready to install a new driveway, it’s very important that you clear out any surface materials and debris from the area.
This makes for a much more smooth installation process and it makes it so the driveway doesn’t get any integrity issues in the future.
This step sets up a level and solid base that’ll support all of the layers of crushed asphalt well so your finished product lasts longer and performs better.
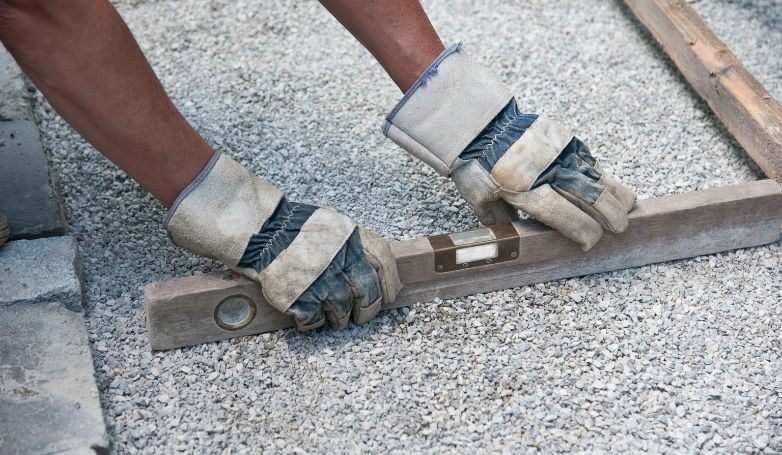
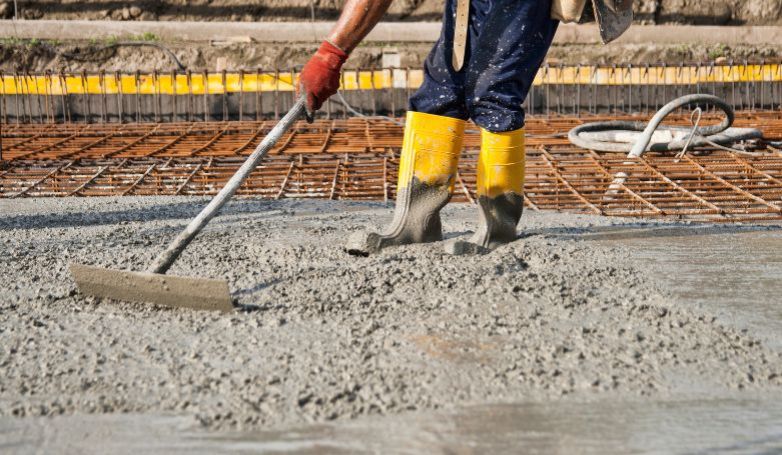
2. Level the surface
After clearing everything up, you have to make sure that the ground is as level as possible. A flat base is key for stability and water control.
It should be graded with tools to ensure runoff away from your house (at 1% – 2% slope). If there isn’t enough of an angle, water could pool up on your driveway over time and shorten its life span.
When making everything level, take note of how thick you’re making each layer of crushed asphalt because this step has an effect on their final appearance.
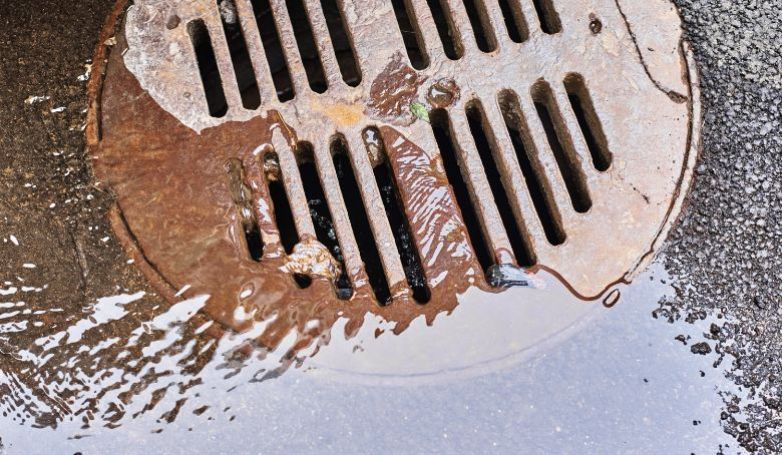
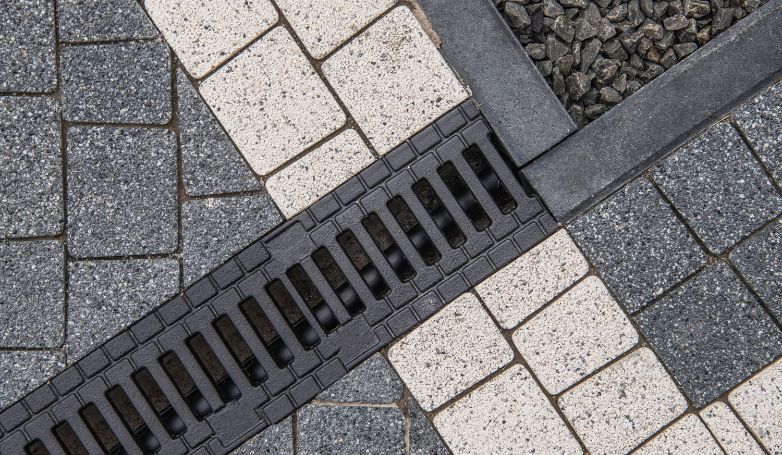
3. Address drainage issues
A lot of people don’t realize just how important proper drainage is when installing a new driveway!
You need to check if there’s an efficient way for water to run off without pooling anywhere near your home or at any point beneath your future asphalt pavement.
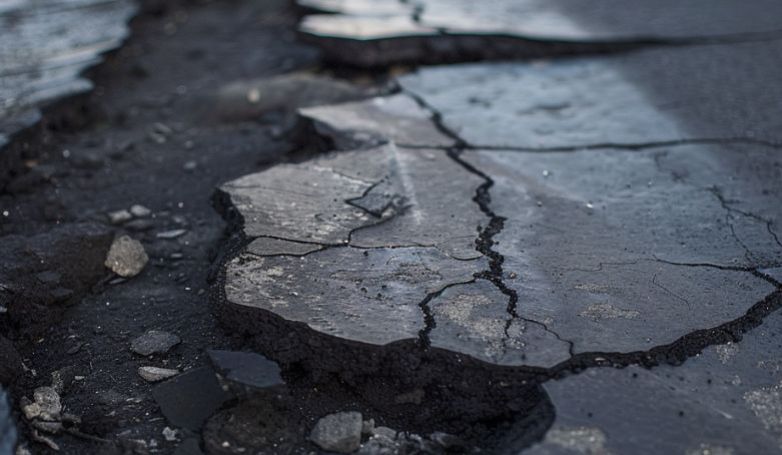
Inadequate drainage systems could cause damage like erosion, cracks, or potholes further down the line which could cost thousands to repair.
4. Select the appropriate crushed asphalt material
The material should have a mix of sizes to ensure compactness and stability.
Discuss options with your supplier to find the best fit for your climate and soil type. The right material will provide a strong, durable surface that resists weathering and heavy use.
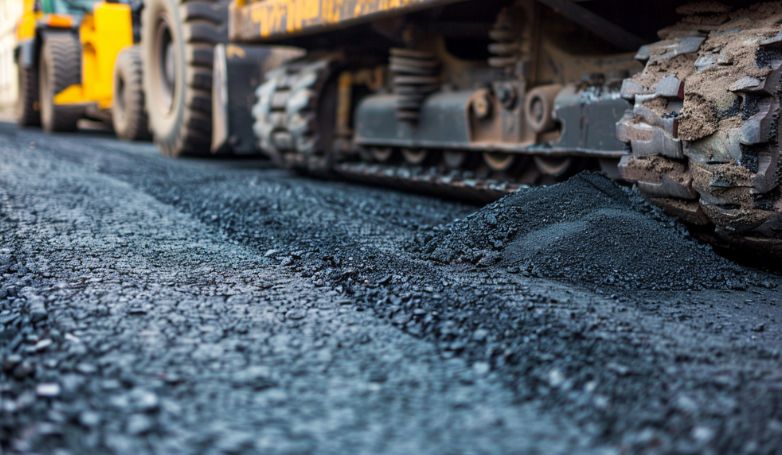
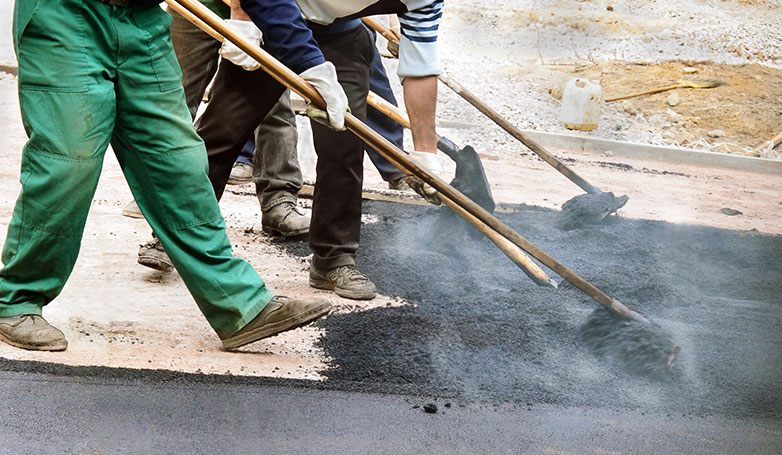
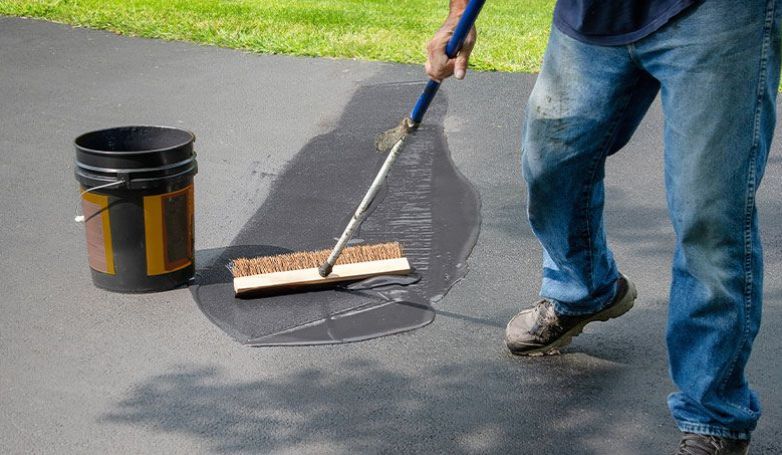
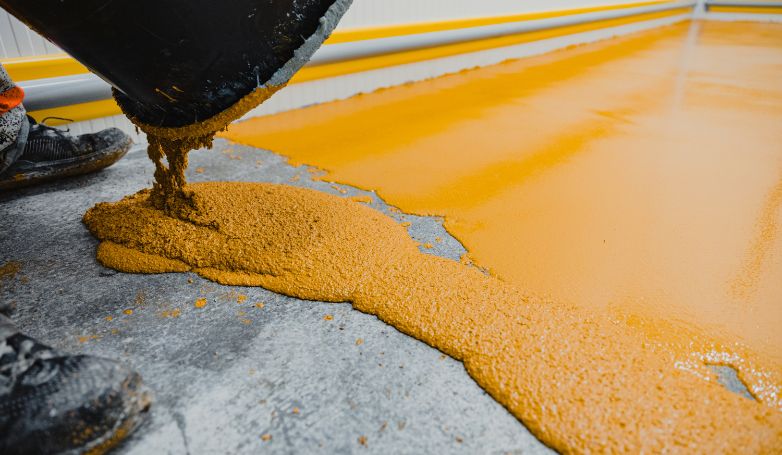
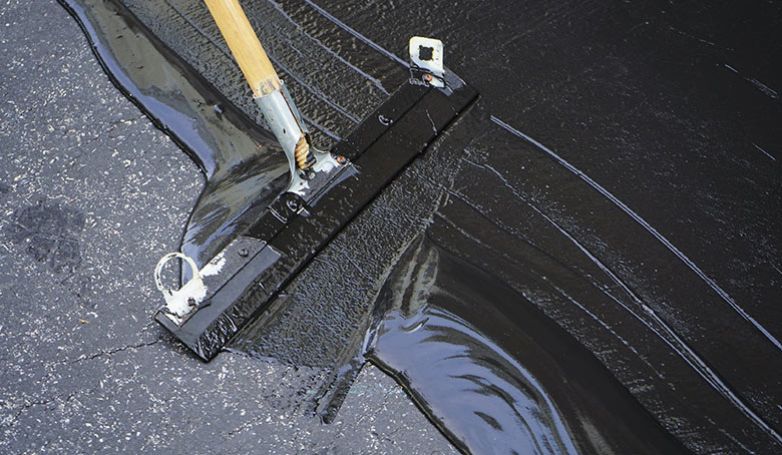
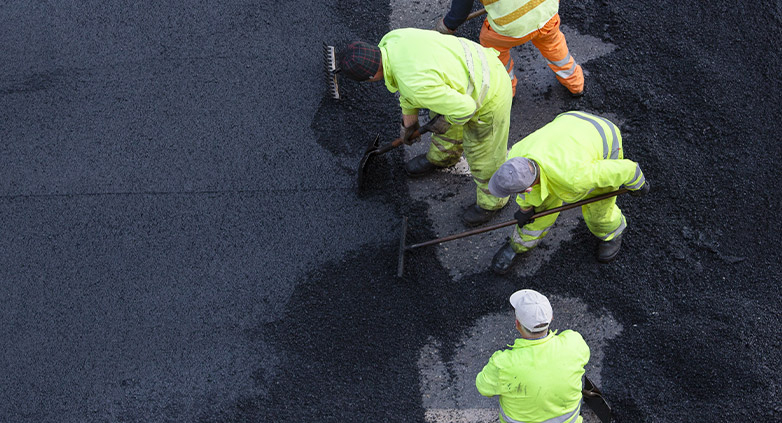
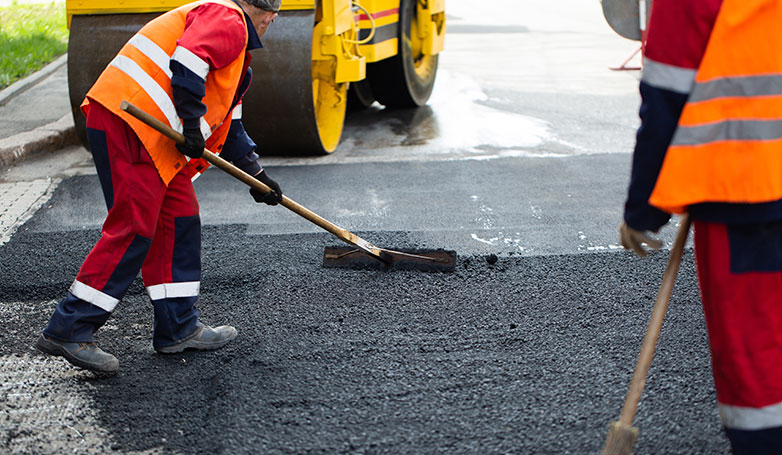
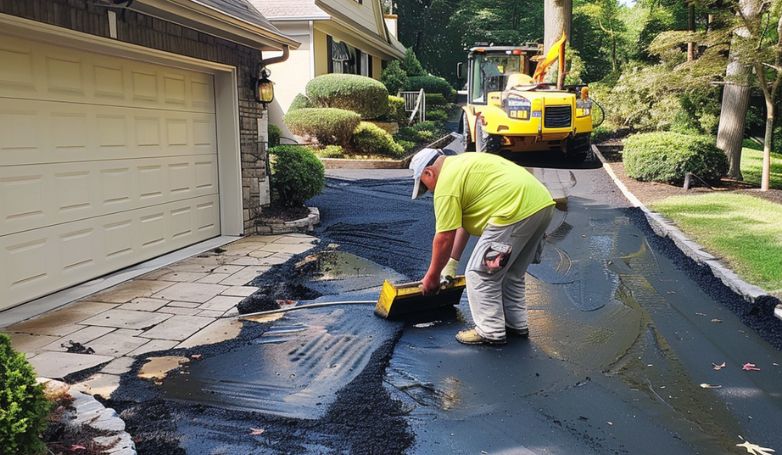
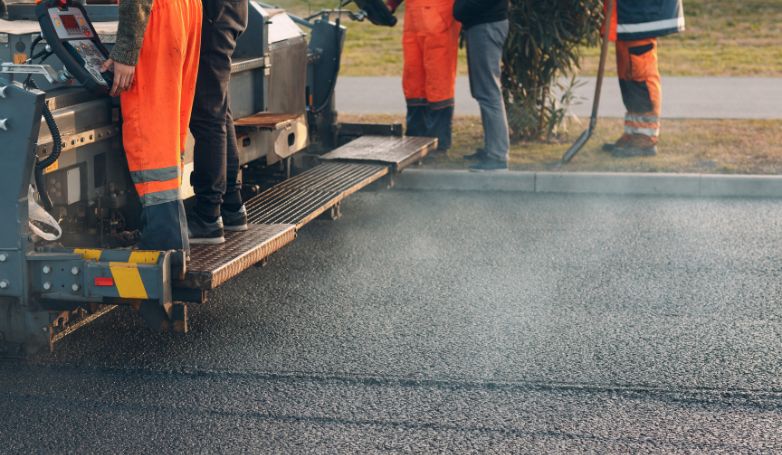
5. Spread and compact the crushed asphalt
Spread the crushed asphalt across the prepared surface using a rake or mechanical spreader.
Aim for a uniform depth that will avoid any weak spots in the driveway but still get compacted enough to be strong, even and smooth, which can wear through thin areas of your driveway due to weathering and vehicle traffic.
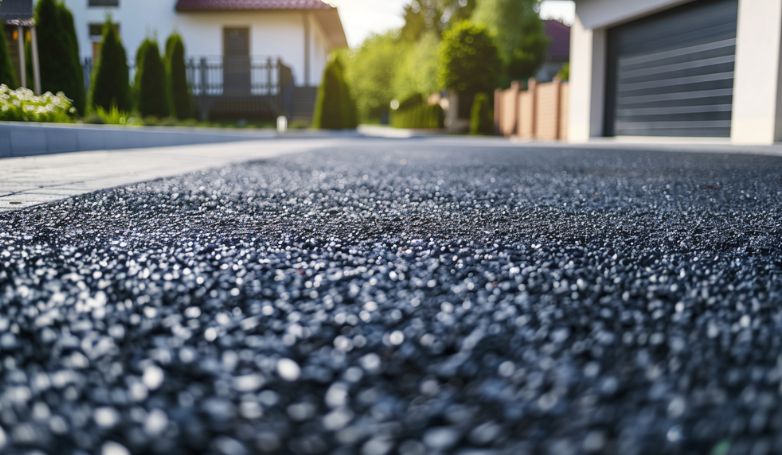
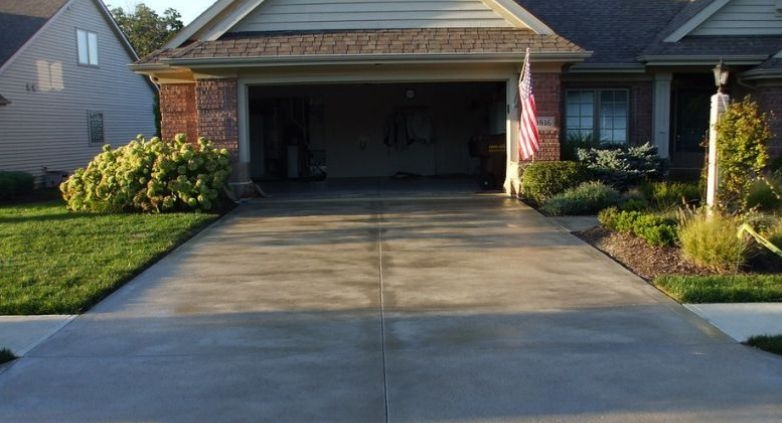
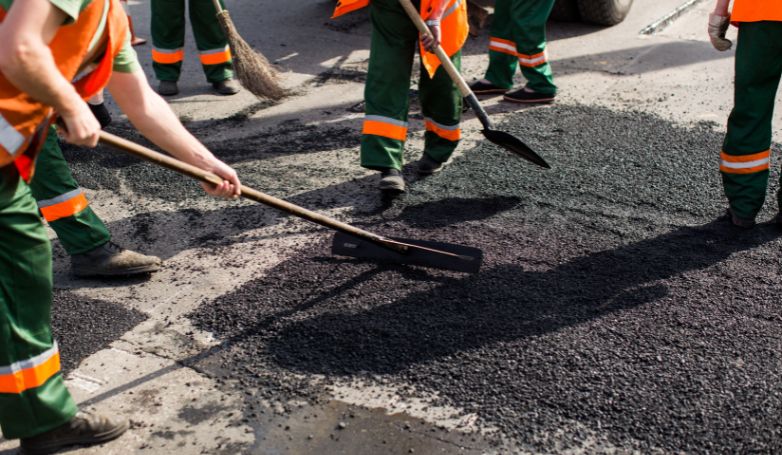
6. Creates a smooth and even surface
After compaction, inspect the surface for any irregularities or low spots.
Fixing these problems is not just about aesthetics. Making sure your driveway is flat will make it last longer and have consistent drainage, reducing maintenance issues down the line.
In turn, this will bring you a professional looking driveway that performs well when conditions vary.
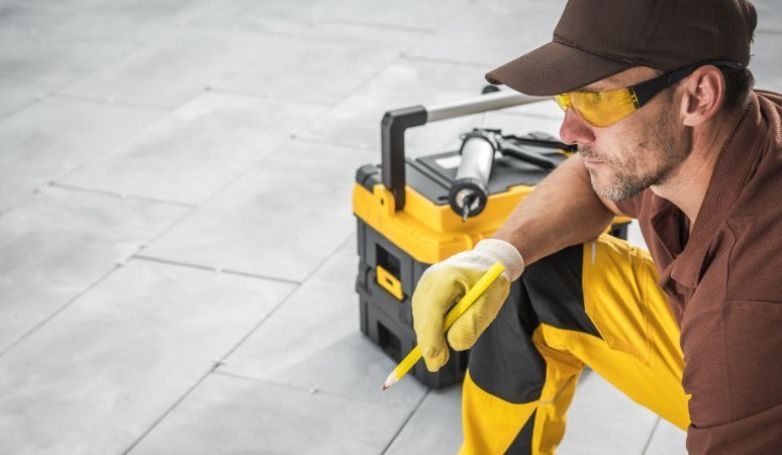
6. Inspect and maintain your driveway regularly
Keep an eye on your driveway at all times, paying special attention to cracks, holes or loose areas.
Catching them early prevents major problems from happening in the future so you don’t have to pay out huge amounts of money for repairs.
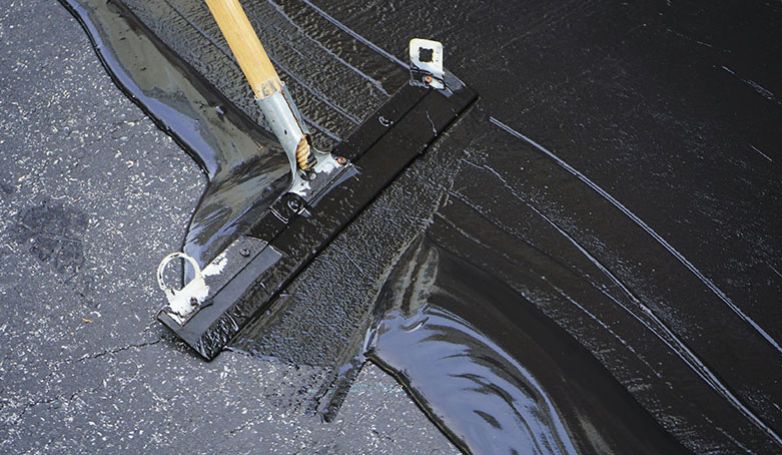
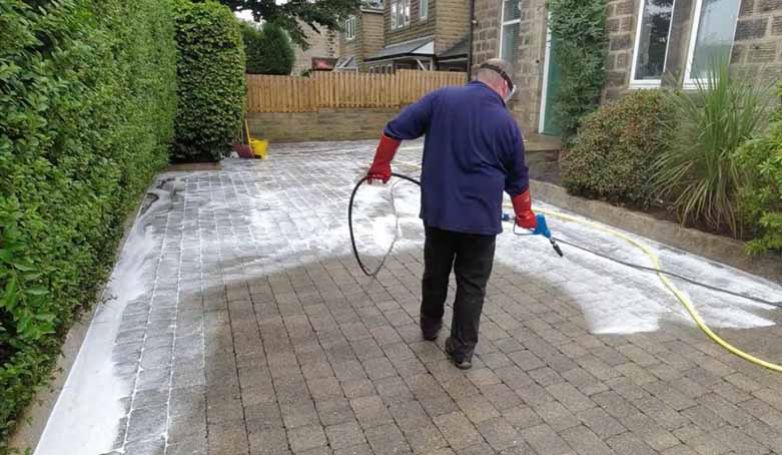
Sealing your driveway every few years should also help protect against water infiltration, UV damage and chemical spills that are common with driveways like these.
Take care of it right now, so you don’t have to spend nearly as much later on trying to fix it up again.
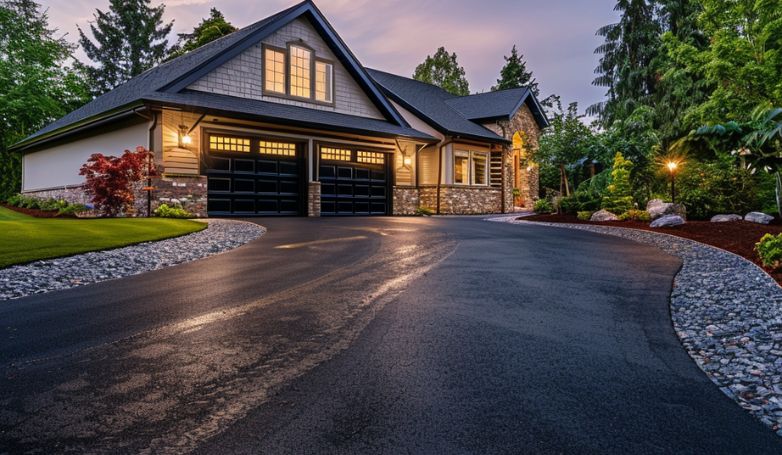
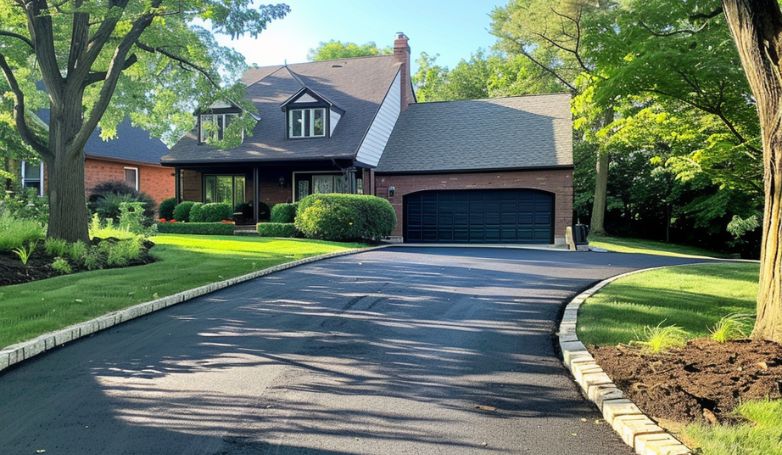
Benefits of crushed asphalt driveway
The advantages in choosing a crushed asphalt driveway are durability, cost-efficiency and environmental sustainability. Let’s get into the specifics of it all.
Cost-effectiveness compared to traditional asphalt or concrete
Most often crushed asphalt is less expensive than new asphalt or concrete because it uses recycled materials.
Homeowners can save a lot of money on the initial installation without compromising the driveway’s functionality or appearance.
This makes crushed asphalt an attractive option for those looking to maximize their budget while achieving a durable and appealing driveway solution.
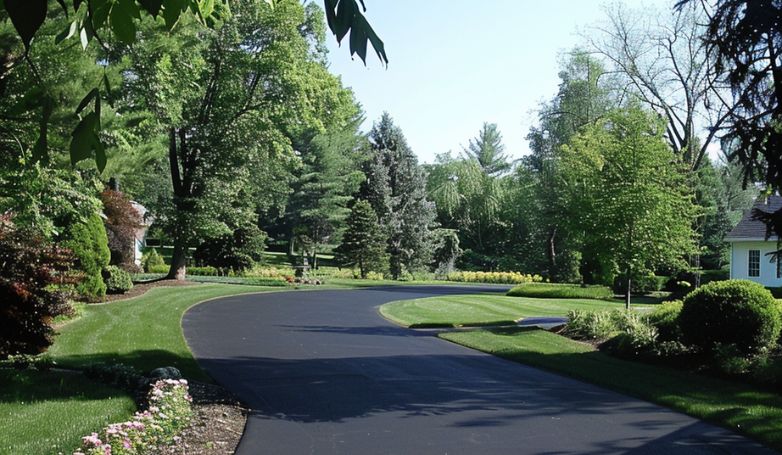
Durability and longevity
Crushed asphalt driveways are incredibly durable and long-lasting. Once compacted, this material creates a hard surface that can withstand daily use like heavy vehicle traffic.
The resilience of crushed asphalt also means it can better resist the elements such as the scorching sun to freezing temperatures without cracking or eroding as quickly as other materials might.
With proper installation and minimal maintenance, a crushed asphalt driveway can serve your home for many years, making it a smart investment for the long term.
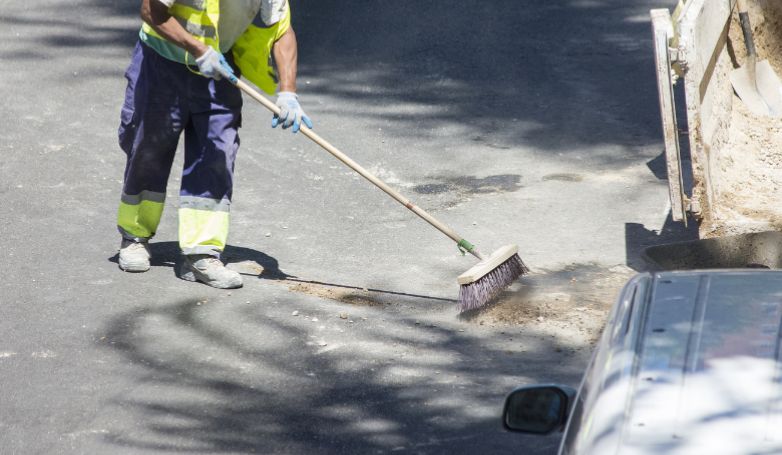
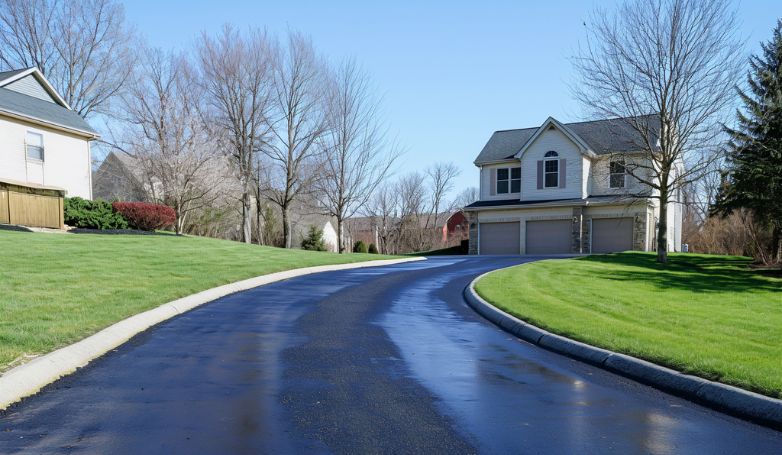
Low maintenance requirements
The demands of maintaining a crushed asphalt driveway are much lower than those of traditional paving materials.
Unlike concrete that could crack and require regular sealing, or gravel that needs frequent leveling, crushed asphalt maintains its integrity without constant upkeep from you.
All you’ll need is an occasional sweep to remove debris and check on signs of wear every so often. This ease of maintenance saves time but most importantly reduces long-term upkeep costs over time.
Eco-friendliness and sustainability
Making the decision to have a crushed asphalt driveway done is more than just an aesthetic choice.
The material is made from recycled pavement which helps you do your part to keep our environment healthy and thriving.
By choosing this option, you’re contributing to reducing land waste and the energy it takes to produce new pavement. In addition, crushed asphalt has excellent water drainage which will be useful in protected local waterways.
This might seem like a simple blacktop solution, but it’s much more than that!
Types of crushed asphalt materials available
The different types of crushed asphalt materials come in many shapes and sizes — all suited to various applications.
By understanding the options, homeowners can select the right one for their crushed asphalt driveway project:
To create RAP, workers grind up old roads, driveways, and parking lots to remove the original pavement. Reusing some of the original bitumen helps it compact and bind together once laid down and compacted again.
This material is a great option for those on a budget or with sustainability goals in mind since it utilizes existing supplies.
The tiny particles are compact and do well at sticking together, making them excellent for creating solid surfaces that withstand time and wear.
Millings also have another unique property: over time in direct sun heat they rebind themselves into a semi-solid surface, which makes them easier to manage as they get older.
They can handle any weather condition or heavy use without much maintenance.
Hot Mix Asphalt (HMA)
While not exclusively made from just crushed asphalt, Hot Mix Asphalt (HMA) does contain a good amount of recycled content.
HMA combines new asphalt binder, fresh aggregate, and RAP before heating it all together to make it pliable enough to work with on-site construction equipment .
People who want traditional-looking driveways might choose this option because HMA makes smooth surfaces that look uniform but still has recycled content inside.
Cold Patch Asphalt
If you’re looking to repair your existing driveway rather than replace it entirely then cold patch asphalt may be what you need.
Cold patch asphalt comes in pre-mixed packages so you don’t have to worry about making it yourself. It’s ready for you to pour into those annoying potholes and divots or seal troublesome cracks.
While it may not be used to pave entire driveways, this material is beneficial for maintenance purposes — ensuring the driveway lasts longer.
Picking out the right kind of asphalt is a puzzle.
It all depends on so many different factors. You’ve got to think about the project’s very specific requirements and how you want it to look in the end. Budget matters too of course.
Homeowners need to work with professionals in order to get the best bang for their buck, that way they can make sure everything goes as smoothly as possible and they’ll be happy with what they get at the end of it all!
Crushed asphalt vs. gravel driveway
When it comes to deciding between crushed asphalt and gravel for your driveway, there are many factors at play.
You’ll want to consider things like cost, durability, maintenance required, and the overall look and feel of each material.
To help you better understand which one might be the right fit for your home (based on what you’re looking for), I’ve put together a handy table below:
Factor
Crushed Asphalt
Gravel
Cost
Affordable, with potential long-term savings.
Generally lower upfront cost.
Durability
More durable, can withstand heavier loads.
Durable but may shift and spread.
Maintenance
Low maintenance; develops a semi-solid surface over time.
Requires frequent leveling and replenishment.
Ease of Installation
Requires spreading and compacting.
Simple to spread, but needs ongoing adjustment.
Aesthetics
Mimics traditional asphalt for a cohesive look.
Offers natural aesthetics with a variety of colors.
Eco-Friendliness
Made from recycled materials.
Permeable, better for groundwater recharge.
Here, you’ll find the most important points about each option lined up side by side. Hopefully this makes things easier!
FAQs about crushed asphalt driveway
Here are detailed answers to frequently asked questions about crushed asphalt driveways to clear up some of the most burning concerns homeowners have:
Is crushed asphalt better than gravel?
The battle between crushed asphalt and gravel comes down to what you prioritize in a driveway. Crushed asphalt presents itself cohesively, requires less maintenance, and can turn semi-solid for more durability under vehicle traffic. While gravel is cheaper during purchase and carries a natural look. Both alternatives have environmental benefits; however, the lower maintenance that crushed asphalt demands may make it a better option for those who value durability and a clean appearance.
Is crushed asphalt any good?
Crushed asphalt makes an excellent choice for driveways. It’s cost-effective, durable, eco-friendly, and requires less maintenance compared to gravel. The process involves recycling old asphalt which reduces waste and decreases demand for new raw materials. Once compacted, it offers a solid surface that is able to withstand vehicle traffic — providing both practicality and aesthetics all in one paving solution.
How thick should a crushed asphalt driveway be?
The recommended thickness for a crushed asphalt driveway usually falls between 2-4 inches. Starting with a 2-inch base layer of larger crushed stone followed by another 2-inch layer of crushed asphalt allows proper compaction and stability. Making adjustments to the thickness based on load expectation as well as usage will further enhance its durability.
Does crushed asphalt get hard?
Indeed — with time — properly compacted crushed asphalt does get hard. This happens especially when exposed to heat after compaction has occurred. Heating activates binders within the material causing it to set and harden: creating a stable surface that mimics traditional pavement offering more durability.
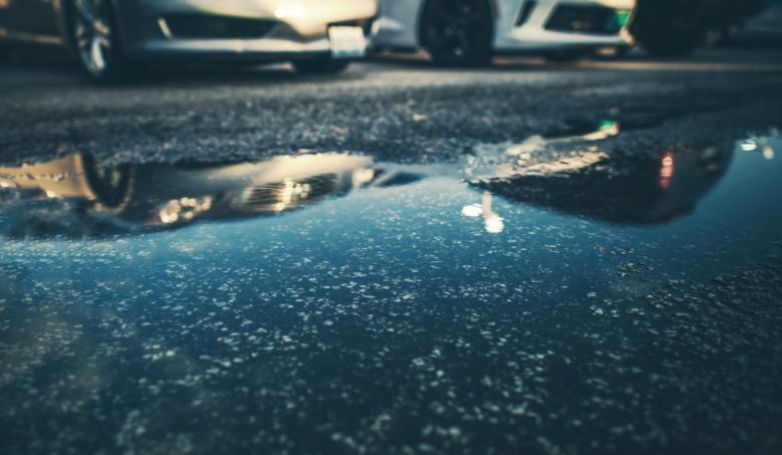
Does crushed asphalt get muddy?
Water accumulation on top of a driveway occurs less often on crushed-asphalt surfaces compared to dirt or graveled driveways thanks to their compaction properties — but they are not immune to it. During heavy rain or in areas with poor drainage, water can pool on the surface and cause soft spots. Proper installation that focuses on drainage will minimize this issue, preserving the driveway’s integrity even during wet conditions.
Conclusion
Crushed asphalt driveways are the total package, offering something for all homeowners. It’s durable, cost-efficient and environmentally sustainable, making it a prime pick for many.
By knowing how to install it, what the benefits are and how to upkeep it, you can decide if this is best for you or not.
If not crushed asphalt, there’s always gravel to consider. But if going eco-friendly with low-maintenance qualities is your end goal, then embrace crushed asphalt as your best choice.
Tim is a seasoned paving expert with 30+ years of experience in the industry. He has worked on countless projects, from small residential driveways to large commercial parking lots.
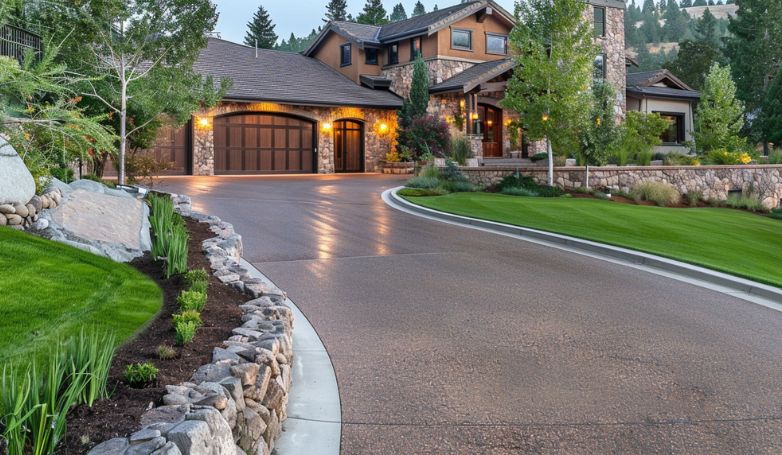
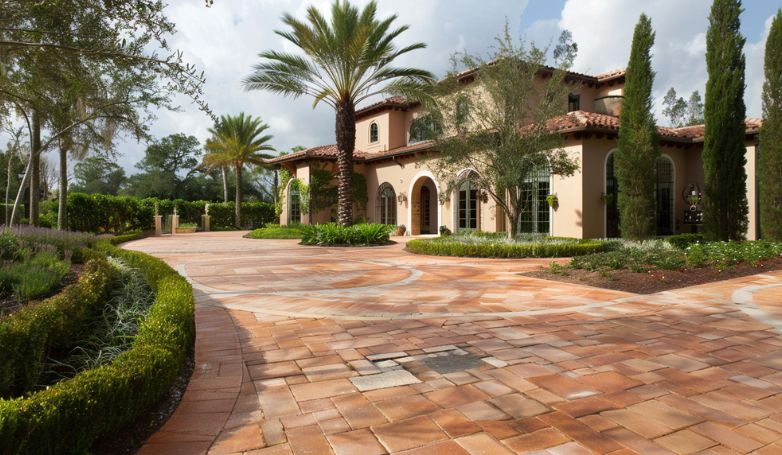
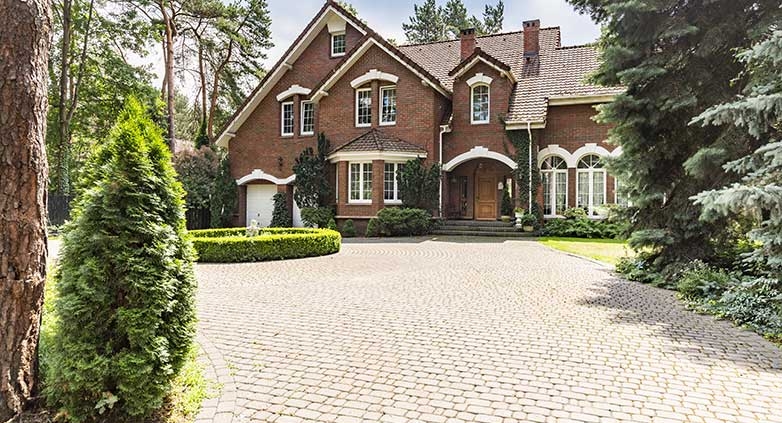
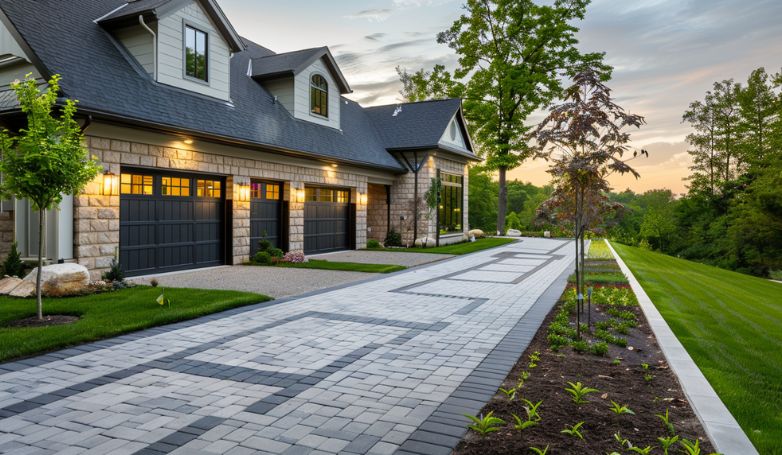
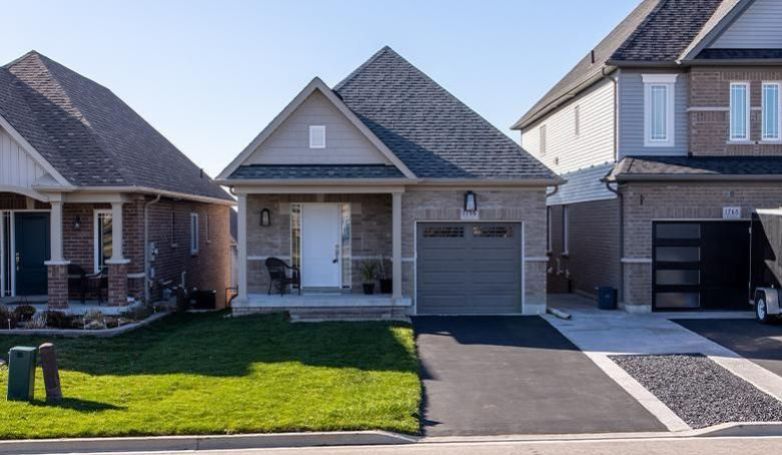
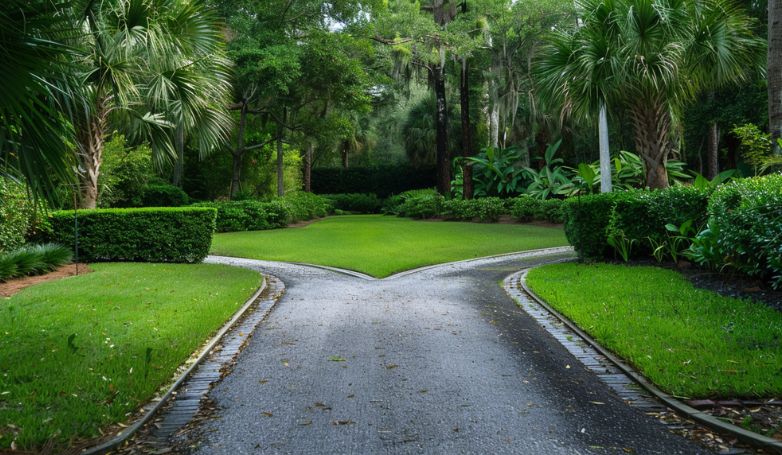
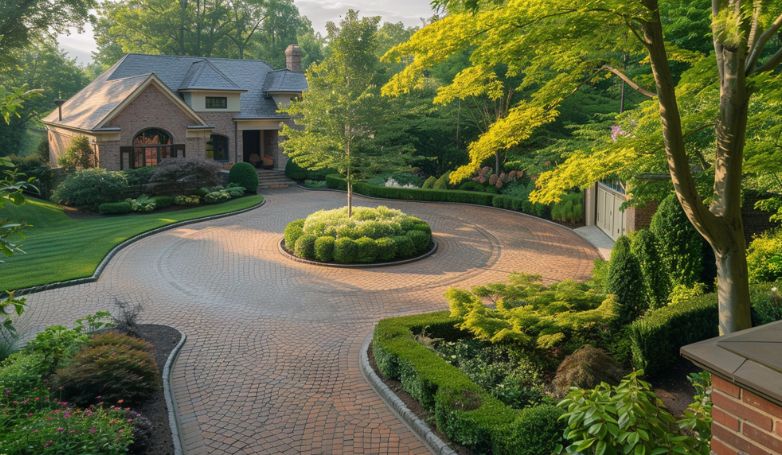
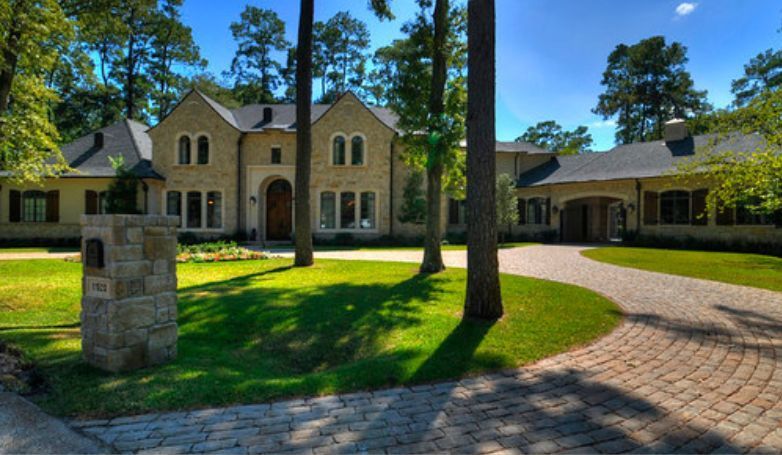
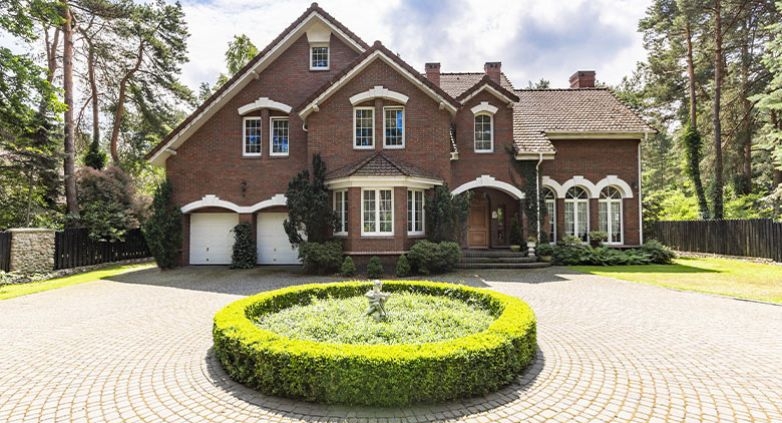
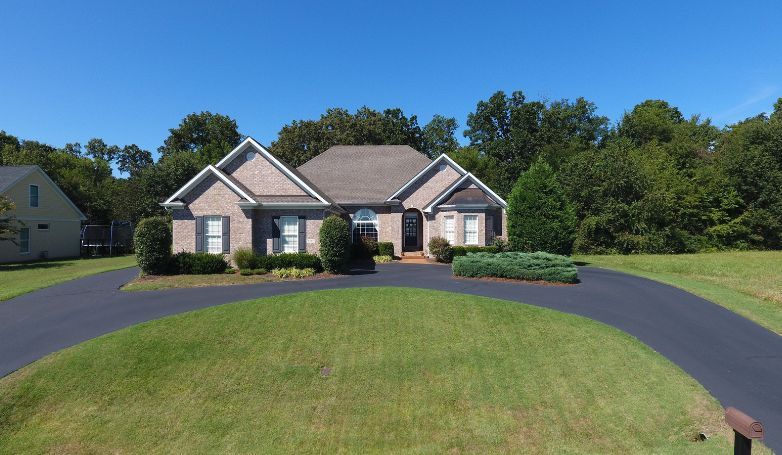
A half-circle driveway enhances the functionality of your property, making entry and exit seamless.
Installing a half circle driveway optimizes space while providing a grand entrance to your home. It allows for easy maneuverability and parking, reducing the need for vehicles to back out into the street. This driveway style suits various property sizes and enhances landscaping opportunities, making it a practical and aesthetic choice for homeowners.
Read on to discover how a half-circle driveway can transform your home’s accessibility and appearance.
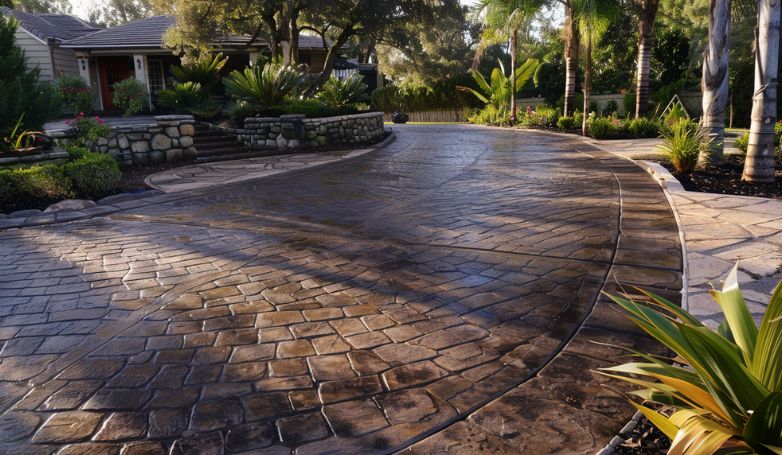
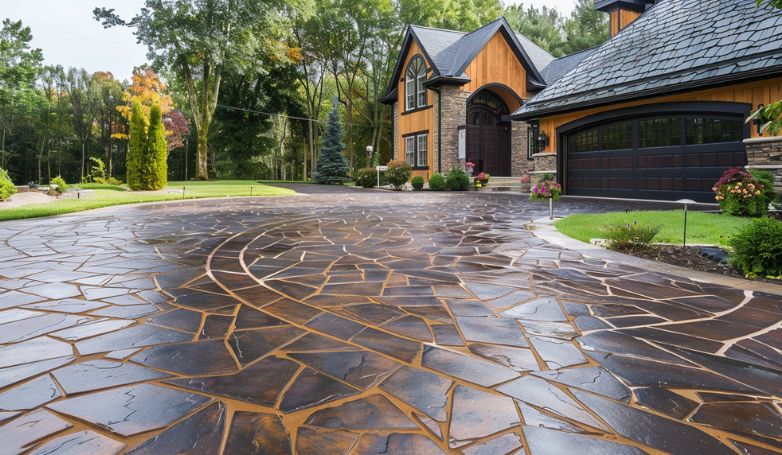
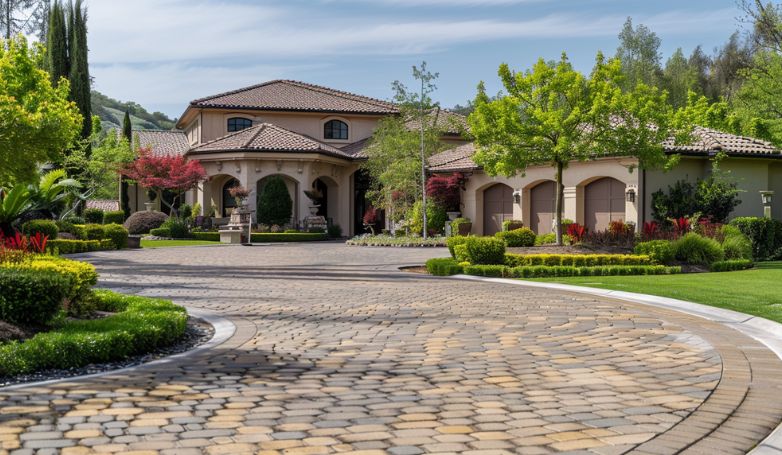
1. Stamped Concrete Designs
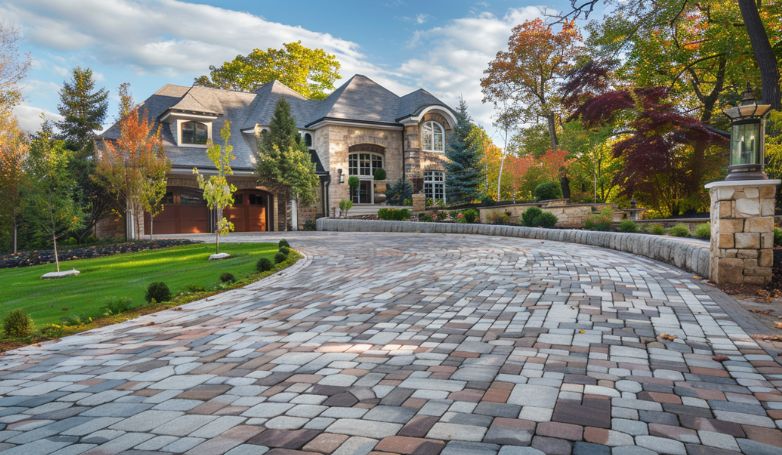
Stamped concrete elevates your home entrance through its versatility and resilience, offering the luxurious appearance of pricier materials like natural stone, brick, or slate at a fraction of the cost.
With an extensive palette of textures and colors, it enables endless customization, ensuring your driveway reflects your personal style and complements your home’s architecture.
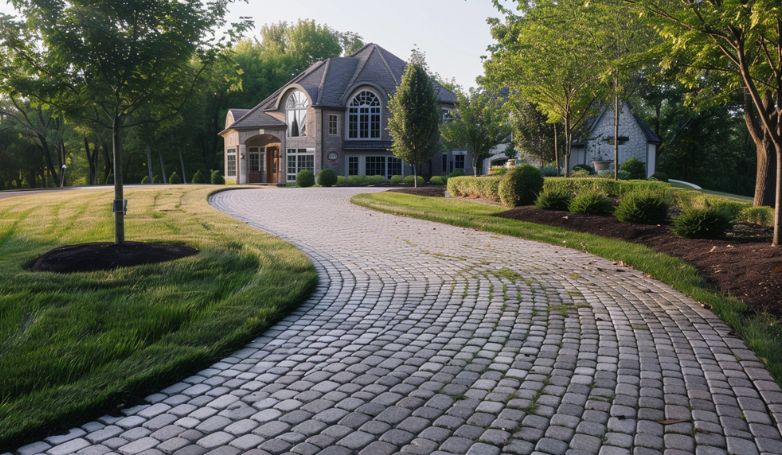
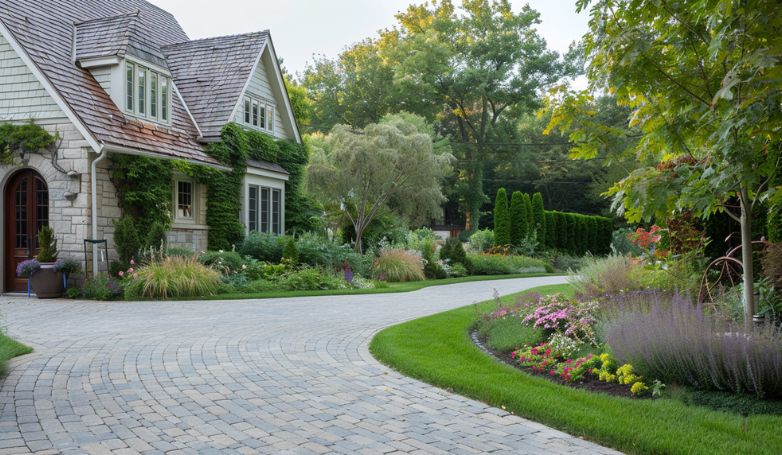
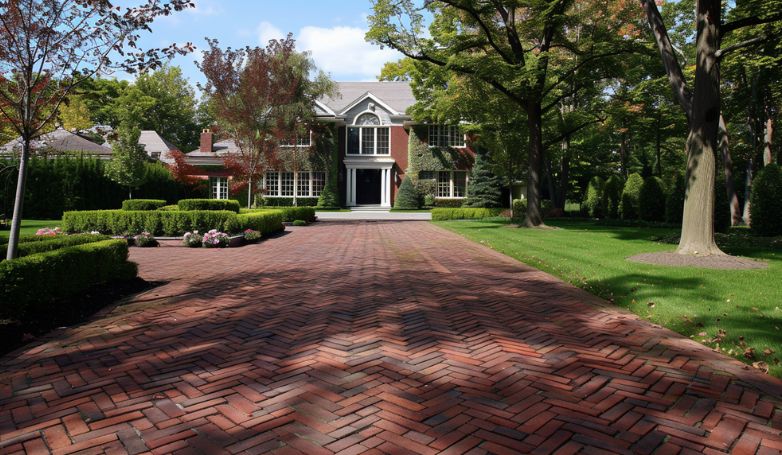
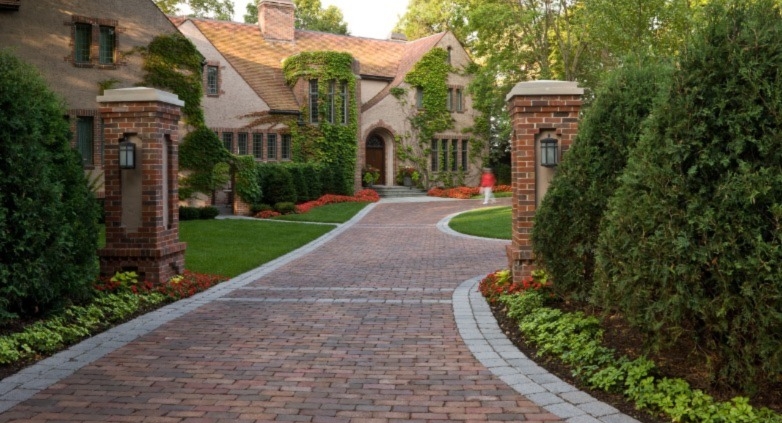
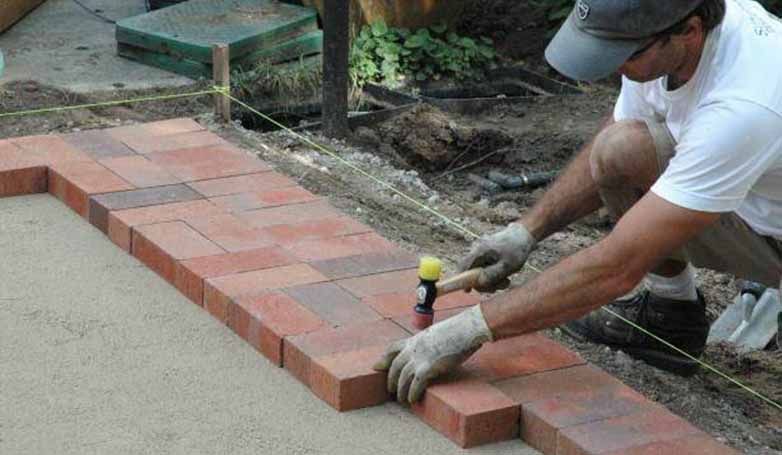
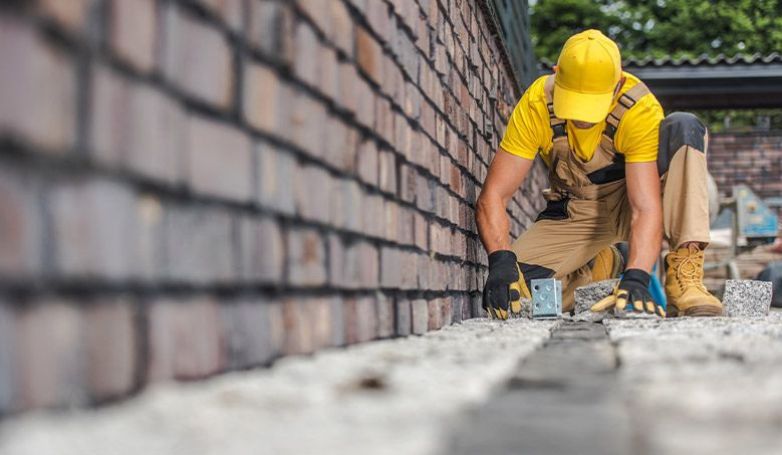
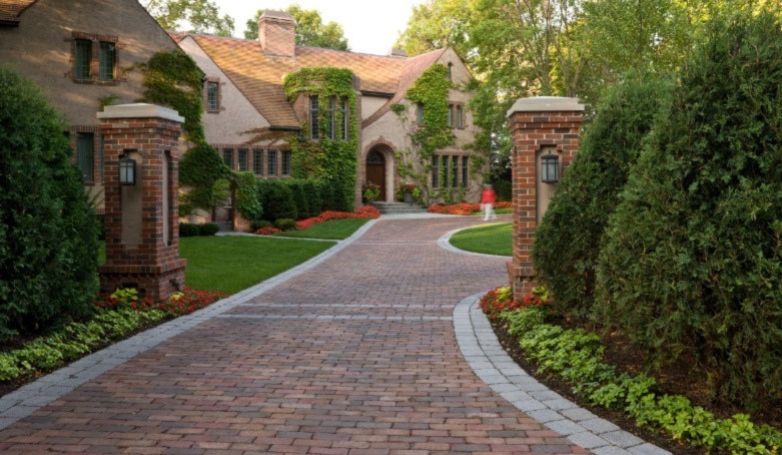
2. Classic Brick Paver Patterns
Brick pavers infuse timeless elegance and charm into half circle driveways.
Their distinct warm tones and tactile surface texture provide a sense of heritage and craftsmanship, elevating the property’s entrance.
Offering versatility, brick pavers come in various laying patterns—such as the intricate herringbone, the classic basket weave, or the simple running bond—each adding a unique character and sophistication.
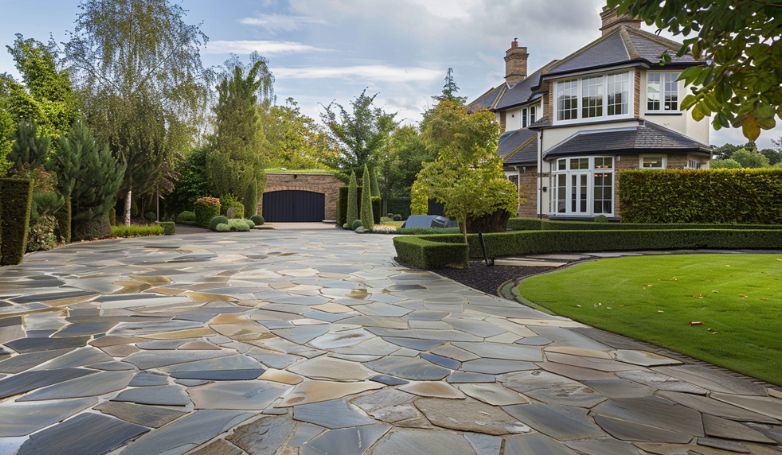
3. Natural Stone Installations
Opt for the enduring beauty of natural stone to achieve a driveway that stands the test of time.
Granite, limestone, and sandstone are among the preferred choices for their robustness and unique aesthetic appeal.
Natural stone’s compatibility with a variety of landscape designs makes it an excellent choice for those looking to enhance the natural beauty and value of their property.
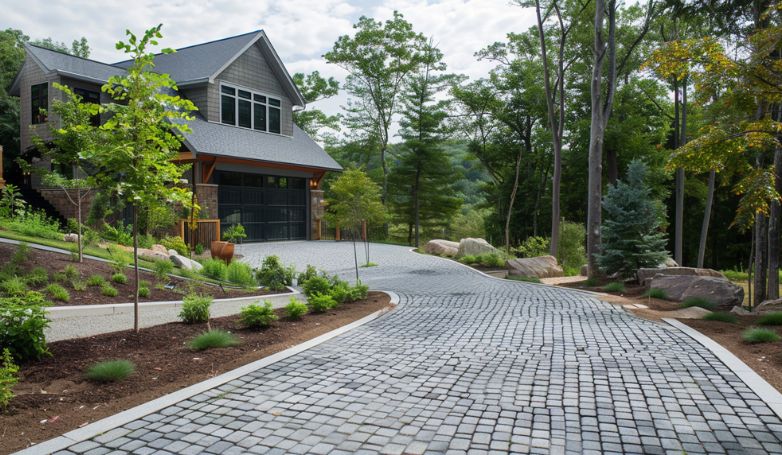
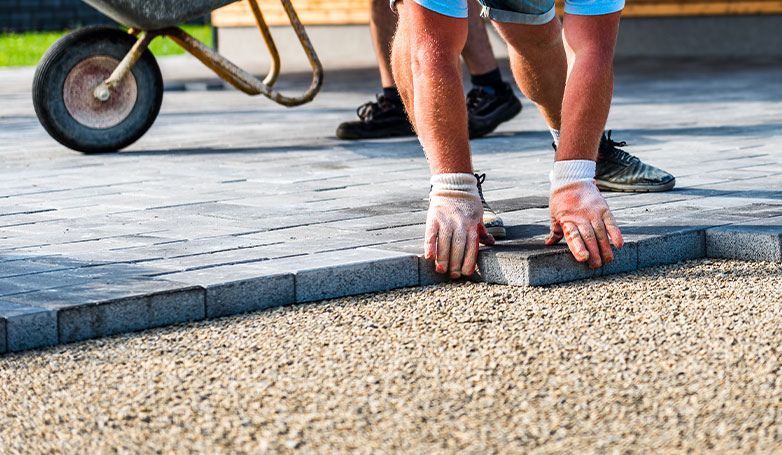
4. Interlocking Paver Systems
Interlocking pavers are engineered for strength and longevity, making them a perfect material for your half circle driveway.
Their unique design allows each piece to lock together, forming a stable and cohesive surface that resists shifting and settling.
Available in a myriad of colors and styles, interlocking pavers offer the flexibility to create stunning, personalized patterns that can withstand the rigors of daily use while maintaining their aesthetic appeal.
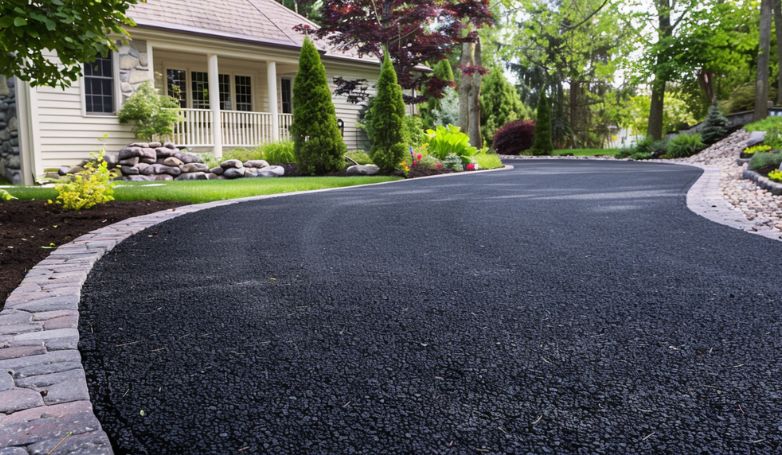
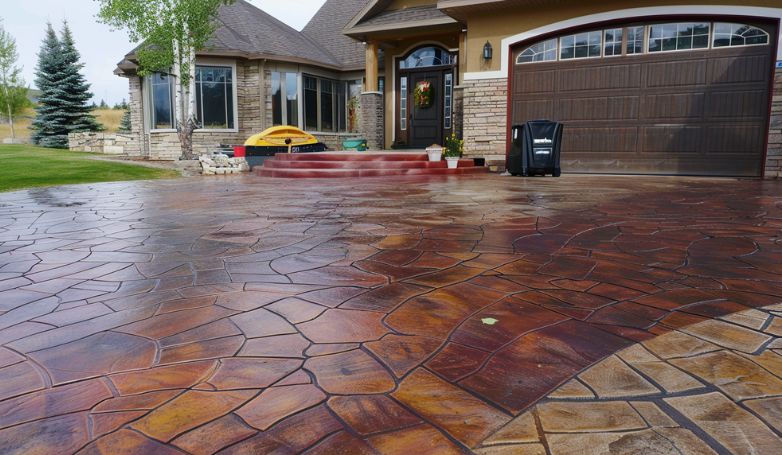
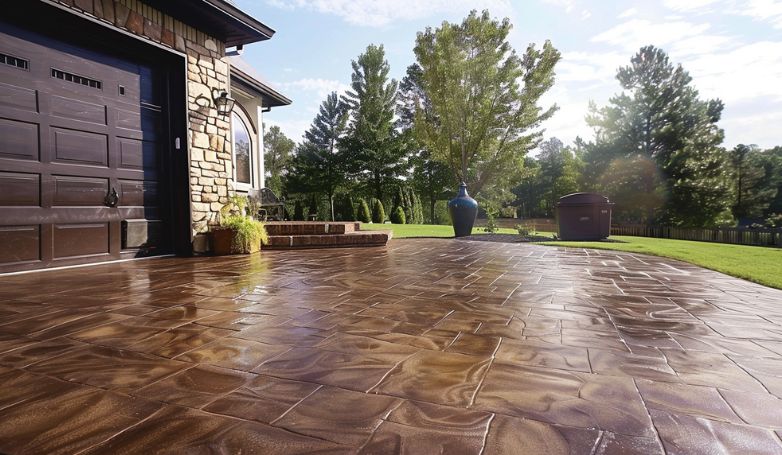
5. Decorative Asphalt Finishes
Revamp your home entrance with decorative asphalt to enjoy the traditional durability of asphalt with a modern twist.
Innovative techniques such as stamping, staining, or coloring asphalt allow for creative expression, transforming a basic driveway into a work of art.
Additionally, decorative asphalt offers a cost-effective way to achieve a customized look without sacrificing the practical benefits of traditional asphalt paving.
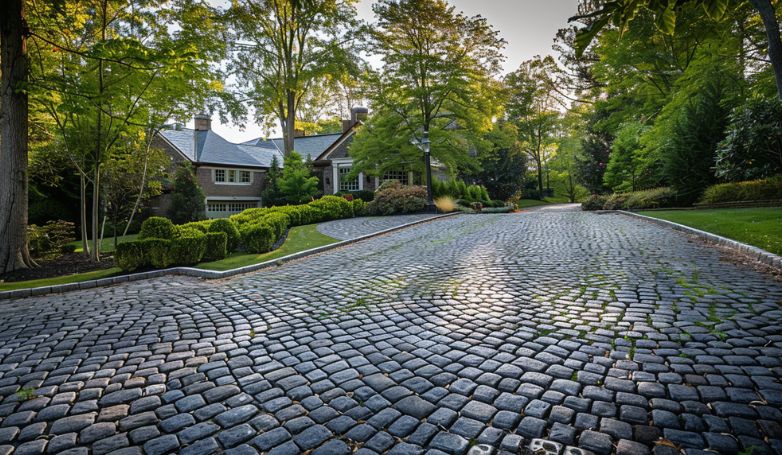
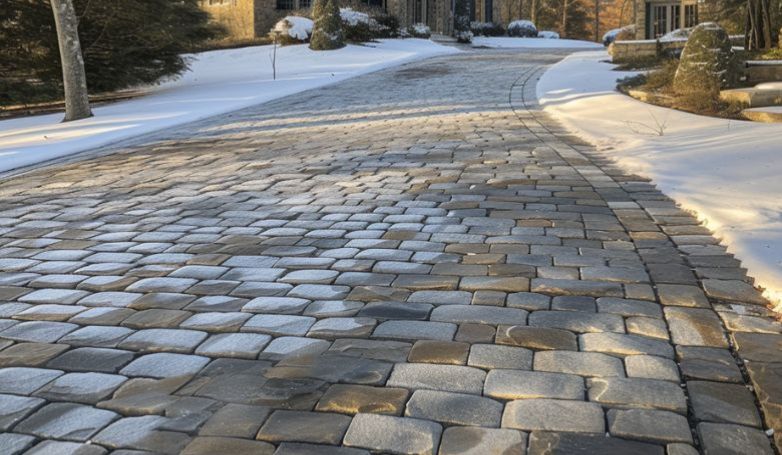
6. Elegant Cobblestone Pathways
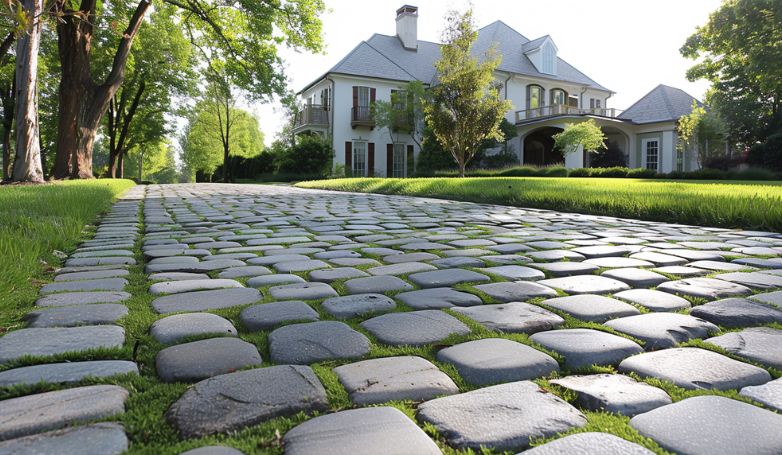
Cobblestone driveways exude a timeless charm and durability, reminiscent of old European streets.
Ideal for adding an element of romantic antiquity, cobblestones are highly durable and capable of enduring heavy traffic, making them a practical yet picturesque choice for homeowners desiring an entrance with character and longevity.
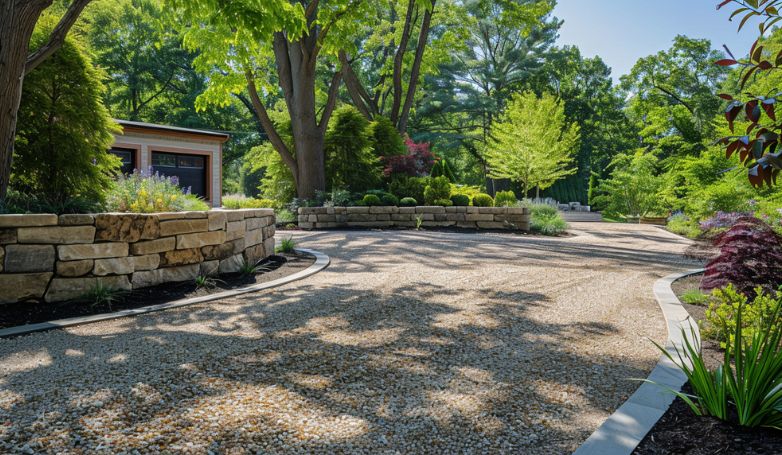
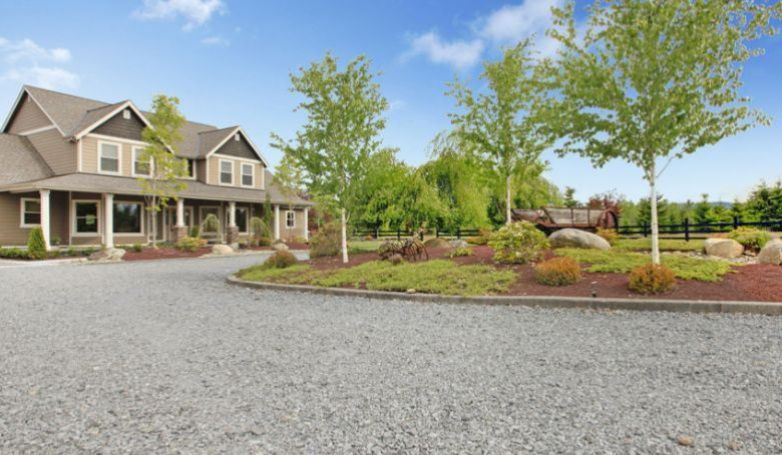
7. Gravel Driveway Surfaces
Gravel is a versatile and eco-friendly option for half circle driveways, offering a blend of rustic charm and natural aesthetics. Its permeable nature ensures excellent drainage, preventing water buildup and promoting sustainability.
Easy to install and maintain, gravel entry drives can be customized with a variety of colors and sizes to match the home’s exterior and landscape.
8. Modern Composite Materials
Embrace the innovation of composite materials for a driveway that combines durability with environmental responsibility.
These materials, crafted from a mix of natural and synthetic elements, offer resistance to the common foes of outdoor installations: rot, decay, and pests.
Ideal for homeowners looking for a long-lasting and maintenance-free option, composite surfaces present a modern solution that doesn’t compromise on style or the planet’s well-being.
9. Rustic Wooden Plank Drives
Wooden plank driveways bring a warm, rustic appeal to your home, creating a cozy and inviting atmosphere right from the entrance.
Utilizing hardwoods like cedar or eco-friendly alternatives such as bamboo, this option introduces a natural element to your property’s design.
While offering distinct aesthetic value, wooden pathways need careful maintenance to preserve their beauty and durability, making them a choice for those willing to invest in their unique charm.
10. Sustainable Permeable Pavers
Opting for permeable pavers is a step towards sustainability, allowing rainwater to seep through and replenish groundwater reserves. These pavers, made from recycled materials or natural stone, do not sacrifice aesthetics for eco-friendliness.
They come in various designs, promoting water conservation and reducing runoff, all while enhancing the visual appeal of your half circle driveway.
11. Stylish Porcelain Tile Layouts
Porcelain tiles bring a refined elegance and durability to the forefront of your home’s exterior, particularly for half circle driveways.
Their availability in an extensive array of hues, finishes, and sizes allows for unparalleled customization, offering a contemporary and stylish upgrade.
This versatile surfacing choice promises to significantly boost the visual appeal of your entrance, marrying practical resilience with cutting-edge design to create an inviting, modern pathway into your property.
Made from repurposed tires, they provide a slip-resistant and cushioned surface in various colors and patterns, allowing for personalized design choices that are as sustainable as they are stylish.
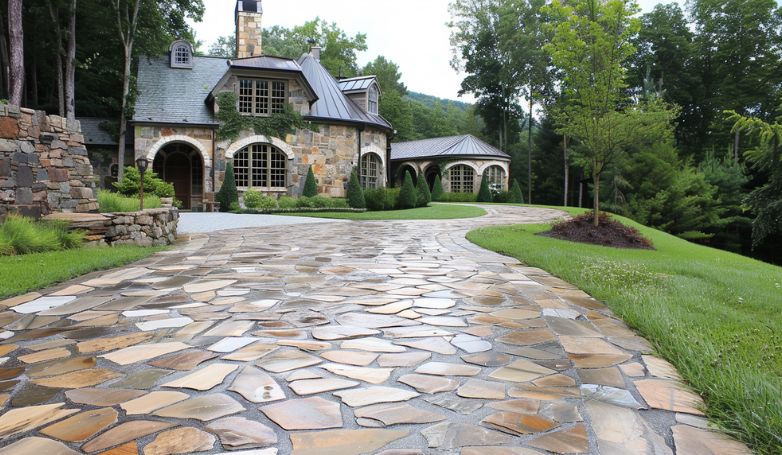
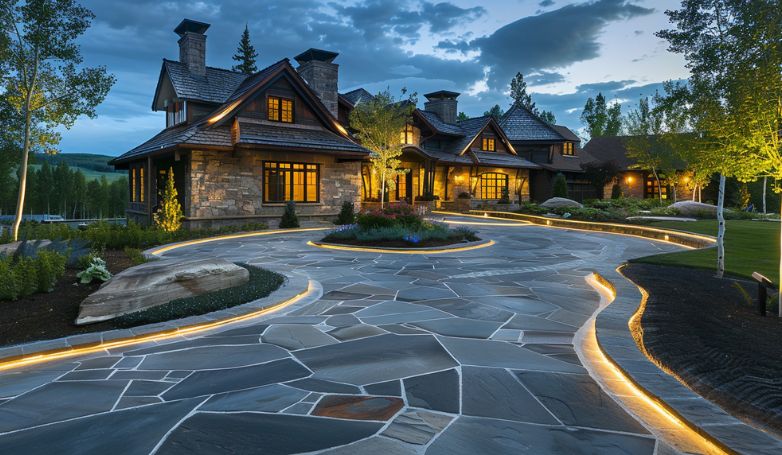
13. Timeless Flagstone Installations
Flagstone installations transform driveways into showcases of timeless elegance and nature’s beauty.
The irregular shapes and rich, earthy tones of flagstone add unparalleled character, while its versatility in patterning—from random to geometric—offers both durability and a visually appealing entrance, uplifting your home’s overall aesthetic.
14. Artistic Terrazzo Surfaces
Terrazzo driveways offer a luxurious and artistic option for your property, with their unique blend of marble chips, glass, or other aggregates set in a durable resin or cement matrix.
Highly customizable and durable, terrazzo surfaces provide a stunning and enduring statement for your home entrance.
15. Customizable Asphalt Millings
Asphalt millings, recycled from old pavement, offer a cost-effective and environmentally friendly option for your half circle driveway.
With their compacted surface and ability to be easily shaped and contoured, asphalt millings provide a customizable and durable solution that blends seamlessly with the surrounding landscape.
16. Durable Resin-Bound Surfaces
Resin-bound surfaces combine natural aggregates with a clear resin binder to create a durable and permeable driveway solution.
Offering a smooth and seamless finish, resin-bound surfaces are resistant to cracking, UV damage, and weeds, providing a low-maintenance and visually appealing option for your pathway.
17. Luxurious Quartzite Features
Quartzite surfaces radiate luxury and sophistication, boasting shimmering textures and deep hues.
Originating from sandstone and refined under intense heat and pressure, this material is remarkably durable and weather-resistant. It stands as a premium selection for those seeking an elegant and lasting entranceway.
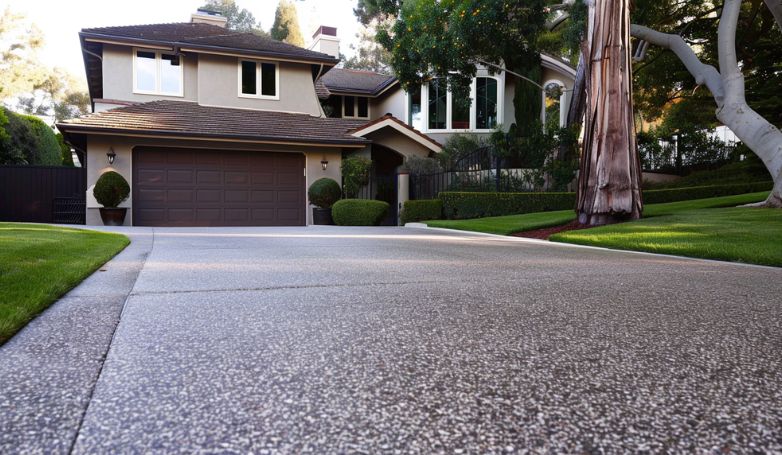
18. Versatile Exposed Aggregate Finishes
Exposed aggregate surfaces offer a textured and visually appealing surface that adds character and depth to your property.
With aggregates like gravel, crushed stone, or recycled glass embedded in the concrete surface, exposed aggregate finishes provide durability, slip resistance, and endless design possibilities for your entrance path.
19. Traditional Clay Tile Designs
Clay tile pathways exude timeless charm and elegance, featuring warm tones and rustic textures.
Whether using traditional terracotta tiles or handmade clay pavers, these natural materials add character and sophistication to your half circle driveway, creating a welcoming and inviting entrance for your home.
20. Contemporary Metal Grating Solutions
Metal grating presents a sleek and contemporary choice for your property, featuring geometric patterns that enhance its industrial appeal.
Constructed from sturdy materials such as aluminum or steel, this option ensures superb drainage and ventilation. It accentuates your entryway with a bold visual statement, seamlessly blending functionality with modern design aesthetics.
21. Eco-Friendly Green Driveways
Green entryways incorporate living vegetation into the surface, providing environmental benefits such as reduced heat island effect, improved air quality, and habitat for wildlife.
Whether opting for grass pavers, permeable turf, or planted grids, these eco-friendly approaches present a sustainable and visually attractive choice for enhancing your property’s entrance.
22. Innovative Shell Aggregate Applications
Shell aggregate driveways bring a unique, coastal-inspired charm to your property, utilizing natural shells to infuse texture, color, and character.
The use of crushed oyster shells, clamshells, or other marine aggregates crafts a delightful, beachy vibe, elevating the allure of your home’s entrance.
This innovative material not only stands out for its aesthetic qualities but also offers durability and low maintenance, making it an ideal choice for a stylish and practical entryway.
23. Sleek Tarmac Installations
Tarmac offers a smooth, enduring surface known for its traction and resistance to the elements.
With their sleek and uniform appearance, tarmac installations create a modern and minimalist look that complements a variety of architectural styles.
A practical, stylish solution that enhances your property’s entrance, making it a standout choice for homeowners seeking both functionality and visual appeal.
24. Ornate Slate Pathways
Slate surfaces exude elegance and sophistication with their rich colors and textured surface.
Whether using natural slate tiles or slate-effect pavers, these durable materials create a striking and enduring driveway that adds character and charm to your property’s entrance.
25. Unique Lava Rock Features
Lava rock driveways offer a distinctive and natural option for your property, with their volcanic origins and rugged texture adding visual interest and character to the surface.
Whether using crushed lava rock, lava stone pavers, or lava gravel, these materials create a striking and durable access that stands out from the crowd.
26. Chic Rubber Tile Layouts
Rubber tile driveways offer a stylish and eco-friendly option for your property, with their recycled rubber construction providing durability, slip resistance, and impact absorption.
Whether using interlocking tiles, modular mats, or rolled rubber sheets, rubber driveways offer versatility and comfort while reducing environmental impact.
27. High-Quality Terracotta Surfaces
Terracotta driveways evoke Mediterranean charm and warmth with their earthy tones and natural textures.
Whether using traditional terracotta tiles or terracotta-effect pavers, these durable materials create a timeless and inviting entrance that complements a variety of architectural styles.
28. Adaptable Gravel and Grass Mixes
Combining gravel’s natural elegance with grass’s ecological advantages offers a sustainable, visually striking choice for your property.
Utilizing grid systems, permeable pavers, or interspersing grass among gravel beds, these versatile combinations ensure superior drainage and erosion control.
This approach enhances your entryway’s appeal, blending aesthetics and functionality seamlessly.
29. Polished Marble Driveway Options
Marble half circle driveways offer a luxurious and opulent option for your property, with their elegant veining and glossy surface adding sophistication and grandeur to the entrance.
Whether using polished marble tiles, marble-effect pavers, or marble chips embedded in resin, these high-quality materials craft a stunning and enduring entrance that radiates timeless beauty.
30. Budget-Friendly Crushed Stone Choices
Opting for crushed stone presents a cost-effective and flexible solution for your property, enhancing its appeal with natural beauty and a diverse palette of colors and sizes.
Whether using crushed limestone, granite, or gravel, these affordable materials create a durable and low-maintenance driveway that enhances the overall aesthetic of your home’s entrance.
Benefits of a Half Circle Driveway
Opting for a half circle driveway brings a myriad of advantages, seamlessly combining aesthetic allure with functional superiority.
This design choice not only boosts the visual charm of your property but also introduces practical improvements, significantly elevating your home’s overall ambiance and value.
Enhanced Curb Appeal
Incorporating a half circle driveway significantly transforms your home’s exterior, offering an elegant and welcoming approach.
The unique curvature of the driveway serves as an architectural highlight, introducing sophistication and enhancing the landscape.
Such an addition not only captivates visitors with its aesthetic appeal but also contributes positively to the perceived value and character of the property, setting a distinguished tone right from the entrance.
Improved Traffic Flow
A half circle driveway not only enriches property aesthetics but also enhances functionality by facilitating smoother vehicular movement.
Its broad turning radius allows for effortless entry and exit, a feature particularly advantageous for homes with regular guests or multiple vehicle owners.
This layout streamlines traffic flow, minimizing congestion and improving overall driveway accessibility.
Increased Property Value
Its distinctive shape and functional advantages make your home stand out, attracting potential buyers.
The blend of visual and practical merits it brings often translates into a commendable increase in resale value, positioning it as a wise investment for homeowners.
Versatile Design Options
The half circle driveway is celebrated for its design flexibility, providing a canvas for homeowners to express their style.
From classic concrete to intricate landscaping features, it accommodates a wide range of materials and designs. This adaptability allows for a personalized touch that can harmonize with the home’s exterior, offering a tailored approach to enhancing curb appeal.
Design Considerations for a Half Circle Driveway
Crafting the perfect half circle driveway involves careful consideration of various design aspects to ensure functionality, aesthetics, and safety seamlessly blend into your property’s landscape.
Space and Layout Planning
Begin by assessing the available space to determine the optimal layout for your half circle driveway. Consider factors such as vehicle size, turning radius, and clearance from structures to ensure smooth traffic flow and efficient use of space.
Material Selection
Choose durable and visually appealing materials for your half circle driveway, such as concrete, asphalt, or pavers.
Each material offers unique benefits in terms of longevity, maintenance requirements, and aesthetic appeal, so select one that best suits your preferences and budget.
Landscaping Integration
Integrating landscaping elements into your half circle driveway design can enhance its overall aesthetic and seamlessly blend it into the surrounding environment.
Consider incorporating flower beds, trees, or shrubs along the edges to soften the hardscape and add natural beauty.
Lighting and Safety Features
Ensure adequate lighting along your half circle driveway to enhance visibility and safety, especially during nighttime.
Install lighting fixtures strategically along the curvature and at key points to illuminate the path for both pedestrians and vehicles, reducing the risk of accidents and enhancing security.
FAQs about Half Circle Driveway
Here are the most frequently asked questions about the half circle driveway:
Is a half circle driveway right for my property?
A half circle driveway can enhance both the aesthetic appeal and functionality of your property, providing a convenient and elegant entrance solution.
How long does installation typically take?
The installation time for a half circle driveway varies depending on factors such as size, materials used, and site preparation, but it usually ranges from a few days to a couple of weeks.
Can I use different materials for my half circle driveway?
Yes, you have the flexibility to choose from various materials like concrete, asphalt, pavers, or gravel to create a half circle driveway that suits your preferences and complements your property’s aesthetic.
How do I maintain my half circle driveway in winter?
To maintain your half circle driveway during winter, ensure regular snow removal with a snow shovel or snow blower, apply ice melt or salt to prevent ice formation, and consider installing a snow-melting system for added convenience.
Conclusion
A half circle driveway offers a multitude of benefits, from enhancing curb appeal and improving traffic flow to increasing property value and providing versatile design options.
By carefully considering factors such as space planning, material selection, landscaping integration, and lighting and safety features, homeowners can create a stunning and functional entrance that complements their property’s overall aesthetic.
Whether it’s for everyday convenience or making a lasting impression, a well-designed half circle driveway adds both beauty and practicality to any home.
James has over two decades of experience in the paving industry and has worked on a wide variety of projects, from large-scale commercial installations to small residential repairs.
https://pavingfinder.com/wp-content/uploads/2024/04/Half-Circle-Driveway-.jpg455782admin123https://pavingfinder.com/wp-content/uploads/2020/10/logo.jpgadmin1232024-04-01 15:29:292024-04-01 15:29:32Half Circle Driveway – 30 Cutting-Edge Design Ideas
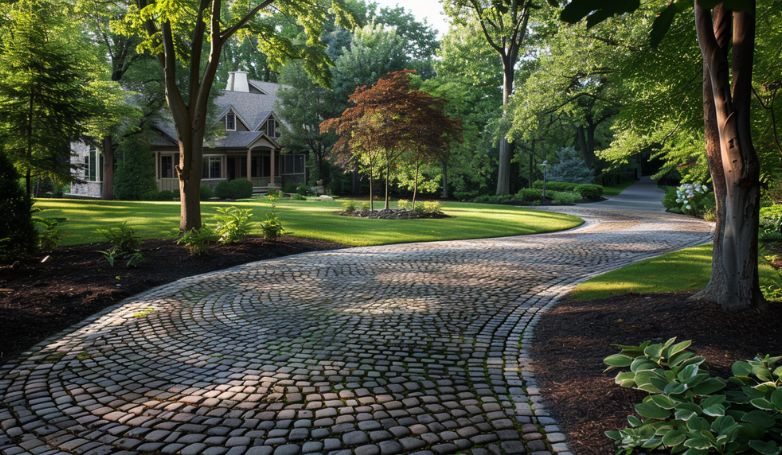
Choosing the right material for your driveway is a crucial decision that can significantly impact the aesthetics, functionality, and value of your property. These alternatives offer homeowners the opportunity to customize their driveways according to specific preferences, environmental considerations, and budget constraints.
Alternative Driveway Materials:
Gravel
Concrete
Asphalt
Brick
Pavers
Grass
Shell
Permeable Pavers
Recycled Material
Block Paving
Tar and Chip
Resin-Bound
Pervious Concrete
Crushed Concrete
Cobblestone
Each material brings its unique set of benefits, from environmental sustainability to aesthetic versatility, making it essential to weigh the pros and cons tailored to individual needs and preferences.
1. Gravel
Gravel driveways offer an economical and flexible solution for homeowners.
Unlike rigid pavement types, gravel allows for water drainage, reducing runoff and supporting eco-friendly landscaping.
Its installation and maintenance costs are significantly lower than those of concrete or asphalt, making it a budget-friendly option. Gravel also provides a natural aesthetic that can enhance the curb appeal of a property. Moreover, it’s easy to repair by simply adding more gravel, thus avoiding the need for extensive resurfacing or replacement.
The variety of gravel sizes and colors available allows for customization, enabling homeowners to tailor their driveway’s appearance to match their home’s style.
2. Concrete
Concrete driveways are highly favored for their durability and longevity, capable of lasting up to 30 years with proper care. This material offers a sleek, clean look that enhances the aesthetic appeal of any property.
Concrete’s versatility allows it to be stamped, colored, or engraved, providing homeowners with a range of design options to personalize their driveway. Additionally, its solid surface withstands heavy loads, making it suitable for areas with frequent vehicle traffic.
Concrete’s reflective properties also contribute to cooler surroundings in hot climates. Despite higher upfront costs, its durability and low maintenance requirements make concrete a cost-effective choice over time.
Now, let’s explore different options for alternative driveway materials.
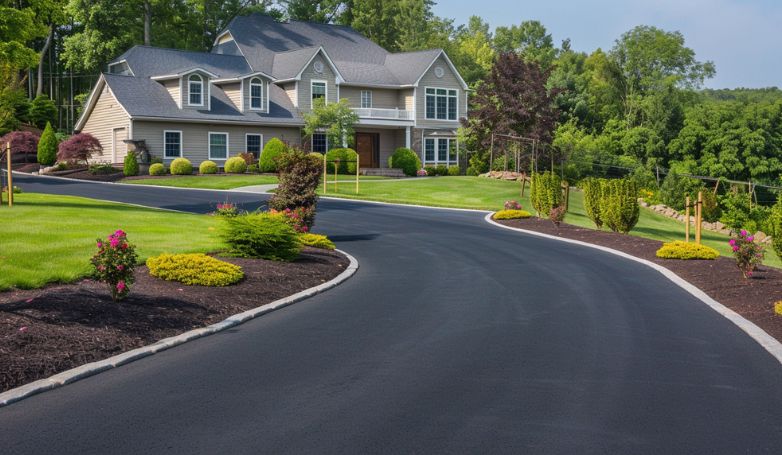
Asphalt driveways are a popular choice due to their cost-effectiveness and quick installation process. Ideal for colder climates, asphalt’s black color absorbs heat, helping to melt snow and ice more efficiently than other materials.
This characteristic makes it a practical option for regions experiencing harsh winters. Asphalt is also flexible, which means it’s less likely to crack under the stress of freeze-thaw cycles. Furthermore, it offers a smooth, continuous surface that provides safe traction for vehicles and pedestrians.
Periodic sealing is required to maintain its condition, but overall, asphalt offers a balance of affordability, durability, and ease of maintenance.
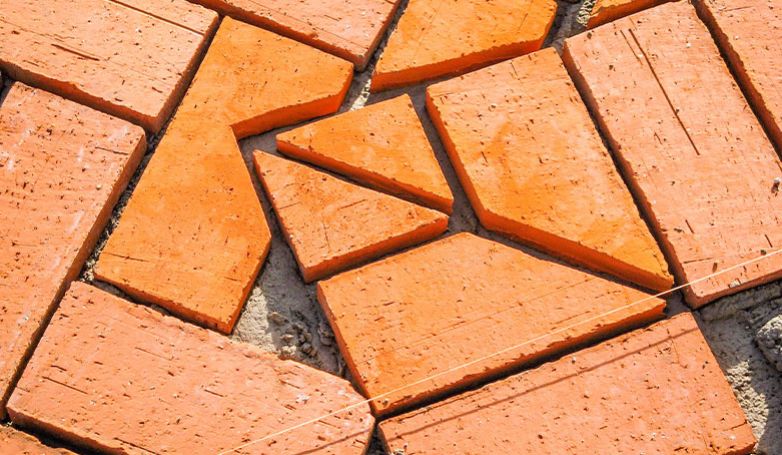
4. Brick
Brick driveways exude a classic elegance and charm that instantly boosts curb appeal and property value. Made from natural clay, bricks offer environmental benefits and are known for their durability, withstanding heavy loads and traffic without significant damage.
The color of brick driveways does not fade over time, ensuring a vibrant entrance for years. Additionally, bricks are available in various colors, shapes, and patterns, allowing for extensive customization options.
While the initial investment may be higher than other materials, the longevity and aesthetic appeal of a brick driveway can outweigh the cost, making it a worthwhile consideration for homeowners seeking a timeless look.
5. Pavers
Paver driveways provide unparalleled aesthetic appeal and versatility, with a wide array of materials, colors, textures, and patterns available. They offer excellent durability and can withstand heavy vehicular traffic without cracking, thanks to their interlocking design.
Pavers are easy to repair; individual pavers can be replaced without disturbing the surrounding area, ensuring a consistently attractive appearance. This material also promotes better drainage compared to traditional concrete or asphalt surfaces.
Although the initial cost of pavers may be higher, their longevity, ease of maintenance, and potential to increase property value make them a sound investment for homeowners seeking both functionality and style.
6. Grass
Grass driveways represent a sustainable and visually appealing alternative, seamlessly blending the driveway with the surrounding landscape.
By using grass pavers or a grid system, vehicles can park without harming the underlying grass, combining the functionality of a traditional driveway with the aesthetics of a green lawn. This approach encourages rainwater infiltration into the soil, reducing runoff and promoting groundwater recharge.
Grass driveways can significantly lower surface temperatures around your home, mitigating the urban heat island effect. Though requiring more maintenance than hard surfaces, grass driveways offer an eco-friendly solution that enhances the ecological value and beauty of your property.
Next, we’ll examine alternative choices for alternative driveway materials.
7. Shell
Shell driveways, made from crushed shells of clams, oysters, and scallops, are an environmentally friendly choice that provides a unique, coastal aesthetic. The natural white or off-white color of the shells brightens up the driveway area and reflects sunlight, reducing heat absorption.
Shells naturally interlock and compact over time, creating a stable yet permeable surface that allows for effective drainage, minimizing puddles and runoff. As an added benefit, shell driveways can gradually release beneficial minerals into the soil.
This option is especially appealing for properties near the coast, offering durability and a distinct, natural look that complements seaside landscapes.
8. Permeable Pavers
Permeable pavers are an innovative solution designed to combat drainage and runoff issues, making them an ideal choice for environmentally conscious homeowners.
These pavers allow water to filter through the surface and into the ground or a specially prepared sub-base, reducing erosion and replenishing groundwater supplies. By mitigating stormwater runoff, permeable pavers help reduce the risk of flooding and pollution.
Available in various materials, shapes, and colors, they offer aesthetic flexibility and can be arranged in unique patterns to enhance the curb appeal of any property. Although initial costs may be higher, the long-term environmental and drainage benefits justify the investment.
9. Recycled Material
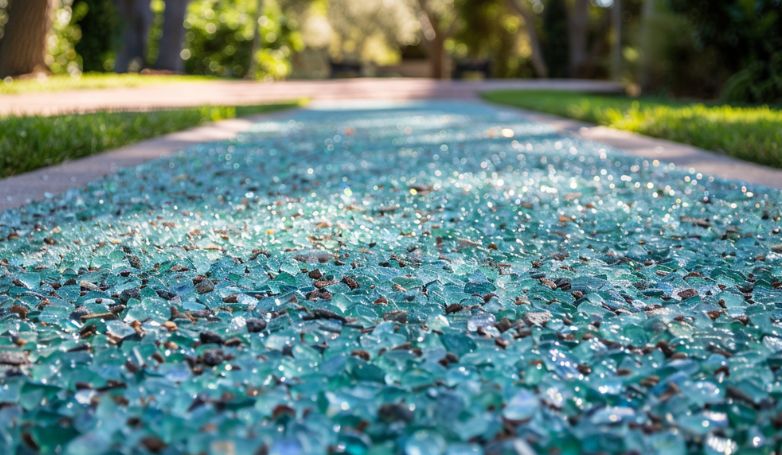
Driveways constructed from recycled materials, such as crushed glass, rubber, or plastic, offer an eco-friendly and creative alternative to traditional driveway options.
These materials reduce landfill waste by repurposing discarded items into functional, durable surfaces. Recycled material driveways can be both eye-catching and environmentally responsible, providing unique textures and colors not found in natural stone or concrete driveways.
Additionally, they often feature excellent drainage properties and can be more resistant to cracking and shifting. Opting for a driveway made from recycled materials supports sustainability efforts while giving your property a distinctive and conversation-worthy feature.
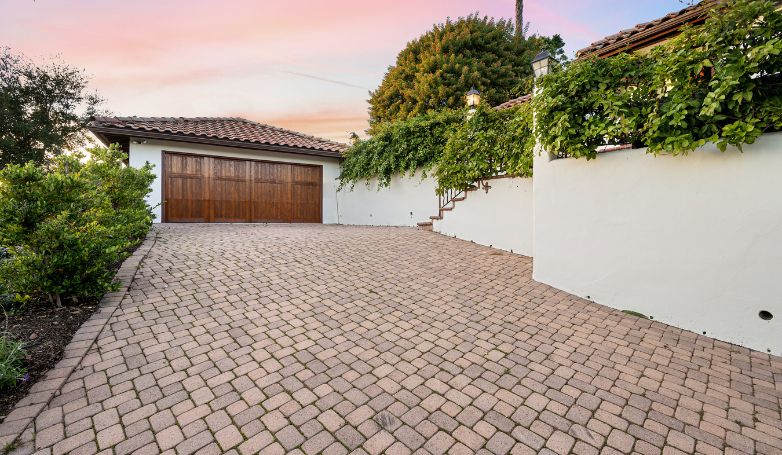
10. Block paving
Block paving driveways are highly customizable and durable, offering a range of colors, shapes, and patterns to create a unique and visually appealing entrance to your home.
The individual blocks can be lifted and replaced if damage occurs, making repairs simpler and less invasive than with poured surfaces. This modularity also allows for easy access to underground utilities without disrupting the entire driveway. Block paving provides excellent drainage when properly installed, preventing standing water and reducing slip hazards.
Though the initial installation may be more labor-intensive, the long-term benefits of aesthetic appeal, durability, and easy maintenance make block paving a versatile and practical choice.
Moving on, we can consider various materials for alternative driveway materials.
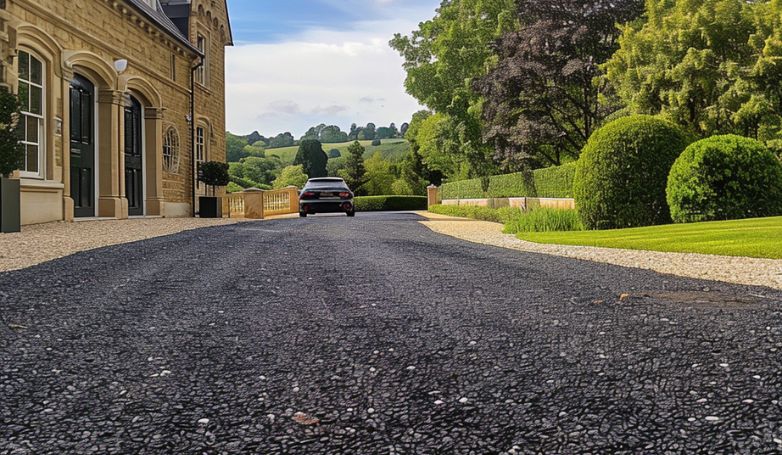
11. Tar and Chip
Tar-and-chip driveways, also known as chip-and-seal or seal chip, offer a rustic, textured alternative to smooth asphalt or concrete surfaces.
This method involves laying a hot tar foundation, followed by a layer of crushed stone that is compacted into the tar. The result is a driveway with improved traction and a natural, gravel-like appearance without the maintenance of loose gravel. Tar-and-chip driveways are cost-effective, requiring less material and labor than traditional asphalt.
They also provide excellent durability and a customizable look through the choice of stone color, catering to homeowners seeking a balance between aesthetics and functionality.
12. Resin-bound
Resin-bound driveways are becoming increasingly popular due to their attractive finish and permeability, which allows water to drain through, reducing puddles and runoff.
This system mixes natural aggregate, marble, or recycled glass with a clear resin to form a strong, durable surface that can withstand heavy traffic. The seamless finish of a resin-bound driveway is available in various colors and patterns, offering great flexibility in design to complement any home style.
Moreover, resin-bound surfaces are low maintenance, resistant to weeds, and UV stable, ensuring that the color does not fade over time, making it a practical and visually appealing choice.
13. Pervious concrete
Pervious concrete is an innovative material designed to address runoff issues by allowing water to permeate through the surface into the ground below.
This feature makes it an environmentally friendly option, reducing the need for stormwater management systems and mitigating flooding risks. Pervious concrete is ideal for homeowners concerned with sustainable landscaping and water conservation.
Although it may have a higher initial cost, its long-term benefits include reducing the heat island effect and replenishing local aquifers. Its rough texture also provides natural filtration, improving water quality, making it a responsible choice for eco-conscious property owners.
Let’s investigate additional options for alternative driveway materials.
14. Crushed concrete
Crushed concrete, repurposed from demolished structures, is a sustainable and cost-effective material for driveways. It offers a similar level of durability and performance as traditional gravel, with the added benefit of being eco-friendly.
Using crushed concrete helps reduce waste in landfills and the demand for new materials. Its rugged texture provides good traction, while its ability to compact under weight creates a stable surface suitable for vehicle traffic.
The versatility of crushed concrete, capable of fitting various landscape designs, makes it an appealing option for homeowners looking to combine practicality with environmental responsibility.
15. Cobblestone
Cobblestone driveways evoke timeless elegance and historical charm, significantly enhancing a property’s curb appeal and value. Made from natural stone, cobblestones are extremely durable, capable of lasting centuries with minimal maintenance.
Their unique texture offers excellent traction in all weather conditions, making them a safe option for sloped driveways. Cobblestones are environmentally friendly, as they allow water to percolate between the stones, reducing runoff and promoting natural groundwater recharge.
While the initial cost can be higher, the longevity, aesthetic appeal, and potential increase in property value make cobblestone driveways a worthwhile investment for those seeking a distinctive and luxurious entrance.
Considerations When Choosing an Alternative Driveway Material
Choosing the right alternative driveway material involves several key considerations that can influence both the functionality and aesthetics of your driveway. Here are the most crucial factors to weigh in your decision-making process:
Aesthetic Appeal
When selecting an alternative driveway material, consider how it complements your home’s architectural style and landscape design. The material’s color, texture, and pattern should enhance your property’s overall appearance, creating a welcoming entrance. Aesthetic appeal can significantly impact curb appeal and, consequently, property value, making it crucial to choose a material that aligns with your aesthetic preferences and the character of your home.
Climate
The climate in your area plays a significant role in determining the suitability of a driveway material. Materials must withstand local weather conditions, whether it’s freezing temperatures, heavy rainfall, or extreme heat. For instance, permeable options like gravel or pervious concrete are ideal in areas prone to heavy rain, while asphalt’s heat absorption is beneficial in cold climates for snow melt.
Durability and Maintenance
Evaluate the longevity and maintenance requirements of each material. Some materials, like cobblestone or concrete, offer decades of durability with minimal upkeep, while others, such as gravel, may need regular replenishment. Consider the material’s resistance to wear and tear, its ability to handle vehicle traffic, and the frequency and cost of maintenance tasks to ensure it meets your long-term needs.
Cost
Cost encompasses not only the initial installation but also long-term maintenance and potential replacement expenses. Budget-friendly options like crushed concrete can offer savings upfront, while investments in materials like resin or cobblestone can provide value over time through durability and low maintenance. Assess your budget, considering both immediate and future costs, to choose a material that offers the best value and aligns with your financial plan.
FAQs about alternative driveway materials
When exploring alternative driveway materials, several common questions arise regarding cost, practicality, and durability. Here are answers to some frequently asked questions:
What is the cheapest option for a driveway?
Gravel is often considered the cheapest option for a driveway. It’s relatively inexpensive to purchase and install, making it a budget-friendly choice for covering large areas.
What is the most practical driveway?
Asphalt is deemed the most practical driveway material for many due to its durability, cost-effectiveness, and ease of repair. It’s particularly beneficial in colder climates due to its ability to expand and contract without cracking.
What is the cheapest alternative to concrete driveways?
Crushed concrete, also known as recycled concrete aggregate, is a cheaper alternative to traditional concrete driveways. It provides a similar aesthetic and durability at a lower cost.
What is the longest lasting driveway material?
Cobblestone and pavers are among the longest-lasting driveway materials. When properly installed and maintained, they can last for decades or even centuries, offering a durable and timeless appeal.
Conclusion
In conclusion, selecting an alternative driveway material involves balancing aesthetics, climate resilience, durability, and cost to meet your specific needs and preferences. Whether you opt for the eco-friendly permeability of gravel, the classic appeal of cobblestone, or the cost-effectiveness of crushed concrete, each material offers unique advantages. By carefully considering these key factors, homeowners can choose a driveway solution that not only enhances their property’s curb appeal but also provides long-lasting functionality and value.
Chris is a paver with more than 15 years' expertise in the field. He has established a reputation as an expert and trustworthy specialist with a track record of providing his clients with top-notch paving solutions.
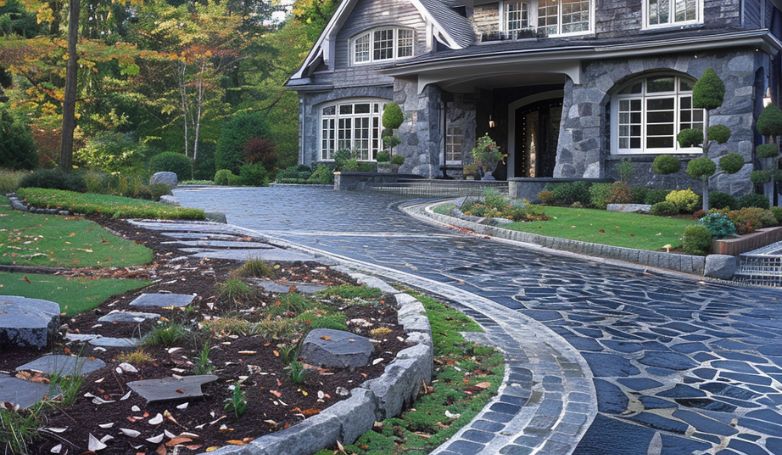
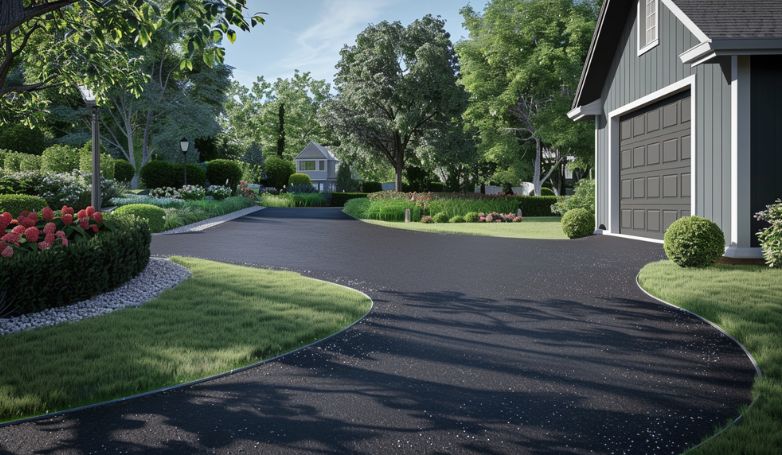
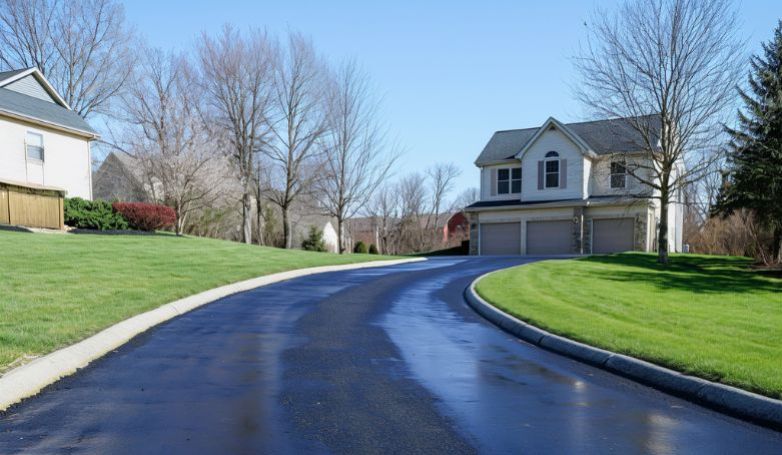
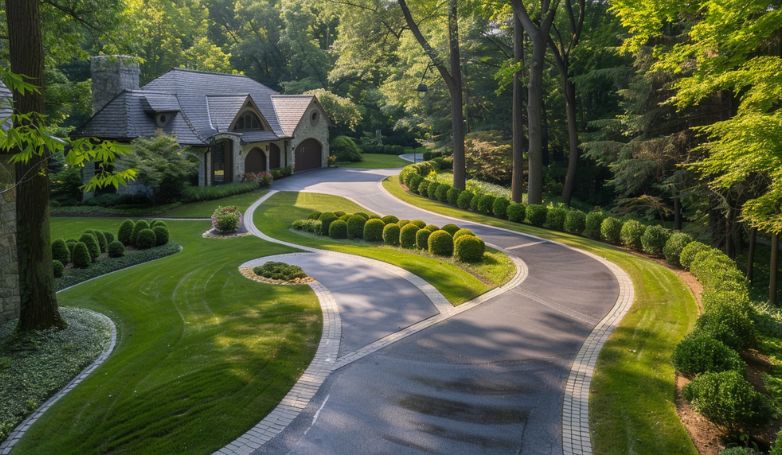
Long driveways are opportunities for enhancing aesthetic appeal and functionality. With the right design and maintenance, they can become a standout feature of your property
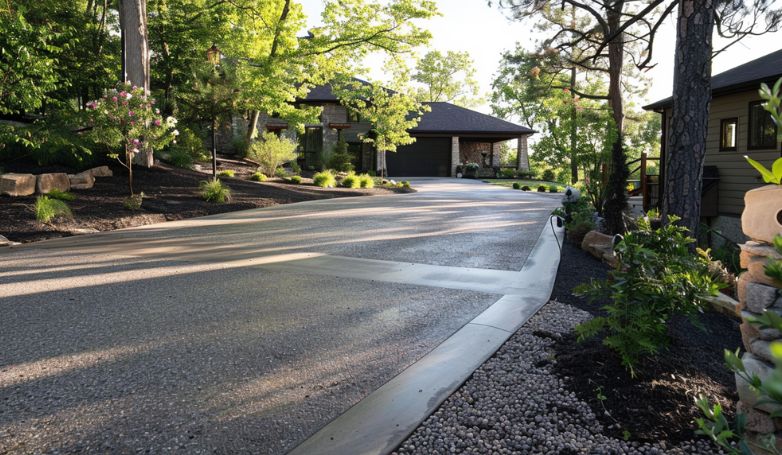
For long driveways, consider materials that blend durability with aesthetic appeal, such as stamped concrete for elegance or asphalt for a smooth finish. Landscaping alongside the driveway can enhance its appearance and create a welcoming entrance. Incorporating lighting fixtures not only improves visibility but also adds to the ambiance. Regular maintenance, including sealing cracks and resurfacing, ensures longevity and keeps your driveway looking its best. Lastly, consider the drainage system to prevent water accumulation and damage.
Explore these 25 creative designs and practical tips to make your long driveway both inviting and enduring.
25 Long Driveway Ideas and Examples
Transform your home’s approach into a statement of style and functionality with these 25 long driveway ideas. Each design offers a unique blend of elegance, practicality, and charm, perfect for enhancing your property’s curb appeal.
1. Classic Cobblestone Elegance
A cobblestone driveway exudes an aura of timeless elegance. It transports your home’s entrance back to the quaint streets of old European towns. Its durability withstands heavy traffic, while its unique texture and variety of patterns create a captivating first impression. Cobblestones, available in various shades, can be laid in intricate designs, adding a touch of personalized artistry to your property’s entrance.
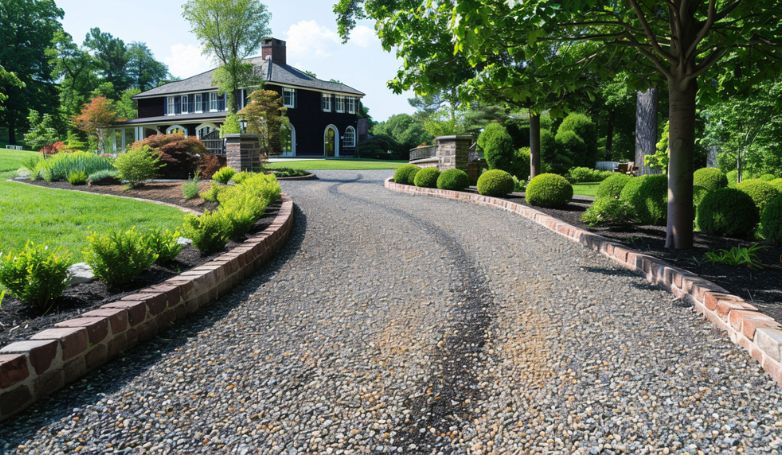
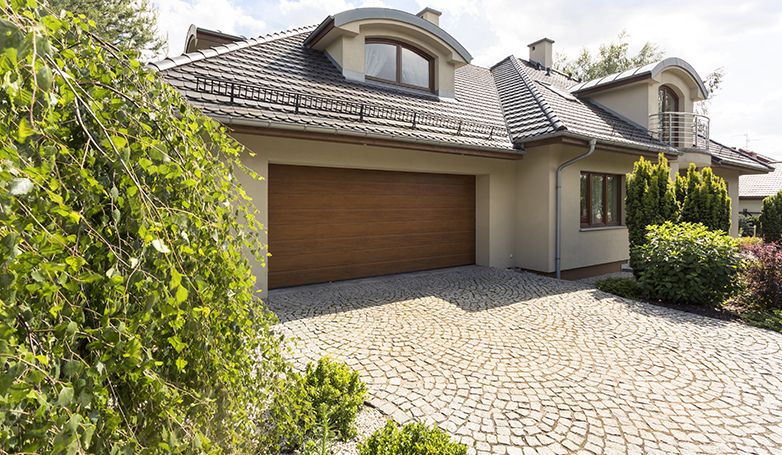
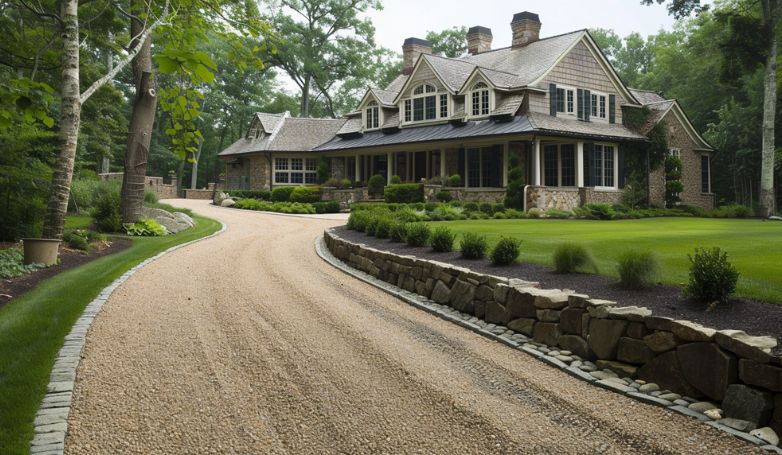
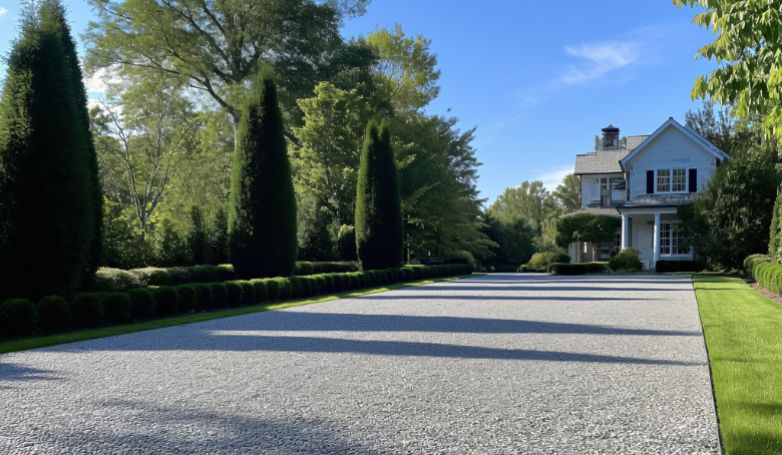
2. Rustic Gravel Charm
Gravel driveways offer a simple, yet charming approach to your home, blending seamlessly with natural landscapes. This cost-effective option provides excellent drainage and is easy to maintain, allowing for repairs by simply adding more gravel. The crunch underfoot announces visitors’ arrival, while its versatility in color and size can match any home’s style.
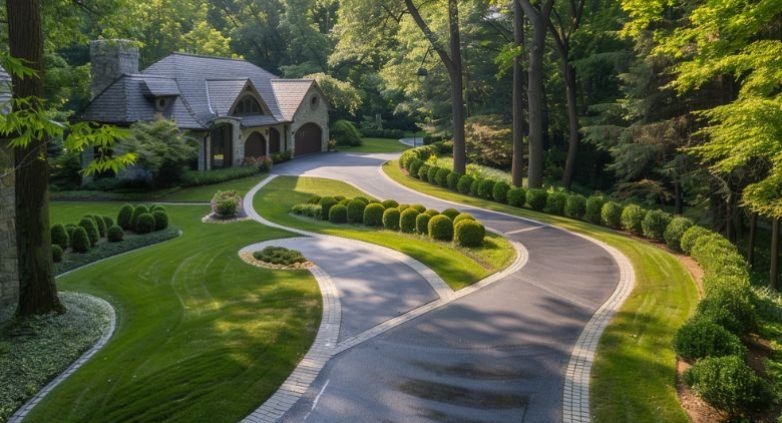
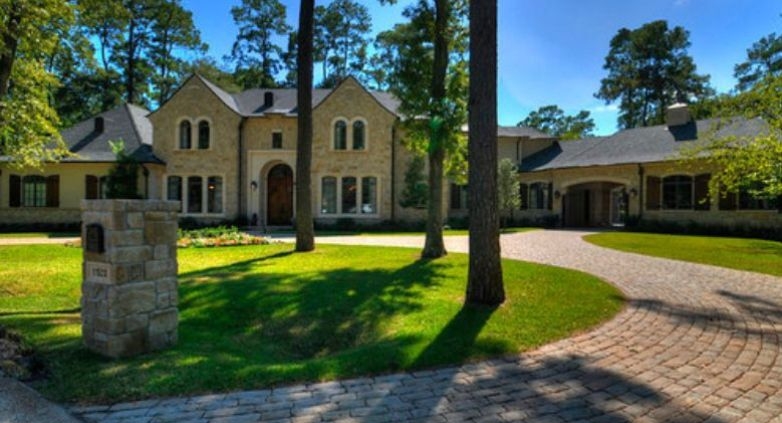
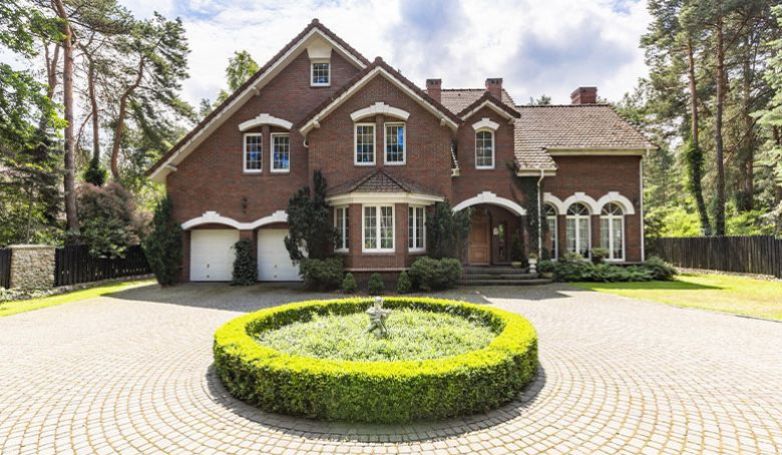
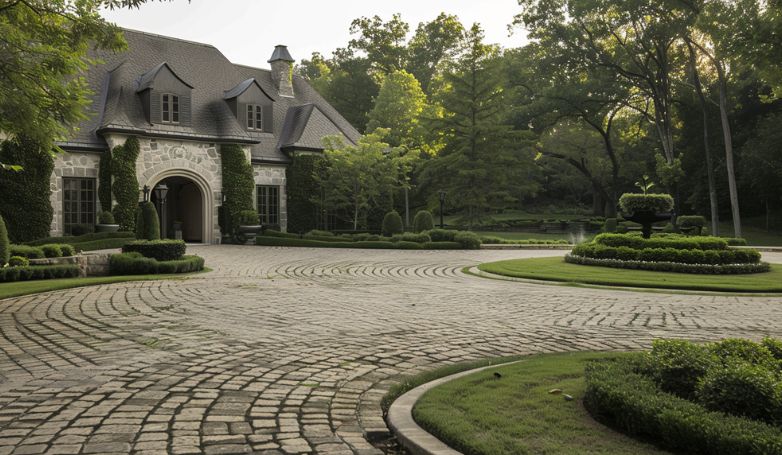
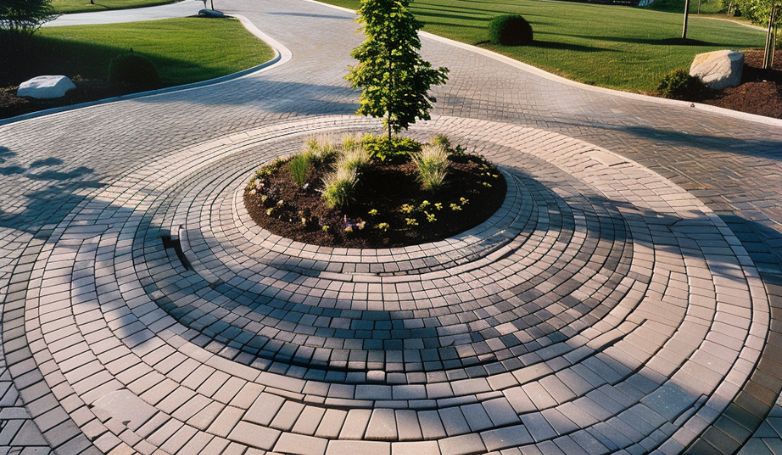
3. Grand Circular Driveway
A circular driveway not only provides a regal entrance but also enhances the functionality of your property, facilitating smooth entry and exit. It’s perfect for homes with ample front yard space, offering an impressive area for landscaping centerpieces like fountains or statues. This design also increases safety by eliminating the need for reversing onto the street.
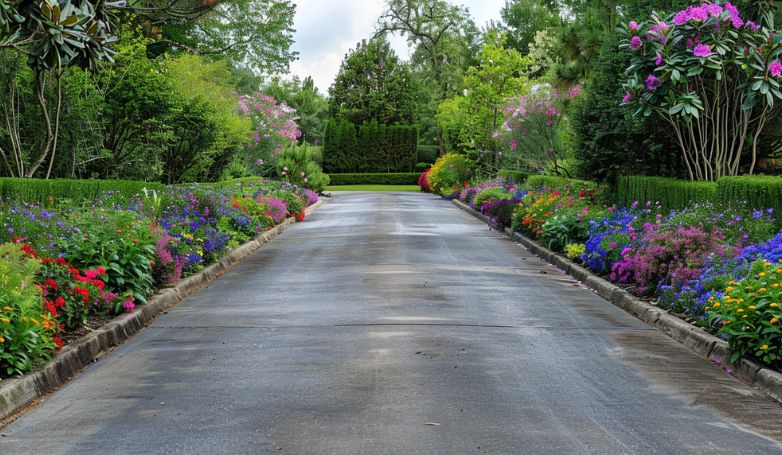
4. Lavish Landscaped Edges
Integrating lush landscaping along your driveway’s edges transforms the path into a vibrant journey. From flowering shrubs to towering trees, the right selection of plants can create a sense of enclosure and intrigue. This leads the eye towards the home.Seasonal blooms or evergreens can provide year-round color and texture, enhancing the driveway’s aesthetic appeal.
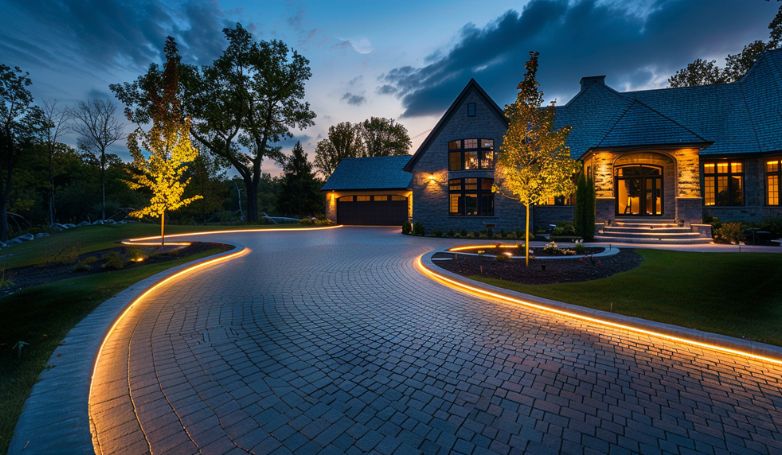
5. Illuminated Pathway Perfection
Properly placed lighting fixtures can turn a long driveway into a mesmerizing path at night. They ensure safety and add to your home’s curb appeal. From subtle ground lights to statement lamp posts, a variety of lighting options can highlight architectural features and landscaping. These create an inviting, warm glow that welcomes guests.
Natural stone pavers offer unparalleled beauty and durability, making them a premium choice for driveways. With each stone boasting unique hues and textures, they lend an artisanal touch to your entrance. Suitable for various design aesthetics, from rustic to modern, stone pavers ensure a high-end look that’s built to last.
7. Eco-Friendly Permeable Pavers
Permeable pavers are an environmentally conscious choice, allowing water to seep through and recharge groundwater supplies. This sustainable option reduces runoff and can help prevent erosion, all while offering a stylish surface for your driveway. Available in various materials and designs, they contribute to a green, eco-friendly property landscape.
8. Colorful Stamped Concrete
Stamped concrete driveways bring creativity and color to the forefront. They mimic the appearance of brick, stone, or even wood with remarkable accuracy. This versatile material allows for a range of patterns and hues. Thus, making it possible to customize your driveway to complement your home’s exterior perfectly.
9. Old World Brick Paving
Brick driveways radiate a classic charm that’s hard to replicate, offering a warm, inviting path to your home. Their durability and ease of repair make them a practical choice. Meanwhile, the variety of laying patterns—from running bond to basketweave—adds visual interest. This bespoke elegance enhances your property’s entrance.
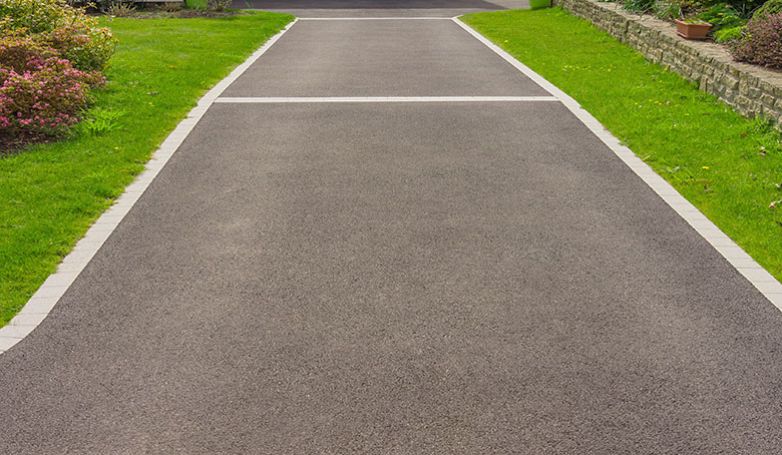
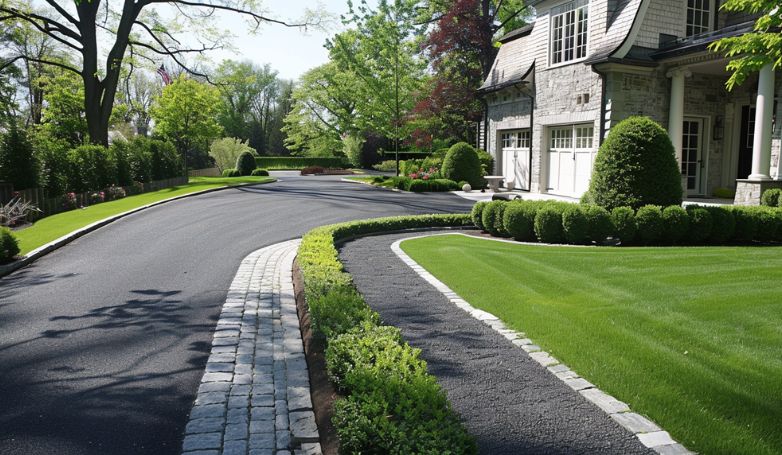
10. Sleek Asphalt with Border Accents
Asphalt is a popular choice for its durability and smooth finish, but adding decorative border accents can elevate its appearance significantly. Borders made from contrasting materials like brick or stone not only define the long driveway’s edges but also add a custom look that enhances the overall landscape design.
11. Contemporary Resin-Bound Gravel
Resin-bound gravel combines the natural aesthetic of gravel with a smooth, durable surface that’s permeable and resistant to weeds. This contemporary driveway option offers a sleek, low-maintenance entrance that can be customized with different colors and textures, aligning with modern design trends while providing practical benefits.
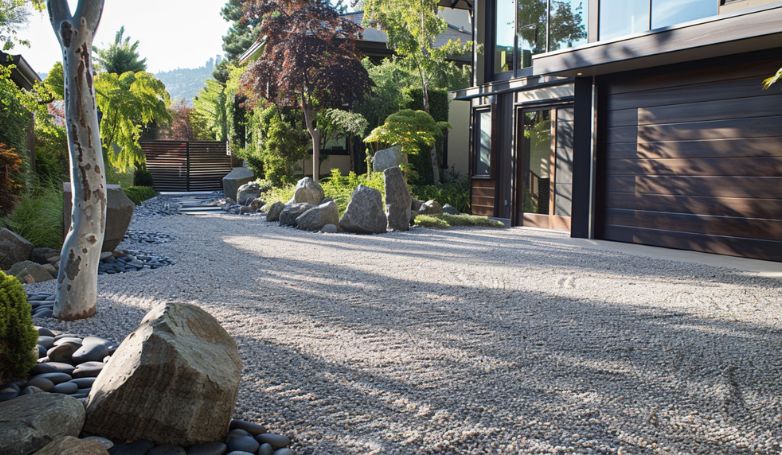
12. Serene Zen Garden Style
Incorporating elements of a Zen garden into your driveway design can create a tranquil, inviting entrance. Using natural materials like gravel, stone, and bamboo, along with minimalist landscaping, this approach fosters a sense of calm and simplicity, making every return home a peaceful experience.
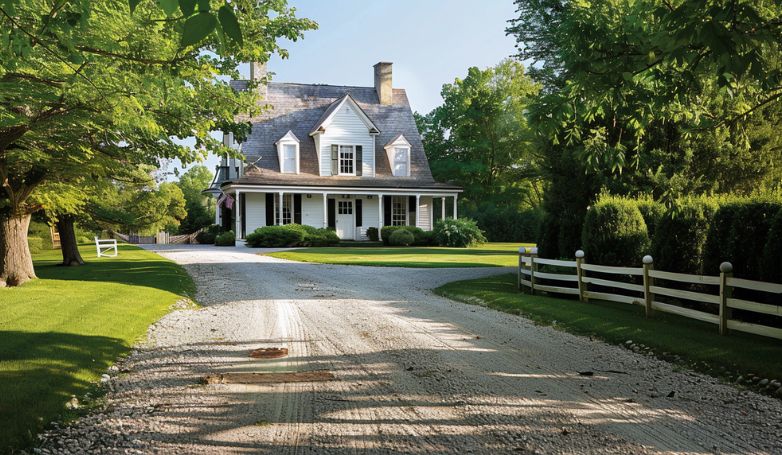
13. Charming Country Farmhouse Gravel
A driveway that captures the essence of country farmhouse charm with its rustic gravel surface sets the tone for a cozy, welcoming home. Complemented by wildflowers, vintage lanterns, and perhaps a wooden fence, this style evokes nostalgia and simplicity, embodying the heartwarming allure of country living.
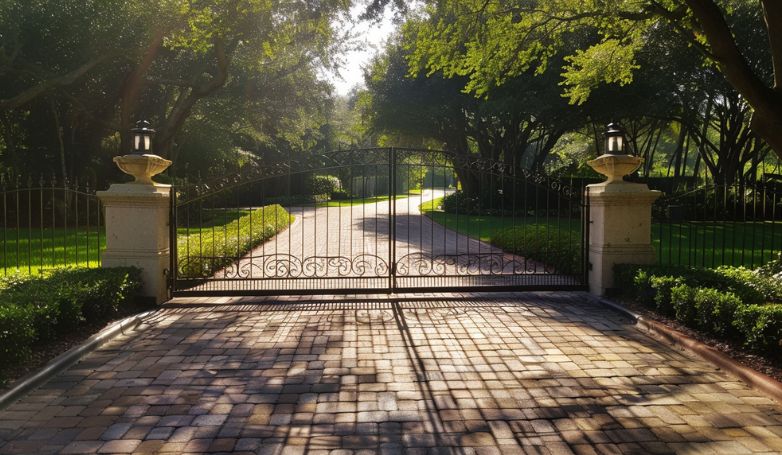
14. Regal Estate Iron Gates
Iron gates stand as sentinels at the entrance of your driveway, instantly elevating the property’s stature with their ornate designs and robust presence. Beyond their aesthetic appeal, these gates offer enhanced security and privacy, making a clear statement of elegance and exclusivity as they welcome guests into your estate.
15. Elegant Herringbone Brick Driveway
The herringbone pattern offers a sophisticated and visually striking choice for brick driveways. It presents a dynamic surface that plays with light and shadow. This elegant design adds a touch of refinement and provides a durable, timeless entryway. It complements both traditional and contemporary homes.
16. Lush Floral Border Showcase
Creating a showcase of floral borders along your long driveway turns the path into a living tapestry of colors and textures. Carefully selected blooms can offer seasonal interest, fragrance, and a pollinator-friendly environment, making your drive path a captivating visual journey that changes throughout the year.
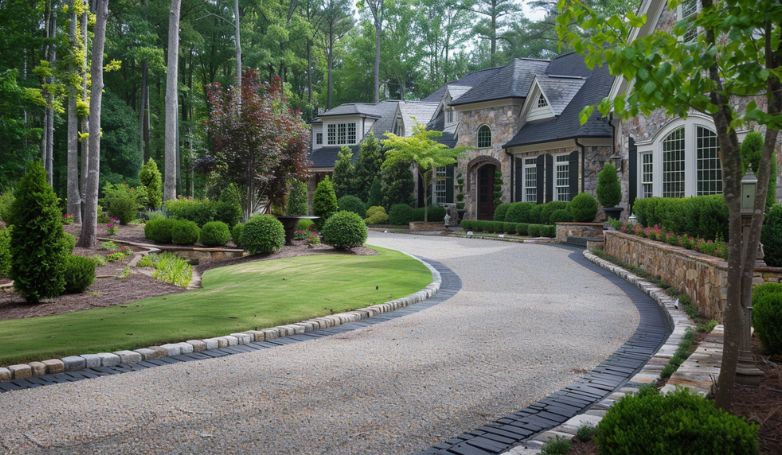
17. Gravel Driveway with Stone Borders
Merging the rustic appeal of a gravel surface with the defined elegance of stone borders creates a driveway that’s visually appealing and functional. This combination offers a harmonious balance between casual charm and formal structure, providing a durable and attractive entrance that’s easy to maintain.
18. Asphalt Driveway with Stamped Concrete Accents
Pairing the smooth expanse of an asphalt driveway with decorative stamped concrete accents can transform a utilitarian surface into a work of art. This approach allows for creative expression through patterns and colors, adding a bespoke element that enhances the driveway’s visual interest and curb appeal.
19. Cobblestone Driveway with Grass Grout
Integrating grass grout between cobblestones introduces a touch of greenery to the driveway, creating a blend of natural beauty and old-world charm. This eco-friendly design encourages drainage and adds a unique, textured look that softens the hardscape, making it visually pleasing and environmentally conscious.
20. Exposed Aggregate Concrete Driveway
An exposed aggregate concrete driveway reveals the natural textures and colors of stones embedded within, offering a visually engaging and slip-resistant surface. This technique adds depth and character to the driveway, making it a standout feature that complements the home’s exterior.
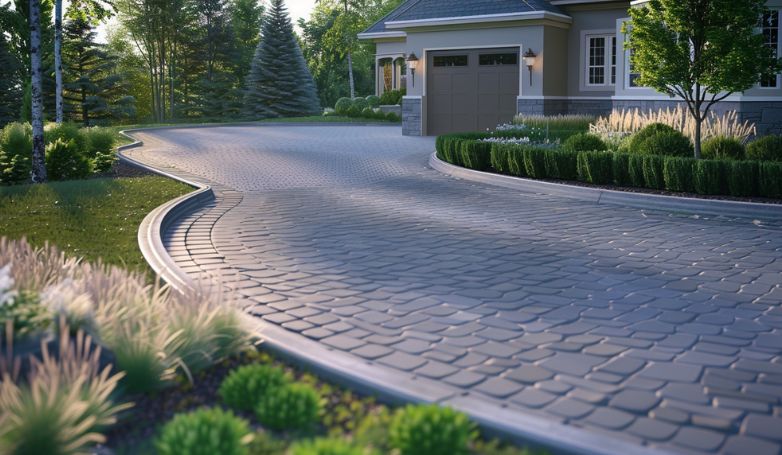
21. Stamped Concrete Driveway with Geometric Patterns
Geometric patterns stamped into concrete driveways add a modern, artistic flair, allowing for a range of designs that can be tailored to match your home’s aesthetic. This customizable approach offers the look of more expensive materials at a fraction of the cost, providing both beauty and functionality.
22. Natural Stone Paving
Choosing natural stone for your driveway pavers guarantees a unique and elegant entrance, with each stone offering its own color, texture, and character. Durable and versatile, natural stone fits various architectural styles, from rustic to contemporary, enhancing the property’s value and appeal.
23. Stained Concrete Driveway with Faux Tile Finish
Achieving the sophisticated look of tile with the practicality and durability of concrete, a stained concrete driveway with a faux tile finish offers endless possibilities for customization. This technique allows homeowners to enjoy the elegance of tile patterns without the high cost and maintenance.
24. Crushed Granite Driveway with Bordered Planters
A long driveway surfaced with crushed granite provides a sleek, textured look that’s both durable and permeable. Adding bordered planters along the edges introduces greenery and color, creating a natural frame that enhances the driveway’s aesthetic while contributing to a well-manicured landscape.
25. Natural Stone Slab Driveway with Inlaid Lighting
Combining the robust elegance of natural stone slabs with strategically placed inlaid lighting results in a driveway that’s not only visually stunning but also functional after dark. This design enhances safety and highlights the natural beauty of the stone, offering a luxurious and welcoming approach to your home.
Benefits of a Long Driveway
Here’s why investing in a long driveway can be beneficial.
Privacy and Security
A long driveway provides a buffer between your home and the street, offering increased privacy and security. This distance can deter unwanted visitors and reduce street noise, creating a peaceful, secluded environment for homeowners. It acts as a first line of defense, adding an extra layer of safety for your property and family.
Aesthetic Appeal
The aesthetic appeal of a long driveway cannot be understated. It creates a grand entrance, setting the tone for the rest of the property. Whether lined with trees, lights, or decorative stones, a well-designed driveway enhances the visual appeal of your home and contributes to a welcoming atmosphere for guests and residents alike.
Increased Property Value
Investing in a long driveway can significantly boost your property’s market value. A well-maintained and aesthetically pleasing driveway improves curb appeal, making your property more attractive to potential buyers. Additionally, the practical benefits of added privacy and security are appealing features that can increase demand and, subsequently, the overall value of your home.
Design Considerations for Long Driveways
Here are key factors to keep in mind during the planning process.
Material Choices
Selecting the right material for your long driveway is crucial for both its appearance and longevity. Options range from asphalt and concrete to gravel and pavers, each with unique benefits and aesthetics. Consider durability, climate compatibility, and how the material complements your home’s exterior design. The choice of material will significantly impact the driveway’s overall look, maintenance needs, and cost.
Maintenance Requirements
Every driveway material comes with its own set of maintenance requirements. Asphalt may need periodic sealing, concrete might require crack repairs, and gravel driveways could need regular leveling and weed control. Understanding these needs upfront will help you choose a material that fits your lifestyle and maintenance capacity, ensuring your driveway remains in top condition for years to come.
Drainage Solutions
Proper drainage is essential for the longevity of your driveway and the safety of your property. Inadequate drainage can lead to water damage, erosion, and even foundation problems. Consider incorporating a sloped design, drainage grates, or permeable materials to manage water runoff effectively. A well-planned drainage system will protect your surface from weather-related damage and maintain its functionality and appearance.
FAQs about Long Driveway
Check out the most frequently asked questions:
What are the best materials for a long driveway?
The best materials for a long driveway include asphalt, concrete, gravel, and pavers, each offering a balance between durability, maintenance, and aesthetics tailored to different needs and climates.
How do I prevent erosion on a lengthy driveway?
Preventing erosion on a lengthy driveway involves ensuring proper grading, installing drainage solutions like culverts or ditches, and using erosion control materials such as geotextiles or riprap along vulnerable areas.
Are there specific considerations for drainage on a long driveway?
Yes, drainage on a long driveway requires careful planning to prevent water accumulation and erosion. Solutions include sloping the driveway for natural runoff, installing drains or culverts, and choosing permeable paving materials.
What maintenance is required for a lengthy gravel driveway?
Maintaining a lengthy gravel driveway involves regular grading to smooth out bumps and ruts, replenishing gravel as needed, and applying weed control measures to prevent overgrowth and maintain a neat appearance.
How can I enhance the aesthetics of a long driveway while maintaining functionality?
Enhancing the aesthetics of a long driveway while maintaining functionality can be achieved by adding landscape lighting, planting border gardens, using decorative gates or arches, and selecting visually appealing materials that complement your home’s exterior.
Conclusion
A long driveway not only serves as a practical pathway to your home but also presents a unique opportunity to enhance your property’s curb appeal, value, and privacy. By carefully considering material choices, maintenance requirements, and drainage solutions, you can create one that is both beautiful and functional. Remember, the key to a successful long driveway lies in balancing aesthetics with practicality, ensuring it complements your home’s architecture while standing up to the demands of everyday use.
Tim is a seasoned paving expert with 30+ years of experience in the industry. He has worked on countless projects, from small residential driveways to large commercial parking lots.
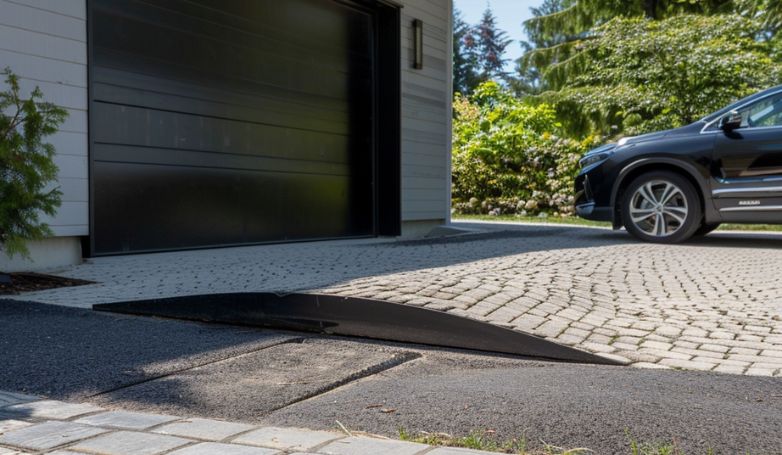
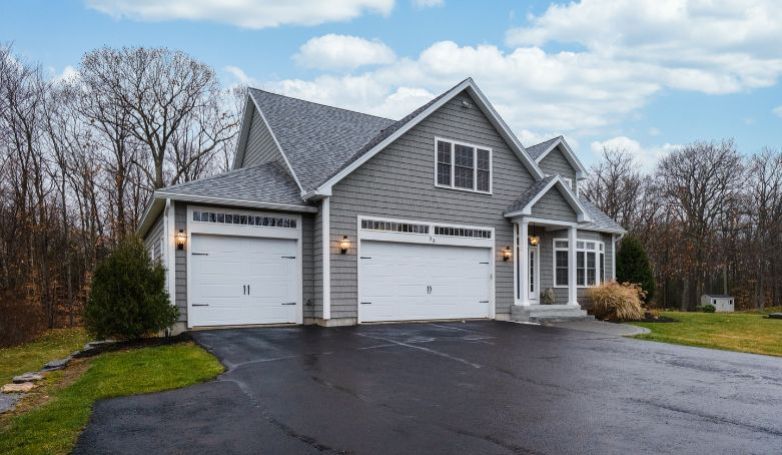
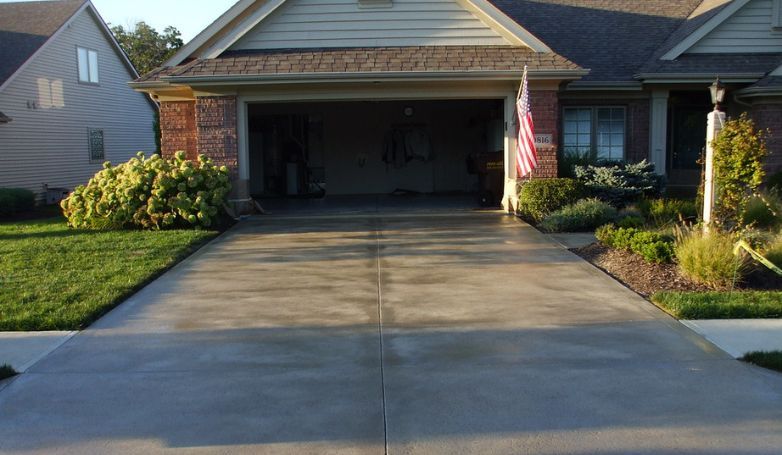
Transitioning smoothly from your driveway to your garage floor not only enhances curb appeal but ensures a seamless and safe entry into your home.
To fix the driveway to garage floor transition, begin by evaluating the existing height difference and materials. Choose durable options like concrete or asphalt for longevity. For seamless integration, use transition strips or create a slight slope to ensure smooth entry. Addressing drainage is also key to prevent water damage and ensure the transition remains functional and visually appealing over time.
Looking for more insights on how to seamlessly connect your driveway to your garage? Keep reading for step-by-step guidance and expert tips.
How to Fix the Driveway to Garage Floor Transition in 10 Steps
The transition from driveway to garage floor is crucial for a smooth, safe entrance to your home. Proper execution not only enhances curb appeal but ensures durability. Follow these detailed steps for a flawless upgrade.
1. Assessment and Planning
Begin your project by thoroughly assessing the current state of the driveway to garage floor transition. Look for any discrepancies in levels, potential water damage, or wear and tear that could affect the new installation. Planning involves determining the scope of work, necessary materials, and any adjustments needed to align with your home’s structural integrity. This step ensures a solid foundation for the project, setting the stage for a seamless and efficient process.
2. Choose Materials
Selecting the right materials is pivotal for both the aesthetic and functional success of the transition. Consider factors such as compatibility with existing surfaces, durability against weather conditions, and load-bearing capacity. Materials should not only complement the visual appeal of your home but also offer longevity and ease of maintenance. This decision impacts the project’s overall success, ensuring the transition withstands the test of time and use.
3. Ensure Proper Drainage
Proper drainage is essential to prevent water accumulation at the transition point, which can lead to damage over time. Assess the area’s slope and install drainage solutions that effectively direct water away from the structure. This might involve integrating channels, grates, or adjusting the landscape gradient. Ensuring effective drainage safeguards the transition against water damage, contributing to the longevity and integrity of the driveway and garage floor.
4. Mark the Transition Area
Accurately marking the transition area is crucial for precision in the following steps. Use markers or chalk to outline the exact area where modifications will be made. This visual guide helps in aligning materials and ensures that all subsequent actions are focused and accurate, leading to a cleaner, more professional finish.
5. Excavate if Necessary
Depending on the transition’s requirements, excavation may be necessary to remove old materials, level the ground, or prepare for the new subbase. This process involves carefully digging out the marked area to the required depth, ensuring a solid foundation for the transition. Proper excavation is key to preventing future settling or shifting, contributing to the durability of the finished project.
6. Install a Subbase
A strong subbase is essential for supporting the material and ensuring an even load distribution. This layer, typically made of gravel or compacted soil, provides a stable foundation that prevents cracking or shifting. Installing a properly compacted subbase is critical for the longevity of the transition, ensuring it remains level and intact under various conditions.
7. Apply the Transition Material
With the subbase in place, apply the chosen transition material, whether it be concrete, asphalt, or pavers. This step requires careful application to ensure a smooth, level transition between surfaces. Attention to detail here ensures a seamless integration, enhancing both functionality and visual appeal of the entryway.
8. Smooth and Level
After applying the material, it’s imperative to smooth and level the surface. This not only affects the transition’s appearance but also its safety and usability. A smooth, level surface prevents tripping hazards and ensures water runs off properly, avoiding pooling that could lead to damage.
9. Cure and Set
Allow the transition material ample time to cure and set, a process that can vary in duration depending on the materials used. Proper curing is crucial for the material to reach its full strength and durability. This patience ensures the transition area can withstand vehicle traffic, environmental elements, and time, maintaining its integrity and appearance.
10. Seal and Protect
Finally, apply a sealant to the cured surface to protect it from weather, stains, and wear. This protective layer extends the life of the material, maintaining its look and function. Regular maintenance, including resealing as necessary, will keep the transition looking new and performing well for years to come. This final step encapsulates your efforts, safeguarding the surface against the elements and ensuring a durable, aesthetically pleasing entrance to your garage.
Common Problems and Solutions
Addressing common issues in the transition from driveway to garage floor is essential for safety, functionality, and curb appeal. Here’s how to identify and rectify these typical challenges with effective solutions.
Uneven Settling
Uneven settling can create hazardous dips or uneven surfaces, often resulting from soil movement or compaction issues beneath the transition.
How to solve: Stabilize the ground by removing the uneven section, compacting the soil beneath, and adding a layer of gravel before reapplying the surface material. This reinforces the foundation, preventing further settling.
Drainage Issues
Water pooling due to inadequate drainage can lead to surface damage and foundation issues.
How to solve: Incorporate proper drainage solutions, such as installing French drains or grading the surface to encourage water flow away from the transition area, ensuring longevity and preventing water damage.
Material Deterioration
Continuous exposure to elements and traffic can lead to the breakdown of transition materials.
How to solve: Regularly inspect and replace worn materials with high-quality, durable alternatives. Applying protective sealants can also extend the lifespan of the area.
Height Discrepancies
A significant difference in height between the driveway and garage floor can cause tripping and vehicle damage.
How to solve: Install a ramp or adjust the height of one surface to match the other, ensuring a smooth, safe transition. Materials should be chosen for durability and slip resistance to maintain safety.
Transition Wear from Vehicle Traffic
Frequent vehicle movement over the transition can lead to wear and tear.
How to solve: Reinforce the transition area with more durable materials or additional layers to withstand traffic. Regular monitoring for signs of wear will allow for timely maintenance or repairs.
Aesthetic Mismatch
Discrepancies in materials or colors between the driveway and garage can be visually unappealing.
How to solve: Choose complementary materials or use transitional design elements to create a cohesive look. Consider resurfacing options to unify the appearance of both areas.
How to solve: Apply weather-resistant coatings and perform regular maintenance, such as sealing cracks and using ice melt products carefully to mitigate damage from cold weather.
Improving Slip Resistance
Slippery transitions can be dangerous, especially in wet or icy conditions.
How to solve: Apply textured coatings or slip-resistant sealants to enhance traction. Alternately, using inherently rough materials like stamped concrete or pavers can naturally improve grip.
Long-Term Maintenance Strategies
Neglect can turn minor issues into major repairs.
How to solve: Develop a regular maintenance schedule that includes cleaning, inspecting, and repairing the transition area. Applying sealants and addressing small issues promptly can greatly extend the life and appearance of the transition.
Best Materials for Driveway to Garage Floor Transition
Selecting the ideal material for the driveway to garage floor transition is pivotal for ensuring durability, aesthetic harmony, and practical functionality. Each material offers unique advantages tailored to different needs and preferences.
Concrete: Durability and Versatility
Concrete’s unmatched durability and versatility make it a prime choice for transitions between driveways and garage floors. Its ability to be easily shaped and finished allows it to match any home’s exterior decor, providing a wide range of decorative options. Concrete is capable of withstanding heavy vehicle traffic and extreme weather conditions, making it a long-lasting solution that maintains its appearance over time.
Asphalt: Cost-Effective and Flexible
Asphalt stands out for its cost-effectiveness and flexibility, offering a smooth transition that can effortlessly adapt to temperature fluctuations without cracking. This makes it an ideal material for various climates, providing a seamless connection between different surfaces. Its black color contributes to a sleek, uniform look that can easily blend with most driveway and garage styles.
Pavers: Aesthetic Appeal and Customization
Pavers are celebrated for their extensive customization options and aesthetic appeal. With a variety of colors, shapes, and sizes available, they allow for the creation of unique patterns that enhance the visual transition between the driveway and garage. This option not only adds a personalized touch but also significantly boosts the property’s curb appeal and value.
Gravel: Economical and Easy Installation
Gravel offers an economical and simple installation process, making it an attractive option for creating permeable transitions. It enhances natural drainage, reduces runoff, and blends seamlessly with various landscapes. Gravel’s varied textures and colors can complement any setting, providing a rustic or informal aesthetic.
Resin-Bound Surfaces: Smooth and Permeable
Resin-bound surfaces deliver a smooth, permeable finish, ideal for effective water management and reducing the risk of puddles and slips. The combination of natural aggregate and resin forms a durable, non-slip surface that allows water to drain through, offering both functional and aesthetic benefits to any driveway or garage entrance.
Rubber Thresholds: Accessibility and Cushioning
Rubber thresholds provide an accessible, cushioned transition that is particularly beneficial for reducing trip hazards and facilitating the movement of wheelchairs and walkers. This solution is practical for ensuring a gentle slope from the driveway to the garage, offering comfort and convenience for all users.
Stone: Natural Beauty and Longevity
Stone transitions offer unparalleled natural beauty and longevity. The unique texture and color variations of each piece can create visually stunning entrances that add timeless elegance to any property. Durable and resistant to weathering, stone is an investment that enhances the aesthetic and value of a home.
Brick: Classic Look and Strength
Brick brings a classic aesthetic combined with robust strength to driveway to garage floor transitions. Its versatility allows for various patterns and colors, making it suitable for both traditional and contemporary homes. Brick adds character and charm to any entrance, contributing to the overall appeal and durability of the transition.
Composite Materials: Modern Solutions
Composite materials offer modern, durable solutions for transitions, requiring little to no maintenance. These materials are designed to resist weathering, wear, and fading, providing a contemporary appearance that can mimic other materials. Composites represent a practical choice for homeowners looking for a sleek, modern transition with minimal upkeep.
Transition Strips: Bridging the Gap
Transition strips are specifically designed to smoothly and attractively bridge the gap between different flooring types. They come in various materials and finishes to ensure a cohesive look across the transition. Transition strips accommodate height differences and protect the edges of both surfaces, ensuring a practical and aesthetically pleasing solution.
Driveway to Garage Floor Transition: Costs and Budgeting
When planning the transition from your driveway to your garage floor, understanding the financial aspects is crucial for effective budget management. This section explores costs, savings, and budgeting strategies to help you make informed decisions.
Initial Cost Analysis: Materials and Labor
The initial cost of transitioning materials and labor can vary widely. Concrete and asphalt offer durability at different price points, while pavers and stone provide aesthetic appeal but may increase costs. Labor charges depend on the project’s complexity and the installation method chosen.
Long-Term Savings: Durability vs. Maintenance
Investing in durable materials like concrete or stone can lead to long-term savings, reducing the need for frequent repairs or replacements. However, considering maintenance expenses for less durable materials is essential for accurate budget forecasting.
Price Comparison: DIY vs. Professional Installation
DIY installations can significantly reduce costs but may lack the finish and durability of professional work. Professional installations, while more expensive, ensure expertise and often come with warranties, offering peace of mind and potentially saving money in the long run.
Budgeting Tips: How to Save Without Sacrificing Quality
To save money without compromising quality, consider materials that offer a balance of durability and cost-effectiveness. Planning your project during off-peak seasons can also result in lower labor costs. Additionally, sourcing materials directly from suppliers might yield discounts.
Hidden Costs: What to Anticipate Before Starting Your Project
Be prepared for hidden costs, such as preparation work, drainage improvements, and permits. These unforeseen expenses can impact your budget, so it’s wise to allocate an additional 10-20% of your total budget for such contingencies.
FAQs about Driveway to Garage Floor Transition
Check out the most frequently asked questions:
Can I create a seamless transition between different materials, like asphalt to concrete?
Yes, creating a seamless transition between materials like asphalt and concrete is possible using transition strips or gradually blending materials for a smooth changeover, ensuring both aesthetic appeal and functionality.
What are the best practices for ensuring proper drainage in my transition area?
For proper drainage, ensure the transition area slopes away from the garage and driveway, use permeable materials, or install drainage channels to prevent water accumulation and potential damage.
How can I address height differences between my driveway and garage floor?
To address height differences, consider installing a ramp or using a graded transition layer of asphalt or concrete to create a gentle slope, ensuring a smooth and safe entry into the garage.
Are there any DIY solutions for creating a driveway to garage floor transition?
DIY solutions include using concrete, asphalt, pavers, or rubber ramps to create the transition. Careful planning, preparation, and following manufacturer instructions for materials can lead to successful outcomes.
How do I ensure my transition complies with local building codes and regulations?
Ensure compliance with local building codes by consulting with your local building department before starting the project. They can provide guidelines on materials, design, and necessary permits to avoid future legal or safety issues.
Conclusion
Fixing the driveway to garage floor transition is key to ensuring a seamless and safe passage. This process involves selecting appropriate materials like concrete or pavers and meticulously planning each step, from leveling differences in height to ensuring adequate drainage. Focusing on these critical aspects and considering long-term maintenance needs, homeowners can significantly enhance their property’s functionality and curb appeal. The right approach not only addresses current issues but also prevents future problems, guaranteeing a smooth transition for years to come.
James has over two decades of experience in the paving industry and has worked on a wide variety of projects, from large-scale commercial installations to small residential repairs.
https://pavingfinder.com/wp-content/uploads/2024/03/Driveway-to-Garage-Floor-Transition.jpg455782admin123https://pavingfinder.com/wp-content/uploads/2020/10/logo.jpgadmin1232024-03-04 13:06:282024-03-04 13:06:31Driveway to Garage Floor Transition – 10 Steps to Fix It
When considering a new driveway, the shape you choose can significantly impact your property’s curb appeal and functionality. Driveway shapes vary widely, offering each homeowner the chance to find the perfect match for their home and lifestyle.
Driveway shapes range from the straightforward straight and curved designs to more intricate forms like circular, semi-circular, U-shaped, L-shaped, S-shaped, and Y-shaped driveways. There are also wide, custom, serpentine, and teardrop options for those looking for something unique. Each shape has its benefits, from enhancing aesthetic appeal to improving traffic flow and maximizing space.
For more insights on how each driveway shape can complement your property and meet your specific needs, keep reading.
11 Popular Driveway Shapes and Their Benefits
Choosing the right driveway shape is not just about aesthetics; it also impacts functionality, ease of navigation, and the overall flow of your property. Here are 11 popular driveway shapes and their unique benefits:
1. Straight Driveway
This type of driveway offers a direct route from the street to the garage or parking area, making it highly efficient for daily use. Its uncomplicated design also means lower construction costs and easier maintenance.
Straight driveways are ideal for properties with limited space or those that favor a minimalist aesthetic, providing a clean and unobstructed path that enhances the home’s curb appeal.
2. Curved Driveway
A curved driveway introduces an element of sophistication to any property. Designed to meander gently around natural landscapes, trees, or architectural features, curved driveways create a welcoming approach to the home. This shape can also increase the driveway’s length, providing more space for vehicles and reducing the slope on hilly terrains.
Curved driveways are perfect for adding character to the property while improving functionality and maximizing the use of available space.
3. Circular (or Loop) Driveway
Circular driveways, often referred to as loop driveways, offer exceptional convenience by allowing vehicles to enter and exit without the need to back up. This driveway shape is particularly beneficial for properties with busy or difficult-to-navigate streets.
Beyond practicality, a circular driveway can serve as a grand entrance to your home, significantly enhancing its curb appeal and providing a focal point for front-yard landscaping.
4. Semi-Circular Driveway
The semi-circular driveway shares many benefits with its circular counterpart but requires less space. This design is ideal for properties that aim to achieve an elegant entrance without the extensive land use of a full circular driveway. It facilitates easy vehicle maneuvering and adds aesthetic value to the home’s frontage.
Semi-circular driveways are also versatile, fitting well with various architectural styles and property layouts.
5. U Shaped Driveway
U-shaped driveways are highly functional, providing seamless access to the front door or garage from two entrance points. This shape is particularly useful for properties with multiple buildings or frequent visitors, as it allows for efficient traffic flow and ample parking space.
The U-shape also encloses a portion of the yard, creating a private and inviting courtyard effect that can be landscaped for added beauty and privacy.
6. L Shaped Driveway
Tailored for corner lots or properties with unique layouts, the L-shaped driveway offers flexibility in design and use. It connects two different property access points, making it easier to utilize multiple entrances or buildings.
This driveway shape can effectively separate pedestrian paths from vehicle areas, enhancing safety and accessibility. Additionally, the L-shape allows for creative landscaping opportunities, enabling homeowners to maximize both aesthetic appeal and functionality.
The S-shaped driveway is a dynamic choice that adds visual interest and appeal to the property. Ideal for larger estates, this design provides a longer driveway that gently curves, creating a scenic approach to the home.
The shape is perfect for navigating around existing landscaping features, offering a visually pleasing and functional driveway solution. An S-shaped driveway can also slow down incoming traffic, making the entrance safer and more serene.
8. Y Shaped Driveway
The Y-shaped driveway is an excellent solution for properties with multiple buildings or access needs. It branches off to different sections, allowing for efficient distribution of vehicles to various areas of the property. This driveway shape enhances the property’s functionality by providing separate access points, which can be particularly beneficial for guest parking or service areas.
The Y-shape also offers unique landscaping opportunities, dividing the yard into distinct zones for varied uses or themes.
9. Wide Driveway
A wide driveway provides substantial benefits, particularly for households with multiple vehicles. This shape offers ample space for parking, maneuvering, and even playing sports or other activities.
Wide driveways can accommodate more than one vehicle side by side, reducing congestion and improving accessibility. Additionally, a wide driveway can significantly enhance the property’s curb appeal, creating a grand entrance that complements the home’s architectural style.
10. Serpentine Driveway
The serpentine driveway, with its winding path, offers an elegant and intriguing approach to the home. This design is perfect for long driveways, providing a visually engaging experience as it snakes through the landscape.
Serpentine driveways can slow down traffic, enhancing safety and allowing visitors to appreciate the property’s scenery. This driveway shape is ideal for estates with extensive grounds, offering a sophisticated and memorable entrance.
11. Teardrop Driveway
The teardrop driveway features a circular turnaround area, providing ease of vehicle movement and an attractive design element. This shape is especially useful for properties with limited space for turning or those seeking to minimize the need for reversing. The central island of the teardrop can be landscaped beautifully, serving as a focal point and adding to the overall aesthetic of the property. Teardrop driveways combine functionality with design elegance, making them a popular choice for homeowners looking to enhance their property’s appeal and usability.
Pros and Cons Visualized
Shape
Pros
Cons
Cost
Straight
Direct path Lower construction costs Easy maintenance
Basic, less curb appeal
Generally lower due to simplicity
Curved
Elegant design Can navigate around obstacles
More complex to design and construct
Higher than straight, due to complexity
Circular (Loop)
Easy entry and exit High curb appeal
Requires significant space
High, due to size and complexity
Semi-Circular
Less space than full circular Enhances frontage
Still requires considerable space
Moderate to high, depending on size
U-Shaped
Efficient traffic flow Ample parking and turning space
Requires large front yard
High, due to larger covered area
L-Shaped
Good for corner lots Separates pedestrian and vehicle paths
May not be as visually appealing as other shapes
Moderate, varies with design complexity
S-Shaped
Visually appealing Slows down traffic
Best suited for larger properties
High, due to length and design complexity
Y-Shaped
Efficient for multiple buildings Unique landscaping opportunities
Can be complex to design
High, depending on branches and overall size
Wide
Ample space for parking/maneuvering Reduces congestion
Requires more materials, increasing costs
Higher, due to increased material use
Custom
Tailored to specific needs Complete creative control
Potentially high cost due to customization
Varies widely, generally higher
Serpentine
Elegant, memorable entrance Enhances safety by slowing down traffic
Requires long driveway length
High, due to length and landscape integration
Teardrop
Minimizes need for reversing Attractive landscaping focal point
Limited space efficiency
Moderate to high, depending on design details
This table provides a high-level overview for comparison. For accurate cost estimates and design considerations specific to your property, consulting with a paving or landscaping professional is recommended. They can offer tailored advice based on your property’s unique characteristics and your personal preferences.
Considerations for Choosing the Right Driveway Shape
Selecting the ideal driveway shape requires careful consideration of various factors to ensure it complements your property’s aesthetics, meets functional needs, and stays within budget.
Space and Size
The available space and size of your property play crucial roles in determining the feasible driveway shapes. Larger areas can accommodate elaborate designs like circular or serpentine driveways, which might not be possible in tighter spaces. Straight or L-shaped driveways could be more suitable for smaller properties, offering simplicity and efficient use of limited space.
Landscape and Topography
The natural landscape and topography of your property can greatly influence your driveway shape choice. Curved or S-shaped driveways can gracefully navigate around natural obstacles like trees or slopes, integrating seamlessly with the landscape. In contrast, flat terrains offer more flexibility, allowing for a wider range of shapes including circular or wide driveways.
Usage Needs
Consider how the driveway will be used daily. Families with multiple vehicles may benefit from a wide or U-shaped driveway for easier access and parking. If you frequently receive visitors, a circular driveway could provide the necessary space for smooth entry and exit. For commercial properties, a straight driveway might suffice for straightforward access.
Aesthetic Goals
Your driveway is an extension of your home’s curb appeal. If you’re aiming for a dramatic entrance, circular or serpentine driveways can make a statement. For a minimalist and modern look, straight or L-shaped driveways might be preferable. Custom driveways offer the most flexibility for matching your aesthetic vision exactly.
Budget Constraints
Budget is a significant factor in choosing a driveway shape. Straight driveways are generally the most cost-effective, while circular, serpentine, and custom shapes can be more expensive due to their complexity and the additional materials required. Assess your budget early in the planning process to determine which shapes are financially feasible for your project.
Pros and Cons of Various Driveway Shapes
Exploring the various driveway shapes can significantly impact both the functionality and aesthetic of your property. Let’s delve into the pros and cons associated with some popular designs.
Pros and Cons of Straight Driveways
Pros: Straight driveways offer simplicity and cost-effectiveness, making them a practical choice for many homeowners. They require less land, making them suitable for properties with limited space. Their straightforward design also simplifies construction and maintenance.
Cons: While efficient, straight driveways may lack visual appeal and uniqueness. They offer little in terms of landscape integration and may not make the strong design statement that some homeowners desire.
Curved Driveways: Enhancing Beauty with Complexity
Pros: Curved driveways add an element of sophistication and beauty to a property, gracefully winding through the landscape. They are ideal for navigating around natural features or obstacles, enhancing the property’s overall aesthetics.
Cons: The complexity of designing and constructing a curved driveway can lead to higher costs. Additionally, their shape may require more land, making them less suitable for smaller properties.
Circular Driveways: Elegance and Space Use
Pros: Circular driveways provide an elegant and grand entrance, significantly boosting curb appeal. They facilitate easy vehicle movement, allowing for smooth entry and exit without the need for reversing.
Cons: A major drawback is the substantial space requirement, which may not be feasible for smaller properties. Additionally, circular driveways can be more expensive to install due to their size and complexity.
U-Shaped and L-Shaped: Functional Flexibility
Pros: Both U-shaped and L-shaped driveways offer great flexibility in design and use, accommodating multiple vehicles and improving traffic flow on the property. These shapes allow for creative landscaping opportunities and can enhance the functionality of a property’s entrance.
Cons: These designs may require more space than straight driveways, potentially increasing the cost of materials and construction. The shape may also dictate the landscaping and design of the surrounding area, requiring careful planning to achieve the desired aesthetic.
Enhancing Driveway Shapes Design with Additional Features
Incorporating additional features into your driveway design can significantly elevate its appearance and functionality. Let’s explore how landscaping, lighting, and borders can enhance various driveway shapes.
Landscaping
Landscaping around your driveway can transform it from a mere functional space into a stunning visual element of your property. For straight driveways, lining the sides with flower beds or shrubs can add color and life. Curved and circular driveways benefit from strategic planting that complements their shape, guiding the eye and integrating the driveway into the overall landscape. Trees can create a dramatic entrance or provide shade, while ground cover plants can fill in gaps and soften hard edges, making the driveway an integral part of your garden.
Lighting
Lighting is not only a practical addition for safety and visibility at night but also an opportunity to accentuate your driveway’s best features. For straight driveways, uniform lighting can highlight the path’s directness, while for curved or circular driveways, lighting can emphasize the elegant shapes and turns. Strategically placed lights can create intriguing shadows and silhouettes, adding depth and interest. Whether using in-ground lights, lanterns, or modern LED strips, lighting options can cater to any driveway design, enhancing its appeal day and night.
Borders
Borders serve both a functional and aesthetic purpose, defining the driveway’s edges and contributing to the overall design. They can be made from a variety of materials, including brick, stone, or concrete, and can complement or contrast with the driveway material for added visual interest. Borders can also help to contain gravel or other loose driveway materials, maintaining the neatness and durability of the surface.
Together, these features can significantly enhance the visual appeal and functionality of your driveway, turning it into a cohesive element of your property’s landscape design.
Different Driveway Shapes Installation Insights
Choosing the right driveway shape involves more than just aesthetics; it also encompasses preparation, technique, and overcoming specific challenges. Let’s delve into insights on installing various driveway shapes.
Preparing Your Property for Driveway Installation
Proper preparation is key to ensuring a smooth driveway installation process. This involves clearing the designated area of any debris, vegetation, or obstacles that could hinder construction. Additionally, assessing the ground for any potential issues, such as uneven terrain or poor drainage, is crucial. Addressing these factors beforehand can prevent future complications and ensure the longevity of your driveway.
Navigating Challenges with a Curved and Circular Driveway
Curved and circular driveways present unique challenges, primarily due to their intricate shapes and the precision required in their layout. Accurate measurement and careful planning are essential to achieve the desired curvature without compromising the driveway’s functionality. This might involve using flexible materials or custom-cut pieces to accommodate the curves, ensuring a seamless and aesthetically pleasing result.
Techniques for Perfecting a Straight and L-Shaped Driveway
Achieving perfection with straight and L-shaped driveways relies on maintaining precise alignments and ensuring a level base. Utilizing string lines or lasers can help keep edges straight and angles sharp. Proper compaction of the base material is also crucial to prevent settling or shifting, which can lead to cracks or uneven surfaces over time.
Incorporating Unique Features into a U-Shaped Driveway
A U-shaped driveway offers ample opportunity for incorporating unique features that enhance both its functionality and appeal. This can include adding a central garden or water feature, which becomes a focal point, or integrating turnaround areas for easier navigation. Choosing complementary materials and landscaping can further personalize the space, making it not just a driveway but a standout feature of your property.
Driveway shapes cost analysis
Understanding the cost implications of different driveway shapes is crucial for homeowners looking to balance aesthetics, functionality, and budget in their landscaping projects.
Straight Driveway: Budget-Friendly Choice
Straight driveways are the most economical option, offering a straightforward design that minimizes materials and labor costs. Their simplicity allows for a quick installation process, making them an ideal choice for homeowners seeking efficiency and cost-effectiveness.
Curved Driveway: Price for Aesthetic Appeal
Curved driveways, while more aesthetically pleasing, come with higher costs due to their complexity. The additional labor and materials needed to achieve the desired curves can increase the overall price, making it a choice for those willing to invest more for beauty.
Circular Driveway: Investment in Elegance
Circular driveways represent a significant investment, attributed to their grand appearance and the substantial amount of materials required. Their installation is labor-intensive, reflecting in a higher cost that pays off in unparalleled curb appeal and property value enhancement.
U Shaped and L Shaped: Cost vs. Functionality
U-shaped and L-shaped driveways offer a balance between functionality and cost. These designs require more space and materials than straight driveways but provide added convenience and accessibility. The costs are justified by the improved traffic flow and additional parking space they offer.
Maintenance Tips for Different Driveway Shapes
Maintaining your driveway in top condition requires understanding the specific needs of its shape and structure. Here are some tailored tips to help keep your driveway functional and aesthetically pleasing for years to come.
Routine Care for Straight and Curved Driveways
Straight and curved driveways benefit greatly from regular cleaning and the removal of weeds. For straight driveways, ensure that the path is clear of debris to prevent surface damage. Curved driveways might require more attention to detail, especially along the curves, to prevent the accumulation of leaves and dirt that can lead to discoloration and surface wear.
Addressing Wear and Tear on Circular and U Shaped Driveways
Circular and U-shaped driveways, often experiencing high traffic, require frequent inspections for cracks or potholes. Early detection and repair of such damages are crucial to prevent further deterioration. Consider applying a fresh layer of sealant every few years to protect the surface against weathering and stains.
Preventative Measures for L Shaped Driveways
For L-shaped driveways, focus on preventing drainage issues that can lead to water damage. Ensure that the driveway is graded correctly to direct water away from the property. Regularly cleaning the gutters and downspouts can also prevent water accumulation, which is critical for L-shaped driveways where water can pool in the corner.
Enhancing Durability with Sealants and Coatings
Applying sealants and protective coatings is an effective way to enhance the durability of any driveway shape. These products provide a barrier against UV rays, rain, oil, and other substances that can damage the driveway surface. Reapply as recommended by the manufacturer to maintain the driveway’s integrity and appearance, regardless of its shape.
FAQs about Driveway Shapes
Check out the most frequently asked questions:
Which are the best driveway shapes?
The best driveway shape depends on your property’s size, landscape, and personal preferences. Straight driveways suit minimalist designs, while curved, circular, or U-shaped driveways enhance larger properties with aesthetic appeal.
How do you design a driveway layout?
Designing a driveway layout involves assessing your property’s topography, the house’s location, and desired traffic flow. Consider using design software or consulting with a professional to integrate the driveway seamlessly with your landscape and architecture.
Should the driveway be straight or curved?
Choosing between a straight or curved driveway depends on your property’s layout and aesthetic goals. Straight driveways fit well with modern, minimalist landscapes, while curved driveways can navigate around natural features and add visual interest.
How Do Driveway Shapes Impact the Overall Design of a Property?
Driveway shapes significantly impact a property’s curb appeal and functionality. The right shape can complement the house’s architecture, improve traffic flow, and enhance the landscape, making the driveway a key component of the property’s overall design.
Conclusion
In choosing the right driveway shapes, you’re not just selecting a pathway to your home; you’re enhancing its aesthetic appeal, functionality, and overall value. From the simplicity of straight designs to the elegance of curved, circular, U-shaped, or L-shaped options, each driveway shape brings its unique benefits and considerations. By evaluating your property’s layout, your style, and functional requirements, you can identify the driveway shape that best enhances your home’s exterior. Opting for the ideal driveway shape can dramatically elevate your property’s charm and practicality.
James has over two decades of experience in the paving industry and has worked on a wide variety of projects, from large-scale commercial installations to small residential repairs.
Revitalizing your asphalt driveway with paint not only boosts curb appeal but also adds a layer of protection. It’s a smart blend of beauty and durability.
Choosing the right asphalt driveway paint involves navigating a variety of options. Acrylic-based paints are renowned for their strong adherence and longevity, providing a resilient, non-slip finish that’s ready to stand up to the elements. But there are more choices—epoxy and latex paints offer different benefits, from quicker drying times to environmental friendliness. Each type comes in a spectrum of colors for perfect customization, sealing your driveway against moisture, UV damage, and stains.
Explore these top picks to transform and protect your driveway:
Plush 5 gal. Tournament Blue Recreational Surface Coating
FLEX SEAL FAMILY OF PRODUCTS 32 Ounce Flex Seal Liquid
Rust-Oleum Professional 1 gal. Flat Yellow Exterior Traffic Striping Paint
FLEX SEAL FAMILY OF PRODUCTS Flex Seal Liquid MAX White 2.5 Gal. Liquid Rubber Sealant Coating
FLEX SEAL FAMILY OF PRODUCTS Flex Seal Liquid 1 Gal. Black Liquid Rubber Sealant Coating Spray Paint
Acrylic Paint
Oil-Based Paint
Water-Based Latex Paint
Centrecoat Water-Based Driveway Paint
Rustoleum Tarmacoat 6100 Asphalt and Tarmac Paint
Curious about the best way to refresh your driveway? Let’s explore the world of asphalt driveway paint to discover how the right product can not only enhance your home’s appearance but also extend the life of your driveway.
The 10 Best Asphalt Driveway Paints
Enhance your driveway’s appearance and durability with these top-rated asphalt paints, carefully curated for optimal performance and longevity.
1. Plush 5 gal. Tournament Blue Recreational Surface Coating:
Offering a blend of durability and aesthetic appeal, Plush 5 gal. Tournament Blue is ideal for both residential and recreational use. Its vibrant blue color and long-lasting finish make it a standout choice for revitalizing asphalt driveways, providing a fresh and vibrant look that lasts.
2. FLEX SEAL FAMILY OF PRODUCTS 32 Ounce Flex Seal Liquid:
Providing a reliable solution for sealing and protecting asphalt surfaces, FLEX SEAL FAMILY OF PRODUCTS 32 Ounce Flex Seal Liquid ensures your driveway maintains its integrity over time. With easy application and effective weather resistance, it offers peace of mind and long-lasting performance.
Offering long-lasting beauty and protection for your driveway, acrylic paint is renowned for its durability and vibrant colors. With strong adhesion and resistance to UV damage, it’s an excellent option for asphalt surfaces, ensuring your driveway looks great and remains protected for years to come.
7. Oil-Based Paint
Enhancing the appearance of asphalt driveways with its glossy finish and superior adhesion, oil-based paint provides unmatched durability and protection against stains and wear. With long-lasting results, it ensures your driveway maintains its pristine look even in high-traffic areas.
8. Water-Based Latex Paint
Offering easy application and cleanup, water-based latex paint is an environmentally friendly option for protecting and beautifying asphalt driveways. With low VOC levels and a wide range of colors, it provides a durable finish that enhances the overall aesthetic appeal of your driveway.
9. Centrecoat Water Based Driveway Paint
Delivering excellent durability and weather resistance, Centrecoat Water Based Driveway Paint is ideal for efficient driveway renovations. Its fast-drying formula and long-lasting finish ensure lasting protection against the elements, providing peace of mind and a refreshed look for your asphalt surface.
10. Rustoleum Tarmacoat 6100 Asphalt and Tarmac Paint
Providing superior adhesion and protection against harsh weather conditions, Rustoleum Tarmacoat 6100 Asphalt and Tarmac Paint is an ideal choice for asphalt driveways in any climate. Its hard-wearing finish and resistance to cracking and peeling ensure long-term performance and durability, making it a reliable option for driveway renovations.
Types of Asphalt Driveway Paint
Exploring the right type of paint is crucial for asphalt driveway projects, ensuring durability and visual appeal.
Acrylic-based Paint
Acrylic-based paints are favored for their exceptional durability and vibrant finish. Ideal for asphalt surfaces, they offer excellent UV resistance, preventing fading and wear over time. This paint type adheres well to asphalt, creating a flexible, waterproof barrier that withstands temperature fluctuations and traffic. Available in a variety of colors, acrylic paints are environmentally friendly, emitting lower VOCs, making them a safer choice for homeowners looking to combine aesthetic appeal with long-lasting performance.
Latex-based Paint
Latex-based paints are renowned for their ease of use and quick drying properties, making them a popular choice for asphalt driveway projects. They provide a resilient finish that resists fading and cracking, ensuring your driveway maintains its appearance under various weather conditions. Latex paint is water-soluble, which simplifies cleanup and reduces the use of harsh chemicals. Its formulation is less harmful to the environment, offering a balance between performance and eco-friendliness. With a wide range of colors, latex paints allow for creative customization of your driveway.
Oil-based Paint
Oil-based paints are valued for their unparalleled durability and strong adhesion to asphalt surfaces. Known for creating a hard, protective finish, they excel in resisting water, oil, and other substances that typically stain driveways. This type of paint is particularly effective in high-traffic areas, offering long-lasting protection against wear and tear. However, it requires more time to dry and has a stronger odor compared to water-based options. Despite these factors, oil-based paints remain a top choice for their robust protective qualities and rich, glossy finish, enhancing the driveway’s longevity and aesthetic appeal.
Epoxy-based Paint
Epoxy-based paints stand out for their exceptional strength and resistance to chemicals, making them ideal for asphalt driveways exposed to harsh conditions. This paint forms a durable, seamless layer that effectively seals the surface, protecting it from oil spills, gasoline, and extreme temperatures. Its thick consistency ensures a smooth, professional finish that can last for years with minimal maintenance. Epoxy paint is also notable for its glossy appearance, which can significantly enhance the visual appeal of any driveway. Despite its higher cost and more complex application process, its longevity and protective capabilities offer excellent value.
Water-based Paint
Water-based paints for asphalt driveways are celebrated for their environmental friendliness and ease of application. These paints dry quickly, reducing downtime, and offer a durable finish that can withstand moderate traffic and weather conditions. Water-based formulas are low in volatile organic compounds (VOCs), making them safer for both the applicator and the environment. While they may require more frequent touch-ups compared to oil or epoxy-based options, their ease of cleanup and reduced environmental impact make them a compelling choice for homeowners seeking a balance between convenience and sustainability.
Thermoplastic Paint
Thermoplastic paint is highly regarded for its longevity and high visibility on asphalt driveways. This type of paint is applied hot and cools to form a hard, durable coating that withstands heavy traffic, severe weather, and UV radiation. Its reflective quality improves nighttime visibility, enhancing safety. Thermoplastic paint is also resistant to oil and gasoline spills, making it ideal for driveways. Though the application process requires specialized equipment and expertise, the long-lasting results justify the investment, offering a premium, maintenance-free finish for years.
How to choose the right Asphalt Paint for your Driveway
Selecting the ideal asphalt paint for your driveway is essential for both aesthetic and functional longevity. Let’s navigate through the factors that will guide your choice, ensuring a result that meets your needs and expectations.
Assessing Your Driveway’s Needs
Evaluate your driveway’s condition, focusing on wear, damage, and typical usage. This step determines the type of paint required, whether for heavy-duty protection or cosmetic enhancement. Identifying these needs early ensures the selected paint addresses your driveway’s specific issues, leading to a more durable and appealing result.
Considering Climate Conditions
The weather in your area dictates the suitable paint type. Products designed for your climate will better resist local weather challenges, maintaining their integrity and appearance over time. For instance, in areas with harsh winters, choose a paint that withstands freezing and thawing without cracking.
Color Selection
Color isn’t just an aesthetic choice; it affects heat absorption and visibility. Darker colors might absorb more heat, which is beneficial in colder climates but can be a drawback in warmer areas. Choose a color that complements your home’s exterior while considering its functional impact.
Durability Factors
Opt for paint that promises durability. High-quality asphalt paint should offer resistance to fading, weather conditions, and daily wear and tear. Investing in a durable paint can save you from frequent reapplications, making it cost-effective in the long run.
Safety Features
Reflective or non-slip additives in asphalt paint can enhance the safety of your driveway. Reflective paints improve visibility at night, while non-slip surfaces are essential in areas prone to rain or snow. Prioritize these features if safety is a concern for your household.
Eco-Friendly Options
If environmental impact is important to you, consider eco-friendly asphalt paints. Water-based formulas typically contain fewer volatile organic compounds (VOCs), making them safer for the environment and your family. They also offer easier cleanup and shorter drying times.
Application and Maintenance Requirements
Finally, consider the ease of application and the maintenance required. Some paints might need professional equipment or preparation, adding to the cost and effort. Additionally, understand the maintenance each type of paint demands to keep your driveway looking its best.
5 Inspirational Ideas for Asphalt Driveway Painting
Transform the entrance to your home with these innovative asphalt painting concepts, infusing your driveway with character and charm.
Vibrant Color Borders
Brighten up your driveway with edges painted in lively colors. This splash of color not only highlights the path to your home but also complements the surrounding landscape. It’s a simple touch that brings warmth and welcomes every guest with open arms.
Modern Geometric Patterns
Imagine transforming your driveway into a piece of art with sharp, clean geometric shapes. Picture hexagons and triangles coming together in a pattern that catches the eye of every passerby, blending seamlessly with the modern aesthetics of your home, making every arrival a moment to admire.
Playful Checkerboard Design
Envision your driveway with a playful twist, featuring a classic checkerboard pattern. This isn’t just about black and white squares; it’s about adding a dash of fun and an element of surprise to your home’s entryway, turning ordinary into extraordinary.
Elegant Stone Imitation
This idea involves painting techniques that mimic the natural variations and hues of stone, offering an upscale look without the hefty price tag. It’s about elegance that speaks volumes before you even step inside.
Sports-Themed Driveways
For the sports lover, imagine a driveway that doubles as a homage to your favorite game. From a basketball court outline to racing stripes, it’s a creative way to merge passion and functionality, providing a unique playground for all ages right at your doorstep.
FAQs about Asphalt Driveway Paint
Here are some frequently asked questions about asphalt driveway paint.
Can you paint the asphalt driveway?
Yes, you can paint an asphalt driveway to enhance its appearance and provide protection. Choose a high-quality asphalt driveway paint suitable for your climate and follow proper application instructions for best results
How to remove spray paint from asphalt driveway
To remove spray paint from an asphalt driveway, you can try using a commercial graffiti remover or a solvent like mineral spirits. Apply the remover according to the manufacturer’s instructions and scrub the affected area with a stiff brush before rinsing thoroughly.
Conclusion
Selecting the right asphalt driveway paint is essential for achieving both aesthetic appeal and long-lasting durability. Whether opting for acrylic, oil-based, or water-based paints, each offers unique advantages in terms of adhesion, weather resistance, and environmental impact. By considering factors such as climate, color choice, and maintenance requirements, homeowners can make informed decisions to ensure their driveways not only look great but also withstand the test of time. With the plethora of quality paint options available, refreshing and protecting your asphalt driveway has never been easier.
Chris is a paver with more than 15 years' expertise in the field. He has established a reputation as an expert and trustworthy specialist with a track record of providing his clients with top-notch paving solutions.
https://pavingfinder.com/wp-content/uploads/2024/02/asphalt-driveway-paint-.jpg455782admin123https://pavingfinder.com/wp-content/uploads/2020/10/logo.jpgadmin1232024-02-29 08:57:382024-04-04 15:39:18Asphalt Driveway Paint – 10 Best Buys for Quick Makeover
Brick driveway edging is a stylish yet functional addition to any home, effortlessly blending durability with curb appeal. It’s the perfect way to elevate your outdoor space.
Brick driveway edging involves lining the sides of a driveway with bricks to create a clear boundary and enhance aesthetic appeal. This method not only adds a touch of elegance but also helps to protect the driveway edges from crumbling or cracking, ensuring a longer lifespan for your pavement. It’s a practical choice for homeowners looking to improve their driveway’s durability and visual charm.
Discover how to transform your driveway with brick edging. Explore installation tips, design ideas, and the many benefits it offers to homeowners.
How to Install a Brick Driveway Edging in 8 Steps
Here are the steps to follow in order to accomplish the installation of a brick driveway edging successfully.
1. Assessing Your Space
Begin your brick driveway edging project by accurately assessing the area you plan to enhance. Measure the length and width where you’ll install the edging, paying attention to the driveway’s existing contours and any nearby landscaping that might affect your layout. This initial step is vital for visualizing the project’s end result and calculating the required materials.
2. Choosing Your Brick Style
Choosing the right brick style is crucial for aligning with your home’s aesthetics and landscape. From classic reds to modern grays and textures ranging from smooth to rustic, options abound. Consider whether solid bricks or pavers fit your vision and budget. The ideal selection will not only beautify your driveway but also elevate your property’s overall charm and resilience.
3. Gathering Necessary Tools and Materials
Before you start, ensure you have all required tools and materials. This includes a shovel, rubber mallet, level, and trowel for the installation process. You’ll also need bricks, landscape fabric to inhibit weeds, plus sand or gravel for the foundation. Collecting these items beforehand streamlines your workflow, making the installation smoother and more efficient.
4. Marking the Edging Area
Accurately marking the area where your brick edging will go is essential for achieving a precise and professional-looking outcome. Use stakes and string to outline the perimeter of your driveway where the bricks will be laid. This step helps visualize the final look and ensures your edging follows the desired path and shape. A measuring tape can assist in keeping the lines straight or perfectly curved, as planned.
5. Excavating the Edging Path
Carefully excavate the outlined area for your brick edging, digging to the required depth. This step creates the foundation for your bricks, ensuring they sit securely and at the correct height. Removing grass, roots, and debris during excavation prepares a clean, stable base, crucial for the longevity and appearance of your edging.
6. Laying the Foundation
After excavating, prepare the foundation by laying down a layer of sand or gravel. This base aids drainage and provides a stable platform for the bricks, preventing shifting and settling. Compacting this layer ensures a level surface, essential for the uniform appearance and structural integrity of your brick edging.
7. Placing and Securing Bricks
Begin placing your bricks tightly along the prepared trench, following your design. Use a rubber mallet to gently tap each brick into place, ensuring they’re level and securely nestled against one another. This careful placement forms a durable, attractive edge that defines your driveway, with each brick contributing to the overall stability and aesthetic of the project.
8. Finishing Touches and Cleanup
After laying the bricks, sweep sand over them to fill any gaps, ensuring a snug fit and locking them in place. Rinse the area to remove excess sand and debris, revealing the edging’s beauty. This final step not only secures the bricks but also enhances their appearance, completing your project with a clean, polished look..
By following these steps, you can significantly enhance your driveway’s appeal and functionality. This comprehensive approach, from initial space assessment to the final cleanup, guarantees a polished and enduring brick edging that beautifully complements your property.
Benefits of Brick Driveway Edging
Brick driveway edging not only defines the boundaries of your driveway but also brings with it a multitude of benefits. From enhancing your property’s visual charm to guaranteeing your driveway’s durability and utility, choosing brick edging yields significant benefits over time, offering rewards immediately and years down the line.. Let’s explore the key advantages.
Enhanced Curb Appeal
Incorporating brick edging around your driveway elevates your property’s aesthetic appeal significantly. The classic and versatile nature of brick can complement any home’s exterior, adding a layer of sophistication that catches the eye of passersby. This simple addition can transform the front of your home, setting a tone of elegance and well-maintained beauty that enhances the neighborhood’s charm.
Improved Driveway Durability
Brick edging serves more than an aesthetic purpose; it strengthens the driveway’s perimeter, protecting against edge wear, cracks, and structural breakdown. This robust barrier ensures the main driveway material, be it asphalt or concrete, remains compact and less prone to erosion or damage from vehicle traffic. The long-term stability this provides helps in preserving the driveway’s integrity and appearance.
Low Maintenance Requirements
The durability of brick as an edging material translates into lower maintenance efforts for homeowners. Unlike softer landscaping elements that require frequent care, brick stands up to the elements and time with minimal upkeep. Occasional sweeping and washing are typically all that’s needed to keep the brick edging looking pristine, making it an ideal choice for both busy and budget-conscious homeowners.
Increased Property Value
Adding brick driveway edging is an investment that pays off by boosting your property’s market appeal and value. The visual appeal, coupled with the practical benefits of durability and low maintenance, makes your home more attractive to potential buyers. This curb appeal enhancement can be a decisive factor in real estate transactions, offering a return on investment through improved property valuation.
By addressing each of these aspects, brick driveway edging proves to be a beneficial choice for homeowners looking to enhance their property’s curb appeal, durability, maintenance, and value.
Types of Brick Edging
From traditional solid bricks to versatile brick pavers and interlocking designs, each option offers unique benefits. Let’s explore the characteristics of different brick edging types to help you make an informed decision for your project.
Solid Brick versus Brick Pavers
Solid bricks offer a classic, timeless look with their uniform shape and size, ideal for traditional garden paths and driveway edges. Brick pavers, thinner and often more varied in color and texture, provide flexibility in design, allowing for intricate patterns and custom layouts.
Interlocking Bricks for Stability
Interlocking bricks are designed with grooves that fit together snugly, creating a stable, cohesive structure. This type of edging is particularly useful in areas that experience heavy rain or foot traffic, as the interlocking mechanism helps prevent shifting and separation.
Color and Texture Variations
One of the joys of choosing brick edging is exploring the wide range of colors and textures available. From rich, earthy reds to cool, contemporary grays, and from smooth finishes to rugged, natural textures, the options are nearly endless. This variety allows homeowners to perfectly match or contrast their edging with the existing landscape and architectural elements.
10 Brick Driveway Edging Ideas and Examples
Brick driveway edging can transform a simple driveway into a standout feature of your home’s exterior. With a variety of styles and techniques available, you can easily customize the look to match your home’s aesthetic and landscape design. Here are ten creative brick-edging ideas to inspire your next outdoor project.
1. Classic Red Brick Lining
Classic red brick lining is a timeless choice that brings traditional elegance to any driveway. Its consistent color and texture offer a sense of harmony and order, beautifully complementing homes of all styles.
2. Herringbone Pattern Edging
For a touch of sophistication, consider a herringbone pattern. This arrangement adds a dynamic visual interest and texture, making your driveway border both functional and decorative.
3. Interlocking Brick Border
Opt for interlocking bricks for enhanced stability and a seamless look. This edging style is perfect for areas prone to erosion or heavy rainfall, as the interlocking design firmly holds the bricks in place.
4. Contrasting Color Accents
Incorporate bricks in contrasting colors to create visual accents along your driveway. This can highlight the driveway’s shape and make the entrance to your home even more inviting.
5. Raised Brick Edging
A raised brick edge not only defines the driveway boundary but also helps contain gravel or asphalt. It adds dimension and can prevent soil or mulch from spilling onto the driveway.
6. Glow-in-the-Dark Brick Edging
For functionality and flair, glow-in-the-dark brick edging illuminates your driveway at night, enhancing safety and adding a unique aesthetic touch to your landscape after sunset.
7. Brick and Plant Combo
Pairing bricks with low-growing plants or ground cover introduces a natural element to the edging. This combination softens the hard lines of the driveway and adds a burst of color and texture.
8. Antique Brick Charm
Use antique or reclaimed bricks for a rustic, weathered look that has character and history. This option adds a vintage charm to your driveway, making it stand out.
9. Brick Mosaic Edging
Get creative with a brick mosaic, arranging bricks of various colors or shapes into unique patterns. This artistic approach can turn your driveway edging into a work of art.
10. Serpentine Brick Edge
For a more whimsical or organic look, a serpentine brick edge with its curves and waves can add movement to your driveway’s border, offering a softer alternative to straight lines.
Each of these ideas offers a unique way to enhance the edges of your driveway with bricks, proving that functionality and beauty can go hand in hand in landscape design.
Comparing Materials for Driveway Edging
Choosing the right material for your driveway edging can significantly impact the overall look and functionality of your landscape. From the durability of concrete to the natural aesthetics of gravel and the cost-effectiveness of asphalt, each material offers unique benefits. Here’s how these materials compare when used in conjunction with brick edging.
Concrete Driveway Brick Edging: Durable and Versatile
Concrete offers unmatched durability, making it an ideal choice for supporting brick edging. Its versatility in color and texture complements the brick, providing a cohesive look that can withstand the test of time and heavy traffic.
Gravel Driveway Brick Edging: Affordable and Natural
Pairing brick edging with a gravel driveway creates a charming, rustic appeal. This combination is not only affordable but also offers excellent drainage, reducing the risk of water damage to the bricks. The contrast between the structured bricks and loose gravel adds a pleasing texture variation.
Asphalt Driveway Brick Edging: Smooth and Cost-Effective
Asphalt, known for its smooth finish and cost-effectiveness, pairs well with brick edging to define driveway boundaries clearly. The dark color of asphalt highlights the brickwork, creating a striking visual boundary that is both practical and aesthetically pleasing. This combination also offers a smooth transition from the driveway to the surrounding landscape.
Brick Driveway Edging Design Considerations
Designing brick driveway edging involves more than just laying bricks along the driveway’s edge. It requires thoughtful consideration of how the edging will complement your home’s exterior, integrate with the landscape, and serve its intended purpose. Whether you aim for functionality, aesthetics, or both, here are key factors to keep in mind.
Matching Bricks with Your Home’s Exterior
Selecting bricks that harmonize with your home’s facade ensures a cohesive look. Consider color, texture, and size when choosing bricks, aiming for a seamless blend that accentuates your home’s architectural style.
Selecting the Right Pattern
The brick pattern can significantly impact the overall appearance of your driveway edging. From traditional running bond to more intricate herringbone or basketweave, the right pattern can add visual interest and enhance the driveway’s aesthetic appeal.
Integrating with Existing Landscaping
Your brick edging should complement, not clash with, your existing landscaping. Consider the colors and textures of your garden beds, lawns, and other landscape features. The goal is to create a harmonious balance that ties the entire outdoor space together.
Functional vs. Decorative Edging
Decide on the primary purpose of your brick edging. If it’s functional, focus on durability and stability to protect the driveway edges. For decorative edging, you might prioritize color, pattern, and design to enhance curb appeal. Many homeowners opt for a combination, seeking both practicality and beauty in their design.
Brick Driveway Edging Cost
The expense can vary widely depending on the choice of materials, whether you opt for professional installation or take on the project yourself, and the scale of your design. Here’s a breakdown of the main cost factors involved in adding brick edging to your driveway.
Estimating Material Costs
The price of bricks can fluctuate based on type, color, and quality. High-end, designer bricks will cost more than standard ones. Additionally, consider the cost of supplementary materials like sand, gravel, or concrete for the base, as well as any required sealants or finishes.
Labor Costs for Professional Installation
Hiring professionals to install your brick driveway edging can significantly impact your budget. Labor costs vary by region and contractor but paying for expertise can ensure the job is done right the first time, potentially saving you money on future repairs.
DIY vs. Professional Installation Cost Comparison
Tackling the installation yourself can save on labor costs, making the project more affordable. However, it’s important to weigh the potential savings against the risk of mistakes that could result in higher costs down the line. Consider your own skills and the complexity of your design before deciding between DIY and professional installation.
Brick Driveway Edging Maintenance Tips
Proper care involves routine cleaning, timely repairs, seasonal maintenance, and effective weed prevention strategies. Let’s delve into essential maintenance tips to keep your brick edging looking its best year-round.
Routine Cleaning Practices
Regular cleaning is key to preserving the aesthetic appeal of brick driveway edging. Delicately remove any debris and wash with water to avoid the accumulation of dirt. For stubborn stains, a mild detergent solution can be used, followed by a thorough rinsing.
Repairing Loose or Damaged Bricks
Inspect your edging regularly for any loose or damaged bricks and address these issues promptly to maintain structural integrity. Replacing or resetting bricks can often be a straightforward DIY task, ensuring the edging remains stable and attractive.
Seasonal Maintenance Considerations
Adapt your maintenance routine to the changing seasons. Prepare for winter by checking for proper drainage to prevent water from pooling and freezing, which could lead to damage. In spring, assess any winter wear and perform necessary repairs.
Preventing Weed Growth
Weeds can quickly mar the appearance of brick driveway edging. To deter weed growth, consider applying a pre-emergent herbicide or using landscaping fabric beneath the bricks. Regularly removing any emerging weeds will also help keep your edging looking neat and well-kept.
FAQs about Brick Driveway Edging
Here, you’ll find the answers to the questions that are asked most frequently.
What is the best edging for a driveway?
The best edging for a driveway combines durability, aesthetic appeal, and compatibility with the driveway material. Brick and stone are popular for their longevity and visual appeal, while metal and plastic offer cost-effective, durable solutions.
What is the cheapest way to edge a driveway?
The cheapest way to edge a driveway is using materials like plastic or metal edging, which are both affordable and easy to install. Alternatively, repurposed or recycled materials can also serve as economical edging options.
What do you put under brick edging?
Under brick edging, it’s common to use a layer of landscape fabric covered by a base of crushed stone or sand. This foundation aids drainage and stability, preventing the bricks from shifting over time.
What do you put between bricks on a driveway?
Between bricks on a driveway, polymeric sand is often used. It hardens after application, locking the bricks in place, deterring weeds, and preventing ant infestation. It also offers flexibility, accommodating slight movements without cracking.
Conclusion
Incorporating brick edging into your driveway design not only elevates the aesthetic appeal of your home’s exterior but also enhances the functionality and longevity of your driveway. By selecting the right materials, adhering to proper installation techniques, and committing to regular maintenance, homeowners can ensure their driveway remains a beautiful and durable feature for years to come. Whether opting for a DIY approach or enlisting professional help, brick driveway edging is a worthwhile investment that adds charm and value to any property.
Chris is a paver with more than 15 years' expertise in the field. He has established a reputation as an expert and trustworthy specialist with a track record of providing his clients with top-notch paving solutions.
A circular driveway not only boosts your home’s curb appeal but also adds a touch of elegance and functionality. It’s the perfect blend of style and convenience right at your doorstep.
What exactly is a circular driveway? It’s a continuous loop that allows cars to enter and exit your property without the need for reversing. Planning your circular driveway project starts with measuring your space, choosing the right design, and deciding on materials. It’s all about creating a seamless flow that complements your home’s aesthetics while improving traffic movement.
Ready to transform your front yard? Let’s get into the nitty-gritty of designing a circular driveway that not only turns heads but also makes your life easier.
How to plan your circular driveway in 13 Steps
In these 13 steps, we’ll guide you from measuring your space to choosing materials and beyond, ensuring your project is a success. Get ready to transform your property with a driveway that’s as practical as it is beautiful.
1. Measure Available Space
Begin with assessing your property’s dimensions. This initial step is crucial, as it determines the scale of your circular driveway project. Understand not only the total area available but also how the driveway will integrate with existing structures and landscaping. Accurate measurements ensure a seamless fit into your property’s layout.
2. Determine Driveway Shape and Design
Visualize the driveway’s shape and how it complements your home’s architecture. Whether you opt for a classic circle or a more elaborate design, consider the statement you want to make. This decision influences not just aesthetics but also the functionality of your driveway.
3. Consider Traffic Flow and Accessibility
Analyze the expected traffic pattern on your driveway. A well-designed circular driveway facilitates smooth entry and exit, minimizing congestion and enhancing safety. Factor in the needs of all household members to ensure accessibility for everyone.
4. Decide on Driveway Width
The width of your driveway impacts its usability and appearance. It should accommodate vehicles comfortably, allowing easy passage without compromising the landscape’s aesthetics. Striking the right balance is key to a practical yet attractive driveway.
5. Mark Entrance and Exit Points
Identifying clear entry and exit points is vital for the flow of traffic. These markers guide visitors and enhance the driveway’s functionality. Strategic placement can also enhance safety by providing clear sightlines to oncoming traffic.
6. Plan for Turning Radii
Adequate turning radii ensure vehicles can navigate the driveway without difficulty. This consideration is especially important for households with larger vehicles. Ample space for turning reduces the risk of damage to the landscape and improves user experience.
7. Choose Materials for Driveway Surface
Selecting the right materials affects the driveway’s durability, maintenance, and visual appeal. Consider the climate, the architectural style of your home, and your personal preferences when deciding. Each material, from concrete to gravel, offers distinct advantages.
8. Consider Drainage Solutions
Effective drainage systems protect your driveway from water damage and extend its lifespan. Assess the natural flow of water on your property and implement solutions, such as grading or drains, to ensure water is directed away from the driveway and structures.
9. Incorporate Landscaping Elements
Landscaping can enhance the beauty and functionality of your circular driveway. Choose plants and hardscaping elements that complement the driveway’s design and the overall aesthetic of your property. Well-thought-out landscaping can turn the driveway area into a captivating visual feature.
10. Obtain Necessary Permits
Before beginning construction, ensure all required permits are obtained. This step is crucial for compliance with local regulations and can prevent costly modifications later. Familiarize yourself with local zoning laws and building codes relevant to driveway construction.
11. Hire Professionals if Needed
For complex designs or if you’re unsure about any aspect of the installation, consider hiring professionals. Expertise in design and construction can save time and ensure the driveway is built to last. Choose contractors with experience in circular driveway projects for best results.
12. Finalize Budget and Timeline
Set a clear budget and timeline for your project. Consider all costs, including materials, labor, and any unforeseen expenses, to avoid budget overruns. Setting a realistic timeline ensures the project progresses smoothly without unnecessary delays.
13. Implement the Plan
With all preparations complete, begin the construction of your circular driveway. This phase brings your vision to life, enhancing your property’s appeal and functionality. Stay involved in the process to ensure the project meets your expectations.
By following these steps, you’re on your way to adding a circular driveway that not only boosts your home’s curb appeal but also its functionality and value.
Circular driveway design shapes
Choosing the right design shape for your circular driveway not only enhances your home’s curb appeal but also optimizes functionality. Each shape offers unique benefits and aesthetic appeal, suitable for different spaces and architectural styles. Let’s explore the most popular circular driveway design shapes to find the perfect match for your property.
Classic Circle
The epitome of elegance, a classic circular driveway loops directly in front of your home, offering a grand entrance. It’s ideal for properties with ample front yard space, creating a focal point that directs visitors gracefully to your doorstep.
Oval Shape
An oval-shaped driveway offers a softer look with its elongated curves, making it a great choice for longer properties. It provides ample space for landscaping in the center, adding a touch of greenery to your entrance.
Keyhole Design
Combining a straight approach with a circular turnaround, the keyhole design is perfect for properties with limited space. It offers the convenience of a circular driveway without requiring a large area, efficiently using the available space.
Elliptical Layout
Similar to the oval shape but with more pronounced curves, an elliptical layout adds a modern twist to the circular driveway concept. It’s well-suited for contemporary homes, offering sleek lines and an elegant entryway.
Teardrop Configuration
Featuring a single entry and exit point with a teardrop-shaped island in the middle, this design is practical and aesthetically pleasing. It allows for easy maneuvering while providing space for landscaping or a statement piece in the center.
Crescent-shaped
Mimicking the gentle curve of a crescent moon, this driveway style offers simplicity and elegance. It’s ideal for properties that have a slight curve in their approach, enhancing the natural lines of the land.
Figure-eight Pattern
For larger properties, a figure-eight pattern adds complexity and character. This layout can include one or more islands and offers endless landscaping opportunities, making it a statement piece of your property.
Spiral Driveway
A spiral driveway is a dynamic choice that adds a sense of movement to your property. Best suited for spacious areas, it can become a striking feature of your landscape design, leading up to your home in a graceful swirl.
Irregular or Freeform Design
Embracing the natural contours of your land, an irregular or freeform driveway is completely customized. This design is perfect for properties with unique landscapes, allowing the driveway to flow naturally around existing features.
Each circular driveway design shape offers a unique way to welcome guests to your home, blending aesthetics, and functionality. Consider your property’s layout, your home’s architectural style, and your personal preferences to choose the perfect design for your circular driveway.
Best Materials for Circular Driveways
Selecting the right material for your circular driveway is crucial for achieving the desired look, durability, and maintenance level. From classic to contemporary, various materials can cater to different tastes and functional requirements. Let’s dive into the best materials for circular driveways and what makes each one stand out.
Concrete
Known for its strength and longevity, concrete is a popular choice for circular driveways. It offers a smooth, uniform look that can be customized with colors or patterns. Concrete’s versatility makes it suitable for any home style, ensuring a timeless appeal.
Asphalt
If you’re looking for a cost-effective solution, asphalt might be the way to go. It provides a smooth, durable surface that withstands harsh weather conditions. While it may require periodic sealing, its overall low cost and ease of repair make it a practical choice for many homeowners.
Pavers
For those seeking elegance and uniqueness, pavers are an excellent choice. Available in various colors, shapes, and textures, pavers allow for custom designs that can complement any home exterior. They’re also durable and can be easily replaced if damaged, adding to their appeal.
Gravel
Gravel driveways add a rustic charm to your property and are eco-friendly. They’re permeable, reducing runoff and helping with drainage. While gravel requires more maintenance to keep tidy and replenished, its natural look and lower initial cost are attractive to many.
Decorative Options: Stamping, staining, and more for a unique touch.
Incorporating decorative techniques like stamping, staining, or adding aggregates to concrete can elevate the aesthetic of your circular driveway. These options allow for personalization, making your driveway a unique feature of your home.
Choosing the right material for your circular driveway involves considering factors like climate, maintenance, budget, and the overall look you want to achieve. Each material offers distinct advantages, allowing you to tailor your driveway to your specific needs and preferences.
How to Install a Circular Driveway in 10 Steps
Installing a circular driveway enhances both the aesthetic appeal and functionality of your property. This process involves careful planning and execution. Here’s a detailed guide through each step:
1. Clear the Area by removing any debris where the driveway will be installed.
Start by removing any debris, vegetation, or obstructions in the designated area. This step ensures a clean workspace, crucial for a smooth installation process. Clearing the area helps in visualizing the project’s scope and prevents any future issues with the driveway’s foundation.
2. Mark the Layout to ensure accuracy during excavation.
Use stakes and string to outline your driveway’s intended path. Accurate marking is essential for ensuring that the excavation aligns perfectly with your design plans. This visual guide aids in making precise adjustments before the actual digging begins.
3. Excavate to the Recommended Depth to guarantee a stable base.
Dig out the soil within your marked area to a depth suitable for the driveway material you’ve chosen. This creates a stable base and prevents future structural problems. The correct depth varies based on soil type and the driveway material.
4. Grade the Site to prevent water accumulation.
Proper grading directs water away from the driveway and your home, preventing pooling and water damage. This step is vital for maintaining the driveway’s integrity and ensuring long-term durability.
5. Compact the Soil to avoid uneven settling of the driveway.
Use a compactor to firm the soil, creating a solid foundation for the driveway. This prevents uneven settling, which could lead to cracks or potholes in your driveway over time.
6. Lay a Layer of Crushed Stone or Gravel to provide a stable sub-base.
A layer of crushed stone or gravel acts as a sub-base, providing stability and aiding in drainage. Ensure this layer is evenly distributed and compacted for a firm foundation.
7. Install Edge Restraints to prevent materials from spreading outward over time.
Edge restraints keep the driveway materials from spreading and maintain the shape of your driveway. They’re essential for preserving the structural integrity and aesthetic of the driveway edges over time.
8. Install Drainage Solutions to prevent erosion.
Effective drainage systems, such as French drains or graded slopes, prevent water accumulation and erosion, safeguarding your driveway from weather-related damage.
9. Pave the Driveway ensuring it is evenly spread and compacted.
Choose your paving material—concrete, asphalt, pavers, or gravel—and apply it evenly across the prepared base. Proper installation ensures a smooth, durable surface that withstands traffic and the elements.
10. Apply a Sealer and Add Decorative Elements to protect the driveway’s surface
Finish by applying a protective sealer to extend the lifespan of your driveway and enhance its color. Adding decorative elements like lighting or landscaping can further improve the driveway’s appearance and functionality.
By following these steps, you’ll ensure that your circular driveway is not only visually appealing but also built to last, adding significant value and charm to your property.
Benefits of a Circular Driveway
A circular driveway not only elevates the look of your property but also brings multiple practical benefits, making it a popular choice among homeowners. Here’s a closer look at the advantages:
Aesthetic Enhancement
A circular driveway adds a touch of sophistication and elegance to your property. Its graceful curves create a focal point, enhancing the overall curb appeal and beauty of your landscape.
Functional Advantages
Beyond its visual appeal, a circular driveway offers superior functionality. It allows for easier vehicle maneuvering, providing a seamless flow of traffic in and out of your property without the need for reversing or making complex turns.
Safety and Security
This driveway design improves safety by reducing the need to back out onto busy streets. It offers a safer environment for drivers and pedestrians alike, making it a secure option for families.
Property Value Increase
Installing a circular driveway can boost your property’s market value. The combination of its visual appeal and practical advantages enhances your property’s appeal to prospective purchasers, possibly boosting its market value.
Environmental Benefit
Additionally, certain circular driveway designs, especially those using permeable materials, can offer environmental advantages. They improve onsite water management by allowing rainwater to percolate through the ground, reducing runoff and promoting groundwater recharge. This aspect not only contributes to the sustainability of your property but also can help in managing local water ecosystems more effectively.
Drawbacks of a Circular Driveway
While circular driveways add elegance and convenience to any property, it’s important to consider potential drawbacks before committing to this design. Understanding these limitations can help homeowners make informed decisions that align with their priorities and lifestyle needs.
Limited Privacy
A circular driveway often means a more open and accessible front yard, which can reduce the privacy of your home. The continuous access may invite more attention from passersby and vehicles, potentially making your front yard feel less secluded.
Higher Construction Costs
Constructing a circular driveway usually involves more materials and labor compared to traditional straight driveways. The complexity of the design, along with the need for additional landscaping and possibly retaining walls, can lead to significantly higher initial investment costs.
Limited Street Parking Options
Depending on the layout of your property and local regulations, a circular driveway might limit the amount of available street parking. This could be a concern in neighborhoods where on-street parking is already scarce, possibly affecting guests or additional household vehicles.
Understanding these drawbacks is crucial for homeowners considering a circular driveway. While the benefits can be substantial, weighing them against potential limitations ensures that your driveway project enhances your property in ways that best suit your needs and preferences.
Maintenance and Care for Circular Driveways
Maintaining a circular driveway is essential to ensure it remains both functional and visually appealing over the years. Regular care not only extends the lifespan of your driveway but also keeps it safe and welcoming for visitors. Here are key maintenance and care tips:
Routine Cleaning to keep your driveway looking new
Regular sweeping and washing remove debris, stains, and harmful substances like oil, which can degrade the driveway material over time.
Crack and Pothole Repair: Tips for longevity
Addressing cracks and potholes promptly is crucial for the longevity of your driveway. Early repair prevents water from seeping in and causing further damage, especially in freeze-thaw cycles. Use appropriate fillers and sealants to keep the surface smooth and intact.
Sealcoating to protect against weather and wear
Applying a sealcoat every few years protects your driveway from the elements, including UV rays, rain, and chemicals. Sealcoating also refreshes the look of your driveway, keeping it vibrant and new.
Weed and Erosion Control to preserve your driveway’s integrity
Weeds can cause cracks to widen, while erosion can undermine the driveway’s foundation. Implementing measures like edge restraints and using landscape fabric under gravel areas can help control weeds and prevent erosion, maintaining the structural integrity of your driveway.
Regular maintenance and care keep your circular driveway in top condition, ensuring it continues to enhance your property’s curb appeal and functionality for years to come.
Design Considerations for Circular Driveways
Here are some essential design considerations:
Space Optimization: Maximizing functionality within constraints
Space Optimization: Utilizing available space efficiently is key in circular driveway design. It’s important to plan a layout that maximizes functionality without overwhelming your property. Consider the size of your land and how the driveway can serve its purpose without sacrificing too much green space.
Harmony with Landscape: Complementing your home’s exterior
A well-designed circular driveway should blend seamlessly with your home’s exterior and the surrounding landscape. Choose materials and designs that complement your home’s architectural style and natural surroundings, creating a cohesive look that enhances your property’s aesthetic appeal.
Customization Options: Tailoring to personal taste and style
Customization Options: Personalizing your circular driveway allows you to express your style while adding character to your home. From the choice of materials to decorative elements like lighting, borders, and landscaping, there are numerous ways to tailor your driveway to your personal taste and preferences.
Accessibility Features: Ensuring ease of use for everyone
Accessibility Features: Ensuring your circular driveway is accessible to everyone, including those with mobility challenges, is crucial. This includes considering the slope, width, and surface texture. Smooth transitions, adequate lighting, and clear markings can make your driveway safer and more welcoming for all visitors.
Incorporating these design considerations will help you create a circular driveway that not only meets your practical needs but also adds value and charm to your home.
Circular Driveway Cost Analysis
A detailed cost analysis helps in making informed decisions, ensuring the project aligns with your budgetary constraints and expectations. Here’s a breakdown of the key financial aspects to take into account:
Budgeting Basics
Initiating any home improvement project starts with setting a realistic budget. For a circular driveway, factor in the size of the driveway, the materials you prefer, and any additional landscaping or decorative elements you envision. Having a clear budget helps manage expenses and avoid overspending.
Material Cost Breakdown
The choice of materials significantly impacts the overall cost of your circular driveway. Options like gravel and asphalt tend to be more budget-friendly, while pavers and stamped concrete are on the higher end due to their aesthetic appeal and durability. Researching the cost per square foot of each material gives you a clearer picture of what fits your budget.
Labor and Installation
The complexity of installing a circular driveway often requires professional expertise. Labor costs can vary widely based on your location, the driveway’s design, and the installation time. Obtaining multiple quotes from contractors ensures you get a fair price and quality workmanship.
A thorough circular driveway cost analysis, incorporating these components, enables you to plan financially for the project. It ensures that you can achieve the desired outcome without compromising on quality or facing unexpected expenses.
5 Circular Driveways ideas
Circular driveways not only enhance your home’s curb appeal but also add a layer of functionality and elegance. Whether you’re aiming for a grand entrance, efficient traffic flow, or simply to elevate your property’s aesthetics, there’s a circular driveway design that fits every style and need. Explore these five distinct ideas to inspire your next home improvement project.
1. Grand Entrance Circle
Imagine a spacious, grand circular driveway that sweeps elegantly in front of your home, creating a stately first impression. Incorporating a central focal point like a beautiful fountain or a striking piece of sculpture enhances its grandeur, making your entrance truly unforgettable.
2. Dual-Access Driveway
A practical yet stylish design, the dual-access circular driveway offers two entry/exit points, facilitating smoother traffic flow. This setup is perfect for busy households, allowing vehicles to enter and exit the property with ease, and provides ample space for guest parking.
3. Green Island Oasis
Center your circular driveway around a lush, landscaped island. This design not only adds a pop of nature to your front yard but also serves as a serene welcome to your home. Think of flowering plants, ornamental grasses, or a small tree to create a green oasis.
4. Modern Minimalist Circle
For those who prefer clean lines and a sleek look, a modern minimalist circular driveway is the way to go. Utilize simple, yet high-quality materials like polished concrete or granite, and keep the design straightforward with minimal decorative elements for a chic, contemporary feel.
5. Rustic Charm Loop
Gravel or natural stone pavers, combined with native plants and soft landscape lighting, can create a warm and inviting path that complements homes with a country or cottage aesthetic.
Each of these circular driveway ideas can be tailored to fit your home’s style and your personal preferences, ensuring that the final design not only enhances your property’s curb appeal but also meets your functional needs.
5 Circular driveway landscaping ideas
Enhancing your round driveway with strategic landscaping can significantly boost your home’s curb appeal and create a welcoming atmosphere. From lush greenery to elegant hardscaping, the right landscaping ideas can turn your driveway into a stunning visual centerpiece. Explore these five diverse landscaping concepts designed to complement any circular driveway.
1. Perennial Paradise
Surround your circular driveway with a mix of perennial plants for a landscape that comes back stronger each year. Choose varieties that bloom at different times for a continuous display of color. This approach offers a low-maintenance yet constantly evolving landscape feature.
2. Formal Garden Elegance
Adopt a formal garden style with symmetrical plantings and manicured hedges to frame your circular driveway. This idea suits properties with a classic or traditional architectural style, adding a sense of grandeur and orderliness to the entrance.
3. Drought-Tolerant Display
For areas prone to dry weather, consider landscaping with drought-tolerant plants. Succulents, lavender, and ornamental grasses can create a resilient yet attractive setting around your circular driveway, ensuring your landscape remains vibrant with minimal water usage.
4. Illuminated Pathway
Incorporate lighting into your circular driveway landscaping for both aesthetic and functional benefits. Soft landscape lighting can highlight architectural plants, trees, or features, offering a magical ambiance at night while ensuring safe navigation for vehicles and pedestrians.
5. Natural Stone Accents
Integrate natural stone elements such as boulders, pebbles, or decorative rocks into your circular driveway landscape. These elements add texture and a sense of permanence to the design, complementing both the driveway and the natural surroundings of your property.
Each of these landscaping ideas can be customized to suit your personal taste and the specific characteristics of your property.
FAQs about Circular Driveway
Here are some FAQs about Circular Driveways:
Does a circular driveway add value to a house?
Certainly. A circular driveway not only boosts your home’s curb appeal but also its functionality, making it more appealing to potential buyers. This can lead to an increase in property value, especially in markets where convenience and aesthetics are highly valued.
How wide does a circular driveway need to be?
A circular driveway should be at least 10 to 12 feet wide for single-car access. For two cars to pass or park side by side comfortably, a width of 20 to 24 feet is recommended, ensuring smooth navigation and safety.
What is a circular driveway called?
Commonly known as a “loop driveway” due to its design allowing vehicles to enter and exit without reversing. When it encircles a landscaped area, it’s also referred to as a “courtyard driveway,” highlighting its ability to create a grand entrance.
Conclusion
A circular driveway offers a blend of aesthetic appeal, practicality, and increased property value. Whether it’s enhancing curb appeal with elegant designs, improving safety with seamless entry and exit, or choosing the right materials for durability and style, a well-planned circular driveway is an investment in your property’s functionality and beauty. By considering design options, maintenance needs, and installation details, homeowners can create a welcoming and impressive entrance that complements their home and lifestyle for years to come.
Tim is a seasoned paving expert with 30+ years of experience in the industry. He has worked on countless projects, from small residential driveways to large commercial parking lots.
https://pavingfinder.com/wp-content/uploads/2024/02/Circular-Driveway.jpg455782admin123https://pavingfinder.com/wp-content/uploads/2020/10/logo.jpgadmin1232024-02-22 14:18:472024-02-26 09:25:40Circular Driveway – Installation, Shapes, Ideas, and More
Resurfacing an asphalt driveway rejuvenates your home’s curb appeal and extends the life of your driveway, making it a practical and cost-effective maintenance solution.
Resurfacing an asphalt driveway means applying a new layer of asphalt over the existing driveway to repair damage, improve appearance, and extend its lifespan. This process restores the surface to its original condition without the need for a complete replacement. To successfully resurface an asphalt driveway, follow these steps:
Inspect driveway for any damage
Clean the driveway thoroughly to remove debris
Repair cracks and potholes
Prepare the surface for resurfacing
Apply primer if required
Mix the asphalt resurfacer according to instructions
Apply the asphalt resurfacer evenly across the surface
Smooth the resurfacer for a uniform finish
Allow the new surface to dry completely
Apply a second coat if necessary for optimal thickness and protection
Cure the resurfaced area to ensure durability and readiness for use
Discover the detailed steps, benefits, and maintenance tips for a newly resurfaced driveway in the following sections.
Signs your asphalt driveway needs resurfacing
When your driveway starts showing uneven textures, fading from its original black to gray, and the surface becomes rough, it’s time to consider resurfacing. These indicators suggest wear and exposure to elements, signaling the need for a fresh asphalt layer to restore its appearance and functionality.
Visible cracks and potholes
Cracks and potholes are signs of underlying issues with your asphalt driveway. Left unaddressed, they can lead to more significant damage, affecting the driveway’s structural integrity. Resurfacing fills these imperfections, providing a smooth, safe driving surface.
Surface discoloration
Over time, UV rays, rain, and chemicals can discolor your asphalt driveway, turning it from deep black to a dull gray. This discoloration isn’t just cosmetic—it often indicates surface wear that can compromise the driveway’s durability. Resurfacing rejuvenates its color and protective properties.
Drainage issues
Proper drainage is crucial for maintaining your driveway’s condition. If water pools on the surface, it can seep into the asphalt, causing cracks and potholes. Resurfacing not only addresses these symptoms but can also improve drainage by leveling the surface and ensuring water flows away efficiently.
Now that you’re aware of the signs indicating your driveway needs resurfacing, let’s dive into the 11 steps you should follow to achieve a smooth, revitalized asphalt surface.
How to Resurface Asphalt Driveway in 11 Steps
Take a look at the detailed steps below to understand how to effectively resurface your asphalt driveway, ensuring a durable and visually appealing result.
1. Inspect driveway for any damage
Start your resurfacing project by meticulously inspecting your driveway for damages like cracks, holes, and uneven surfaces. This initial step is crucial for tailoring the resurfacing process to your driveway’s specific needs. Use chalk or markers to highlight areas that require repairs or special attention. Identifying these problem areas ensures a thorough and effective resurfacing, laying the groundwork for a smoother application of the new asphalt layer.
2. Clean the driveway thoroughly to remove debris
Cleaning your driveway is essential for the resurfacing material to adhere properly. Start by sweeping away loose debris and dirt. For oil stains and embedded dirt, use a degreaser and a stiff brush, followed by pressure washing the entire surface. This step not only prepares the surface for resurfacing but also prevents future deterioration by removing materials that could interfere with the new asphalt’s bonding process.
3. Repair cracks and potholes
Addressing cracks and potholes is a critical step before you resurface your asphalt driveway. Utilize an asphalt patching compound for minor cracks and cold asphalt patch material for significant potholes. Thoroughly fill and compact the damaged areas to ensure a smooth surface. These preparatory repairs are essential for the longevity of your driveway, preventing water infiltration and further damage, setting the stage for a successful resurfacing project.
4. Prepare the surface for resurfacing
Once repairs are made, preparing the surface ensures optimal adhesion of the new asphalt layer. This may involve applying a tack coat or primer to the cleaned and repaired surface, which helps the resurfacing material bond with the old asphalt. Follow the manufacturer’s recommendations for the best results, as this step is pivotal for a durable resurface.
5. Apply primer if required
If your resurfacing product or method requires a primer, apply it according to the instructions. The primer promotes better adhesion between the old driveway surface and the new resurfacing material. Ensure even coverage and allow it to dry as recommended, which is usually a matter of hours. This preparatory step is vital for a seamless, long-lasting resurface.
6. Mix the asphalt resurfacer according to instructions
The quality of your resurfacing job depends significantly on how well you mix the asphalt resurfacer. Follow the manufacturer’s instructions closely to achieve the correct consistency. Typically, this involves adding a specific amount of water to the resurfacer mix and stirring until you achieve a uniform, lump-free mixture. Proper mixing is essential for an even application and the strength of the layer.
7. Apply the asphalt resurfacer evenly across the surface
With the resurfacer mixed, apply it evenly across your driveway, starting at one end and working your way to the other. Use a squeegee or a trowel for a consistent layer. Ensure you cover the entire surface, paying extra attention to the areas that were previously repaired. An even application is crucial for a smooth finish and uniform drying.
8. Smooth the resurfacer for a uniform finish
After applying the resurfacer to resurface your asphalt driveway, use a trowel or a broom to even out the surface for a uniform finish. This step not only enhances your driveway’s appearance but also guarantees a smooth surface free from bumps and lumps, crucial for durability and proper drainage. A smooth, consistent finish is vital for a professional-looking resurface, ensuring your driveway remains both functional and aesthetically pleasing.
9. Allow the new surface to dry completely
Let the newly applied asphalt resurfacer dry and harden completely before using the driveway. Drying times can vary based on the product used, temperature, and humidity. This step is crucial to ensure the durability of your resurfaced driveway, as premature use can cause damage and affect the surface’s integrity.
10. Apply a second coat if necessary for optimal thickness and protection
In some cases, a second coat of resurfacer may be necessary to achieve optimal thickness and protection. If the manufacturer’s instructions suggest it, or if the initial application was absorbed unevenly, apply a second coat. This enhances the driveway’s durability and extends its lifespan by providing additional protection against wear and tear.
11. Cure the resurfaced area to ensure durability and readiness for use
The final step in resurfacing your asphalt driveway is allowing it to cure properly. Curing time can vary, but it’s generally recommended to wait at least 24-48 hours before walking on the surface and longer before driving on it. Proper curing is essential for the resurfaced driveway to achieve full strength and durability, ensuring it can withstand vehicle traffic and environmental conditions.
Benefits of Resurfacing Your Asphalt Driveway
Explore the significant advantages of opting to resurface your asphalt driveway, from cost savings to environmental impact, detailed in the sections below.
Cost-effectiveness compared to full replacement
Resurfacing an asphalt driveway is more affordable than replacing it entirely. This method uses fewer materials and requires less labor, offering a budget-friendly alternative that still significantly improves your driveway’s look and performance, without the higher costs associated with complete removal and replacement.
Extended lifespan of your driveway
A resurfaced driveway can extend its lifespan, delaying the need for a full replacement. This maintenance technique addresses existing surface damage and protects the underlying asphalt, prolonging the driveway’s durability and utility for years to come.
Improved appearance and curb appeal
Resurfacing revitalizes your driveway’s appearance, instantly boosting your home’s curb appeal. This simple update can transform a faded, cracked driveway into a smooth, inviting path, enhancing the overall aesthetic of your property.
Enhanced safety and surface traction
Resurfacing improves the safety of your driveway by increasing surface traction. This prevents accidents by reducing the likelihood of slips and falls for pedestrians and improving vehicle grip during adverse weather conditions.
Environmental benefits of resurfacing over replacing
Opting to resurface rather than replace your driveway has environmental advantages. It minimizes the waste generated from tearing out the old driveway and reduces the demand for new asphalt, conserving resources and lowering the carbon footprint associated with driveway construction.
Maintenance Tips After Resurfacing
Maintain the pristine condition and longevity of your newly resurfaced asphalt driveway with these essential maintenance tips:
Regular cleaning and debris removal
Engage in frequent cleaning to remove leaves, dirt, and debris, which prevents surface damage and maintains the driveway’s aesthetic. Regular removal of such materials also prevents the buildup that can lead to asphalt deterioration over time, ensuring the surface remains in good condition and extends its lifespan.
Prompt repair of small cracks and holes
Address small cracks and holes as soon as they emerge to prevent water infiltration and further degradation of the asphalt. Early repairs with a quality asphalt patching compound can maintain the driveway’s integrity, preventing minor issues from escalating into significant problems that require more extensive and costly interventions.
Sealcoating: Benefits and recommended frequency
Sealcoating your driveway every two to three years is a crucial maintenance step after you resurface your asphalt driveway, significantly extending its lifespan by shielding it from UV damage, water penetration, and chemical spills. This preventative care not only maintains the asphalt’s structural integrity but also boosts its appearance, ensuring your driveway looks freshly maintained and visually appealing.
Avoiding common damages (e.g., heavy equipment, chemical spills)
Mitigate common sources of damage by avoiding heavy equipment on the driveway and promptly addressing chemical spills. These measures protect the asphalt’s surface from unnecessary stress and chemical corrosion, thereby preserving its condition and appearance. Such proactive steps are crucial for maintaining the driveway’s durability and visual appeal.
DIY vs. Professional Resurfacing
Navigating the choice between DIY and professional asphalt driveway resurfacing requires understanding the benefits and drawbacks of each approach, recognizing when expert help is needed, and knowing how to select the right contractor for the job.
Pros and cons of DIY asphalt driveway resurfacing
Take a look at this comparison:
Pros: DIY resurfacing can be cost-effective, allowing homeowners to save on labor costs. It offers a sense of personal achievement and can be scheduled at your convenience.
Cons: Without professional expertise, there’s a higher risk of mistakes that could compromise the driveway’s durability and appearance. The project requires specialized tools and materials, and the learning curve can be steep for those unfamiliar with asphalt work.
When to call in professional paving contractors
Consider hiring professionals if your driveway has extensive damage, such as deep cracks, large potholes, or issues that require a complete overhaul. Professionals can also better handle driveways with complex designs or drainage problems. Their expertise ensures the job is done right the first time, saving you time and potential future costs.
How to choose the right contractor for your driveway
Selecting the right contractor involves researching and vetting potential hires. Look for contractors with:
A solid reputation, confirmed by reviews and testimonials
Proper licensing and insurance
A portfolio of previous work
Transparent pricing and a detailed contract
A willingness to provide references
Asking for detailed quotes from multiple contractors is a wise strategy when planning to resurface your asphalt driveway. This approach allows you to gauge the market rate and understand the specific services included in the price. It’s an essential step in ensuring you receive competitive and fair pricing for your driveway resurfacing project, helping you make an informed decision.
Cost Considerations
Cost considerations play a crucial role in planning for asphalt driveway resurfacing. Understanding these financial aspects ensures you can budget effectively for your project.
Estimated cost range for asphalt driveway resurfacing
The cost to resurface an asphalt driveway typically ranges from $1 to $3 per square foot, but this can vary widely based on regional prices and the specific conditions of your driveway. For a standard driveway, this translates to an approximate total cost of $2,000 to $6,000.
Factors affecting the cost (driveway size, condition, location)
Several factors influence the final cost of resurfacing an asphalt driveway:
Driveway Size: Larger driveways require more materials and labor, increasing the overall cost.
Condition: Driveways in poor condition may need extensive prep work or repairs before resurfacing, leading to higher costs.
Location: Prices for materials and labor vary by region, with urban areas typically having higher rates than rural locations.
Budgeting for your resurfacing project
When budgeting for driveway resurfacing, include a contingency fund of at least 10-20% of the total estimated cost to cover unexpected expenses. Obtain quotes from several contractors to get a realistic idea of the project’s cost. Consider the long-term benefits of resurfacing, such as increased property value and extended driveway lifespan, against the initial investment to ensure it aligns with your financial planning.
FAQs about Resurface Asphalt Driveway
Here are some of the most frequently asked questions about resurfacing asphalt driveways, providing clarity on the process, benefits, and considerations:
How does resurfacing differ from a complete driveway replacement?
Resurfacing involves applying a new layer of asphalt over the existing driveway, addressing superficial damage and wear. It’s less invasive and more cost-effective than replacement, which involves removing the old driveway and laying down a completely new surface, suitable for more severe damage or structural issues.
Can you put asphalt over old asphalt?
Yes, you can put a new layer of asphalt over old asphalt. This process, known as overlay or resurfacing, is a common practice for extending the life of a driveway with minor to moderate wear. Proper preparation, including cleaning and repairing the old surface, is crucial for the success of the overlay.
Should I resurface or replace my asphalt driveway?
The decision to resurface or replace depends on the condition of your driveway. If the foundation is stable and damage is mostly superficial, resurfacing is a viable option. For extensive damage, poor foundation, or drainage issues, replacement might be necessary to ensure longevity and performance.
How often should an asphalt driveway be recoated?
An asphalt driveway should typically be recoated every 3 to 5 years, depending on the climate, usage, and condition of the driveway. Sealcoating is a preventative maintenance measure that protects the asphalt from UV rays, water, and vehicle fluids, extending its lifespan.
How long will an asphalt overlay last?
An asphalt overlay can last between 10 to 15 years, depending on factors like the quality of the installation, the condition of the underlying asphalt, and how well the driveway is maintained. Regular maintenance, including sealcoating and prompt repairs, can significantly extend the overlay’s lifespan.
Conclusion
In conclusion, resurfacing your asphalt driveway is a cost-effective way to extend its lifespan, improve curb appeal, and enhance safety. By understanding the signs that indicate the need for resurfacing, following the outlined steps, and maintaining the new surface properly, you can ensure your driveway remains in top condition for years to come. Whether you choose a DIY approach or hire professionals, proper planning and execution are key to achieving a durable and attractive asphalt driveway.
Tim is a seasoned paving expert with 30+ years of experience in the industry. He has worked on countless projects, from small residential driveways to large commercial parking lots.
https://pavingfinder.com/wp-content/uploads/2023/08/Resurface-Asphalt-Driveway-Featured.jpg455782admin123https://pavingfinder.com/wp-content/uploads/2020/10/logo.jpgadmin1232024-02-21 17:15:252024-02-22 16:23:34Resurface Asphalt Driveway – Renew Your Path in 11 Steps