Tar and Chip Driveways

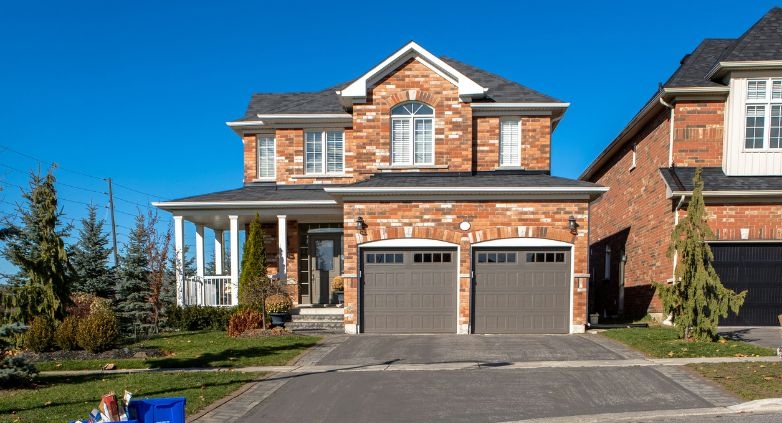
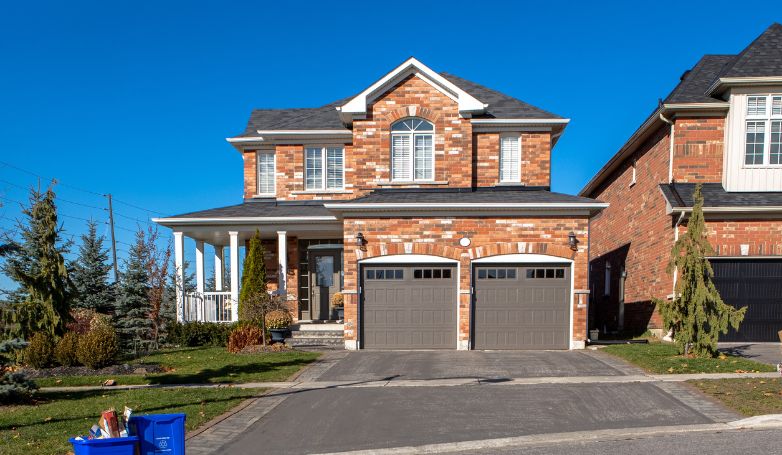
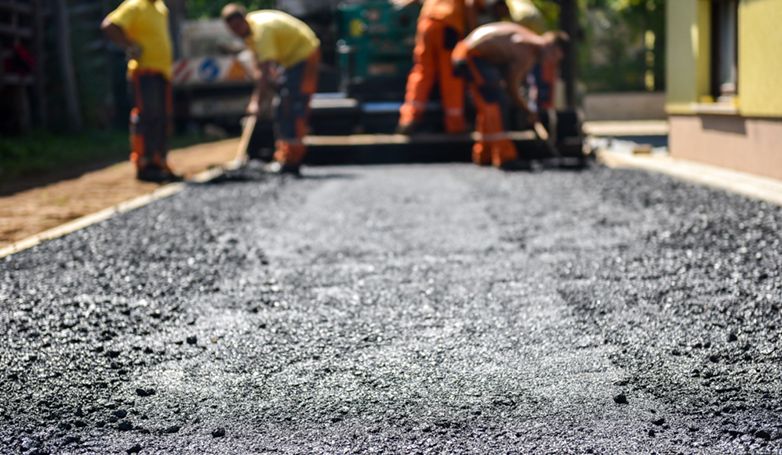
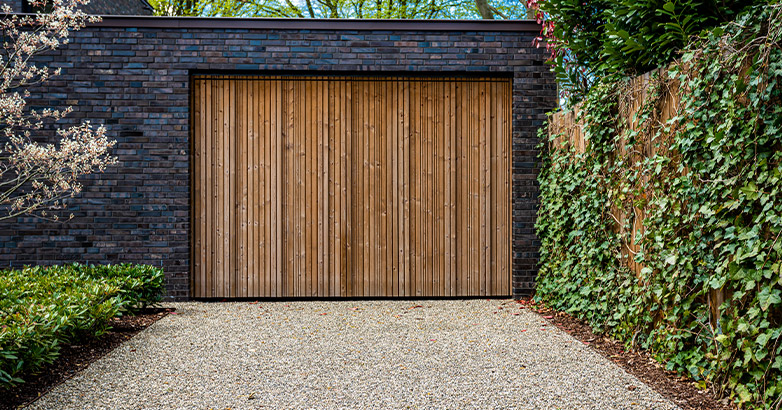
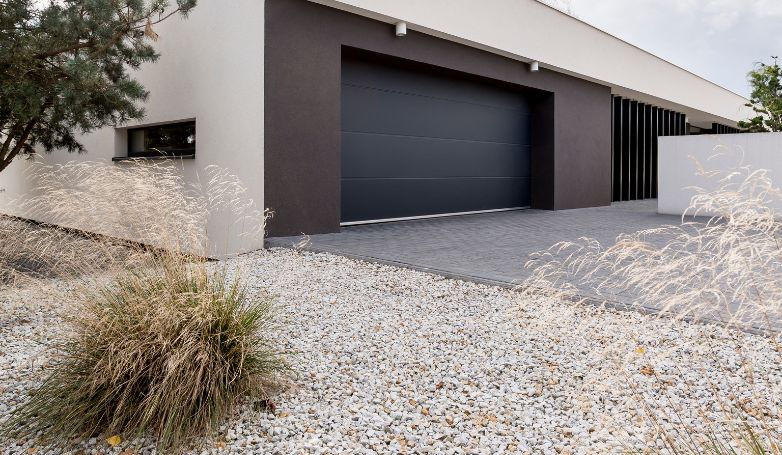
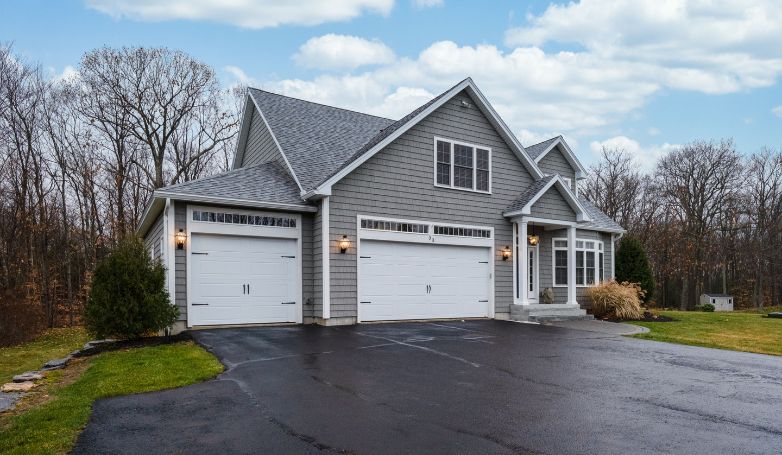
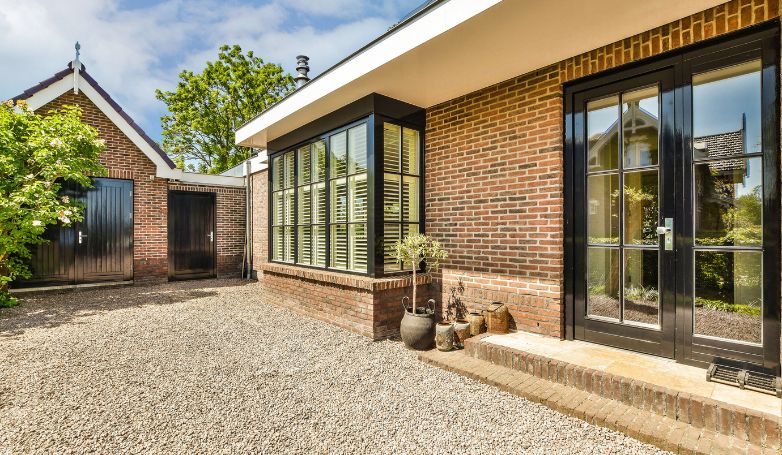
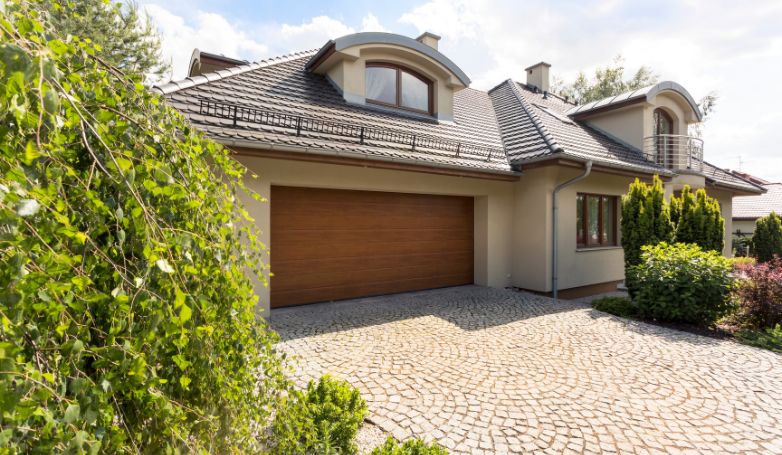
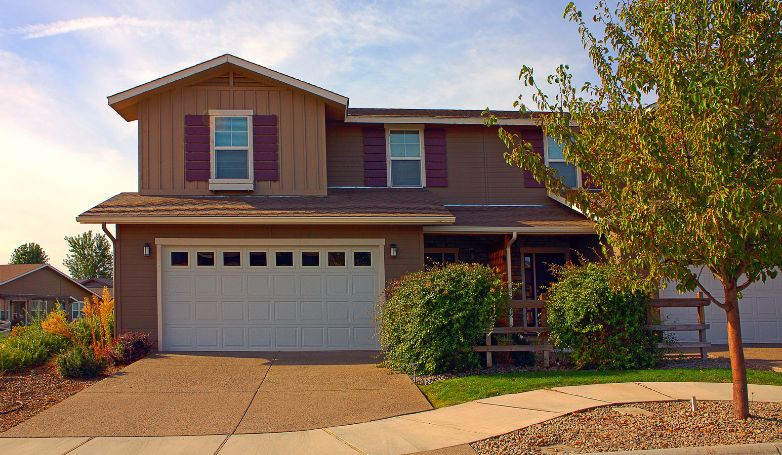
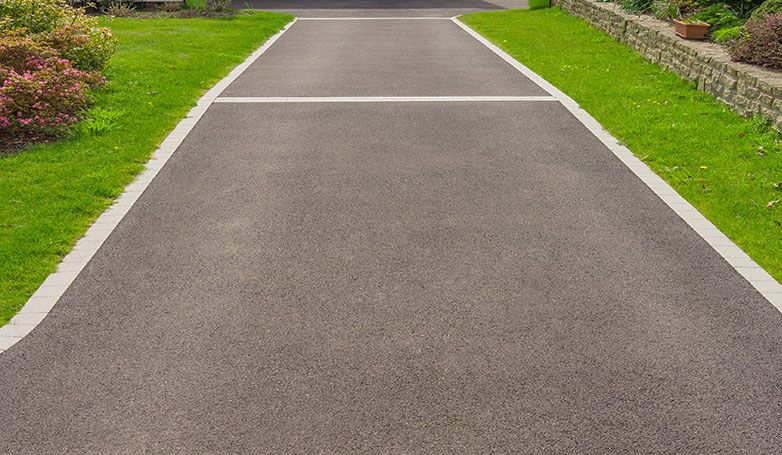
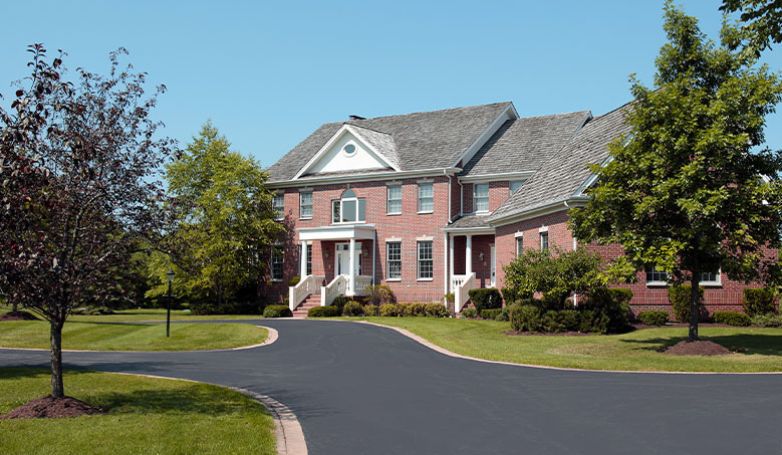
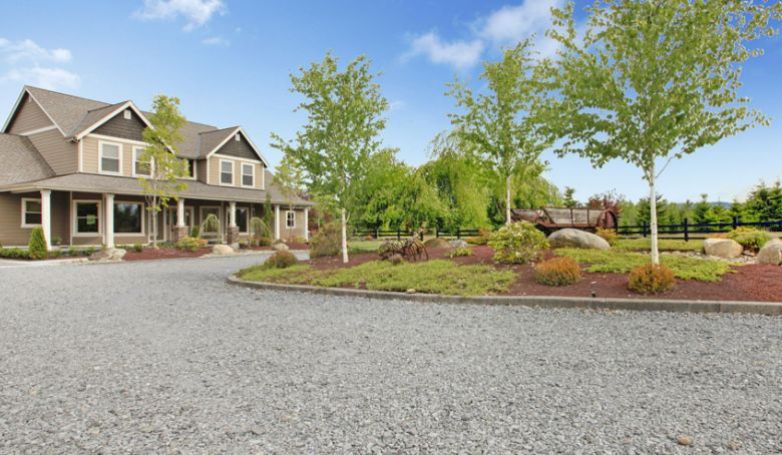
Exploring the rustic charm of a tar and chip driveway offers a blend of durability and aesthetic appeal, making it an enticing option for homeowners seeking a unique look.

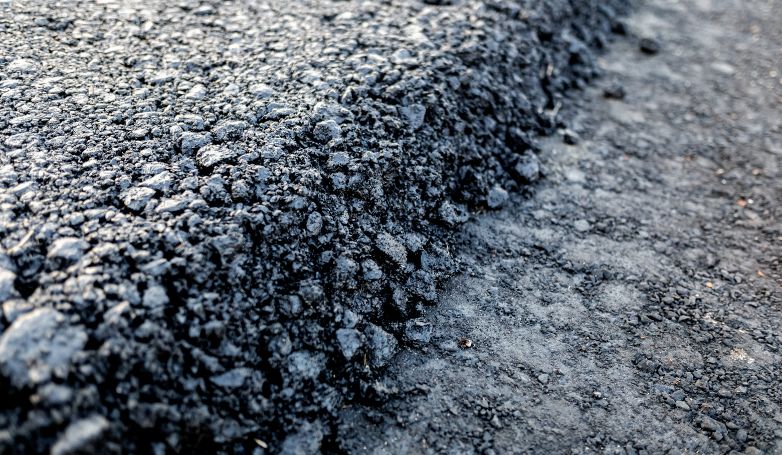
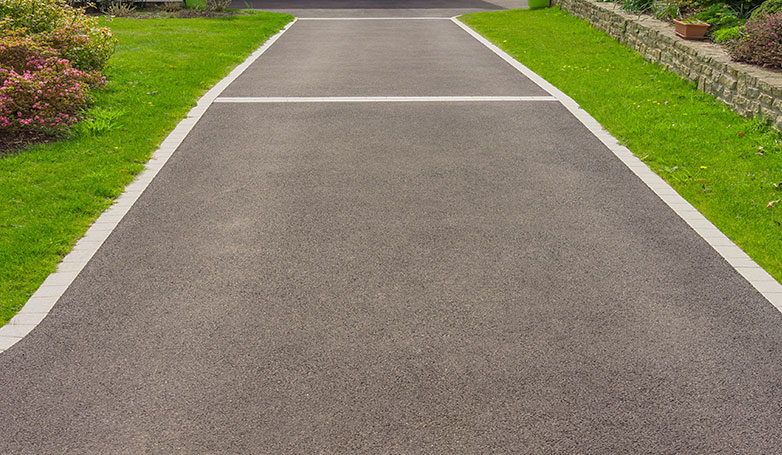
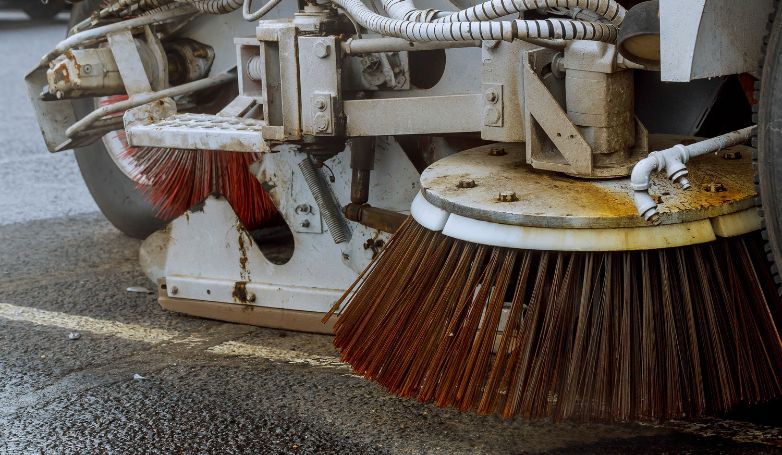
A tar and chip driveway is a construction method where hot tar is applied to the ground as a binder, and then stone chips are spread over it for a textured finish. This process creates a driveway with a more natural, gravel-like appearance while offering the durability and solidity of conventional pavement. It’s particularly valued for its ability to provide excellent traction, lower heat absorption in summer, and a customizable look through the choice of different stone colors and sizes.

Discover the installation steps and the benefits of tar and chip driveways, ensuring your pathway not only stands the test of time but also enhances your home’s curb appeal.

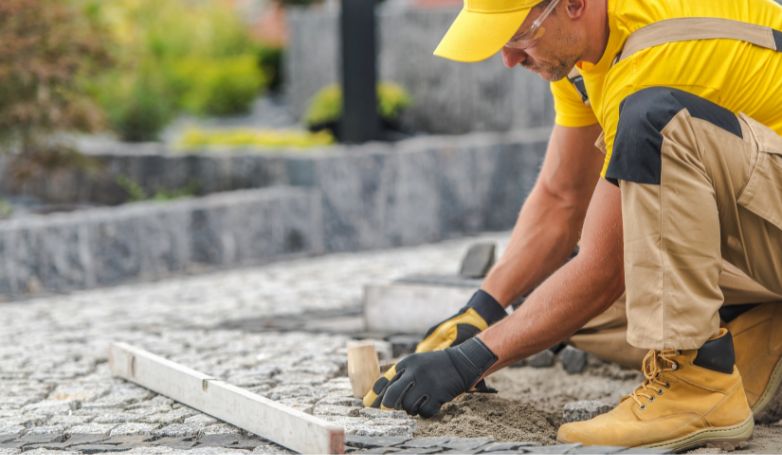
How To Install a Tar and Chip Driveway in 10 Steps

A new tar and chip driveway installed

Installing a tar and chip driveway is a cost-effective way to achieve a durable and attractive surface. This ten-step guide will walk you through the process, from preparation to completion, ensuring you have all the knowledge needed to create a stunning driveway.

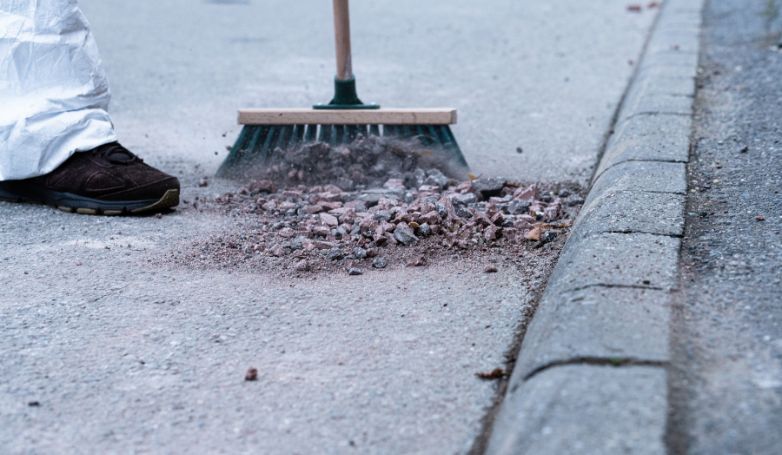
1. Clearing the area of any vegetation or debris

Begin by thoroughly clearing the designated driveway area of all vegetation, roots, and debris. This step is crucial to prevent organic material from decomposing underneath your paved path, which could lead to unevenness and instability in the future. Ensure the ground is completely bare and smooth, ready for the next stage of preparation.

2. Grading the site to ensure proper water drainage

Proper grading is essential to direct water away from your driveway and foundation. Slope the ground slightly (about a 1% to 2% incline away from any structures) to ensure efficient water drainage. This step prevents water accumulation that can weaken your driveway’s structure over time and lead to erosion or damage.

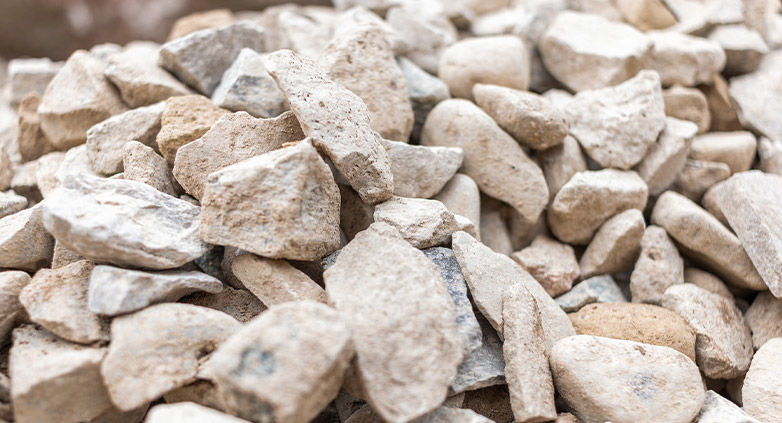
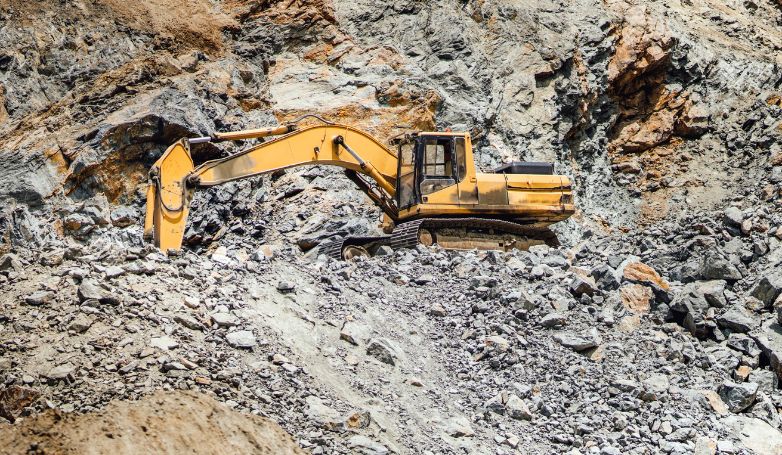
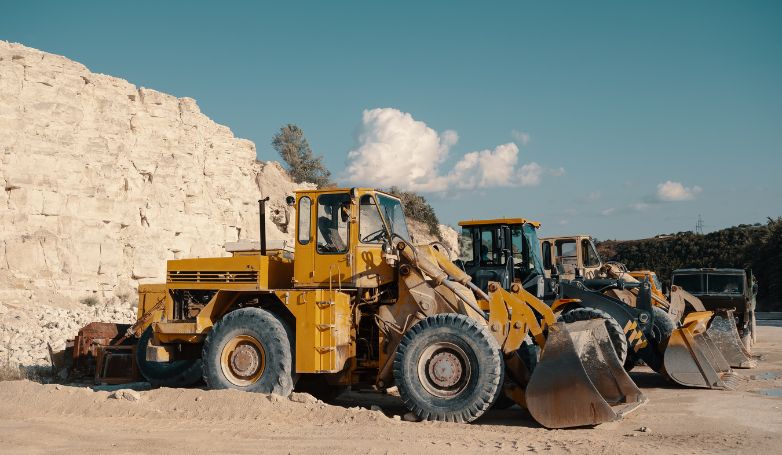
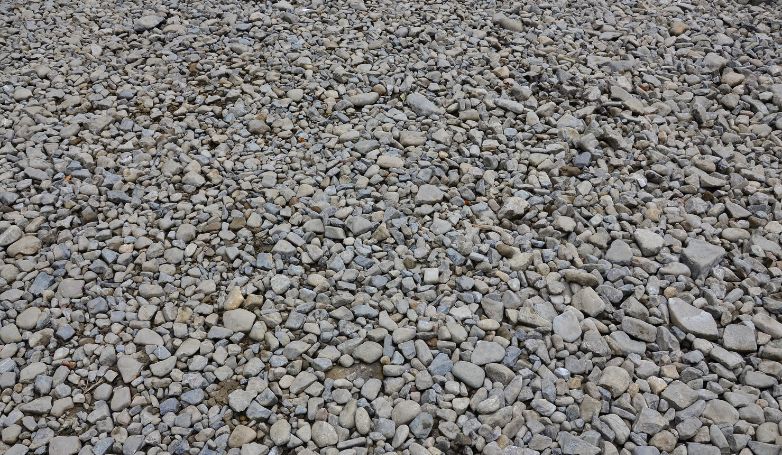
3. Applying a layer of gravel or aggregate for stability

Applying a layer of gravel for the installation of tar and chip

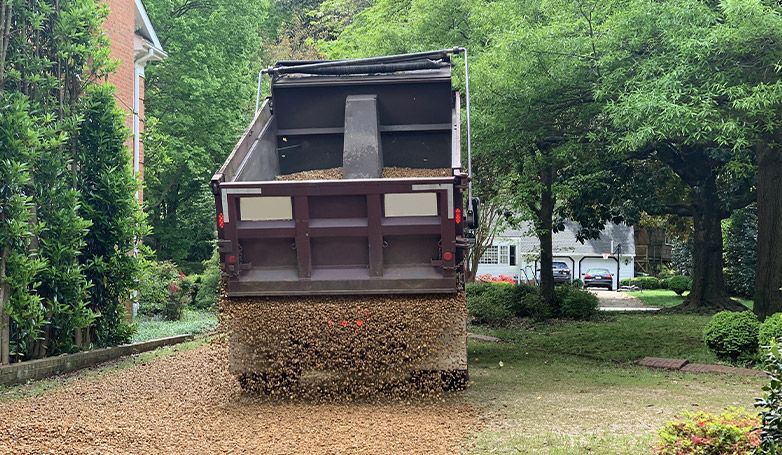
Lay down a thick layer of crushed stone or gravel as the base of your tar and chip driveway. This layer should be at least 4-6 inches deep, providing a stable foundation that will support the weight of vehicles. The gravel also facilitates proper drainage beneath the driveway surface, further enhancing its durability.

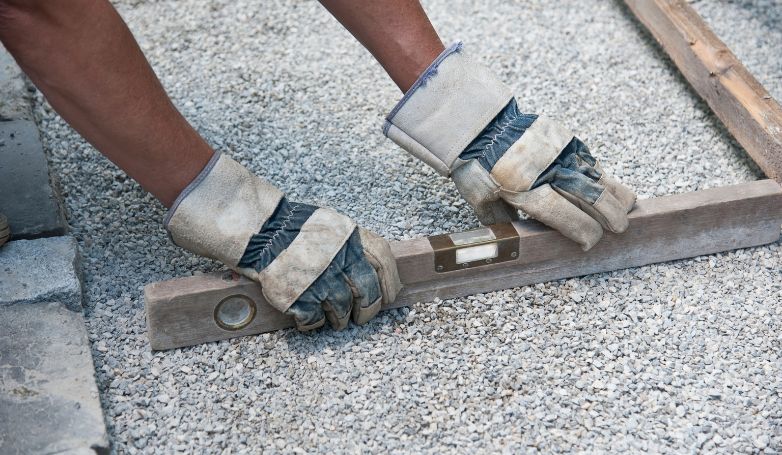
4. Compacting the base material thoroughly

Using a mechanical compactor, press down on the gravel layer to create a solid, compacted base. This step is vital to eliminate any air gaps and ensure a level foundation that won’t shift over time. A well-compacted base prevents future sagging or cracking of the driveway surface.

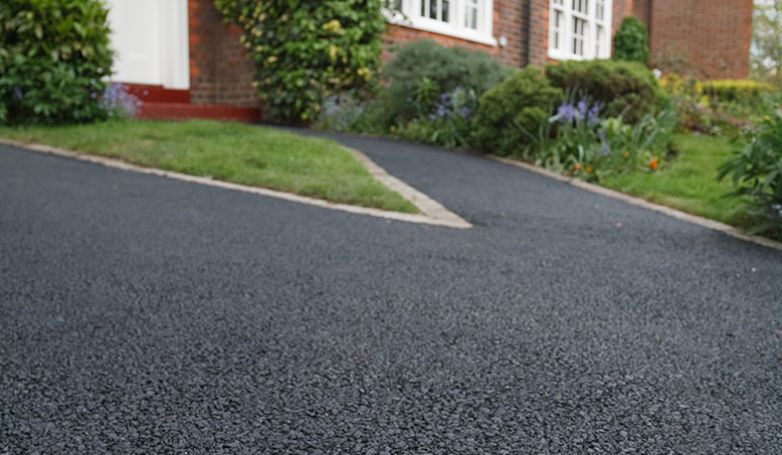
5. Edging the driveway to define its boundaries

Install edging along the sides of your driveway to define its boundaries and contain the paving materials. Edging can be made from various materials such as metal, wood, or stone, and serves to enhance the driveway’s appearance while also providing structural support and preventing the spread of aggregate.

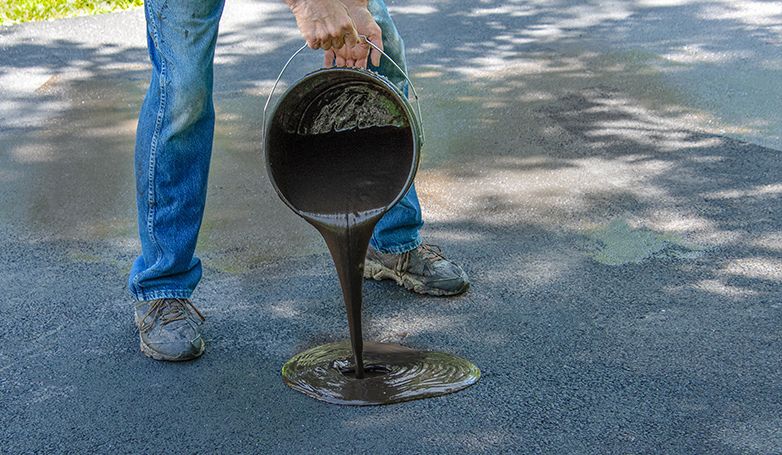
6. Applying a tack coat to enhance adhesion

Before laying the tar, apply a tack coat—a thin, sticky layer of liquid asphalt—to the compacted base. This adhesive layer ensures that the hot tar will properly bond to the base, improving the overall durability and longevity of your driveway. Ensure even coverage for optimal adhesion.

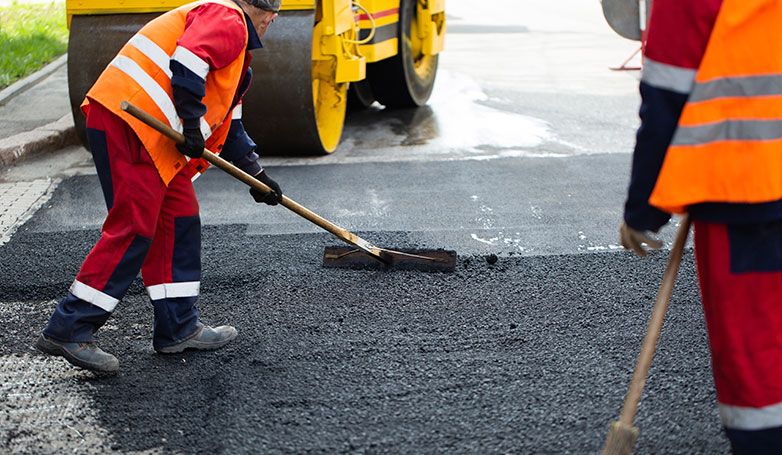
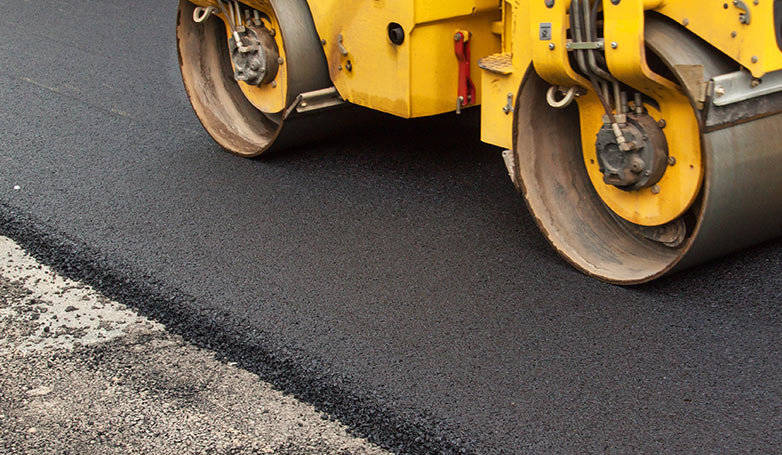
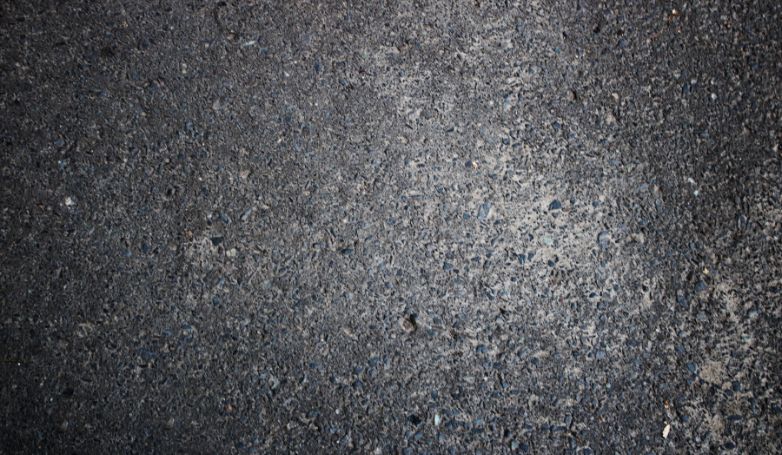
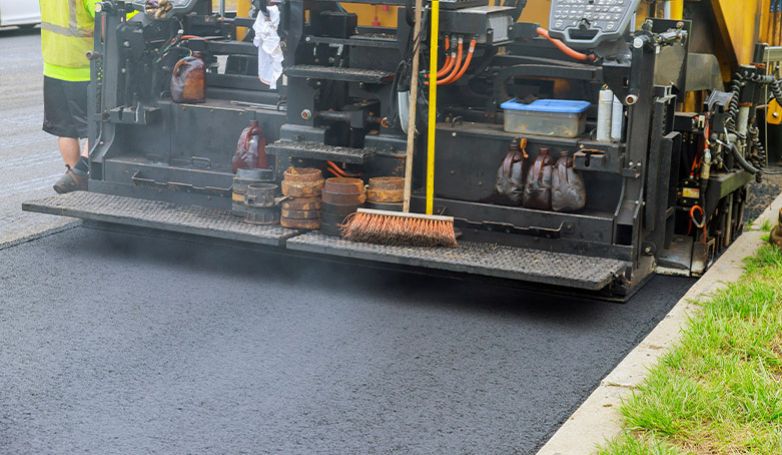
7. Pouring and spreading the hot liquid tar evenly

An installation of driveway with hot liquid tar

Heat the liquid tar to the manufacturer’s recommended temperature and pour it over the prepared base. Use a spreader to distribute the tar evenly across the entire surface, ensuring that every area is adequately covered. This layer acts as the binding agent for the aggregate, creating a cohesive surface.

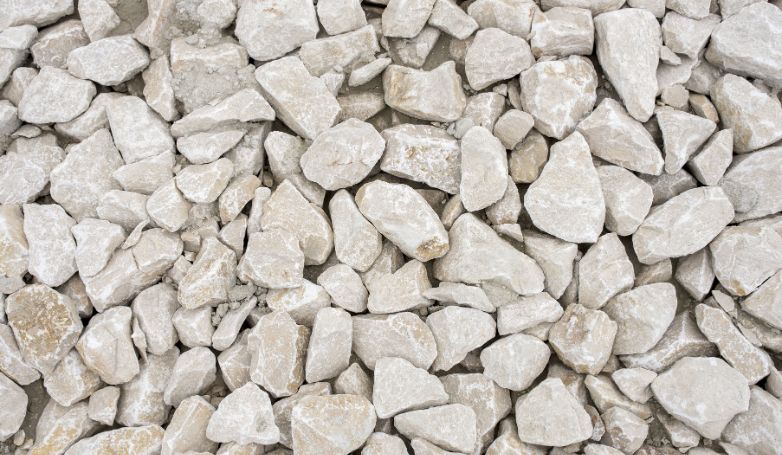
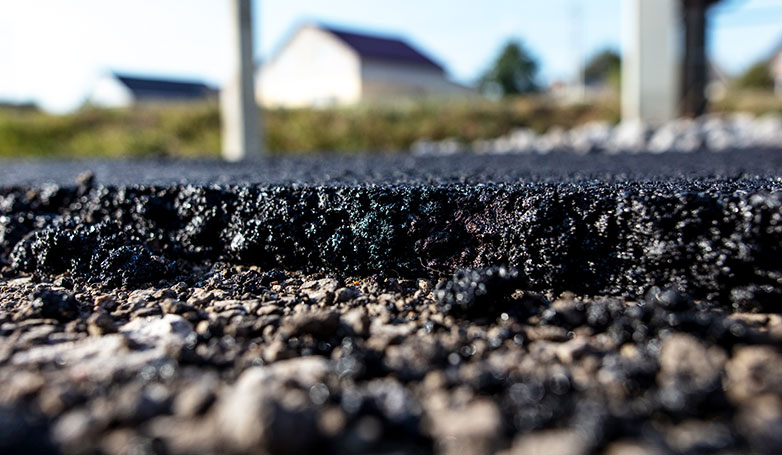
8. Adding a layer of aggregate or chippings over the tar

Immediately after spreading the tar, while it’s still hot, apply a generous layer of stone chips or aggregate. Choose a color and type of stone that matches your home’s exterior for aesthetic appeal. The aggregate should be spread evenly, completely covering the tar to ensure a uniform texture and appearance.

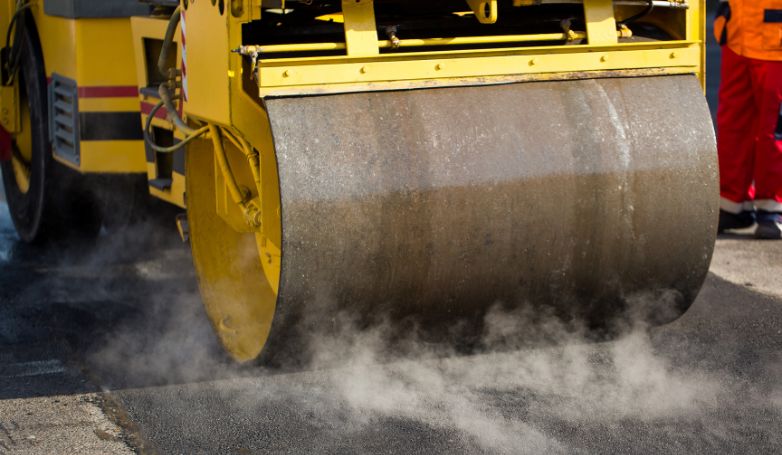
9. Rolling the surface to compact the aggregate

Once the aggregate is in place, use a roller to press the stones into the tar. This compaction process embeds the stones firmly within the tar, creating a solid, cohesive surface. The rolling also ensures that the tar and chip driveway will be level and smooth, with the aggregate securely fixed in place.

10. Curing the driveway for the recommended time

Allow the newly laid driveway to cure and harden. The curing process can take several days, depending on weather conditions and the specific materials used. Avoid driving or walking on the surface during this time to ensure the surface has fully set, resulting in a strong and long-lasting driveway.

Following these steps carefully will result in a beautifully finished tar and chip driveway that combines rustic charm with practical durability, providing an inviting entrance to your home for years to come.

Tar and Chip Driveway Pros

A big house with tar and chip driveway

Let’s explore the advantages that make tar and chip driveways a popular choice for many homeowners.

Cost-effective Compared to Alternatives

These types of driveways are significantly more affordable than many other driveway materials, such as concrete or asphalt. This cost-effectiveness stems from the use of inexpensive materials and a simpler installation process that doesn’t require specialized machinery. The economic savings don’t compromise quality, making tar and chip an excellent choice for those looking to maximize their investment in home improvements.

Long-lasting and Durable

An additional advantage is its durability. When properly installed, it can withstand harsh weather conditions, heavy traffic, and the test of time, lasting up to a decade or more before needing a refresh. This resilience is due to the robust combination of tar and stone, which together create a tough, flexible surface that resists cracking and damage.

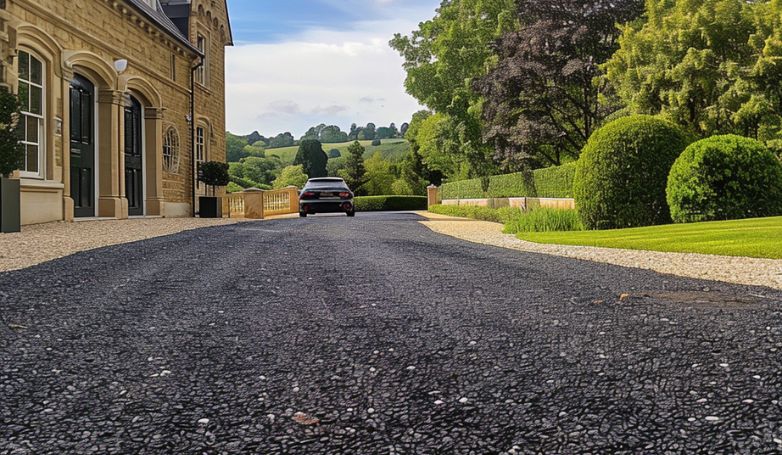
Aesthetic Appeal with Customizable Options

Customize tar and chip driveway with gardens

Tar and chip driveways bring a unique, rustic charm that you just don’t get with asphalt and concrete. With a variety of aggregates to choose from, you can customize both the texture and color, letting you design a driveway that perfectly matches your home and garden. Whether you’re going for something understated and natural or want to make a striking visual statement, you can tweak a tar and chip driveway to get the exact look you’re after.

Low Maintenance Requirements

Maintaining a tar and chip driveway is relatively straightforward and requires less effort than other types of driveways. There’s no need for regular sealing, and the rough texture helps hide stains and marks. Occasional topping up of the chips may be needed, but overall, the low maintenance aspect of these driveways makes them a practical choice for busy homeowners or those seeking a hassle-free driveway solution.

Tar and Chip Driveway Cons

A newly installed tar and chip driveway

While tar and chip driveways offer unique benefits, it’s important to consider a few drawbacks before making your decision.

Rough Surface

The textured finish of tar and chip driveways, while offering excellent traction, can be rougher underfoot than other materials. This makes it less ideal for activities like basketball or skateboarding, where a smoother surface is preferred. The rough texture can also be harsher on pets’ paws, making it a consideration for households with outdoor animals.

Limited Aesthetic Options

While tar and chip driveways offer a rustic charm, they don’t provide the wide range of colors and patterns available with options like concrete or asphalt. The aesthetic is more natural and less customizable, which might not suit every homeowner’s vision for their property’s exterior. This limitation could influence the overall landscape design and curb appeal.

Maintenance Challenges

Over time, the chip surface can become loose, leading to the need for periodic maintenance. This might include adding additional layers of chips or occasional patching where the surface has worn away, especially in areas of high traffic. Unlike asphalt or concrete, which can be resealed as a whole, maintaining a tar and chip driveway can require more targeted repairs, potentially adding to long-term upkeep costs.

Tar and Chip Driveways Maintenance Tips

A well maintained tar and chip driveway

Maintaining a tar and chip driveway is crucial for preserving its appearance and extending its lifespan. Here are some effective tips to keep your driveway in top condition.

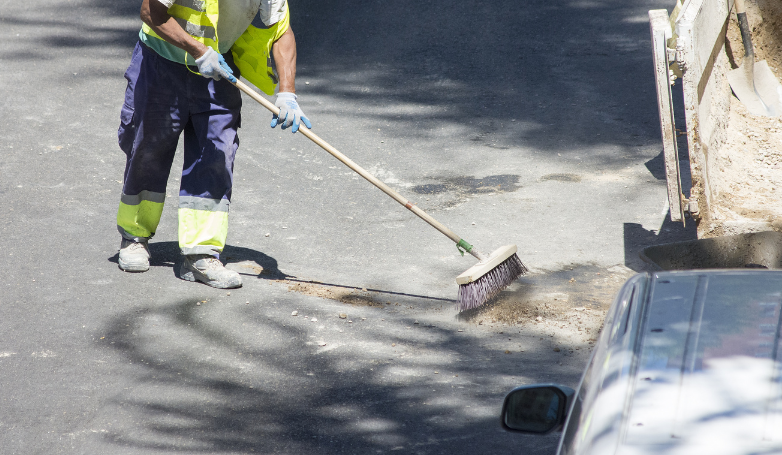
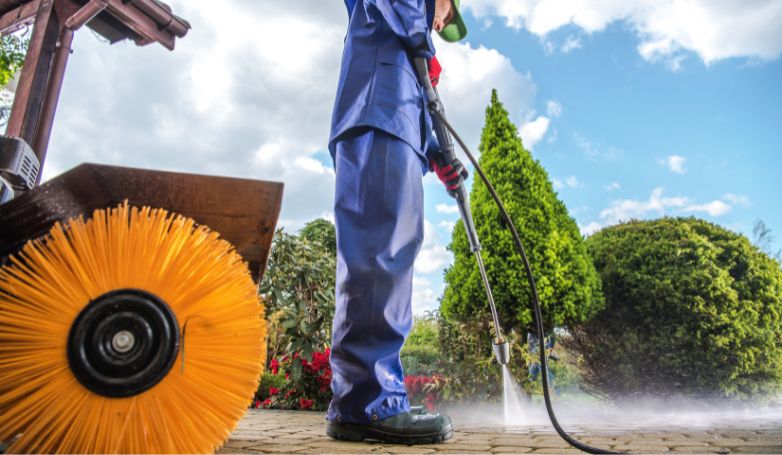
Regular Cleaning to Prevent Debris Accumulation

Regular sweeping and occasional rinsing with a hose can prevent debris and dirt from accumulating, which can retain moisture and potentially damage the surface over time. Cleaning also maintains the driveway’s aesthetic appeal, ensuring it looks its best year-round.

Sealcoating to Enhance Longevity

Applying a seal coat to your driveway every few years can significantly enhance its longevity. Sealcoating provides an additional protective layer against water infiltration, UV rays, and chemical spills, all of which can degrade the tar binder over time. This preventive measure keeps your driveway looking fresh and can extend its lifespan by several years.

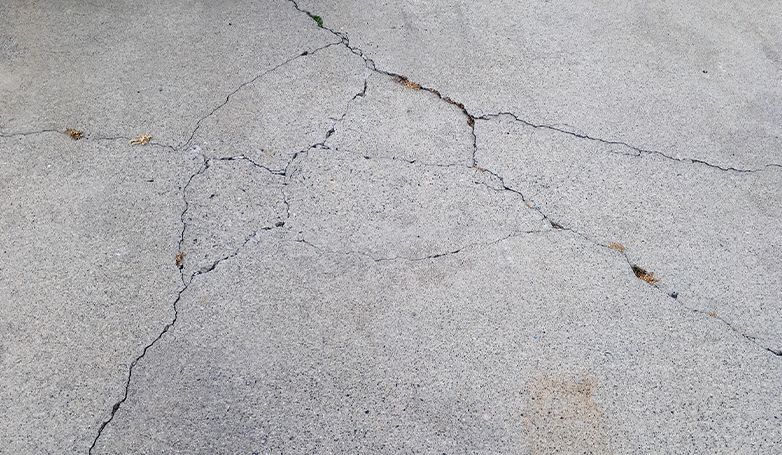
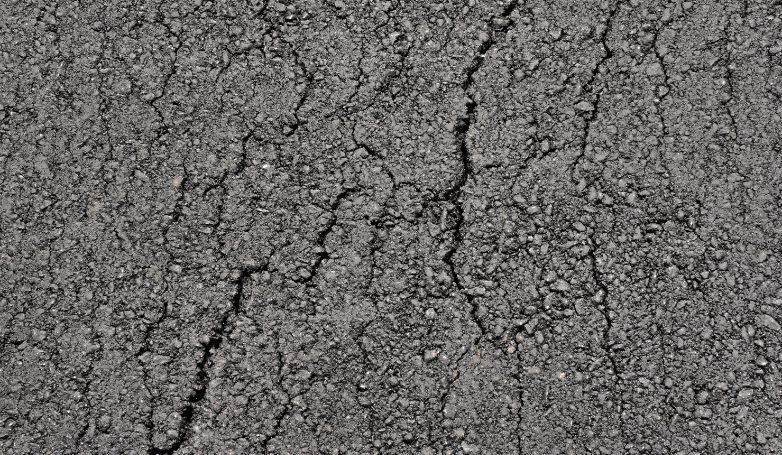
Filling Cracks and Addressing Damage Promptly

Workers filling cracks on the tar and chip driveway

Although tar and chip driveways are durable, they may develop cracks or damage due to extreme weather or wear. Addressing these issues promptly by filling cracks and repairing damaged areas can prevent them from worsening. Early intervention keeps repairs minimal and helps maintain the structural integrity of your driveway.

Professional Inspections and Repairs

While many aspects of tar and chip driveway maintenance can be handled by homeowners, it’s wise to have professional inspections and repairs done periodically. Professionals can spot potential issues that may not be obvious to the untrained eye and can perform repairs using the right materials and techniques. Investing in professional upkeep ensures your driveway remains in optimal condition, safeguarding your investment.

Common Issues and Solutions

Cracks on the tar and chip driveway

Tar and chip driveways, while durable and aesthetically pleasing, can encounter common issues over time. Understanding these problems and their solutions can help maintain the driveway’s integrity and appearance.

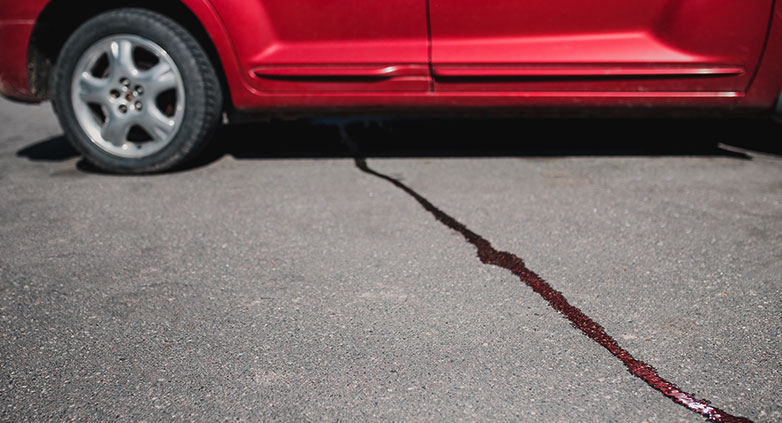
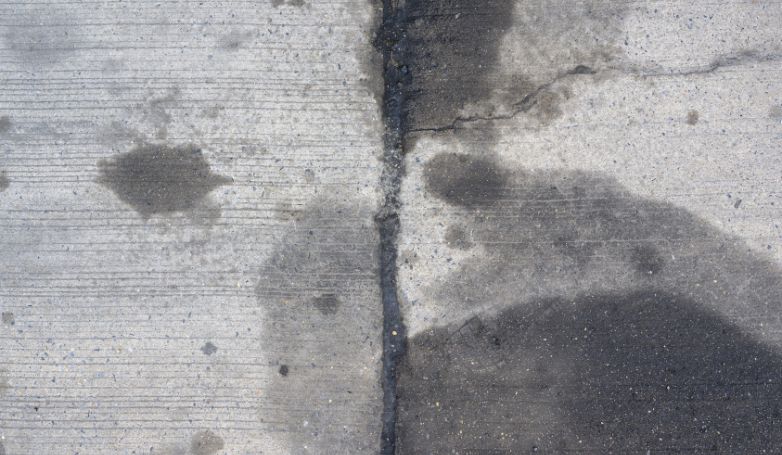
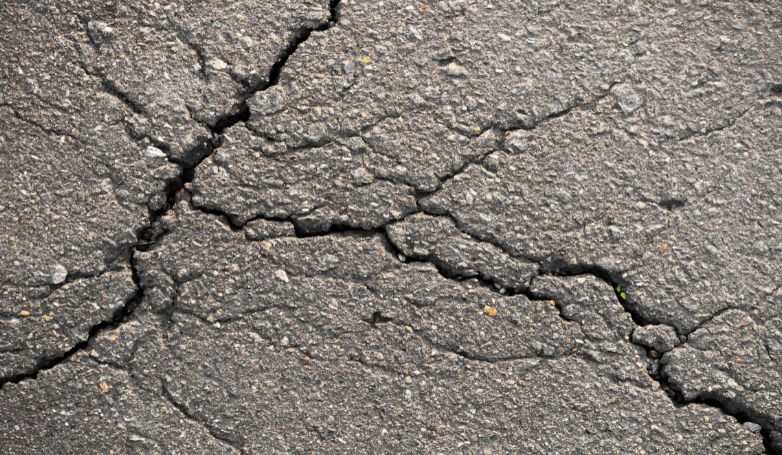
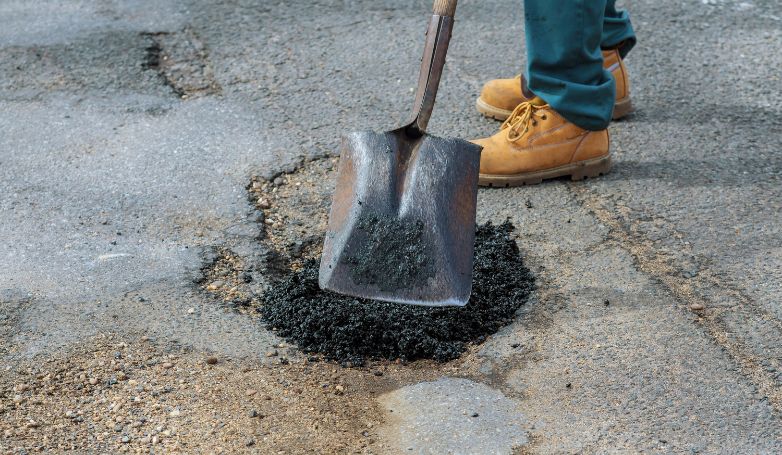
Cracking and Potholes

Cracking and the development of potholes are often due to water infiltration and subsequent freeze-thaw cycles. Address these issues by promptly filling in cracks and potholes with a suitable patching compound. Regular maintenance and ensuring proper drainage can prevent these problems from arising in the first place.

UV Damage and Fading

Continuous exposure to sunlight can cause the driveway’s surface to fade and the tar to deteriorate, leading to a loss of the aggregate. Applying a UV-protectant sealant can minimize this damage, preserving the color and condition of the driveway. Reapplying the sealant every few years can help maintain its effectiveness.

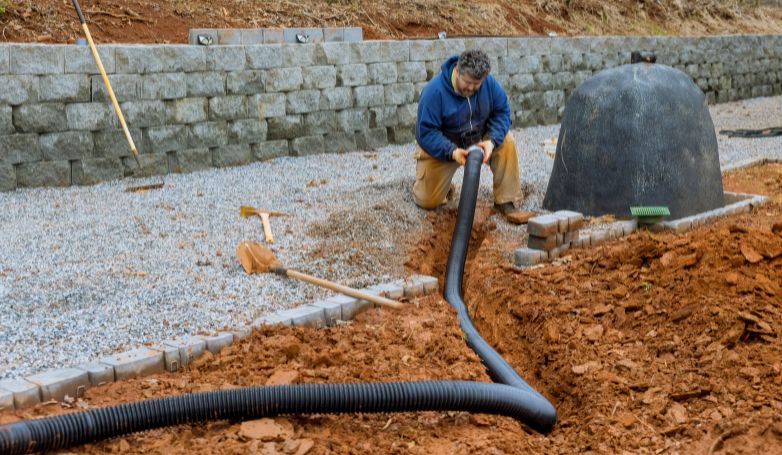
Drainage Issues and Water Pooling

Improper drainage can lead to water pooling on the surface of the driveway, which can weaken the tar and lead to aggregate loss. Ensure the driveway is graded correctly during installation to facilitate proper water runoff. For existing driveways, consider installing drainage solutions like French drains or adjusting the driveway’s slope.

Addressing Vegetation Growth

Weeds and grass can grow through cracks in the driveway, causing further damage and detracting from its appearance. Regularly inspect the driveway for signs of vegetation and use an appropriate weed killer to address any growth. Sealing cracks and maintaining the driveway’s surface can also prevent seeds from taking root.

Tar and Chip Driveways Ideas and Examples

Tar and chip driveways offer a versatile and customizable option for homeowners looking to enhance their property’s curb appeal. Here are some inspiring ideas and examples:

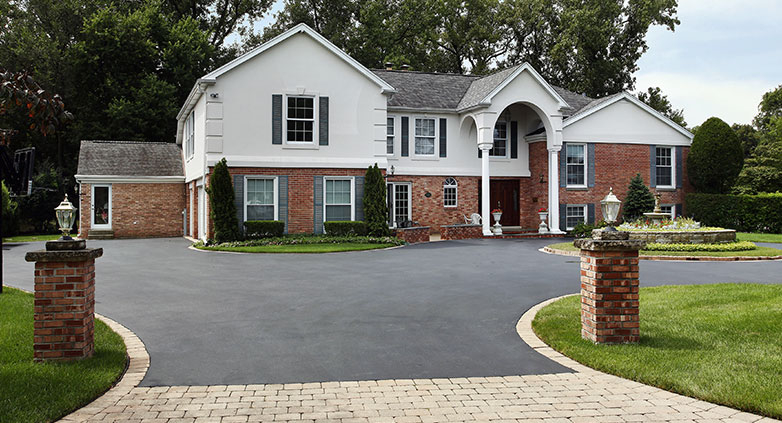
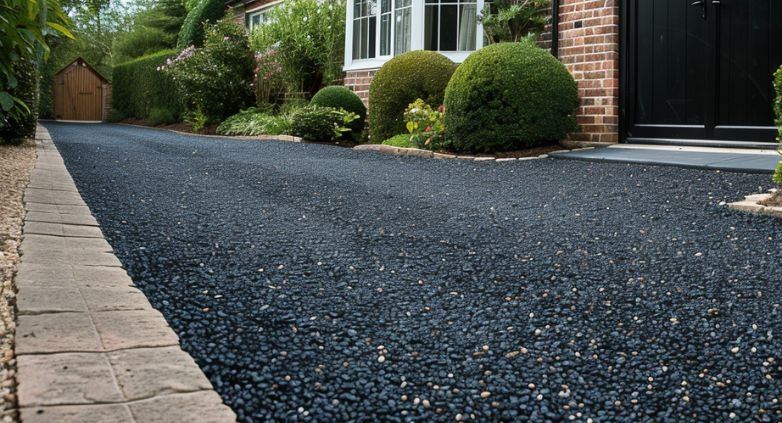
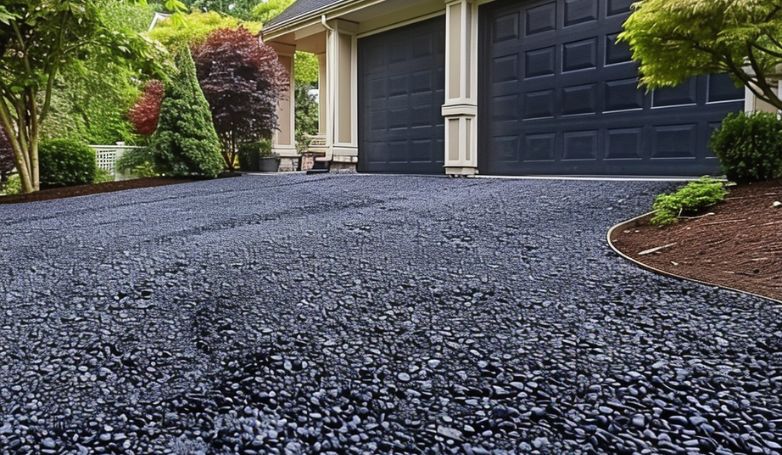
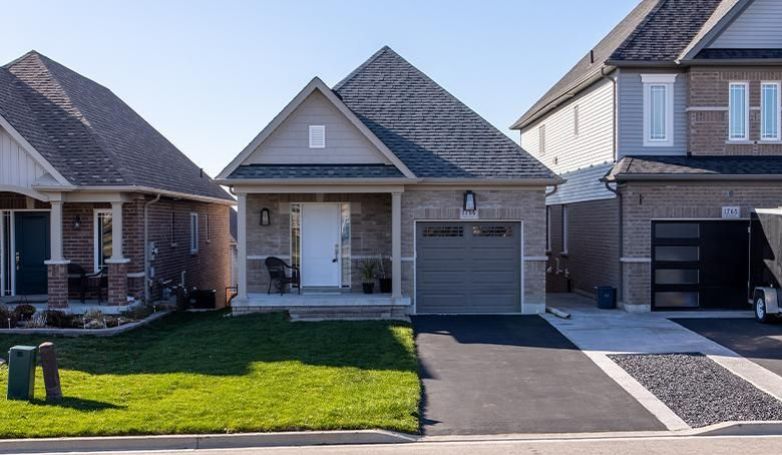
Classic Black Tar Driveway

Newly black tar and chip driveway on the private property

A classic black tar driveway exudes elegance and simplicity, providing a smooth, uniform look that complements any home exterior. Its timeless appeal and durability make it a popular choice, offering a sleek and sophisticated entrance to your property.

Decorative Chip Seal Driveway

Incorporating various colors and types of chips, a decorative chip seal driveway can be customized to match your home’s aesthetic. This option allows for creative patterns and designs, adding unique texture and character to your driveway and overall landscape.

Stamped Asphalt Driveway Patterns

Though not a traditional tar and chip (driveway) method, incorporating stamped patterns into the asphalt layer before the chip seal process can mimic the look of brick, stone, or other textures. This technique adds a decorative touch, enhancing the visual appeal of your driveway.

Colored Tar Driveway Surfaces

By adding pigments to the tar, colored tar driveways can be created to complement or contrast with your home’s color scheme. From subtle earth tones to more vibrant shades, colored tar offers an opportunity to personalize your driveway’s appearance.

Exposed Aggregate Tar Driveway

An exposed aggregate tar driveway features a surface where the stone chips are prominently displayed, creating a rugged, textured look. This method not only adds visual interest but also provides excellent traction, making it a practical choice for all weather conditions.

Tar and Chip Driveway Cost

The installing of tar and chip using machinery

The cost of a tar and chip driveway is often regarded as one of its most appealing features, particularly when compared to other driveway materials. On average, homeowners might expect to pay between $2 and $5 per square foot, making it a notably economical choice. This cost-efficiency doesn’t compromise the driveway’s durability or aesthetic value.

Factors influencing the final price include the driveway’s size, the type of stone chips selected, and regional labor costs. Despite these variables, the tar and chip method remains an attractive option for those seeking a balance between affordability and functionality, offering a rustic charm that asphalt or concrete driveways can’t match.

Tar and Chip Driveway Alternative

Exploring alternatives to tar and chip driveways can offer different benefits and aesthetics suited to varying preferences and requirements. Here are some popular alternatives:

Concrete Driveway

A elegant house with concrete driveway

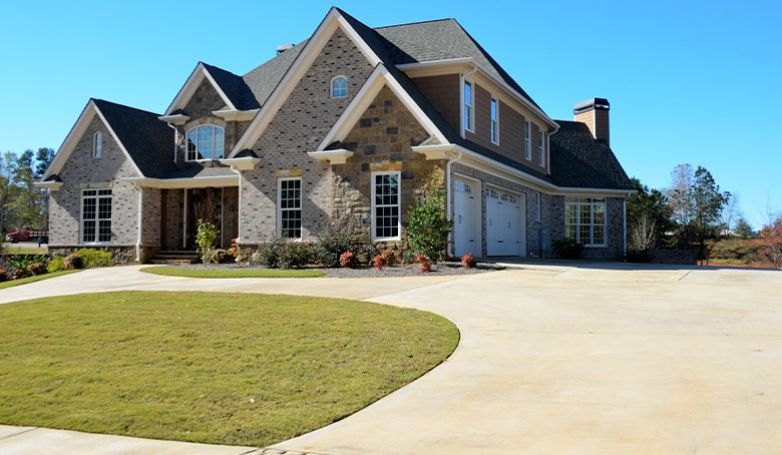
Concrete driveways provide a clean, modern look with their smooth, uniform surface. They offer durability and long lifespan, resisting weather-related damage and heavy loads. While initially more expensive than tar and chip, their minimal maintenance and longevity can make them a cost-effective option over time.

Asphalt Driveway

Small house with asphalt driveway

Asphalt driveways are prized for their resilience and flexibility, with an ability to withstand freezing and thawing without cracking as easily as concrete. They require sealing every few years to maintain their dark, rich color and prevent water penetration but are generally more affordable to install than concrete.
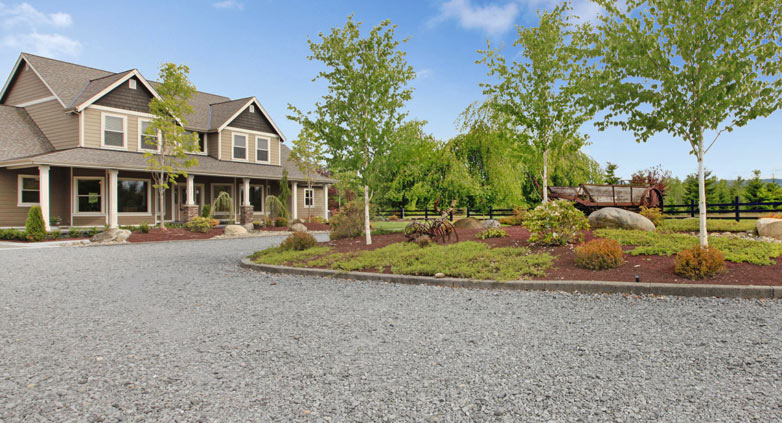
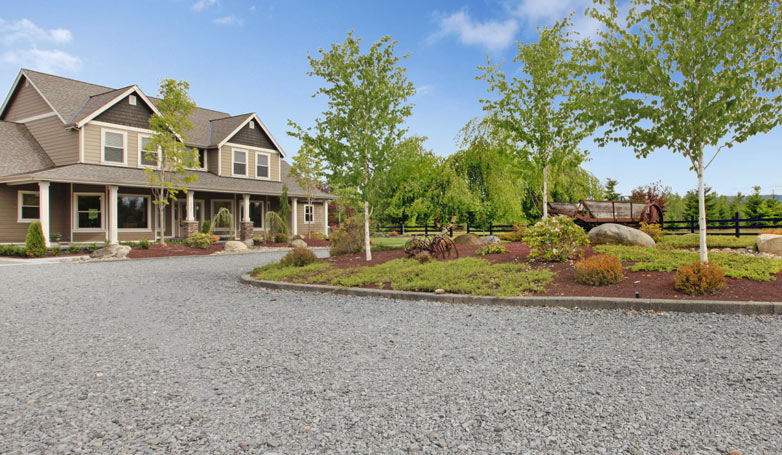
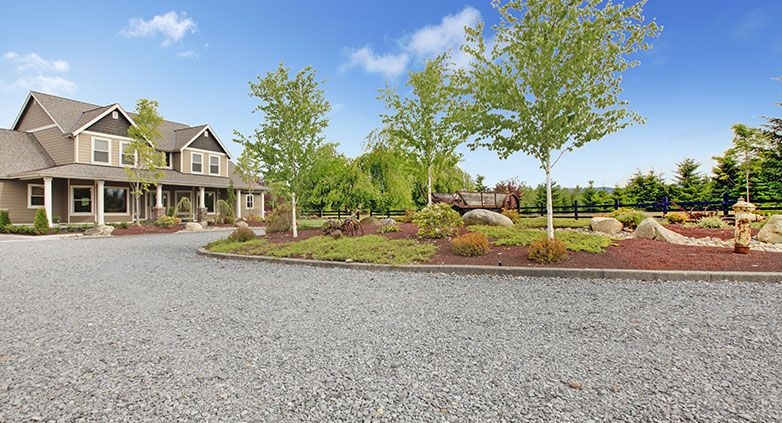
Gravel Driveway

House surrounded by plants and trees with big gravel driveway

Gravel driveways are one of the most affordable and easiest to install. They provide natural drainage and can be replenished or adjusted as needed. While they may require more frequent maintenance to keep tidy and functional, their rustic appeal can complement country or cottage-style homes beautifully.

Paver Driveway

Paver driveway design

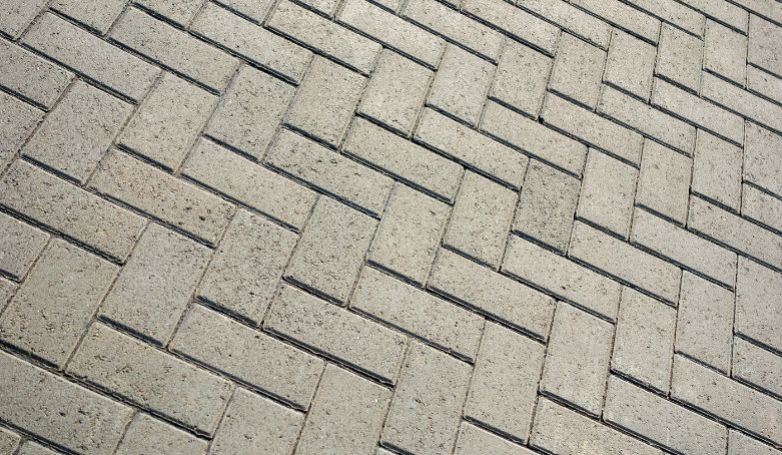
Paver driveways, made from brick, stone, or concrete pavers, offer unparalleled aesthetic diversity and charm. They can be laid in various patterns and colors to create unique designs. Although the upfront cost can be higher, their ease of repair and potential for personalization make them a desirable choice for many homeowners.

Permeable Driveway

Aesthetic permeable paver driveway

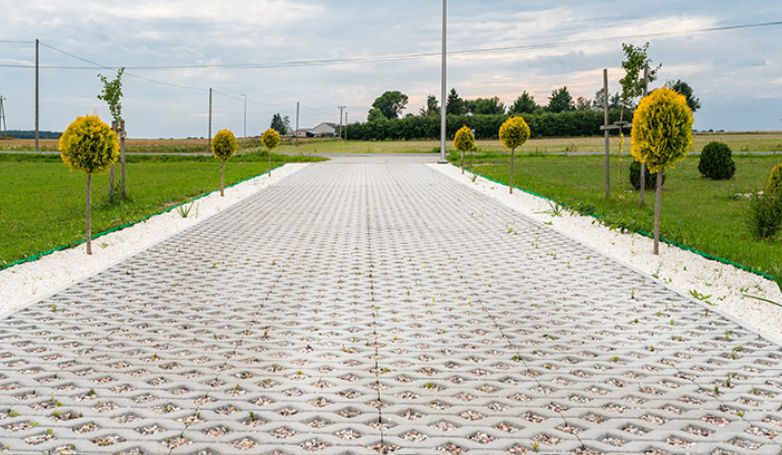
Permeable driveways, constructed from materials that allow water to pass through to the ground beneath, offer an eco-friendly solution to stormwater management. They can be made from porous concrete, permeable pavers, or plastic grids filled with gravel or grass. This alternative is ideal for reducing runoff and promoting groundwater recharge, combining functionality with environmental responsibility.

FAQs about a Tar and Chip Driveway

Take a look at these frequently asked questions about tar and chip driveways.

Can you tar and chip your own driveway?

DIY enthusiasts can tar and chip their own driveway with the right equipment and materials. However, it requires a bit of skill to ensure proper application and even coverage. For best results, some might prefer hiring professionals.

Can you seal a tar and chip driveway?

Yes, you can seal a tar and chip driveway, though it’s not commonly done. Sealing can enhance its durability and extend its lifespan. If choosing to seal, select a product compatible with tar and chip surfaces.

How long will a tar and chip driveway last?

A tar and chip driveway generally has a lifespan of 7 to 10 years. Its longevity can be extended with proper maintenance, including regular cleaning and addressing any damage promptly.

How thick should a tar-and-chip driveway be?

The recommended thickness for a tar-and-chip driveway is about 2 inches. This thickness ensures durability and the ability to withstand regular vehicular traffic without significant wear.

Is tar and chip cheaper than concrete?

Yes, tar and chip is generally cheaper than concrete. The materials and installation process for a tar-and-chip driveway are less costly, making it a budget-friendly alternative to concrete driveways.

Is tar and chip cheaper than asphalt?

Tar and chip driveways are usually comparable in cost to asphalt but can be slightly cheaper depending on local material and labor costs. They offer a similar level of durability and maintenance requirements, making them a cost-effective alternative.

Conclusion

Tar and chip driveways offer homeowners an excellent blend of affordability, durability, and aesthetic appeal, making them an attractive option for those seeking to upgrade their outdoor space. This method, combining the robustness of tar with the natural beauty of chip stones, provides a customizable solution that fits various home styles. With proper maintenance and installation, a tar and chip driveway not only enhances the property’s appearance but also offers a long-lasting surface. As we explore the cost, alternatives, and maintenance tips, it becomes clear that tar and chip driveways stand out as a versatile and practical choice for any homeowner.

Tim Dawson's Avatar

About the Author: Chris Hawk

Chris is a paver with more than 15 years' expertise in the field. He has established a reputation as an expert and trustworthy specialist with a track record of providing his clients with top-notch paving solutions.

Tarmac Driveway

Tarmac driveways are increasingly popular among U.S. homeowners. They’re known for their ease of installation and longevity, but some wonder if it’s the right choice for their homes.

Tarmac, short for ‘tarmacadam’, is a robust and cost-effective driveway material. Originating from John Loudon McAdam’s 1820 technique, modern tarmac combines a tar layer over a pavement base, topped with gravel. This composition ensures durability, sturdiness, and reduced dust. Tarmac driveways are easy to install, requiring less maintenance than other materials, making them an attractive option for quick, reliable, and long-lasting driveways.

To learn more about the costs, benefits, and potential drawbacks of tarmac driveways, let’s delve deeper into what makes this material a smart choice for homeowners.

How to Install Tarmac Driveway in 8 Steps

To guide you through this process, we’ve broken down the installation into eight detailed steps. Each step is designed to ensure your driveway not only looks professional but also stands the test of time. So, let’s roll up our sleeves and dive into the intricacies of laying a tarmac driveway that you can be proud of.

1. Clearing and Preparation

The worker is cleaning debris from the driveway before proceeding to install the tarmac

Before anything else, let’s thoroughly clear your future driveway area. This means more than just removing debris and vegetation; you’ll need to excavate the area to a suitable depth, which is usually around 200-250mm. This depth ensures that all topsoil, which is prone to swelling and shrinking, is removed. The aim here is to reach a level of subsoil that’s stable and less affected by weather changes.

It’s also a good time to think about the future: envision how water will run off your tarmac driveway to avoid puddles. You might need to plan for a slight slope or integrate drainage solutions. Precision in marking out the boundaries of the driveway ensures accuracy throughout the installation process. Consider using string lines or spray markers for this.

2. Sub-base Installation

The sub-base is crucial for a durable driveway. For standard driveways, a depth of 100-150mm is usually sufficient, but for areas expecting heavier vehicles, go deeper. The type of material used for the sub-base is vital. Materials like MOT Type 1 are commonly used due to their stability and ability to drain well.

After laying the sub-base material, it’s essential to compact it layer by layer, rather than all at once, to avoid any weak spots. This can be done using a vibrating plate compactor. Proper compaction ensures a more durable, longer-lasting driveway and reduces the risk of future sinking or distortion.

3. Geotextile Membrane

The worker is applying the geotextile membrane on the driveway

This step is often overlooked but is vital for longevity. The geotextile membrane acts as a barrier, keeping the sub-base separate from the soil below, which is important for preventing the driveway from sinking.

It also plays a role in weed prevention and aids in water management. When laying the membrane, ensure it covers the entire area and overlaps at the edges. Secure it in place to prevent movement during the installation of the upper layers.

4. Base Tarmac Layers

The foundational layer of a tarmac driveway is commonly crafted by blending coarse aggregates with bitumen. This crucial layer must possess adequate thickness, typically ranging between 50-100mm, to ensure it can effectively support the weight of vehicles. An essential aspect of this process involves laying the layer evenly and meticulously checking for uniform thickness to guarantee a well-constructed tarmac driveway.

Once laid, compacting this layer is crucial. A roller may be used for larger driveways to ensure an even and solid base. Remember, the quality of your base layer sets the tone for the rest of the driveway.

5. Binder Course Application

The worker is compacting the tarmac driveway with the roller

The binder course provides an additional layer of strength and binds the base layer to the surface layer. This layer should be around 40-60mm thick. When applying, it’s important to ensure an even distribution and to compact it thoroughly.

This middle layer also helps to even out any minor imperfections in the base layer and provides a smooth surface for the final layer.

6. Wearing Course Application

The top layer, or the wearing course, is what will be visible and subjected to the daily wear and tear. This layer is usually finer and includes smaller aggregates for a smoother finish. The thickness of this layer can vary but is generally around 25-40mm.

It’s important to spread this layer uniformly and compact it well to achieve a smooth, durable surface. The quality of the finish in this layer is crucial, as it affects both the aesthetics and the functionality of the driveway.

7. Edge Restraint

The tarmac was installed precisely thanks to the guides

Edge restraints are essential to keep the layers of your driveway intact. They provide a boundary and help to maintain the structure of the driveway. This can be done using various materials like bricks, stone, timber, or pre-formed concrete kerbs.

The key is to install them at the correct height and ensure they are firmly embedded in concrete. This step not only enhances the driveway’s appearance but also adds to its structural integrity.

8. Cooling and Setting

The final step is to allow the tarmac to cool and set properly. This is crucial for the tarmac driveway to harden and gain its full strength. The time required for this can vary depending on the weather conditions – cooler weather means a longer setting time.

It’s generally advised to keep the driveway free from vehicles and heavy equipment for at least 24-48 hours. This patience ensures that when you finally use the driveway, it is at its maximum strength and durability.

Remember, every step in this process plays a vital role in ensuring the overall excellence and durability of your driveway. By taking your time and concentrating on quality at each phase, you’ll create a driveway that’s not only functional but also aesthetically pleasing. Keep reading to discover the benefits of this material.

Benefits of Tarmac Driveways

A new tarmac driveway surrounded by plans

When considering a tarmac driveway for your home, it’s essential to understand the unique advantages it offers. Here are some key benefits to keep in mind:

Easy Installation

One of the primary reasons homeowners use tarmac for their driveways is that it is one of the easiest materials to install. Many homeowners will complete their tarmac driveway project within a single day, depending on the size of the driveway. The material is easy to lay, and it takes about 2 to 3 days to solidify or cure before it can be driven on.

Compared to other materials, this installation time is significantly short. For example, if you were to install a concrete driveway, you would have to wait around seven days for it to cure before you could drive on it. 

Low Cost

Tarmac is also a low-cost material, which is why so many homeowners prefer it over other options. In fact, it is one of the most cost-effective solutions on the market today. Compared to brick, concrete, sandstone, and other types of pavement slabs, you can save a good amount of money. 

Durability

A heavy vehicle parked above the Tarmac Driveway

Tarmac driveways, when poured and installed correctly, have a substantial lifespan. Under favorable conditions, they can endure for about 12 to 13 years, with many lasting even longer—up to 20 years or more—before requiring repouring.

Maintaining a tarmac driveway is relatively hassle-free, and numerous experts assert that these driveways practically take care of themselves. As a homeowner, your primary task is to ensure your tarmac driveway stays clean by removing dirt and debris regularly to preserve its fresh and new appearance. Additionally, it’s advisable to apply a sealant to your tarmac driveway every four or five years for optimal protection.

Smooth Surface

One of the standout benefits of a tarmac driveway is its incredibly smooth finish. This seamless surface results from the fine aggregates used in the top layer of the tarmac.

Not only does this make for a more pleasant driving experience, but it also contributes to a cleaner look and reduces the risk of tripping hazards. Additionally, the smoothness of tarmac is kinder to vehicles, leading to less wear and tear on tires and suspensions.

Versatility in Design

Tarmac driveways offer a surprising amount of design versatility. While the classic black is popular, there are options for different colors and finishes to match the style of your home and landscape.

You can also play with borders and patterns, using materials like bricks or stones to create a unique, personalized look. The flexibility in design means that a tarmac driveway can complement a wide range of property styles, from traditional to contemporary.

Disadvantages

A newly tarmac driveway with leaves on the surface

While tarmac driveways have several appealing features, it’s equally important to consider some potential drawbacks. Here are a few cons to be aware of:

UV Light

Tarmac is able to withstand heat pretty well, though UV light is one of its worst enemies. Constant UV exposure can cause this material to degrade, making it brittle. Eventually, if left without any care, potholes will start to appear. 

Beyond UV light, automotive oils such as petrol and diesel can be very damaging. Similar to UV light, these oils can loosen the binding and result in cracking. 

Weed Growth

Weed growth is a big problem that many tarmac driveway owners experience. If you have a crack in your driveway and you don’t repair it immediately, there is a good chance that weeds will pop up through it. When weeds start popping up through your tarmac’s cracks, they can make the cracks much bigger and more difficult to repair. 

Tarmac Driveway Cost

Cost ComponentAverage Cost
Material Costs$7 – $15/sq ft or $100 – $200/ton
Labor CostsVaries
Size of DrivewayDepends on size
Preparatory WorkVaries based on scope
Material Source and ContractorVaries

When delving into the financial aspects of installing a tarmac driveway, it’s crucial to have a comprehensive understanding of the various factors that contribute to the overall cost. On average, the expense for a tarmac driveway hovers around $4,500, but this figure can fluctuate based on several key elements.

Material Costs

The cost of tarmac material itself ranges from $7 to $15 per square foot. This price variation is influenced by factors such as the quality of the material, regional price differences, and any specific characteristics of the tarmac you might choose, like color or texture. If you opt to purchase tarmac by the ton, which is a common approach for larger projects, the price can be expected to fall between $100 to $200 per ton. This pricing can be affected by market demand, transportation costs, and the grade of the material.

Labor Costs

Labor costs are another significant component of the overall expense. The cost of labor can vary widely depending on the region, the expertise of the contractors, and the complexity of the installation. For instance, a driveway with intricate design features, slopes, or drainage requirements may necessitate more skilled labor, thus increasing the cost.

Size of Driveway

Additionally, the size of your driveway plays a pivotal role in determining the total cost. Larger driveways require more material and labor, thereby escalating the expenses. It’s also important to consider any preparatory work needed, such as excavation, leveling, or the removal of an existing driveway, as these can add to the cost.

Balancing Quality and Cost

Finally, the source of your materials and the choice of contractor can impact the overall price. Sourcing materials locally can sometimes reduce costs, while choosing a highly reputable contractor, though potentially more expensive, can ensure a higher quality and longer-lasting driveway.

How To Clean a Tarmac Driveway

The worker is showing how to clean the tarmac driveway

Effortlessly cleaning a tarmac driveway to maintain its pristine appearance demands minimal exertion. However, it is crucial to employ the correct cleaning approach to prevent potential damage to the base layer and surface.

One of the best approaches for cleaning a tarmac driveway is to sweep off any dirt and debris that are on the surface. If there is debris that you’re unable to get off using a broom, you can also hit your driveway with a bit of low-pressure water. 

We never recommend using a high-pressure water source, as this can remove loose stone chippings and create additional damage that is difficult to repair. 

How To Get Rid of Moss On a Tarmac Driveway

One of the things many tarmac driveway owners deal with, especially if they live in wet locations, is moss growth. Moss can present potential problems with your tarmac driveway, making it very slick and slippery to walk on or expanding cracks that can be difficult to repair. 

It’s best to get rid of moss at the source. Luckily, the solution to ridding your tarmac driveway of moss is very simple. 

Start by diluting some vinegar with water and spraying it onto the algae or moss deposits on your driveway. Let the vinegar and water solution soak for around 15 to 20 minutes before washing it off with low-pressure water. You can repeat this process every day for a week until the algae or moss disappears. 

If this vinegar and water solution doesn’t work, you can also try bleach or baking soda. 

How To Remove Oil From a Tarmac Driveway

One of our favorite DIY remedies for removing oil stains from a tarmac driveway is baking soda. Start by sprinkling a generous amount of baking soda atop your oil stain. To get it slightly wet, add a little bit of water. 

Allow the baking soda and water to soak in for a few minutes before brushing the stain with a cleaning brush in small circular motions until the stain begins rising. You can repeat this process as many times as you need if the stain doesn’t come up right away. 

Some other materials you can try this same method with include:

  • Cat litter
  • Coca Cola
  • WD-40 
  • Oven cleaner
  • Dish soap

How To Repair Cracks In a Tarmac Driveway

A new tarmac was installed over the concrete driveway.

If you’re dealing with cracks in your tarmac driveway that are less than ¾ inch wide, you can use an asphalt patching product to repair it. 

Start by cleaning your surface to get rid of dirt and debris. Make sure the crack itself is clean too. You can use a screwdriver or wire brush to clean out the crack. Remove any remaining debris using a low-pressure hose. 

Next, prep your filler according to the instructions on your bottle. Once the filler is ready, fill the crack flush to the surrounding tarmac and smooth it out to that the height is the same as the rest of your driveway.

Tarmac Driveway Ideas

Here are some ideas that can inspire you for your tarmac driveway!

This multi-car driveway uses tarmac to provide plenty of space while blending in with the road out front.

Surrounded by paver stones, this tarmac driveway blends a modern and traditional look, accompanying the red brick material in a uniquely contrasting manner.

This tarmac driveway is sectioned using brick, breaking up the monotony of what would otherwise be a long, plain, black driveway.

With stones around the circumference and driveway lights to lead the way, this tarmac driveway has a more upscale aesthetic.

This tarmac driveway provides contrast to the surrounding gravel and brick material, perfect for a simple yet aesthetically-pleasing look. 

FAQs about Tarmac Driveway

Here are some frequently asked questions to help you make an informed decision.

Can You Resurface a Tarmac Driveway?

Yes, you can resurface a tarmac driveway. While there are some methods for resurfacing on your own, these depend on the size and quality of your driveway. If your tarmac driveway is in need of serious repair, we recommend getting in touch with a resurfacing professional. 

How Long Do Tarmac Driveways Last?

There are several factors that have an impact on how long a tarmac driveway will last. Some of these factors include: 

  • The climate of the surrounding area
  • The amount of traffic the driveway handles
  • The general wear and tear of the driveway

If you have a tarmac driveway that is under relatively good circumstances, such as nice weather and low-volume traffic, you can expect it to last anywhere between 12 and 13 years. 

Is tarmac cheaper than concrete?

Tarmac generally tends to be more cost-effective than concrete, especially when considering initial installation costs. Concrete can be more expensive due to its material costs and the labor-intensive process of laying it. However, the total cost can vary based on factors like the project size, local material prices, and labor rates.

Is tarmac good for driveways?

Absolutely, tarmac is an excellent choice for driveways. It’s durable, long-lasting, and can withstand heavy loads, making it ideal for both residential and commercial properties. Its smooth surface provides good traction, and it’s relatively easy to maintain. Additionally, tarmac’s ability to expand and contract with temperature changes helps prevent cracking, a common issue in some other driveway materials.

How much will 1 ton of tarmac cover?

 The coverage area of 1 ton of tarmac can vary based on the thickness of the layer being laid. On average, 1 ton of tarmac can cover about 8 to 10 square meters at a depth of about 50mm. It’s important to calculate the area and depth accurately for your specific project to determine how much tarmac you’ll need.

What is a cheaper alternative to tarmac?

Gravel is a popular and more affordable alternative to tarmac. It’s easier to install and doesn’t require specialized equipment. Other cost-effective options include asphalt, which is similar to tarmac but generally cheaper, and resin-bound surfaces, which offer a balance between cost and aesthetics. Each alternative comes with its own set of benefits and limitations, so it’s important to weigh these against your specific needs and budget.

Final Thoughts

Tarmac is a wonderful material for paving driveways and is quick and easy to install, perfect for any homeowner looking for a cost-effective driveway.  We hope you feel more confident in your driveway-paving choice after reading our article. Make sure to get in contact with one of the many top-rated companies in our paving network here at Paving Finder.

Tim Dawson's Avatar

About the Author: Chris Hawk

Chris is a paver with more than 15 years' expertise in the field. He has established a reputation as an expert and trustworthy specialist with a track record of providing his clients with top-notch paving solutions.

replace asphalt driveway

Considering replacing your asphalt driveway? Understand the causes of degradation and why opting for a full replacement offers a more lasting and effective solution than mere repairs.

A well-executed asphalt driveway replacement not only revamps your home’s curb appeal but also addresses underlying issues causing deterioration. By understanding factors like weather exposure, heavy usage, and inadequate maintenance, you can make informed decisions. Choosing to replace ensures a robust, long-lasting driveway, free from the recurring issues associated with temporary fixes.

Explore our comprehensive 12-step guide on replacing your asphalt driveway, turning this daunting task into a manageable and rewarding home improvement project.

How to Replace an Asphalt Driveway

The asphalt of the driveway has been completely replaced

Revamping your driveway with a fresh layer of asphalt can do wonders for both functionality and curb appeal. Whether you’re tackling this as a DIY project or hiring professionals, the process involves several key steps to ensure a durable and aesthetically pleasing result. From meticulous preparation to the final touches, let’s break down the essential stages of replacing your asphalt driveway to guide you through the journey of transforming your driveway into a resilient and eye-catching feature of your home.

1. Preparation

Start by gathering all the tools and materials you’ll need – everything from safety gear to the asphalt mix. Measure the area you plan to replace, get any required permits, and give your neighbors a heads up about potential disruptions. Adequate preparation sets the stage for a smoother process, ensuring you’re well-equipped for the task ahead.

2. Demolition

Fire up the heavy machinery and systematically remove the existing asphalt. Responsibly dispose of debris and take a close look at the underlying layers for any needed repairs. A thorough demolition lays the foundation for a successful driveway replacement, and it’s the first step in transforming your driveway.

3. Grading and Excavation

Focus on achieving the perfect slope and drainage by excavating the area to the required depth during the process of replacing your asphalt driveway. Get rid of any soft or unstable soil, setting the stage for a stable foundation. Precision in grading and excavation ensures longevity and functionality, ensuring your newly replaced asphalt driveway stands the test of time.

4. Subbase Installation

Lay down a robust subbase material, like crushed stone, to create a solid foundation. This layer is key to supporting the weight and traffic that your asphalt will endure over time. Think of it as the backbone of your new driveway, providing the necessary strength for the layers to come.

5. Edge Restraints

Install edge restraints along the perimeter to prevent any material shift. This not only adds to the structural integrity but also contributes to a polished and well-defined appearance. Picture it as the frame of your driveway, holding everything together and adding a touch of finesse.

Read more: Infrared Asphalt Repair

6. Base Course Placement

Lay a substantial base layer of coarse asphalt, providing additional support and stability. This is the heavy lifter of the process, fundamental to the overall strength and durability of your new driveway. Think of it as the solid foundation upon which everything else will be built.

7. Asphalt Installation

Apply the hot mix asphalt evenly across the prepared surface, using professional equipment for precision. Ensure a smooth and level application – it’s not just about looks; it’s about functionality too. This step is where your new driveway starts to take shape.

8. Compaction

Roll up your sleeves and use a heavy roller to systematically compact the material during the process of replacing your driveway. This step eliminates air gaps and promotes a dense, durable surface. Thorough compaction is vital for preventing future issues, ensuring your replaced asphalt driveway stands strong against the tests of time and traffic.

9. Curing

Give your newly installed asphalt the time it needs to cure properly. This critical step ensures the material achieves optimal strength and stability before regular traffic takes its toll. Think of it as letting your driveway build up its strength before entering the big leagues.

10. Sealing

Protect your investment by applying a high-quality sealant. This shield defends your asphalt from the damaging effects of UV rays, water, and other environmental factors. Proper sealing not only enhances longevity but also keeps your driveway looking sharp and ready to face the elements.

11. Striping and Marking

If you fancy some flair, add striping and markings for designated parking spaces or other purposes. This step not only adds functionality but also enhances the visual appeal of your driveway. Think of it as putting the finishing touches on your freshly paved canvas.

12. Cleanup

Complete the process by clearing away any excess materials, tools, and debris from the site. Leave the area in a clean and organized state – it’s the final touch for a successful asphalt driveway replacement, and it’s the last step before you can proudly enjoy your revamped driveway.

Benefits of a Replaced Asphalt Driveway

The homeowner found a huge improvement from replacing the old asphalt

Investing in a replaced asphalt driveway brings a multitude of benefits, enhancing not only the visual appeal of your property but also its overall functionality. The decision to upgrade your driveway goes beyond mere aesthetics, offering advantages in terms of durability, maintenance, property value, and environmental considerations.

Enhanced Aesthetics

A replaced asphalt driveway often provides a fresh and appealing look to your property. The new surface can contribute to the overall visual appeal, complementing the architecture of your home.

Improved Durability

A new driveway tends to be more durable than an older, worn-out one. It can better withstand the elements, heavy traffic, and fluctuations in temperature, leading to a longer lifespan for your driveway.

Lower Maintenance Costs

It generally require less maintenance compared to older ones. With proper installation and regular care, you can reduce the need for frequent repairs and save on maintenance costs over time.

Elevated Property Value

Upgrading your driveway can enhance the overall value of your property. Potential buyers often appreciate well-maintained and aesthetically pleasing features, such as a newly replaced asphalt driveway, which can contribute to a higher resale value.

Environmentally Friendly

Depending on the materials used, a replaced asphalt can be more environmentally friendly. Some modern paving materials are designed to be more sustainable, reducing the environmental impact associated with traditional driveway construction.

Signs your asphalt driveway needs repairs

There has a cracks on asphalt driveway

The present condition of your driveway surface can tell a lot about whether you should resurface it or do a complete overhaul and replacement. The following guide will lead you through some of the warning indications that you need to replace asphalt driveway for your property:

Standing water

Potholes, large cracks, and portions of a sunken asphalt driveway can all collect rainwater. So, if you allow water to penetrate the foundation of your driveway, it can result in permanent structural damage.

At the same time, standing water can trigger the surface of your driveway to erode if it cannot drain correctly. Although standing water is not only an indication of structural damage, it can also lead to more pavement issues if left unchecked.

In a nutshell, poor drainage can signal that you need to replace your driveway. 

Alligator cracks 

When a sequence of overlapping cracks appears in your driveway, they begin to separate the pavement into small, fragmented portions. This issue is what is referred to as alligator cracking.

This type of crack could indicate that the subbase beneath your pavement is no longer stable. And when this lower layer breaks, it can lead to damage to the surface layer. 

If this type of problem occurs, it is an indication that it’s time to rip out the old driveway and replace it with a new sub-base and topcoat. 

Raveling

Asphalt is made up of a binder and aggregate mix. However, the aggregate can break away from the binder with time. This is evident when loose gravel is on the driveway’s surface, or you may notice that your driveway is beginning to pit.

Raveling can be treated, so address it right away if you notice it early enough because if the situation isn’t addressed, it can quickly become out of hand. Initially, raveling loosens fine aggregate particles, but the surface gets rougher when larger pieces split away. You can either choose to replace asphalt driveway if resurfacing or seal coating can not remedy the issue. 

Missing chunks

Large cracks that evolve into alligator cracks can rip pieces of your driveway apart, leading to large potholes, which is the last thing anyone wants on their asphalt. 

These spots are hazardous to automobiles and small children or homeowners who may fall or injure themselves when crossing the driveway.

Therefore, if you notice a larger chunk falling off your driveway, it may be time to replace your asphalt driveway.

When Should You Seal, Resurface, or Replace Your Asphalt Driveway?

The workers are busy installing the new asphalt driveway.


Resurfacing, seal coating, or replacing is what you should consider before your driveway issues get any worse.

Here are more details on when your asphalt driveway should be sealed, resurfaced, or replaced, so you can figure out which type of repairs your property requires:

Sealcoat

Sealcoating is the process of applying a liquid sealant to an old asphalt pavement surface in order to seal it and fill cracks. The procedure protects the sublayers and base from the elements while also delaying the need for a new driveway.

You should consider seal coating if the lustrous appearance of your asphalt driveway is fading. You should also consider applying a sealant if there are minor surface flaws, like cracks, that render your driveway uneven or rough in appearance.

Resurface

Resurfacing is the process of removing the top layer of asphalt and replacing it with a new one. Resurfacing your driveway can help it last an additional eight to fifteen years. It is different from when a contractor replace asphalt driveway.

When your driveway has enormous ruts, significant cracks, and potholes but is still functional, you should consider resurfacing it.

Replace

When an asphalt driveway is replaced, the whole surface is demolished and removed to the ground level. All of it will be taken out and replaced with new material.

So, if your driveway has been fully damaged by negligence, weather, or heavy use to the extent where it is no longer functional, you will require a complete replacement. Concurrently, you can also consider a replacement if you want to make substantial modifications to your property. For example, suppose you want to shift your driveway to a different location. 

Installing a new driveway offers a smooth,  comfortable, safe surface that you will enjoy every day.

What is the Cost to Replace Asphalt Driveways

FactorRange/Cost
Cost per Square Foot$2 – $5

Asphalt driveways typically cost between $2 and $5 per sq foot to lay. However, many factors influence the pricing, including location, material quality, the required depth of material, driveway size, and contractor.

Asphalt driveway installation costs around half as much as concrete, making it a cost-effective choice for homeowners looking to make the most of their budget. This price may be the same or differ from when you want to replace asphalt driveway; ultimately, a seasoned paving contractor can advise you accordingly.

FAQs about Replace Asphalt Driveway

Sea view from asphalt driveway at the modern house.

Considering replacing your asphalt driveway but have questions about the process? Delve into these frequently asked questions for insights into overlaying, resurfacing, and the nitty-gritty of DIY removal.

Can you put new asphalt over old asphalt?

Yes, it’s possible to overlay new asphalt over old asphalt if the existing surface is in reasonably good condition. However, for a more lasting result, it’s often recommended to remove the old layer and address any underlying issues.

How do you resurface an old asphalt driveway?

To resurface an old asphalt driveway, clean and repair any damage, apply a bonding agent, add a new layer of asphalt, and then compact it. This process can extend the life of the driveway and improve its appearance.

How do I remove an asphalt driveway myself?

To remove an asphalt driveway yourself, use a jackhammer or heavy-duty equipment to break it up. Afterward, clear the debris, and consider renting a dumpster for disposal.

What machine is used to remove asphalt?

A milling machine or asphalt zipper is commonly used to remove asphalt. These machines grind and remove the old asphalt, allowing for a clean surface for replacement.

What happens to asphalt when it is replaced?

When asphalt is replaced, the old material is typically removed and recycled. The reclaimed asphalt can be reused in new projects, contributing to sustainability in road construction.

How long does a asphalt driveway last?

The lifespan of an asphalt driveway varies depending on factors like maintenance, climate, and usage. On average, a well-maintained asphalt driveway can last 15 to 20 years or more. Regular sealing and timely repairs can extend its longevity.

Conclusion

Replacement is a good choice, especially if your asphalt driveway has deteriorated to the extent that it can not be managed. However, it is wise if you seek the assistance of an expert paving contractor to advise you accordingly. A professional contractor will advise you on the exact installation cost, the perfect timing for the project and can also help you carry out the project so it can withstand the test of time.

Tim Dawson's Avatar

About the Author: Chris Hawk

Chris is a paver with more than 15 years' expertise in the field. He has established a reputation as an expert and trustworthy specialist with a track record of providing his clients with top-notch paving solutions.

tar and chip driveway last

Tar and chip driveways, often chosen for their cost-effectiveness and rural charm, are becoming increasingly popular. But how long do these budget-friendly surfaces last?

A tar and chip driveway, when built and cared for correctly, can last from 7 to 10 years before requiring a new surface layer. The durability of this type of driveway hinges on sound construction, correct installation, and consistent upkeep. Common misconceptions or incorrect implementation often lead to problems, not necessarily the inherent qualities of the tar and chip technique.

Explore the nuances of tar and chip driveways, from cost benefits to maintenance tips, and debunk common myths about this durable surfacing option.

Construction Process of Tar and Chip Driveways

A Tar and Chip Driveway was just built by a paving company

The construction of Tar and chip driveways is relatively straightforward compared to other driveway materials. The foundation, being the most crucial part, involves preparing a base layer that will support the driveway. This base usually consists of compacted dirt or stone, which is graded level and densely compacted, setting the stage for the Tar and chip process.

Application of Hot Liquid Bitumen

The initial step in the Tar and Chip process involves applying hot liquid bitumen asphalt. This application, depending on the driveway size, can be done using a machine or manually with a wand-like sprayer. The hot liquid bitumen acts as an adhesive layer for the chips.

Laying the Chips

After the application of hot liquid bitumen, the “chip” is applied. The chip material varies but commonly includes ground and chipped recycled asphalt or concrete, known as “filings.” The thickness of this layer is typically around half an inch, conforming to the specifications set by the contractor and homeowner.

Compacting and Layering

Once the stone or chosen material is spread over the hot tar, it’s compacted into the bitumen, either manually or by machine, to ensure a stable and uniform surface. In some cases, based on the specific Tar and Chip application and desired specifications, an additional layer may be added to enhance the driveway’s durability and appearance.

Ensuring Your Project is Done Right The First Time

A beautiful house with clean and smooth tar and chip driveway.

Finding a reputable contractor that is experienced in tar and chip applications is very important.  Get at least two estimates, three is better. By the third estimate, you should be able to see the scope of the job, understand the basics of what needs to be done, what will be done, what and how much materials you will need and about how much it should cost.

A quality contractor may cost you a little bit more money but it is worth it in the long run. 

You want to ensure that all the steps of the process are done- correctly, so that your driveway will last you as long as possible and save you some headaches a couple months down the road.

If you are Tar & Chipping over an existing surface, for example, a cracking asphalt driveway, that is 15 years old, be ready for some additional expenses in prepping the old surface . Still,  it will be considerably less expensive than repaving or continuously repairing the old surface. A reputable company will be able to transform your driveway into your dream-way, in no-time.

Read more: Brick Driveway Edging

Characteristics of Tar and Chip Driveways

Example of an optimally constructed tar and chip driveway

Tar and chip driveways offer a distinctive alternative to conventional paving options. They strike an appealing balance between cost-effectiveness and functionality, making them a popular choice for many homeowners.

Cost-Effectiveness

A key benefit of choosing a Tar and Chip driveway is its cost-effectiveness. This option stands out as more affordable than alternatives such as asphalt or concrete, offering a cost-efficient solution while still maintaining quality.

Traction and Weather Resistance

They are known for their excellent traction, especially in inclement weather conditions. The textured surface of the chips provides a better grip underfoot, reducing the risk of slips and falls, and making it a safer option during rainy or snowy weather.

Customization Options

One of the unique features of this type of driveways is the wide range of customization they offer. Homeowners can choose from various materials for the chips, including different colors and sizes, to match their aesthetic preferences. While the possibilities are not endless, the array of choices allows for significant personalization of driveway appearance.

Ease of Adding Layers

The structure of these driveways allows for the easy addition of layers. This feature is particularly beneficial for maintenance or when a refresh of the driveway’s appearance is desired. Adding layers can be done quickly and efficiently, ensuring minimal disruption and extended driveway longevity.

Versatility in Application

Tar and chip driveways can be applied over various surfaces, making them an adaptable option for different settings. This versatility means that they can be used to resurface old driveways or applied over different foundational materials.

Resurfacing Old Driveways

An appealing aspect is the ability to resurface existing driveways with this method. It’s a viable option for revitalizing an old, worn-out driveway. However, it’s crucial to engage a reputable contractor to address any underlying issues such as weak or damaged areas before resurfacing. Proper preparation ensures the durability and effectiveness of the Tar and Chip application.

Downfalls of Tar and Chip Driveways

A smooth tar and chip driveway surrounded by pants and grass.

While tar and chip driveways offer a unique aesthetic and are a cost-effective paving solution, they do come with certain limitations that need consideration. Below, we explore some key challenges associated with this type of driveway, ensuring you have all the information to make an informed decision.

Understanding Maintenance Requirements

When considering driveway surfaces, it’s important to note that tar and chip variants require more upkeep compared to other materials, except for basic options like dirt or gravel. This fact is essential for homeowners to understand when selecting the right material for their driveways.

Resurfacing Frequency and Longevity Concerns

One key aspect to remember is that these driveways typically need resurfacing about every decade. This is due to their quicker deterioration rate compared to alternatives like asphalt or concrete. Such a trait implies that, over time, the overall cost to maintain a tar and chip driveway might exceed that of more durable materials.

Comparative Overhead Costs

While initial installation might be cost-effective, the long-term financial commitment due to frequent maintenance should be a consideration for those contemplating this option for their driveways. The aggregate expense over the years can surpass that of maintaining asphalt or concrete surfaces.

By understanding these nuances, homeowners can make informed decisions that align with their long-term objectives and budget considerations.

FAQs about Tar and Chip Driveway Last

A beautiful tar and chip driveway

Let’s dive into some frequently asked questions about tar and chip driveways, addressing common queries and concerns to help you make informed decisions for your paving needs.

Is tar and chip good for a driveway?

Absolutely! Tar and chip driveways offer a unique blend of durability and aesthetic appeal. They’re particularly great if you’re aiming for a more rustic look. Plus, their rough texture provides excellent traction, which is a bonus for areas that experience icy or wet conditions.

Is tar-and-chip worth it?

It sure does. When you weigh the costs against the benefits, tar-and-chip driveways are a win. They’re less expensive than asphalt or concrete and offer a charming, distinctive appearance. Maintenance might be a bit more frequent, but the overall cost-effectiveness is hard to beat.

Can you pour concrete over tar and chip?

Technically, yes, you can lay concrete over a tar and chip driveway. However, it’s not a straightforward process. The key is ensuring that the existing surface is stable and capable of supporting the concrete layer. It’s always wise to consult with a paving expert to ensure the best approach for long-lasting results.

Conclusion

In conclusion, a well-constructed and maintained tar and chip driveway can last 7 to 10 years. The construction process involves applying hot liquid bitumen and a layer of chips, offering cost-effectiveness, traction in various weather conditions, and customization options. Finding a reputable contractor is crucial for longevity. While tar and chip driveways may not outlast other surfaces, initial savings allow for future resurfacing.

Despite their appeal, they require more frequent maintenance, prompting consideration of long-term costs. Understanding these nuances empowers homeowners to make informed decisions aligning with both aesthetics and budget considerations.

Tim Dawson's Avatar

About the Author: Chris Hawk

Chris is a paver with more than 15 years' expertise in the field. He has established a reputation as an expert and trustworthy specialist with a track record of providing his clients with top-notch paving solutions.

Driveway Lights

Driveway lights enhance safety and aesthetics, offering innovative options like solar power and Bluetooth controls. This guide illuminates the best choices for your home’s nighttime allure.

When selecting driveway lights, consider factors like power source, brightness, style, and control features. Solar-powered lights are eco-friendly and low-maintenance, while Bluetooth-enabled options offer convenience through remote control. Look for lights that complement your home’s architecture and provide adequate illumination for safety. Durability and weather resistance are also key for longevity. This buying guide will focus on these aspects to help you make an informed decision.

Discover the perfect balance of functionality and charm with our expert recommendations for driveway lights. Read on to discover our selected products to transform your driveway into a welcoming path.

1. Siedinlar Solar Driveway Lights

Siedinlar Solar Driveway Lights

> See the product here

These “road markers” provide a potent but friendly source of light from the ground up. They are solar-powered LED lights with enough battery capacity to provide up to 15 continuous hours of lighting.

The design is surprisingly elegant for those who bother to look closely. However, they were created to be discreet: less than an inch high, the Siedinlar lights are easy to hide along a gravel pathway or on the sides of the driveway itself. They are made from pretty stiff metal and are ranked as IP68 waterproof, so there is no need to worry about stepping on them or setting a nearby sprinkler.

This model comes in two versions: a white-light and a blue-light one.

ProsCons
Easy to installRequire additional batteries to operate the timer
Step resistantThe ON/OFF switch is hard to find
Will resist rain, blizzard, or intense heat
Up to 15 hours of continuous lighting

2. URPOWER Solar Lights

URPOWER Solar Lights

> See the product here

The URPOWER solar lights are typical “stake lights”: that is, they are mounted on thick styrene stakes, with the light and the photovoltaic cells resting on top, joined by a resilient hinge. This provides them with two significant advantages:

  • They are straightforward to install: just stick them on the ground
  • You can adjust the angle of the bulb and the cell easily, depending on what you need.

The LED bulbs can provide up to 10 continuous hours of light, provided they remain under direct sunlight. However, they will still get 6 hours of energy if kept under partial light. The URPOWER lights are also IP64 waterproof so that they can resist water and rough weather. 

ProsCons
ResilientNo timer setting
Easy to installNo ON/OFF switch
Can be adjusted separately

3. Happybuy Solar Driveway Lights

Happybuy Solar Driveway Lights

> Click here to see the product

These Happybuy Driveway Lights are, at first glance, very similar to the Siedinlar ones. However, they are equipped with a set of screw holes, screws, and adhesives, which adapt to a broader array of floor types. 

These solar-powered offer a very decent amount of light through two separate rows of LED bulbs. These are available in blue, white, green, orange, and red lights. They can provide up to 72 consecutive hours of light, visible for over 870 yards. They provide a safe and cost-effective option to make your driveway safer during bad weather. However, changing the light colors also makes them great as a decorative accent for pool decks and balconies.

The case itself has an IP68 waterproof rating and can handle up to 20 tons of direct weight.

ProsCons
Very resilient and weather-resistantNo ON/OFF switch
Easy to installThe outer case feels plasticky
Can remain on for three days straight

4. GardenBliss Solar Lights for Outdoor Pathway

GardenBliss Solar Lights for Outdoor Pathway

> See the product here

The GardenBliss solar light set is an efficient set of solar-powered LED lights. At first glance, they do not have much in the way of bells and whistles. Yet, thanks to their sleek design and quality finish, they provide an exquisite option for anyone interested in landscaping

Each small lamp is mounted on top of an adjustable stake, between 8 to 12 inches long. The lamp will offer light at a full 360-degree radius and hides the photovoltaic cell and the light sensor on top. The lights will turn themselves on automatically as soon as dusk sets in but won’t be affected by nearby lamps. 

ProsCons
Adjustable stake lengthNo ON/OFF switch
Long-lasting batteryVery light
Elegant

5. JACKYLED Solar Driveway Lights

JACKYLED Solar Driveway Lights

> Click here to see the product

These driveway lights are solar-powered, small, and discreet but still provide a decent amount of light once activated.  They can last for up to 72 consecutive hours after 10 hours of charging.

Each light comes inside a die-cast aluminum case, featuring the photovoltaic cell on top and two bright LED bulbs on each side. Each case is less than an inch tall, and each light provides up to 500 lumens of white light. They need to be screwed onto wood floor panels or asphalt directly – and the latter may be difficult to do by yourself.

ProsCons
Sturdy constructionThey only come in white
Very bright illuminationNeed to be pre-charged in direct sunlight for three days before first use
Includes screws

6. Solpex Silver Solar Driveway Lights

Solpex Silver Solar Driveway Lights

> Click here to see the product

The combination of stainless steel stakes and cold white lights provides the Solpex Solar driveway lights with a futuristic appeal. This is a pretty budget-friendly option and will work great if you want to create a path through a big garden.

The lights themselves only provide up to 8 consecutive hours of light after a full charge, which may not be enough for the winter. Although the stakes themselves are solid and garden-friendly, the photovoltaic cell on top of the light is left a bit unprotected: make sure not to touch it directly.

ProsCons
LightShort per-charge life
Easy to installThe photovoltaic cells are delicate
The polished steel finish makes them elegant

7. TomCare Solar Lights Upgraded

 TomCare Solar Lights Upgraded

> You can see the product here

Why bother with flammable tiki torches when you can have a solar version that looks almost the same? The TomCare solar lights were created for anyone who likes the warm glow of fire around their garden but doesn’t want to deal with the extra risk

Each torch has an additional ground stake, extending the pole’s length from 32 to 43 inches. The lamp is covered with a mesh of ABS material, which hides a rich yellow-orange LED bulb. Beneath the lamp, there is an ON/OFF switch that also allows you to set them to “flickering mode.” When flickering, the mesh and the light color will make them look like real fire torches.

ProsCons
Tall and resilientThe flickering effect shortens the battery life
Up to 12 hours of consecutive lightHarder to install with additional stake (if desired)
“Fire torch” flickering effect

8. Signature Solar Garden Lights

Signature Solar Garden Lights

> Go to the product

Small, budget-friendly, and easy to use, the Signature Solar Garden lights are just the right height to highlight your flower beds and garden paths. 

Each small stake lamp is rain, moisture, and snow resistant. They provide up to 15 lumens in all directions. They do not have an ON/OFF switch, so instead, they will turn on automatically at sunset, thanks to the sensors located right below the photovoltaic cell. 

The stakes themselves have a smooth finish, reminiscent of polished steel. The lamps look minimalistic and chic. They provide white light only, but the lamps can be black or silver.

ProsCons
Budget-friendlyThe bulbs provide less light than competing brands
Resistant to extreme weatherVery light and could be knocked off by the wind

9. VOLISUN Solar Driveway Lights

VOLISUN Solar Driveway Lights

> Click here to see the product

With these driveway lights, VOLISUN chose to privilege more light for a longer time: with 6 LED bulbs per light and the ability to stay active for up to 5 consecutive days, these are an outstanding option for commercial spaces or sports fields. 

The case is slightly taller than those of most other driveway lights, which makes them less discreet. They only provide white light. These lights are all IP67 waterproof, moisture-proof, and rustproof. They can resist up to 20 tons of pressure. Due to their vast battery capacity, you can only charge them fully with direct sunlight.

ProsCons
ON/OFF switch for light sensing modeTall and bulky
Up to 5 days of continuous operation
Can be screwed onto the floor or stuck with stone adhesive

10. Moonrays Richmond Solar Path Lights

Moonrays Richmond Solar Path Lights

> See the product

The Moonrays Richmond solar path lights try to honor their name from a pure design standpoint: they look ideal for creating the sort of romantic nuance that we associate with the moon. Rather than bright yellow lights, they offer 30 lumens of warm white light. The lamp is designed to provide a 120-degree beam angle, which can still illuminate a pathway thoroughly but leave the rest at a more discreet level of twilight.

Each stake is just over 18 inches tall, providing a knee-high source of light that won’t get lost in your flower beds. They can run for up to 8 hours after being fully charged.

ProsCons
Well-designed and unusualShort run time of only 8 hours
30 lumens of light per lampCan only be installed on soft earth
Provide light up to 48 inches away

11. SmarketBuy Solar Lighting for Driveways

SmarketBuy Solar Lighting for Driveways

> Go to see the product

The SmarketBuy solar dock lights are meant to be durable and practical rather than beautiful. However, you can hide the slightly blocky casing and compensate for the slightly aggressive white light they produce with proper landscaping.

Each dock light needs 8 hours of continuous sunlight for a full charge. Afterward, they will stay lit for up to 72 consecutive hours. They are equipped with crystal light photovoltaic cells, which last longer than those featured on cheaper models.

ProsCons
Very weather-resistantThey don’t look as beautiful as they could
Long run time
Short recharge time

12. SOLMORE Solar Driveway Lights

SOLMORE Solar Driveway Lights

> Click here to see the product

If you are looking for a more futuristic look that will fit a garden driveway and a pool area with the same ease, consider the SOLMORE driveway and dock lights.

Each dock light includes 6 LED blue light bulbs (3 per side) and a wide, light solar panel on top. They require 12 consecutive hours of bright (but not necessarily direct) sunlight for a full charge, and they can provide up to 10 hours of light at night. The aluminum frame is resistant and rated IP68 waterproof and shockproof.

ProsCons
Can take heavy loads and direct rainfall or hailRequire a long charge time
Provide very bright lights
Great for road safety and pool decks

13. Voona Solar LED Outdoor Lights

Voona Solar LED Outdoor Lights

> Click here to see the product

Though a 360-degree beam may offer the best safety standard for roads or shores, regular gardens can often benefit from more creative solutions. The Voona Solar LED outdoor lights provide an exciting alternative thanks to their delicate “sunray” pattern. This can be used to create fascinating patterns around a lawn or a flat court.

Beyond the style touches, the Voona lights are functional and efficient. Each one can provide only 6 lumens. They compensate for this because it only takes them 8 hours to recharge fully and provide over 24 hours of continuous lighting. Each stake is 15 inches long, and you can unscrew the spike from the rest of the lamp for easier removal.

ProsCons
Beautiful sunray patternOnly 6 lumens of light
Short recharge timeNo ON/OFF switch
Light and resilient

14. Moonrays Payton LED Solar Path Lights

Moonrays Payton LED Solar Path Lights

> Go to the product

The Moonrays Payton model uses much of the same hardware as the Richmond model and offers a similar construction and durability. They also use the same type of LED bulb and battery. The main difference lies in the lamp: the Peyton model replaces the smooth glass cover with a “hammered glass” one. This creates a “still water” look for the light, which will appear textured with tiny bubbles.

Each lamp can illuminate an area of up to 12 inches and withstand rain, snow, and dust.

ProsCons
Weather and dust resistantOnly available in warm white
Easy to installNo ON/OFF switch
The “hammered glass” lamp creates a softer atmosphere

15. GIGALUMI Solar Walkway Lights

GIGALUMI Solar Walkway Lights

> Click here to see the product

Sleek and discreet, the GIGALUMI solar walkway lights are more suited to walking paths than proper driveways. However, if you have an eye for exterior décor, you will find that their minimalism and color options offer a lot of potential.

These lights are available in cold white, warm white, a multicolor pack (green, red, yellow, and blue), and color-changing versions. They can provide up to 8 hours of continuous illumination. 

ProsCons
Easy to installShort run time
Small and lightThey feel frail
Many color options

16. HGTV LED Solar Outdoor Path Lighting

HGTV LED Solar Outdoor Path Lighting

> Go to see the product

Well-constructed and beautiful, these outdoor path lighting option stays true to its brand. HGTV paid a lot of attention to the design details, although the hardware is still acceptable. These lights can offer up to 3 lumens each, and they can stay on for ten consecutive hours.

However, the lamps and stakes are made entirely from stainless steel, with an oil-rubbed finish. The glass lamp is slightly textured, which provides the outgoing light with extra warmth.

ProsCons
Beautifully constructed, with great attention to detailOnly 3 lumens of light each
Easy to install and removeOnly 8 hours of run time
The stakes are resilient and can handle shock, bangs, and rain

17. CHINLY Waterproof Solar Driveway Lights

CHINLY Waterproof Solar Driveway Lights

> Click here to see the product

Driveway lights are rarely as used for décor as garden stakes: they often find their place around driveways and steps. Because of these, most models stick to bright, cold white or blue lights. Sensing this gap in the market, CHINLY made their lights available in warm white and a multicolor pack.

These lights are ranked as IP67, so they are waterproof and can withstand heavy blizzards or intense heat. They can provide up to 40 consecutive hours of light but need 15 hours of sunlight for a full charge.

ProsCons
Available in different colorsRequire long charging
Resilient and weather-proofNeed drilling
A long run time of up to 40 hours

18. APONUO Outdoor Solar Lighting for Driveways

APONUO Outdoor Solar Lighting for Driveways

> Click here to see the product

If you are interested in the brightest possible lights or live somewhere with very harsh winters, the APONUO may be the most efficient choice for you. This is because these driveway lights only need 4 hours of direct sunlight to charge fully. Then, they can stay on for up to 72 consecutive hours. In addition, each lamp is made up of 6 LED bulbs and is visible from a distance of 875 yards.

ProsCons
Visible from a very long distanceNot very pretty
Large battery capacity, provides up to 72 hours of consecutive operationOnly available in cold white
They charge quickly

19. MAGGIFT Solar Outdoor Solar Driveway Lights

MAGGIFT Solar Outdoor Solar Driveway Lights

> Click here to see the product

Driveway lights may be great for road safety – but that doesn’t mean they cannot be made more discreet. If that’s what you need, the MAGGIFT disc light may be an acceptable compromise. Ultra-slim and completely smooth, each one of these “discs” is surrounded by a series of 12 LED lights.

The MAGGIFT lights are also flat enough to be half-hidden in a lawn, screwed in a gravel walkway, or into the asphalt. Both the lights and the solar panel are completely protected by a hard waterproof and shockproof case that can withstand up to 200 kg. 

ProsCons
12 bulbs per light, irradiate around a wide areaOnly up to 8 hours of consecutive operation
Include an ON/OFF switch
IP68 waterproof

20. YiLaie Solar Driveway Lights

YiLaie Solar Driveway Lights

> Click here to see the product

These solar LED deck lights offer a similar futuristic look as the MAGGIFT discs, although they are not as fond of rough conditions. On the other hand, they can be stuck onto steps, planks, and tiles using the 3M tape included). 

The sides of each disc is completely covered by small LED bulbs, and therefore all 360 degrees around it will be illuminated. They can offer up to 15 hours of continuous light and only need 6 hours to be fully charged.

ProsCons
Easier to install on tile or hardwood floorsThey cannot be screwed onto concrete
Great battery capacity
Fast charging

What Makes the Best Driveway Lights?

In a nutshell, the best driveway lights are reliable, energy-efficient, durable, and easy to install. In that sense, LED lights usually offer the best value for money. 

Rotating lights that can beam light in several directions will provide a more efficient solution for those with vast front space. When possible, try to choose a solar-powered option: these are more likely to be wireless and will eliminate the hazards entailed by outdoor wiring. 

Solar lights are energy-efficient by definition and are usually easy to install. Hardwired lights require you to run buried wires through your backyard, which an electrician must handle. Meanwhile, wireless solar options often work on a “stick (to the ground) and go” basis.

Read more: Brick Driveway Edging

Durability and Reliability

When it comes to ensuring durability and reliability, you want to look at two specific features:

  • The type of solar light needed: high-end solar lights can charge with partial sun rather than direct sun. Depending on your region or in the presence of nearby trees and shrubs, this will provide a more reliable and extended light source.
  • The type of light bulb they use: as a general rule, LED bulbs last much longer than old-school incandescent bulbs. However, they still break at some point. Some driveway light models use special bulb sizes that may be hard to find at a local hardware store or are too expensive to replace.

More Features

Other features that usually mean “good value,” but that may not be as universally necessary, include:

  • Bluetooth or Wi-Fi connectivity. If you have Smart Home capabilities installed in your home, such as Alexa or Google Home Assistant, this will allow you to control these lights remotely. You can use this to set conditional schedules, synchronize them with proximity sensors, or even check on them remotely.
  • Proximity sensors. At low-traffic times (such as after 10 PM), proximity sensors will allow you only to illuminate your driveway when someone is passing by. This can help you save a considerable amount of energy.

FAQs about Driveway Lights

A beautiful driveway illuminated with solar LEDs at night

Discover answers to frequently asked questions (FAQs) about driveway lights:

What is the best lighting for a driveway?

The best lighting for a driveway balances aesthetics, safety, and functionality. LED lights are a popular choice due to their energy efficiency, longevity, and brightness. Solar-powered lights are also favored for their eco-friendliness and ease of installation. The choice depends on your driveway’s specific needs, including length, surrounding landscape, and personal style preferences.

What is the cheapest way to light a driveway?

The most cost-effective way to light a driveway is by using solar-powered lights. These lights do not require wiring or an external power source, reducing installation and energy costs. Additionally, motion sensor lights can be economical as they only turn on when needed, conserving energy.

How do you light a long dark driveway?

Lighting a long, dark driveway effectively requires strategic placement of lights to ensure even illumination. Opt for lights with a longer range and higher lumens to cover more area. Solar-powered stake lights or LED bollards spaced evenly along the driveway are good options. In areas without direct sunlight, consider low-voltage or LED lights connected to a power source.

How many lumens do I need for my driveway lights?

The number of lumens needed for driveway lights depends on the desired brightness and the size of your driveway. For general driveway lighting, 100 to 200 lumens per light are typically sufficient. For areas needing brighter illumination, such as entry points or steps, consider lights with 300 lumens or more. Remember, it’s about balancing visibility with creating a welcoming ambiance.

Conclusion

There are probably hundreds of additional options for driveway lights out there. However, we have strived to combine a good balance of budget-friendly, high-quality products. If your landscape already has a theme, you can also find many specialty options, which, although beautiful, may not be as versatile. 

Tim Dawson's Avatar

About the Author: Chris Hawk

Chris is a paver with more than 15 years' expertise in the field. He has established a reputation as an expert and trustworthy specialist with a track record of providing his clients with top-notch paving solutions.

Limestone Driveway

Discover the natural charm and durability of limestone driveways, a unique and budget-friendly option for enhancing your home’s exterior with its distinct aesthetic and practical benefits.

Limestone driveways offer a blend of natural beauty and practicality. Made from calcium carbonate, these driveways provide a unique look with different grades and patterns. Ideal for various uses, they ensure effective water drainage, ground stabilization, and erosion control. Their ease of installation, with larger pieces at the base and smaller on top, contributes to their growing popularity among homeowners.

Learn more about the advantages and considerations of choosing a limestone driveway for your home, including insights into cost, maintenance, and installation techniques.

Crushed Limestone Driveway Pros

A limestone quarry. There are many advantages of using limestone for driveways

Limestone crushed is beginning to gain ground in the United States. This material comprises good-quality calcite (calcium), phosphor, copper, and magnesium. Because of its nature, it offers a charming traditional look to driveways and other outdoor landscaping.

Ideal for driveway installation, and when it’s not the main paving material, it acts as a base material for tarmac and concrete slabs or used in railway tracks. The use of crushed limestone is not enough to tell you how great it is for driveways; below are some of the benefits you should consider before deciding on this material for your home or commercial driveway.

Affordable 

Cost! The one reason many homeowners settle for less. As a natural paving material, it’s inexpensive, readily available, and durable. Rest assured, staying within your budget becomes worry-free. These earthly rocks are not only common but also cost-effective.

Durable 

Example of crushed limestone driveway which is extremely resistant and long-lasting

When considering a paving material for your driveway, you should use a material that can withstand extreme weather and harsh substances. Crushed limestone is long-lasting and harder than most stones you will find around. This material stays in place when properly installed until you decide you need a change. You wouldn’t want to go through the stress of having to install another paving material for your driveway after only a few years.

Versatility At Its Peak

This type of material comes in uniform colors, different sizes, and even patterns. Additionally, serving as a base for installing concrete and other paving materials or as a top layer for gravel driveways, limestone opens up possibilities beyond just driveway paving. Explore options like paving your patios with this versatile material.

Easy To Install

Ideal for driveways with numerous benefits, this paving material ensures a DIY project without leaving you fatigued all day. Moreover, if time is scarce for driveway maintenance, opting for this material allows for quick installation. Limestone rocks exhibit durability against heavy traffic and maintain a tidy appearance for an extended period. Doubt not; worry less with this reliable choice.

Crushed Limestone Driveway Cons

a beautiful driveway with crushed limestone

A crushed driveway is a better option for homeowners trying to improve the value of their homes or property. It’s also an alternative way to live an eco-friendly lifestyle without spending so much on your driveway. Some of the setbacks of the crushed limestone driveway include:

Frequent Maintenance

Your limestone rock driveway may require frequent removal of debris, leaves, and other dirt if you are looking for a hundred percent maintenance-free driveway. Crushed limestone isn’t the best option for you.

Lose Stones 

The major setback with a crushed limestone driveway is that you will have some stray stones everywhere when someone drives in and out of your driveway. If you don’t mind gathering them and moving them back to your driveway, you have no problem installing your crushed limestone.

How To Build a Limestone Driveway in 5 Steps

The beautiful thing about limestone driveways is that you can easily install them yourself. However, installing your limestone rock driveway will consume your time and energy, especially if you do it alone and need more tools to complete the job easily. Hiring a professional driveway constructor will take the stress away from you. Installing a limestone driveway requires technical know-how and meticulous planning to complete the job. Below is a step-by-step guide that will help you accomplish your task or give you an idea of what has to be done to install a crushed limestone driveway.

1. Mark The Area

Kick off your limestone driveway project by first marking out where it’s going to be. It’s like drawing your dream driveway right onto the ground! Grab some stakes or landscape marking paint and sketch out its shape and boundaries. Think about making it a bit wider in places where you have curves or walls – it’s like giving yourself a little extra elbow room and making sure everyone stays safe. This bit of extra space is super handy, especially in spots where there’s a lot of walking or driving happening.

2. Dig The Soil

Time to roll up your sleeves and get digging! Bring in a small bulldozer or something similar to scoop out the top layer of soil in the area you’ve marked. This isn’t just busy work – it’s what makes sure your driveway has a solid base and stays put for years. How deep you go with the digging depends on a few things like the type of soil you have, how you’ll use the driveway, and your local weather. Usually, about 8-12 inches should do the trick. And hey, don’t just toss that soil – it could give your garden or other parts of your landscape a new lease on life!

3. Leveling

The worker is checking the soil level after placing the crushed limestone

Once you’ve cleared away the topsoil, it’s time to smooth things out. A nice, level base is what we’re aiming for here. You can do this with a grading tool or something similar. If you’ve got a heavy vehicle handy, driving it back and forth over the area is a great trick to compact the soil. This step is super important – it keeps your driveway from settling unevenly and makes sure rainwater drains off like it should.

4. Cover the Base With Weed Fabric 

With your base all smooth and level, the next step is to roll out some weed barrier fabric. This is like a shield, keeping those pesky weeds at bay and helping to stop the soil from eroding underneath your driveway. Once that’s down, pile on a 4-5 inch layer of crushed #1 or #2 limestone rocks. This isn’t just throwing rocks down; you’re building the main support for your driveway. Make sure those rocks are really packed in there – a heavy tool or a compactor can help with that.

5. Add Crushed Limestone 

Now for the grand finale – adding a layer of #8 crushed limestone, about 4-5 inches thick. This is the stuff that makes your driveway not just sturdy, but also nice to look at and walk or drive on. Get that limestone spread out evenly – a scraper blade can be your best friend here. And here’s a pro tip: shape the limestone so the middle of the driveway is a tad higher than the edges. This isn’t just for looks; it’s all about good drainage, keeping water from pooling and making your driveway last longer.

What Is the Size Of Limestone Best For a Driveway?

The right amount od limestone for your driveway

The precise size of the limestone you need depends on the application. Heavy-duty or traffic driveways will require 2-3 inches to support the driveway perfectly. The ½ inch option is perfect for a topcoat driveway, and for driveway base stone, 3 inches is the right size you need. If you use crushed limestone as aggregate for concrete or asphalt driveways, ½ crushed limestone is good enough. It’s important to note that the thinner you go, the more maintenance is required to keep your limestone driveway in place.

How Much Limestone Do I Need For My Driveway 

You can tell from the size of your driveway whether you need a small amount of crushed limestone or more. Also, a few other factors will decide the amount of crushed limestone your driveway or parking lot will consume. These include whether or not your driveway or parking lot aggregate was installed in it previously. When your driveway already has aggregate installed, it will consume less crushed limestone. 2-3 inches of additional crushed stone will cover your limestone driveway. Without any previous aggregate, you will need at least 4-6 inches installed to reach an appreciable level.

Limestone Driveway Cost

QuantityCost per YardCost per Ton
Bulk Purchase$30 – $40
Small Scale$25 – $35

So, you’re thinking about a limestone driveway and wondering about the costs, right? Well, here’s the lowdown. When it comes to buying crushed limestone, how much you buy at once can really make a difference in what you’ll spend.

If you’ve got a big driveway project or a large area to cover, going for bulk purchases is your best bet. Typically, the price for bulk limestone hangs around $30 to $40 per yard. It’s a smart move for those larger jobs – you end up saving some cash and you get a nice, consistent look in terms of quality and color across your entire driveway.

But what if you’re working on a smaller scale? Maybe you’ve got a cozy little driveway or just need to do some touch-ups here and there. In cases like these, you might find yourself paying a bit more – we’re talking about $25 to $35 per ton. It’s a bit pricier, but it’s perfect when you don’t need heaps of material and just want to focus on specific areas.

FAQs about Limestone Driveway

A driveway made of crushed limestone

Wondering if a limestone driveway is right for your home? Let’s dive into some of the most common questions people have about limestone driveways, covering everything from cost comparisons to installation specifics.

Is limestone more expensive than gravel?

When it comes to cost, limestone typically comes in a bit higher than gravel. The reason? Limestone offers a more refined and uniform look compared to the mix of different stone types and colors found in gravel. However, it’s not just about looks – limestone also tends to be more durable and long-lasting. So, while you might spend more upfront, its durability could save you money in the long run on maintenance and replacements.

How thick should a limestone driveway be?

The thickness of your limestone driveway should ideally be about 4-5 inches. This thickness is crucial for providing a stable base that can support regular vehicle traffic without shifting or sinking. Remember, the base layer is just as important – it should be made of larger, crushed stones and be around 8-12 inches thick to ensure proper drainage and stability.

Is limestone cheaper than concrete?

This one can be a bit tricky. Generally, limestone can be more cost-effective than concrete, especially if you’re considering the long-term maintenance costs. Concrete, while initially cheaper, can crack over time and may require more frequent repairs or resurfacing. Limestone, on the other hand, offers a natural, more durable surface that requires less maintenance over time. Plus, limestone driveways can be easily repaired by adding more crushed limestone, whereas concrete repairs can be more complex and costly.

Which Is Better, Gravel or Crushed Limestone? 

Depending on the function of your driveway, you can choose between gravel and crushed limestone. Unlike crushed limestone, which is more uniform in color, gravel is a loose mixture of different stones. It is versatile and inviting. However, gravel is a rounded stone and easily shifts when applying pressure.

Some other factors like location and rock size might affect your choice of construction material. If you live in an area where limestone is more available, it is your best option because it will be more affordable.

Limestone comes with wider stone sizes than gravel. You can choose the safest grade for your driveway and ensure it’s packed well. For a proper drainage system, a heavy-duty driveway, and stability, limestone is a better option than a gravel driveway.

Conclusion

Designing and installing a crushed limestone driveway is a great option for budget-minded home or business owners. A crushed limestone driveway is appealing and less expensive than a concrete or asphalt driveway. To install your limestone driveway yourself, purchase all the tools you need on home depot or get a professional paver to do it for you.

Tim Dawson's Avatar

About the Author: Chris Hawk

Chris is a paver with more than 15 years' expertise in the field. He has established a reputation as an expert and trustworthy specialist with a track record of providing his clients with top-notch paving solutions.

How to Remove Oil Stains from an Asphalt Driveway

Ever struggled with those annoying oil stains on your asphalt driveway? Worry not! Let’s walk through a hassle-free, five-step solution to get rid of those stains and keep your driveway looking sharp.

Got a fresh oil stain? Start by blotting it up with a cloth or mop. Next, sprinkle some cat litter, baking soda, or sawdust over it to absorb the remaining oil. If you’re tackling an older, more stubborn stain, grab some dishwashing liquid or diluted vinegar and a wire brush to scrub it out. Once you’ve given it a good scrub, rinse off all that soapy business. The final touch? Slap on a seal coat to fend off any future stains. This straightforward approach keeps your driveway looking neat without the need for a complete overhaul.

Stick around as we dive into the nitty-gritty of each of these five steps. Plus, we’ll shed light on what typically causes those pesky asphalt stains and share some pro tips on how to tackle other common driveway stains.

Remove Oil Stains from Your Asphalt Driveway in 5 Steps

If you’re tired of asking how to remove oil stains from asphalt driveway, it’s time to get proactive. Here are the 5 steps from the intro in more detail. 

Step #1: Sop up Fresh Oil Stains

An asphalt driveway stained with car engine oil

It’s always best if you can clean an oil stain as soon as it happens. This prevents the oil from settling in, which requires more elbow grease to remove

If the oil is still fresh, then use an absorbent cloth, a towel, a rag, or a mop to sop up as much oil as you can. You should only do this once, as you won’t be able to get all the oil right now, and that’s okay. Just do what you can at this stage.  

Step #2: Draw Out the Remaining Oil

Next, switch to a product that’s known for its absorbency. You have many options, including commercial oil absorbers, coconut husks, gravel, non-clumping clay cat litter, baking soda, or sawdust. Sprinkle the absorber evenly across the entire stain, being very generous as you do, and let the product sit for a while. 

The longer the better here, even overnight if you have the time. To prevent wild animals or your own pets from sniffing out the cat litter, sawdust, or coconut husks, take a clean towel and cover the pile. This will not interrupt any oil absorption. 

In the morning, when you come back outside, use a broom and a dustpan to clean up the absorber you used. If your stain is especially bad, you might need to repeat this step for another day.

If you’re still asking how to remove oil stains from asphalt driveway, understand that the stain shouldn’t be gone at this point. You’re just absorbing the oil. For older stains especially, using an absorber on the stain will only do so much good.

Step #3: Use Dishwashing Liquid or Diluted Vinegar with a Wire Brush on Older Stains

The worker is using wire brushes to clean oil stains from the driveway

For older stains or newer, stubborn ones, you’ll have to manually tackle the mess. You can try dishwashing detergent aka dish soap, especially one with degreasing properties. Diluted vinegar should also work. To properly dilute vinegar, you want one cup of water to one cup of vinegar. 

A wire brush with stiff bristles is also recommended. Dip your brush into the cleaning mixture and begin scrubbing. Be vigorous with your scrubbing, but not to the point where you risk scratching up the asphalt. Once you’re done scrubbing, you might want to repeat this step a second or even a third time.

Do yourself a favor and skip the heartier cleaners like those with solvents or citrus, as these products may be corrosive. Sure, they will remove the stain, but also part of your asphalt driveway too. 

Step #4: Clear Away Residue

Alright, you’ve done the hard part. Now, grab your garden hose and give the driveway a good rinse. Make sure you wash away every bit of soap or vinegar. This isn’t just about cleaning; it’s about preventing any leftover residue from attracting more dirt. After rinsing, let the sun do its job and dry your driveway naturally. If you see any bits and pieces left behind, give it another sweep. You want your driveway looking not just clean, but spotless.

Step #5: Seal Your Asphalt Driveway 

Take a step back and admire your work – your driveway’s looking fantastic! But hold on, there’s one last step. Sealing the asphalt is like putting a cherry on top. All that scrubbing might have worn away some of the protective top layer of your driveway.

Sealing it helps bring that layer back and keeps future oil spills from sinking in. Think of it as your driveway’s shield against spills and stains. Follow the sealant instructions carefully – whether you’re rolling it on or spraying it – and make sure you cover the whole driveway evenly. Let it dry properly; patience is key here. This final touch not only makes your driveway look great but also extends its life.

What Causes Stains on Asphalt?

Now that you know how to remove oil stains from an asphalt driveway, it’s time to address another important question. How do the stains get there in the first place? Here are some common sources of unappealing driveway stains.

Spilled Oil

A car leaked a lot of engine oil and dirtied the asphalt of the homeowner's driveway

Let’s start with the obvious one: oil stains on your asphalt are caused by spilled oil. Perhaps you decided to save a trip to your dealership this year so you took care of the oil change yourself. Only this was your first time doing it, so it got a bit messy.

Outside of that, a leaky car can also stain your driveway. Your vehicle shouldn’t leave puddles of fluid everywhere you park. Schedule an appointment with your mechanic soon and get the issue fixed. If you don’t, you’ll only leak more oil, leading to you having to do everything above all over again! 

Uncleaned Mulch

You planned on adding some mulch around the trees on your front yard, but the project got derailed. The mulch sat there in your driveway, first for weeks, then for months before you finally cleaned it up. What remains is sort of like a shadow of where the mulch was. 

You thought this was just leftover mulch you can sweep up, but no such luck. What you have now is another stain. Darn. 

Decayed Leaves

Some leaves are dirtying the asphalt, leaving residues

Leaves are so pretty when they begin falling off the trees in the autumn. While many homeowners prioritize raking their lawns, you don’t want the leaves to stay on your driveway either. As you step on them, you accelerate the decay of the leaves. Even if the leaves are untouched, by letting them sit on the asphalt all autumn, the leaves will again decay. As the leaves break down, they stain your driveway.  

Grease Spills

Ever noticed those dark, slick spots on your driveway? That’s usually from grease spills. They’re a common headache, especially if you’re into car repairs or outdoor grilling. Grease has a way of sneaking into asphalt’s pores, leaving stains that don’t go away with just a hose-down. The key here? Tackle these spills quickly to stop them from setting in and causing a bigger mess.

Leaking Automotive Fluids

Cars can be messy, leaking fluids like oil and coolant that love to stain driveways. These aren’t just ugly; they can actually eat away at your asphalt over time. It’s like a double whammy – they look bad and can cause damage. So, keeping an eye on any drips and dealing with them pronto can save your driveway from serious trouble.

Rust from Metal Objects

Rust stains come from metal things left lying around, like tools or old bike parts. They leave these orange-brown marks that stick out like a sore thumb. Rust is a tough customer, and you’ll need something stronger than soap and water to get rid of it.

Chemical Spills

Spilling chemicals on your driveway is bad news. We’re talking cleaning products, pesticides, all that stuff. They can do a number on your asphalt, leading to stains and even damage. If you spill something, clean it up quick to keep your driveway in top shape.

3 Steps for Removing Other Stains on Asphalt

A beautiful asphalt driveway after being cleaned of oil stains

Your question now isn’t how to remove oil stains from an asphalt driveway, but leaf and mulch stains. Oh, and you’re curious about how to get rid of paint and chalk stains too. Fortunately, the methods you follow aren’t all that different from what we discussed earlier. Here’s what to do. 

Step 1: Clean up Your Driveway

Before you dive into stain removal, let’s get your driveway ready. Think of it like prepping a canvas before painting. Give it a good sweep to clear off leaves, dirt, and other bits and pieces. This isn’t just about making it look neat – you’re stopping that stuff from getting ground in and making the stain worse. Avoid the temptation to blast it with a pressure washer though, as that might push the debris and the stain deeper into your asphalt.

Step 2: Clean with Dishwashing Detergent or Diluted Vinegar + Bristle Brush

Now, onto the main event. Grab your diluted vinegar or dishwashing soap – your secret weapons. Splash some on the stain and let it get to work. Don’t be shy with the scrubbing, either. That stiff-bristled brush isn’t just for show – it’s your trusty sidekick in this battle against stubborn stains like mulch marks or chalk leftovers. Pro tip: if you’ve got time, let the vinegar or soap sit for a few hours, or even overnight. It’s like marinating a steak – the longer it sits, the better the results. This might just save you from round two of scrubbing.

Step 3: Rinse the Residue

Alright, final stretch! Hose down your driveway to wash away all the vinegar or soap residue. And just like that, you’re done! Stand back and admire your handiwork. Your driveway is not only stain-free but also has probably never looked better.

FAQs about How to Remove Oil Stains from an Asphalt Driveway

Final result of an asphalt driveway cleaned of dirt and oil stains

Here are some frequently asked questions that can help guide you through the process effectively.

What is the best oil stain remover for asphalt?

When it comes to getting rid of oil stains on asphalt, there’s no one-size-fits-all answer. It often depends on how stubborn the stain is. For fresh spills, something as simple as dish soap can work wonders. For tougher, set-in stains, commercial degreasers or a concoction of baking soda and vinegar can do the trick. Just remember, the sooner you tackle the stain, the better your chances of getting rid of it.

Can old oil stains be removed from driveway?

Yes, old oil stains can be removed, but it’s a bit more challenging than dealing with fresh spills. You’ll need to put in some elbow grease. A mixture of laundry detergent and warm water, left to sit on the stain for a while before scrubbing, can help lift those stubborn spots. For really tough stains, a commercial asphalt cleaner or a poultice made from sawdust and paint thinner might be necessary.

Can you pressure wash oil stains off asphalt?

Pressure washing can be effective, but it’s not always the first solution you should jump to. For light stains, pressure washing with just water might work. But for more stubborn stains, you’ll want to apply a degreaser or cleaning solution first, let it sit, and then go in with the pressure washer. Be careful, though – too much pressure can damage the asphalt.

Conclusion  

You’ve got the know-how on how to remove oil stains from an asphalt driveway, and it’s simpler than you might have guessed, achievable in just 5 steps. Now, if your asphalt driveway gets hit with other nuisances like leaf, paint, mulch, or chalk stains, you’re well-equipped to tackle those too.

Remember, the key to a pristine driveway isn’t just in the cleaning; it’s in the upkeep. Regularly resealing and cleaning your driveway goes a long way in warding off future stains. Here’s to keeping your asphalt driveway looking its best – good luck!

Tim Dawson's Avatar

About the Author: James Brennan

James has over two decades of experience in the paving industry and has worked on a wide variety of projects, from large-scale commercial installations to small residential repairs.

Decomposed Granite Driveway

A decomposed granite driveway stands out as an economical and permeable option. This material is derived from weathered rocks that break down into smaller pieces. Its installation process is known for being straightforward, quick, and cost-effective, making it a popular choice for homeowners.

Decomposed granite (also known as DG) driveway has a natural, rustic appearance, and it is available in several colors, allowing for stylistic flexibility that fits your choice. It’s relatively easy to install and has a gritty texture for excellent traction underfoot. Compared to other materials, decomposed granite has a fine texture and is made up of aggregated granite that has the consistency of sand and is as large as 1/4″. It is highly porous and environmentally beneficial that stormwater can flow through, effectively preventing driveway flooding and reducing the need for additional drainage. 

Understanding the full scope of a decomposed granite driveway is crucial for any hardscape project. This guide, curated by our experts, provides a comprehensive look into the nature of this material, its cost-effectiveness, and longevity.

What is Decomposed Granite 

The machinery is extracting the granite to do the processing and decompose it for the driveway

Amid the vast array of landscaping materials, decomposed granite stands out for its unique attributes and versatile applications, making it a subject worthy of in-depth exploration.

Composition

Composed of aggregate granite, this material is known for breaking down into finer particles. This unique characteristic lends itself to a range of outdoor applications. Its composition, distinct from other aggregates, offers versatility and practicality in various landscaping projects.

Longevity and Durability

One of the defining features of decomposed granite is its extended lifespan. Unlike some paving materials, it boasts a durability that ensures lasting performance in various weather conditions and usage scenarios.

Texture and Aesthetics

The fine texture of this material contributes significantly to its visual appeal, offering a natural and welcoming ambiance. Its softer and more refined composition sets it apart from other hardscaping materials, adding an element of elegance to any outdoor space.

Versatility in Landscaping

This material showcases its adaptability in landscaping applications, ranging from pathways to garden borders. Its capacity to conform to various forms and shapes makes it an ideal choice for innovative and creative outdoor designs.

Preventing Washout

To protect against unwanted runoff, installing plastic or steel edging around driveway drainage is a recommended strategy. This approach helps to keep the material in place, preventing erosion and preserving the surface’s integrity. Implementing such measures is crucial for maintaining the quality and appearance of your driveway.

Wrap Up

In conclusion, decomposed granite emerges as a multifaceted rock type with qualities that extend beyond the ordinary. Its composition, durability, texture, and adaptability make it a valuable asset in the realm of construction and landscaping, offering both aesthetic appeal and functional longevity.

Can Decomposed Granite Be Used For A Driveway? 

A beautiful driveway made of decomposed granite

One of the principles of life includes the beauty that comes from ashes. The same applies to our driveways, walkways, and other outdoor areas. Decomposed granites can be used to pave these areas into a magnificent landscape. Also, it has proven to be less expensive and more natural than standard granite or other paving materials

Decomposed granite driveway pros and cons

While some may question the durability and effectiveness of decomposed granite, its track record in paving applications speaks for itself. Considering the pros and cons of this material can guide you in deciding whether it’s the right fit for your driveway project.

Pros Of Decomposed Granite Driveways

As homeowners seek both functional and visually appealing solutions for their outdoor spaces, decomposed granite driveways come into focus as a versatile and sustainable choice. This exploration delves into the various advantages that make it a compelling option for crafting driveways that stand out in terms of aesthetics, affordability, and environmental consciousness.

Aesthetic Variety

Decomposed granite boasts a rich array of colors, including warm tan, sleek grey, and earthy brown, enabling homeowners to craft visually stunning driveways that harmonize with their landscape design, adding depth and character. This diverse color range not only enhances curb appeal but also provides an opportunity for creative expression in outdoor aesthetics.

Installation Cost is Low

Compared to other paving materials in the market, decomposed granite is affordable and has a low installation cost. After the initial purchase, installation, and stabilization, you can enjoy your driveway for a long time before you worry about turning it up.

Decomposed Granite Is Durable When Stabilized

An excellent final result obtained using decomposed granite for a driveway

While untreated decomposed granite may succumb to impact compaction, stabilization transforms it into a resilient and enduring driveway surface. Implemented stabilization techniques fortify its structure, ensuring longevity and resistance to the wear and tear of daily usage, ultimately maximizing its lifecycle. This durability makes driveways of this material a sound investment with lasting benefits.

Decomposed Granite Encourages Drainage

The porous nature of decomposed granite is a boon for effective water drainage. A decomposed granite driveway not only minimizes concerns about water pooling but also contributes to a stable surface, making it an ideal choice for regions experiencing heavy rainfall or periodic storms. This drainage efficiency enhances the functionality of the driveway and prevents potential damage caused by water accumulation.

It is Eco-friendly and Sustainable 

Beyond its visual allure, decomposed granite emerges as an environmentally conscious paving material. Comprising entirely natural components, it aligns with sustainable landscaping practices, minimizing the ecological footprint associated with driveway construction and contributing to a greener living environment. Choosing this material is not just a stylistic decision but also a step towards environmentally responsible outdoor design.

Decomposed Granite is Easy To Maintain

The simplicity of maintaining a decomposed granite driveway underscores its practical appeal. In cases of spreading or weathering in specific areas, homeowners can effortlessly address these concerns by re-compacting or replacing affected granite particles, ensuring that the driveway remains both visually pleasing and functionally intact over the long term. This ease of maintenance reduces the long-term cost of ownership and enhances the overall homeowner experience.

Cons Of Decomposed Granite Driveways 

While driveways made of decomposed granite offer numerous advantages, it’s crucial to delve into potential drawbacks to make an informed decision about their suitability for your landscaping needs.

Unstabilized Granite has a Short Lifespan 

The production of decomposed granite

When installed without the use of stabilized pavers or resins, the vulnerability of decomposed granite to weathering and erosion increases. The absence of stabilizing elements exposes the driveway to the elements, leading to quicker degradation. This emphasizes the critical role that proper installation plays in ensuring the longevity of a driveway made of this material. Homeowners must prioritize stabilized materials to fortify the structure and safeguard against premature wear and tear.

Loosed Granites Spreads Out

Without proper stabilization, decomposed granite particles tend to spread out, compromising the uniformity and stability of the driveway surface. This spreading effect is accelerated by factors such as heavy rainfall or frequent use of the driveway. Homeowners should recognize the importance of adequate compaction during installation and the incorporation of stabilizing agents to prevent loose granites from migrating. This proactive approach is essential for maintaining the intended design and structural integrity of the driveway.

It Promotes Weed Growth 

Inadequate stabilization of decomposed granite can impede water drainage, creating a persistently moist environment. This moisture, in turn, becomes a breeding ground for weeds and other plants. To address this concern, homeowners should prioritize proper stabilization during installation. This not only enhances water drainage but also creates an environment less conducive to weed growth. By investing in effective stabilization, homeowners can minimize the need for ongoing weed control efforts and preserve the driveway’s aesthetics.

Decomposed granite driveway cost

The typical price range for decomposed granite is between $40-$50 per cubic yard. No matter the size of your driveway, decomposed granite cost won’t be too much to bear. This paving material is not just affordable; it is incredibly soft, natural, and has a fine texture that makes it stand out amongst other paving materials.

Price Range per Yard$40 – $50
AffordabilityVery Affordable
CharacteristicsSoft, Natural, Fine Texture
VersatilitySuitable for Driveways of Any Size
Standout QualitiesSoftness, Affordability, Natural

8 Step-By-Step Guide On How To Install Your Decomposed Granite Driveway

This guide offers in-depth insights for both DIY aficionados and those preferring professional installation. Each step is elaborated to ensure you create a functional and aesthetically pleasing driveway.

1. Site Preparation

The foundation of a successful decomposed granite driveway lies in meticulous site preparation. Begin by clearing the area of debris, roots, and large stones. It’s vital to create a slight slope, about 1-2% grade, away from buildings or the street for effective drainage. Compacting the soil is a must to avoid future settling. A well-prepared base prevents erosion and ensures the longevity of your driveway, especially in areas prone to heavy rainfall.

2. Defining the Construction Area

Accurate marking of the driveway’s boundaries is essential for both aesthetic appeal and construction efficiency. Use highly visible and durable markers like landscaping paint, stakes, or flags. This step is about precision and visualizing the final layout. Take time to measure twice, ensuring symmetry and alignment with your property’s overall design. Consider the driveway’s width and curves, as these will influence the final appearance and functionality.

3. Excavating the Area

The machinery is digging the hole for the driveway area into which the decomposed granite will be thrown

Depth plays a crucial role in the stability of your decomposed granite driveway. For standard driveways, a depth of 4 inches is typically sufficient. However, in areas of high traffic or softer soil, consider excavating 6 inches or more. This increased depth provides additional stability and support, preventing the granite from shifting under the weight of vehicles. Remember to keep the excavation consistent throughout the area to ensure an even distribution of granite later.

4. Leveling the Excavated Area

Once the area is excavated, it’s crucial to level it meticulously. Use a rake and a spirit level to ensure an even surface. For enhanced stability, consider renting a plate compactor to compact the soil firmly. This step is vital to prevent shifting or sinking of the decomposed granite later. An evenly compacted and leveled base is the key to a smooth, durable driveway.

5. Installing Landscape Fabric

Landscape fabric acts as a barrier to weed growth and stabilizes the granite. Lay the fabric over the leveled soil, ensuring it covers the entire area without gaps. Secure the edges with landscape staples. Over the fabric, add a layer of sand, about 1 inch deep, to aid in drainage and provide a smooth base for the granite. This layer also helps to level out minor imperfections in the soil surface.

6. Adding Plastic Edging

Plastic edging is critical in containing decomposed granite and maintaining the shape of your driveway. Install edging along the marked boundaries, ensuring it’s firmly anchored into the ground. This edging not only keeps the granite in place but also adds to the overall aesthetics by providing a clean, defined border. For driveways near drainage areas, the edging plays a crucial role in preventing the washout of granite during heavy rains.

7. Applying Stabilized Granite

The worker applied stabilized granite on the driveway

Determining the right amount of granite is essential. Use a formula based on the length, width, and depth of the excavated area to calculate the needed volume. When spreading the granite, aim for a consistent thickness of about 1.5 inches across the area. Stabilized granite, pre-treated with a binding agent, ensures better cohesion. Distribute it evenly with a shovel or wheelbarrow, and use a rake for a smooth finish. This thickness is optimal for bearing the weight of vehicles while maintaining the driveway’s aesthetic appeal.

8. Watering the Granite

The final step is watering the driveway thoroughly. This process helps the granite particles to bond, creating a more stable surface. Use a garden hose to evenly wet the surface, ensuring all areas are saturated. Initially, the driveway might appear muddy, but this is part of the settling process. Allow it to dry completely, which might take a day or two depending on weather conditions, before using the driveway. This drying period is critical for the granite to set and harden, forming a durable, cohesive surface.

Conclusion

Installing a driveway made of decomposed granite requires attention to detail and proper execution of each step. By following this comprehensive guide, you can ensure your driveway is not only visually appealing but also built to last. This material offers a unique combination of natural beauty and durability, making it an excellent choice for a long-lasting, attractive driveway.

Frequent Questions About Decomposed Granite Driveway

Granite rock. When crushed, it can be used for driveways

Within the domain of driveways made of decomposed granite, frequent inquiries commonly center on their drainage capacities, vulnerability to erosion, and successful strategies for upholding stability. Delving into these questions yields valuable insights into the practical considerations of employing this material as a driveway surface.

Does water drain through decomposed granite?

DG provides excellent drainage for water. It allows water to permeate and be absorbed, eliminating concerns about gathering puddles. This quality makes it an effective choice for water drainage in outdoor spaces.

Will decomposed granite wash away?

Install plastic edging on both sides of the driveway. Plastic edging helps secure your driveway and prevent decomposed granite from washing away. Also, ensure that plastic edging or steel is installed around any driveway drainage. Taking this action will prevent your DG from flowing into the drainage system and being washed off your driveway.

How do you keep decomposed granite in place?

You can pretreat granite or install it with stabilized pavers or resins. A stabilized paver will keep your granite in place and prevent it from spreading and eventually washing away. You can use a Gator stone bond, a simple one-coat application to keep your DG in place. 

What is the difference between crushed granite and decomposed granite?

Crushed and decomposed granite are made from the same component. However, crushed granite has sharp edges and shapes, making it more expensive in the market than DG. At the same time, DG is more economical, eco-friendly, and valuable than crushed granite. 

Conclusion

Your driveway needs to be clean and aesthetically pleasing, which you can get with properly installed decomposed granite. It is perfect for your driveway if you want something natural and eco-friendly. It is also less expensive and low-maintenance compared to other paving materials.

Tim Dawson's Avatar

About the Author: James Brennan

James has over two decades of experience in the paving industry and has worked on a wide variety of projects, from large-scale commercial installations to small residential repairs.

Cheapest Time of Year to Pave Driveway

When considering paving or repaving your asphalt driveway, the timing can significantly impact both the quality and cost. Weather is a key factor; incorrect timing can lead to increased maintenance and costs due to early degradation.

The optimal time for paving, balancing cost and quality, largely depends on temperature. Asphalt paving is best done when air and ground temperatures are consistently above 70°F. This requirement typically leads to three prime periods:

  1. Late Spring to Early Fall: This timeframe usually offers ideal weather conditions for asphalt work.
  2. Summer: Offers consistent warm temperatures, making it a preferred choice.
  3. Early to Mid-Fall: Before it gets too cold, this period can still accommodate effective paving.

Read on to discover how these specific seasons represent the ‘cheapest time of year to pave a driveway, aligning perfectly with cost-effective driveway paving strategies.

1. Late spring to early fall

Installation of new asphalt driveway in Spring, one of the best cheap time

Early spring is usually accompanied by precipitation or melting snow; hence, it is best to put off your paving project until late spring and early fall when the weather conditions are dryer. 

In addition, wet weather can also render the construction of asphalt driveway more complicated, as water can penetrate the material, making it require more time to set. Warmer air temperatures between late spring and early fall help keep the mix at a steady temperature. It helps it preserve a flexible consistency.

2. Summer

Paving asphalt driveway during summertime enables the surface coating to cure out before winter arrives. This will also make the sealing more durable than before. When there is less humidity, the seal coating often solidifies more.  

Summertime, often considered the cheapest time of year to pave a driveway, provides the optimal conditions for driveway and parking lot improvements. The warm weather, extended daylight hours, and high overnight temperatures create an ideal environment for asphalt’s rapid curing. Asphalt performs exceptionally well in hot weather, enhancing the speed and efficiency of the paving process

Besides this, it is easier to work in the summertime compared to any other time of year. Summer is perfect for installing a new driveway or fixing an existing one, so capitalize on the summer heat to guarantee that your next driveway project is successful.

3. Early to Mid-Fall

Many people assume that paving a driveway during the fall is unsafe and can easily cause the driveway to deteriorate. But frankly, it all depends on where you live and the temperatures around you at night. The seal coating curing process requires a night temperature of at least 50 degrees.  

Fall is an excellent time of year to carry out your pavement project. Also, being proactive with your driveway project can save some money for you in the long run.

Why does the time of year you pave your driveway matter?

The newly asphalt over the gravel

Choosing the right time of year to pave your driveway is not merely a matter of convenience; it’s a crucial decision that affects the quality, durability, and overall success of your paving project. The interplay between temperature and the properties of asphalt is a key factor to consider.

Temperature and Asphalt Stability

One of the key reasons the time of year is critical in paving driveways relates to temperature’s impact on asphalt stability. Warmer weather maintains the hot mix asphalt in a stable and flexible state for an extended period. This is crucial because for asphalt to compact and set effectively, it must be kept within a temperature range of 175°F to 275°F. In this range, asphalt remains pliable, allowing for proper laying and shaping.

Challenges of Cold Weather Paving

During colder months, particularly in winter, paving becomes more challenging. As soon as asphalt is removed from its transportation truck, it begins to cool rapidly. This accelerated cooling in cold weather can make it difficult to work with the asphalt, as it hardens quickly and becomes less malleable. Furthermore, if the ground is frozen, the asphalt may not adhere properly to the base layer. The underlying asphalt can become loose or even detach from the binder, leading to structural weaknesses.

Advantages of Warmer Weather Paving

The worker is paving the driveway during one of the cheapest times of the year

In contrast, warmer temperatures simplify the paving process. They allow for easier pouring, spreading, and smoothing of the asphalt. This not only facilitates the work of driveway contractors but also contributes to optimal outcomes. In warm conditions, contractors have sufficient time to meticulously lay and shape the asphalt. As it cools, the asphalt solidifies uniformly, resulting in a more durable and long-lasting surface.

Understanding these factors highlights the importance of choosing the right time of year for driveway paving. It’s not merely a matter of convenience; it’s a critical decision that significantly impacts the quality and longevity of your driveway. This understanding elevates the importance of selecting the cheapest time of year to pave a driveway, not just in terms of cost but also in ensuring the best possible outcome for your paving project.

How can weather and temperature affect the paving of your driveway?

When it comes to driveway paving, understanding how weather and temperature influence the process and the final product is crucial. These elements play a significant role in the longevity and integrity of your asphalt driveway.

Structural Deterioration Due to Weather Conditions

a driveway slightly damaged due to the disturbances

Extreme weather conditions, ranging from scorching sun rays to heavy downpours, can significantly impact the structure of your asphalt driveway. Over time, these elements can cause the asphalt to weaken, leading to deterioration. This degradation is not just limited to surface wear but can also affect the deeper layers of the driveway, compromising its overall strength.

Temperature-Induced Damage: Expansion and Contraction

The asphalt material is sensitive to temperature changes, which can lead to expansion and contraction of your driveway. As temperatures rise, the driveway material expands, and as they fall, it contracts. This continuous cycle, especially in regions with significant temperature fluctuations, can lead to the formation of cracks. These cracks, if not addressed, can become significant over time, allowing water infiltration and further damage.

Slab Curling and Its Implications

a concrete driveway was ruined

In cases where the driveway material is overly rigid, slab curling can occur. This phenomenon happens when the edges of the asphalt slab begin to curl upwards or downwards, usually due to uneven drying or curing of the material. While minor fluctuations in temperature and minimal curling might not pose an immediate threat, significant slab curling can compromise the driveway’s integrity.

Water Infiltration and Its Effects

Cracks and damages on the surface of an asphalt driveway can lead to another significant issue – water infiltration. Rainwater, groundwater, or surface water can seep through these cracks, reaching the lower layers of the driveway. This water absorption can weaken the bond between the asphalt binder and the aggregate, further degrading the structure. In freezing conditions, trapped water can expand, exacerbating the cracking and damage.

Understanding these factors is crucial for anyone planning to pave or maintain an asphalt driveway. By considering the potential impacts of weather and temperature, you can take preventative measures to ensure the longevity and durability of your driveway.

Other factors that can impact the cost of paving your driveway

A simple house with apron concrete driveway

Besides the previously mentioned elements such as weather conditions, optimal timing (including the cheapest time of year to pave a driveway), paving thickness, and driveway shape, there are additional crucial factors that can substantially impact the total cost of your driveway paving project. A comprehensive understanding of these factors is invaluable in formulating a more precise and realistic budget for your paving venture.

Base Material and Preparation

The type of base material used and the preparation required for laying the asphalt are significant cost factors. A solid, well-prepared base is essential for the longevity of the driveway. This might involve removing the old driveway material, grading, and compacting the soil, and laying a suitable sub-base material like gravel. The cost can vary depending on the extent of preparation needed and the quality of materials used for the base.

Drainage System Installation

the worker is installing a water drainage system to protect the driveway pavement

Ensuring effective drainage is essential to preserve the structural integrity of an asphalt driveway. Poor drainage can lead to water pooling, which can weaken the asphalt and lead to cracks or potholes. Installing or improving a drainage system, which may include grading the driveway properly, adding drainage channels, or installing culverts, can add to the overall cost. However, this is a crucial investment to prevent future water damage and maintain the driveway’s condition.

Paving Thickness

As previously mentioned, the thickness of the asphalt plays a crucial role in the driveway’s durability. Thicker paving, while more expensive, is often necessary for driveways that will bear heavier loads.

Driveway Shape/Slope

a beautiful paved driveway at the cheapest time of the year

Unique shapes or significant slopes in a driveway can increase the complexity and, consequently, the cost of the paving project. Non-standard designs require more intricate work and potentially more materials.

Material Quality and Type

The quality and type of asphalt used can also impact cost. Higher-grade asphalt with better longevity and resistance to weather conditions might be more expensive upfront but can offer better value in the long run.

Regional Cost Variations

Labor and material costs can vary significantly depending on your geographic location. Areas with higher living costs may see higher prices for driveway paving. Additionally, the availability of materials in your region can also affect the overall cost.

Taking into account all these aspects, it becomes clear that the costs associated with driveway paving are affected by a wide range of elements, each playing a role to different extents. Strategically balancing these factors, such as the cheapest time of year to pave a Driveway, with your specific requirements and budgetary constraints, is essential for the success and cost-effectiveness of your driveway paving endeavor.

How to protect your asphalt driveway from the impact of seasonal changes

The impact of seasonal weather changes can take a significant toll on the condition of your asphalt driveway. Implementing the right maintenance strategies is key to protecting it from these elements. Here’s a closer look at how to effectively preserve your driveway’s integrity through different seasons.

Regular Resealing: A Shield Against the Elements

the worker is closing the hole that has formed in the driveway

One of the most effective ways to protect your asphalt driveway is through regular resealing. This process involves applying a protective sealant over the surface of your driveway. The ideal frequency for resealing is typically every two to three years, but this can vary based on the level of wear and exposure to harsh weather conditions. Resealing provides a barrier against water penetration and helps to shield the asphalt from the damaging effects of UV rays and high temperatures. This preventive measure not only extends the life of your driveway but also maintains its aesthetic appeal.

Prompt Repair of Cracks and Holes: Preventing Further Damage

Early detection and repair of any cracks or holes in your driveway are crucial. These imperfections, if left unattended, can lead to more significant and costly damages. Cracks and holes can allow water to penetrate the surface and reach the base of the driveway, potentially leading to issues like erosion or frost heave in colder climates. By promptly patching these defects, you not only enhance the safety and appearance of your property but also prevent the deterioration of your driveway. It’s important to address even the smallest cracks as soon as they appear to avoid the likelihood of water infiltration and subsequent expansion of the damage.

Additional Protective Measures

the homeowner is cleaning his driveway with a pressure washer

Besides resealing and repairing, there are other steps you can take to further protect your driveway:

  • Regular Cleaning: Keeping the driveway clean from debris, chemicals, and spills can prevent surface damage and staining.
  • Drainage Management: Ensure that your driveway has proper drainage to avoid water pooling, which can weaken the asphalt.
  • Traffic Management: Heavy vehicles or equipment can stress your driveway. Limiting their frequency or duration on the driveway can help maintain its condition.

Adopting these maintenance practices will greatly assist in protecting your asphalt driveway from the adverse effects of seasonal changes, ensuring its longevity and functionality.

Conclusion

Like any other project, successful asphalt pavement involves thorough planning and consideration of various factors to ensure you remain within budget. If you’re seeking guidance on determining the cheapest time of year to pave a driveway, consulting with specialists like those at Paving Finder can be invaluable.

Selecting the appropriate time of year for your driveway paving project is not only crucial for enhancing its longevity but can also lead to significant cost savings. Moreover, regular and consistent maintenance is key to extending the lifespan of your driveway, often beyond initial expectations.

Green Driveway

Exploring the concept of a green driveway is becoming increasingly popular among environmentally conscious homeowners. This innovative approach to driveway design emphasizes the use of sustainable, eco-friendly materials and techniques, aiming to reduce environmental impact while maintaining aesthetic and functional qualities.

When considering a driveway upgrade, green driveways offer an array of benefits beyond their positive environmental impact. By choosing options like permeable pavers or other eco-friendly materials, you not only contribute to a healthier planet but also potentially increase your property’s value and reduce maintenance needs. These driveways are designed to manage water runoff effectively, complementing your home’s landscaping while supporting sustainable living practices.

If you’re weighing up whether this type of driveway is the right fit for your home, our detailed guide is here to help. We will explore the diverse range of materials available, their installation processes, and the broader benefits they bring. Keep reading to learn how making the switch to a sustainable driveway option can be a wise long-term investment for your home and the environment.

What Is A Green Driveway?

A beautiful house with a green driveway

Green driveways, serving as an innovative and eco-conscious alternative to conventional asphalt or concrete, predominantly feature grassed or stabilized permeable gravel surfaces. These environmentally friendly solutions extend beyond driveways, finding applications in pathways, public walkways, and parking areas.

Environmental Benefits of Permeable Design

The key characteristic of these permeable surfaces lies in their ability to facilitate water percolation, enabling the natural absorption of water into the subsoil. Beyond providing cooling and hydration to surrounding vegetation, this process actively contributes to efficient stormwater management by minimizing runoff. This dual function showcases the environmental advantages of green driveways, making them a compelling choice for those seeking sustainable landscaping solutions.

8 Different Green Options For A Sustainable Driveway

As we said before, there are many options to choose from when it comes to green driveway materials. Let’s take a look at a few of the most common.

1. Permeable Pavers

Some permeable pavers with a succulent plant in a pot above

Permeable pavers are gaining prominence as an environmentally conscious choice for constructing driveways. Characterized by their ecological attributes, these pavers are predominantly crafted from recycled plastic, contributing to a notably reduced environmental footprint during the production process. Additionally, alternative materials like paving stones, pervious concrete, and porous asphalt can also be employed in the fabrication of permeable pavers, further diversifying the sustainable options available for driveway construction.

2. Crushed Concrete

Crushed concrete used to create a driveway green

While crushed concrete certainly isn’t a natural material, there are many homeowners that swear by it for driveway use. The beauty of crushed concrete is that it allows for water runoff, draining nutrients into the surrounding soil to create carbon dioxide. 

It’s also very sustainable in that you can get it from just about any demolition site. You’re essentially using material that would have likely gone to waste otherwise. 

Crushed concrete, sourced from pavements, sidewalks, and building foundations, presents a sustainable option for constructing driveways. By utilizing crushed concrete, homeowners can achieve a driveway aesthetic reminiscent of traditional concrete, but with an added environmentally friendly touch. The permeable nature of this material contributes to the creation of a green driveway, allowing for better water drainage and reduced environmental impact.

3. Natural Stone Pavers

Some natural stone paving is used in the green driveway of the house

By using natural stone pavers on your driveway, you can add a bit more natural character. You can often buy natural stone from quarries, which is more sustainable, as it uses less CO2 production.

Depending on how you set your natural stone pavers up, you can often allow water to run between your pavers, soaking into the surrounding soil. Take a look at the different types of natural stone to find one that fits your aesthetic.

4. Sandstone Bricks

An eco-firendly driveway should be made of natural materials, like thesesandstone bricks

A sandstone brick driveway is a unique way to add character to your property. Sandstone is one of the nicest-looking natural materials. We get sandstone when storms or inclement weather pressurize small bits of sand into granular layers. The end result is a stone substance, which paving experts will often cut into bricks for use in building projects.

The beauty of sandstone bricks is that they are porous yet durable. You can easily customize them to fit the appearance of your driveway, cutting them into different shapes and seeking out the best earthy tones to accentuate desert-style architecture and landscaping. 

Plus, sandstone bricks hold up for a very long time, similar to concrete or traditional bricks. 

5. Porous Concrete

If you want the look of a traditional driveway without making a larger carbon footprint, you can check out porous concrete materials. Porous concrete reduces water runoff, and you don’t need as much of the material to fill the entire space of your driveway. 

Not only can it help the wildlife in your neighborhood thrive, but it is also much less harmful to the environment from a production standpoint. 

For homeowners within Homeowners Associations (HOAs), porous concrete emerges as an ideal recommendation. This material allows residents to maintain the curb appeal associated with traditional concrete driveways while aligning with HOA guidelines on sustainability. By opting for porous concrete, residents can seamlessly blend aesthetic preferences with eco-conscious choices, ensuring their driveways remain both visually appealing and environmentally responsible—an excellent solution for those seeking a sustainable and HOA-compliant green driveway.

6. Porous Asphalt

The porous surface of asphalt

If you’re dealing with a long driveway that has tons of water runoff, you might consider looking at a material like porous asphalt. The great thing about this material is that it allows rainwater to seep through and into the soil underneath. This soil, if left underneath regular asphalt, would suffer from dryness. 

Using porous asphalt allows the water cycle to continue. 

Traditional asphalt typically has around 3% of void space, which only allows a little bit of water to run through at a very slow pace. Porous asphalt alternatives, on the other hand, have around 16% of void space. With a porous asphalt alternative, you can make your driveway five times better for the environment.

7. Local Gravel

Local gravel is a good choice for a sustainable driveway

Local gravel is an excellent material for transforming a driveway. When you get your gravel locally, you don’t support or fund international transport, which is one of the main producers of fossil fuels. 

Opting for eco-friendly gravel for your driveway not only benefits the environment but also supports the local economy. Money spent on this sustainable option circulates back into the community, creating a truly green driveway that’s a win-win for both your property and the broader community.

8. Hempcrete Bricks

In a recent construction industry breakthrough, the idea of hempcrete bricks was born. There are many things to love about hempcrete bricks, including the fact that they are much easier to transport because of their lightweight character. 

One of the other great things about hempcrete bricks is that they absorb atmospheric CO2, even once they are made into bricks. Essentially, by installing hempcrete bricks into your property, you get rid of CO2 around your property, all while supporting an industry that is at the forefront of creating greener alternatives to construction materials.

These manufacturers will often use lime-based binders to shape hempcrete into bricks for use, giving them added durability that lasts for years after laying. This is one of our absolute favorite green driveway options and definitely one of the most unique. 

The Benefits Of An Environmentally Friendly Driveway

A Green Driveway should be flood deterrent as this photo is showing

Green driveways can help prevent several problems. Let’s take a look at some of the ways they might benefit your home.

Flood Deterrent 

If you’ve ever had a standard, impermeable driveway made of concrete or asphalt, then you’ve probably had to deal with all of the problems that arise from them, including erosion, washouts, flooding, and overall surrounding damage that can come with inclement weather and everyday use. 

A sustainable driveway lets rainwater soak into the soil, preventing floods. This is especially advantageous for sloped driveways, where eco-friendly options shine, offering a practical solution for a green driveway.

Durability

Eco-friendly driveways often provide durability than standard asphalt or concrete driveways can’t. You won’t have to worry as much about breakage or stains, and they’re often easy to maintain. This makes eco-friendly driveways a great long-term investment. 

Reduced Heat 

By nature, eco-friendly driveway materials, such as permeable stone driveway tiles offer much better heat reduction compared to other types of driveway materials. Just look at the asphalt, which absorbs and emits lots of heat, especially when it’s in a hotter climate. 

When you have an eco-friendly driveway, you’ll likely even be able to walk around barefoot during the summer without hurting your feet!

Versatility

Environmentally friendly driveways are very versatile. There are so many options to pick from, most of which are relatively easy to install. You can build eco-friendly driveways in many shapes and sizes, as well as on inclines and declines. 

Green Driveway Cost

AspectCost Range (per square foot)
Permeable Pavers and Recycled Materials$4.50 – $8
Direct Installation on Suitable SoilAround $3
Paving Stones$4.50 – $8
Pervious Concrete$7 – $13
Porous Asphalt$8 – $30
Professional Installation and Soil Prep(Varies by material)
Long-Term Value AssessmentLower maintenance costs over time, positive environmental impact

Creating a green driveway involves thoughtful consideration of both environmental impact and budgetary constraints. The cost of implementing an eco-friendly driveway is a multifaceted aspect. It hinges on material choices, soil conditions, and additional factors. Here, we break down the various components influencing the cost, providing valuable insights. This will help you make informed decisions, aligning your sustainable aspirations with financial considerations.

Permeable Pavers and Recycled Materials

When opting for permeable pavers made from recycled materials, the cost of your green driveway may fall within the range of $4.50 to $8 per square foot. This category represents an eco-friendly choice that aligns with sustainability goals, contributing to a reduced environmental impact.

Direct Installation on Suitable Soil

For those fortunate enough to have soil conditions conducive to direct installation without additional layers, the cost can be notably economical. It has the potential to lower to around $3 per square foot. This budget-friendly alternative underscores the importance of assessing your property’s soil characteristics before deciding on the driveway construction approach.

Additional Material Options: Paving Stones, Pervious Concrete, and Porous Asphalt

A green driveway, permeable and made of natural stones

Consider exploring alternative materials like paving stones, pervious concrete, and porous asphalt, each with its own associated costs. While paving stones may fall within the $4.50 to $8 range, pervious concrete and porous asphalt might offer distinct advantages, contributing to the overall versatility and aesthetic appeal of your green driveway.

Professional Installation and Soil Preparation Costs

It’s essential to factor in professional installation costs, which can vary based on the complexity of the chosen material. Additionally, consider any expenses associated with soil preparation. Understanding these additional costs will provide a more comprehensive view of the overall budget required for implementing a sustainable and visually appealing green driveway.

Long-Term Value Assessment

Beyond the initial costs, assess the long-term value of your investment. Green driveways often result in lower maintenance expenses over time, contributing to cost savings in the future. Furthermore, consider the positive environmental impact, making your green driveway not just a financial investment but a contribution to sustainable living.

Final Thoughts – Finding the Right Green Driveway Option For Your Home 

We hope that you now have a better understanding of the available eco-friendly materials and green driveway options. There are so many great solutions to upgrade your property while maintaining sustainability.
If you’re looking for a paving company to help you construct your dream driveway, make sure to check out our local directory of top-notch paving companies. For other expert advice regarding paving, head on over to our blog.

Tim Dawson's Avatar

About the Author: James Brennan

James has over two decades of experience in the paving industry and has worked on a wide variety of projects, from large-scale commercial installations to small residential repairs.