Natural Stone Paving – Cost, Laying, And Maintenance
Homeowners all across the United States are beginning to appreciate the beauty and uniqueness of natural stone paving. Granites, limestones, flagstones, sandstones, marble, bluestones, and travertines increase the aesthetic of patios, walkways, and driveways. They are also low-maintenance, durable, and offer versatile styles.
Natural stone paving is a more prestigious, durable, and stylish hardscape option than colored concrete because it was created by minerals that took thousands of years or longer to form. It is a choice for creating a genuinely distinctive outdoor living environment. Instead of requiring high-energy, fuel-burning processes that release significant volumes of CO2 into the environment, it can be extracted from the ground and processed using low-energy technology. This means natural stone pavers are recyclable in a way that concrete ones aren’t; in our eco-friendly world, this is a big deal.
Outdoor paving made of natural stone is often used for patios, driveways, and sidewalks. The materials are made by the forces of nature, as the name suggests. Choosing between natural stone and concrete would become even simpler because, in this article, we explore how to lay your natural stone paving, the benefits and why it is better than concrete.
What is natural stone paving?
Natural stone paving involves using slabs made from natural rocks to pave outdoor areas. So what are natural stone pavers?
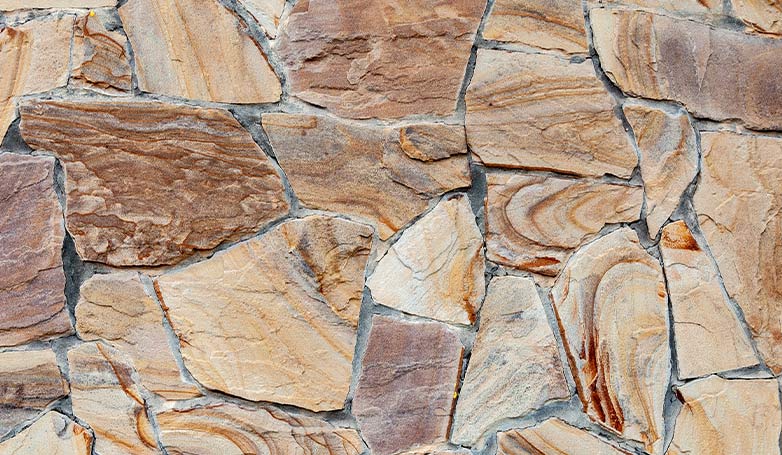
Stone pavers are made from rocks, and they have different characteristics. Natural stone pavers include but are not limited to granite, sandstone, limestone, flagstone, travertine, bluestone, and rainbow sandstone. Natural pavers come in various colors, shapes, textures, and sizes.
How to lay natural stone paving?
Below is a step-by-step guide on how to lay your natural stone paving.
Choose Your Natural Stone paver
The first step to laying your natural stone paving starts with a choice. Deciding on the best natural stone paver can be stressful. You might be caught in between limestone or granite, sandstone or flagstone. The first step to laying your natural stone paving starts with making a choice.
The first step to laying your natural stone paving starts with making a choice. Mark The Area You Want To Pave
When you have decided on the paving stone to use, the next step is to define the area to be paved. You can do this with spray paint, grade stakes, or a string.
Dig Out The Area
The next step is digging out the area to be paved. Before digging, ensure you take out all obstacles. Ensure you dig a good and well-leveled hole. 6-8 inches of topsoil is needed to give it a base.
Lay your base material
Crushed rocks or gravel with moisture makes your work easier to carry out. Use crushed rocks about 3-4 inches for workable surfaces. When laying a base for a driveway, you need 5 inches or more.
Prepare Your Sand Base
The next step is to pour your second layer, the sand base. Your sand base is the strata between your base and your pavers. Pour about half an inch of sand on your rock and lay it out smoothly.
Lay Your Pavers
The final step is to lay your pavers gently. It’s good to start laying your stone slabs on a straight edge. Keeping your edges straight will determine the result.
If you notice a depression after laying your pavers, fill it up with more sand and if the stone pavers look a little bit higher than the rest, use a rubber mallet to level it carefully. A hammer, chisel, or diamond blade will help you do the work.
Restrain The Edges
The moment you are done laying your pavers, you will need to restrain the edges. This process is done with plastic, concrete, or steel strips. They prevent your stones from sliding apart.

How to clean natural stone paving?
Simple cleaning routines will help your natural stone pavers stand the test of time, look beautiful and remain clean. The number of times you will need to clean your natural stone paving depends on several factors, including the season you are in. In the fall, your stone pavers need to be cleaned regularly to reduce the number of fallen leaves and ensure they don’t decompose on your stones.
Use the Right Cleaning Product
Using the right cleaning substance is the first step in cleaning your natural stone paving. Avoid harsh substances in the quest to get your natural stone pavers looking neat and spotless. Go for a cleaning agent that has a neutral pH level.
Regular Sweep
A good sweep once a week will boost the lifespan of your landscape. Clean off the debris and keep fallen leaves away from your patios or driveways.
Clean Up Spills
Stone pavers are susceptible to damage from high or low-pH; when you spill juice or food, ensure that you clean it off. Also, clean off any stain before it settles on your natural stones. If your stone paving is installed over a large area, employ ride-on cleaning machines or pressure cleaners to do the job for you and remove debris where your brooms can’t reach.
Seal Your Patios Or Driveways Regularly
Sealing your natural stone paving will do more good to your driveways. Sealing protects your pavement from cracking easily and prevents moisture from settling into your stone pavers.
Replacement
Sometimes, the only choice you will be left with is to replace the severely damaged or stained areas or stones. Replacing just an area or stone won’t cost a hand and a leg.
Should natural stone be sealed?
Like other materials, sealing helps maintain and protect your patios or driveways from cracks, dirt, and stains. Sealing also improves the aesthetic of your paved surface and prolongs the lifespan of your natural stones.

How to seal natural stone paving?
Using a sealant can improve the lifespan of your natural stone pavers and your patios, driveways, or walkways. Ensure that you choose the most suitable sealant for your natural stone pavers. Once you’ve purchased your sealant, you can carefully follow these steps to seal your pavement;
Clean The Surface To Be Sealed
To seal your natural stone, you must ensure that your walkways, patios, or driveways are clean and free from debris.
Check Your Weather Forecast
Sealing must be done on a dry surface. An unexpected rain will destroy your work. It would help if you had a temperature range of 5°c – 20°c.
Protect yourself
If you easily get upset by smell, wear a mask and protective clothing.
Test your sealant
Using a small area, seal gently to ensure you have a suitable sealant. Once you have confirmed that you have a suitable sealant, apply the first coat of sealant around the paved area. This is the impregnation coat.
Apply the second coat
Apply the second coat of sealant, surface protection; you must let it dry. To get a fine finish, walk back in the opposite direction and ensure you don’t seal any patches or debris.
Allow To Dry
Allow drying for 3-4 hours. And your natural stone paving is dried and ready for use.
Natural Stone Vs. Concrete
There is no doubt that choosing between concrete and natural stone can be a bit confusing for many. Although concrete is inexpensive and appears colorful, they have several backlashes that make natural stone paving stand out.
Maintenance
Maintaining stone pavers is less difficult compared to concrete. Stone pavers barely develop cracks; they are easy to fix if they crack. The repair cost is not as expensive as the cost of repairing concrete.
Style choices and Aesthetic
Because stone pavers are natural rocks that come in different natural colors, sizes, and shapes, you wouldn’t have to worry about installing a boring style. Your style choices are versatile to fit the project you have in mind.
Easy Installation
Installing concrete is quite demanding; labor, grading, and backfilling will stress you out. And because concrete easily cracks, you must be super careful and diligent. On the brighter side, stone pavers will always save the day. You can install your stone pavers by yourself. The time and effort it takes are enough to allow you to have fun on your patio.
Durability
Natural stone pavers or rocks are eco-friendly and 100% sustainable. Stone pavers look beautiful as they age.

Is natural stone cheaper than pavers and concrete?
Concrete is less costly than natural stone. This is because they require fewer resources to manufacture and are more affordable per square foot.
Natural stone is more expensive than concrete and other paving materials. Stone pavers require more time and resources to manufacture; however, the overall cost of natural stone paving depends on the size of the space to be covered and your budget.
The average cost to install natural stone pavers is between $17.17- $22:89 per square foot, and the total cost will depend on other factors. Location, area covered, e.t.c.
Conclusion
Natural stone paving is one of the best methods of paving your patios, walkways, or driveways. Natural stone pavers will stand the test of time when it comes to your patio, walkway, or driveway lifespan.