Sandstone Slabs – 11 Steps for Perfect Patio Installation

Choosing the right paving material is crucial, and sandstone slabs stand out as a top contender. Let’s explore if they’re the ideal choice for your next project.
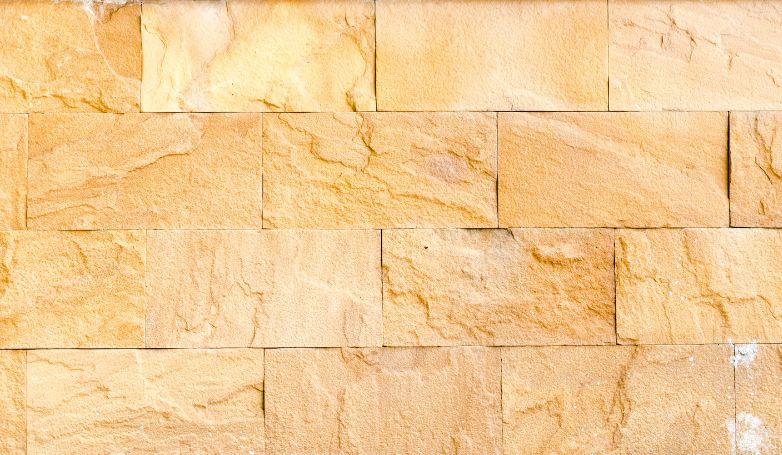
Sandstone slabs are renowned for their versatility, exceptional durability, and diverse color palette. They are an excellent choice for various projects, including patios, gardens, and other outdoor spaces. Their natural beauty enhances any design, offering both functionality and aesthetic appeal. With proper installation and maintenance, sandstone paving can transform your outdoor area into a stunning and enduring landscape feature.
Interested in using this material for your space? Stick around as we dive into the world of sandstone slabs, offering you practical advice and creative ideas for your project
11 Steps To Install Sandstone Patio Slabs
Let’s look at a step-by-step of how to lay sandstone patio slabs.
1. Choose Your Area
The first thing you’ll need to do is decide where you want to lay your sandstone pavers. This area should be level, firm, and have good drainage. We recommend marking the area using some spray paint.
2. Start Digging
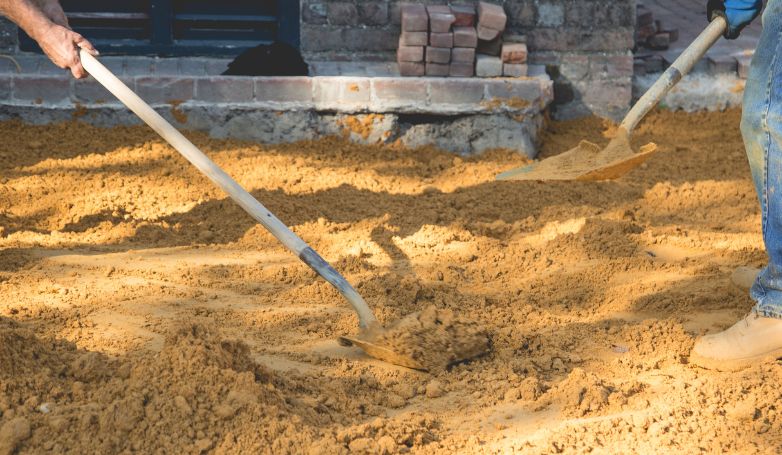
Using a small shovel or your hands, start digging until your sandstone area is 125mm deep + the depth of the pavers. When finished, your area should be about 150mm deeper than the surrounding area.
3. Level It Out
After digging, achieve a level base using a rake and string line. A perfectly level base is essential for the stability of the patio. Use a long spirit level for accuracy, ensuring no areas are higher or lower than others. Compacting the area with a tamper or garden roller is important to create a stable base, reducing the risk of future shifting or sinking of the pavers. This step is vital for the longevity and aesthetic of your patio.
4. Fill In The Sub-Base
You’ll want to provide some sub-base beneath the stones for better hold and drainage. We recommend using a mixture of crushed stone and dust, filling and compacting at least 50mm.
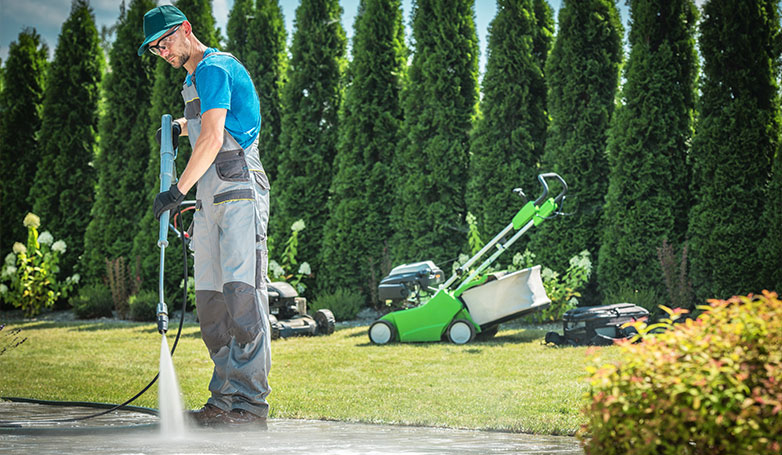
5. Wash Your Stones
Washing the stones removes not just surface dirt but also any fine particles that might hinder adhesion. This step is critical for ensuring the mortar adheres properly, contributing to the durability of your patio.
6. Prime Your Stones
Priming enhances the bond between the stone and mortar. Ensure even coverage for effective adhesion. Skipping this step can lead to loose pavers and longevity issues, so it’s important to use a quality primer.
7. Mix Up Your Mortar
The mortar mix should be homogenous and pliable. It’s important to achieve a balance; too wet, and it lacks strength, too dry, and it won’t adhere properly. Consistency is key for a smooth application and strong bond.
8. Spread It
Spreading the mortar uniformly is crucial for a level surface. Ensure it’s not too thick to prevent shifting and not too thin to ensure adequate support. Consistent spreading helps prevent future issues like cracking or pavers sinking.
9. Lay Your Stones Down
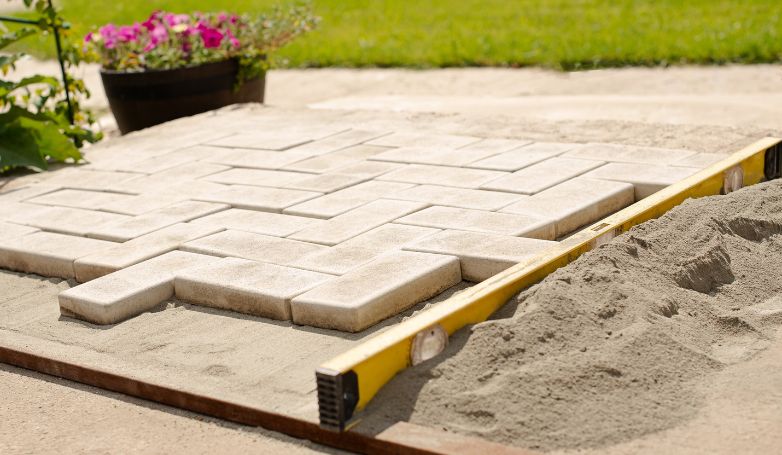
Lay your sandstone units down. You’ll want to make sure that they are around 8-10mm apart from one another. To make sure they are firmly locked in the bed of mortar, you can use a rubber mallet to tap on the stones lightly.
10. Fill The Joints
Next, you will want to take your mortar mix and fill in the joints using a trowel. Again, make sure that your mortar is “wet” in consistency so that you can work with it. You can then use your pointing tool to compress the mortar mix.
11. Allow It To Sit
The setting period is crucial for the integrity of the patio. Avoid any foot traffic or disturbance during this time. Proper curing ensures the mortar reaches its full strength, ensuring the longevity and stability of your patio.
If you want a better visual for laying your sandstone pavers down, you can check out this video:
Pros of Sandstone Slabs
Sandstone slabs offer several advantages that make them a popular choice for various construction and landscaping projects. Here are some of the key pros:
- Natural Aesthetic Appeal: Sandstone has a unique and natural beauty, offering a range of colors and patterns. This natural appeal can greatly enhance the aesthetic of any space, making it ideal for patios, walkways, and garden features.
- Durability: Sandstone is known for its durability and strength. It is capable of enduring diverse weather conditions, rendering it appropriate for outdoor usage. Its resilience ensures a long lifespan with proper care and maintenance.
- Improves with Age: Unlike some materials, sandstone can improve in appearance over time. The weathering process can bring out its natural tones and textures, adding character to the stone.
- Non-Slip Surface: Sandstone naturally has a slip-resistant surface, making it a safe choice for areas like pool decks, patios, and walkways, especially in wet conditions.
- Thermal Properties: Sandstone has good thermal properties, staying cool in the summer and retaining heat in the winter, which can be beneficial for outdoor seating areas and pathways.
- Eco-Friendly: Being a natural stone, sandstone is an eco-friendly option. It doesn’t involve manufacturing processes that emit significant pollutants, and it can be recycled or repurposed at the end of its life cycle.
- Maintenance: Sandstone requires relatively low maintenance. Regular cleaning and occasional sealing are usually sufficient to maintain its appearance and durability.
These advantages make sandstone slabs a highly sought-after material for both residential and commercial projects, offering a blend of aesthetic appeal, durability, and practicality.
Cons of Sandstone Slabs
While sandstone slabs offer many advantages, there are also some drawbacks to consider:
- Porosity: Sandstone is porous, which means it can absorb water and other liquids. This can lead to staining and, if the water freezes, potential cracking and damage. Regular sealing is required to mitigate this issue.
- Susceptibility to Weathering: While some weathering can enhance its appearance, excessive exposure to harsh weather conditions can cause sandstone to erode or lose its color over time. This makes it less ideal in extremely wet or freezing climates.
- Regular Maintenance: To maintain its appearance and durability, sandstone requires regular maintenance, including cleaning and sealing. Neglecting maintenance can lead to issues like staining, moss growth, and erosion.
- Weight: Sandstone is heavy, which can make installation labor-intensive and more expensive. The weight also means it may not be suitable for areas where the underlying structure cannot support heavy loads.
- Limited Load-Bearing Capacity: Compared to some other stone options like granite, sandstone has a relatively lower load-bearing capacity. This might limit its use in high-traffic or heavy-load areas.
- Cost Variability: The price of sandstone slabs can vary widely based on factors like color, thickness, and origin. Some types of sandstone may be quite expensive, increasing the overall cost of a project.
- Installation Complexity: Proper installation of sandstone requires expertise to ensure a level surface and proper drainage. Incorrect installation can lead to problems like uneven surfaces and water pooling.
These cons should be carefully considered against the pros when deciding whether sandstone slabs are the right choice for a particular project.
How Much Do Sandstone Slabs Cost?

Sandstone is one of the best mid-range paving options, which is one of the reasons why so many people use it for their outdoor projects. On average, you’ll end up spending around $30 to $50 per linear foot on the slab.
For stone steps in an average-sized backyard, this price per linear foot equates to about $1,700 to $4,500.
Not sure if sandstone is the right stone for your needs?
Check out our guide: Sandstone vs. Limestone – An In-Depth Comparison Guide
What Determines the Cost of Sandstone Slabs
The cost of sandstone slabs can vary significantly based on several factors including the quality of the stone, the thickness of the slabs, the color and pattern, and the region where you purchase them.
- Quality of Stone: Higher quality sandstone, which is more durable and aesthetically pleasing, typically costs more. The presence of unique colors and patterns can also increase the price.
- Thickness and Size: Thicker and larger slabs are usually more expensive. The size and thickness you choose will depend on your project’s requirements. For example, thicker slabs are recommended for areas with heavy foot traffic.
- Color and Pattern: Sandstone comes in a range of colors and patterns. Unique and rare colors or patterns can command higher prices due to their rarity and demand.
- Regional Variation: Prices can also vary depending on where you live. Transport and delivery costs can affect the overall cost, especially if the stone is sourced from a different region or country.
Can You Seal Sandstone Slabs?
While you can seal your sandstone slabs, you don’t necessarily have to.
Think about it like this:
Natural stone has survived for thousands of years without the need for any chemical sealants. Even if you don’t give it a layer of sealant, it won’t wither away. However, with that said, there are benefits to sealing your sandstone slabs.
For starters, sandstone is a very porous material, meaning it will absorb water quicker than other stones, and stains can be nearly impossible to remove over time. So, if you have your sandstone paving in an area that gets wet really often and you want to maintain a pristine look, you may choose to seal your sandstone.
Of course, some people like the natural look of sandstone without sealant. The way that it ages over time is like a fine wine, so it’s truly up to how “perfect” you want it to look many years down the line.
Can You Paint Sandstone Slabs?
Yes, you can paint sandstone, though it can be a very difficult process that requires a lot of care.
You need to begin by cleaning your sandstone thoroughly, removing any dirt or debris that may be on its surface. To get rid of this dirt and debris, you can use a cloth. You don’t want to use sandpaper, which is a material often used when cleaning other stones, as it can be damaging.
After your sandstone is clean, you can apply your primer. Make sure it is neutral in color. To apply your primer, follow the instructions given to you by the manufacturer. We recommend using a spray gun, as it will allow you to get an even coat over the entire stone.
After you’ve applied your primer, you can start applying a coat of latex paint. The color you choose is up to you. We recommend using a spray gun for this portion of the process again, as it can make sure the entire job is evenly done.
Lastly, we recommend applying a clear sealant to ensure the paint is protected against any damage, especially if your stones are outside and exposed to the elements.
We highly recommend looking at rainbow sandstone if you want sandstone with a unique color.
Check it out in our guide: Rainbow Sandstone – What Is It And When To Use It
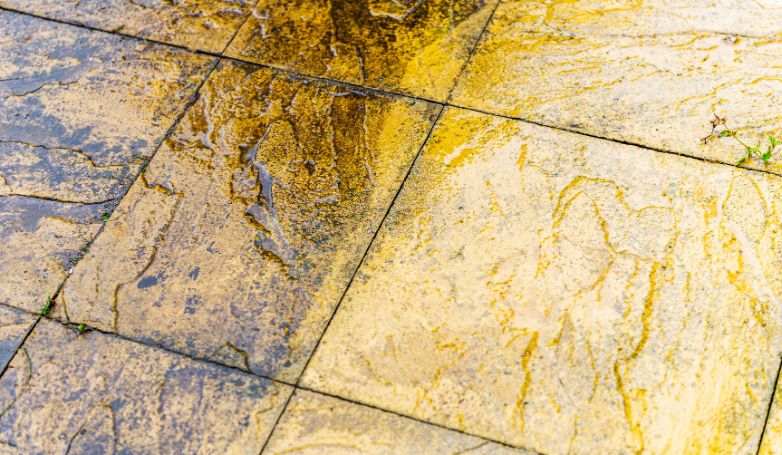
How Do You Clean Sandstone Patio Slabs?
Keeping your sandstone pavers clean is actually quite simple. If you only need to give your sandstone a gentle cleaning, you can use a mixture of soap and water. However, if you’re dealing with tougher stains, you can use heavier cleaners, such as bleach.
Bleach works great when you have heavy algae or moss stains.
To make a bleach mixture for your sandstone, you can combine an equal mixture of water and bleach and pour it onto your slabs. You can then leave the mixture sitting on your stones for around 30 minutes before washing it off with a hose or power washer.
Make sure that you’ve washed off all the bleach, as you do not want it sitting on your stone.
How To Get Paint Off Of Sandstone Slabs
If you’ve recently found paint on your sandstone slabs and you want to get rid of it, there are a couple of methods you can try. We always recommend starting with the least aggressive method first before moving on to heavy-duty methods.
The least aggressive method is to let your stones weather. This means letting the paint deteriorate naturally with the weather.
If that doesn’t work, you can move on to water washing, including scrubbing or gentle sponging. We recommend using a soft bristle brush if you can’t get it off with a cloth or sponge alone. If that doesn’t work, you can move on to steam stripping. To do this, you can use a low-pressure, superheated steam stripper. This method is great for emulsions or other water-thinned paints. It’s an excellent way to clean paint from stone without stripping the stone’s surface.
If all else fails, you can use a solvent or non-caustic chemical removers. These are reasonably aggressive, though not as aggressive as alkaline or caustic chemical removes like potash or caustic soda, which can damage the stone. Non-caustic chemicals are great for latex-based paints.
If you have another kind of paint on your sandstone slabs, we recommend getting in touch with a professional cleaner.
How To Remove Cement Stains From Sandstone Slabs
If you have cement stains on your sandstone, don’t fret. There are methods for removal.
One of the best methods is to clean it with muriatic acid, otherwise known as hydrochloride acid. You can simply dilute this solution with water to remove the cement from your sandstone. However, this needs to be done with caution, as acidic cleaners can break down dolomitic cement or calcite, which holds many types of sandstone together.
It’s a good idea to test out a small portion of your stone before moving on to the rest. You can dilute four parts of water and one part of muriatic acid to test out your stone. If the diluted acidic mixture doesn’t fizz when it hits the surface of your sandstone, you’re probably good.
Final Thoughts
There you have it; all you need to know about paving with sandstone slabs. If you have any other questions regarding paving with sandstone, or you just want to get more advice on paving in general, make sure to head on over to our blogs.
Here at Paving Finder, we’re always looking to help people find the right paving services for their needs. See how joining our pro network can help you seek out the best professionals.