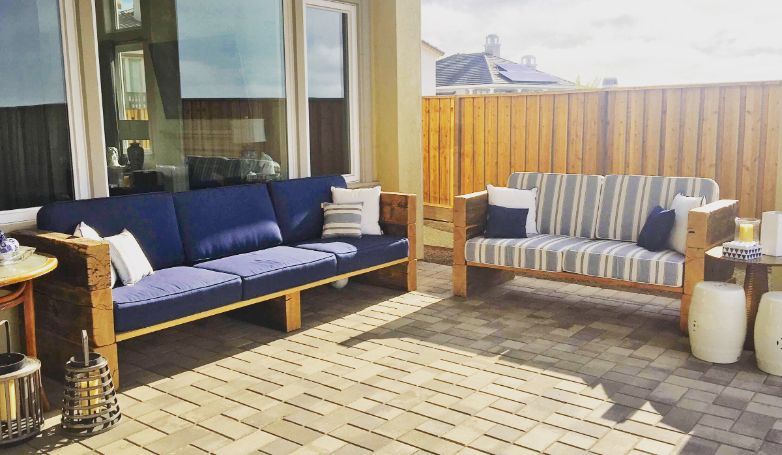
How to Lay A Brick Patio – Everything You Need to Know
Curious to know how to lay a brick patio as a pro? You’ll be glad to know the process isn’t too complicated, and anyone can get the job done. All you’ll need to do is to get the right tools and observe some simple steps.
To lay a brick patio, you’ll first need to outline the target area and choose your preferred brick shapes. Next is to assemble all the materials and tools before you get started with the actual work. Start by marking your target area before you proceed to dig the ground using a shovel. Once the ground is smooth and compact, you’ll spread gravel on the soul before placing a landscaping fabric. Level out the surface before you start laying bricks.
In this article, we give you practical tips on how to lay a brick patio and make your outdoors aesthetically appealing. Let’s get started.
How To Lay a Brick Patio – Preparations
Laying a brick patio is a not-so-straightforward process, as you can’t jump straight to installing the bricks. You must first prepare adequately by determining your working area and having your materials and tools on standby, as explained in this section.
Outline the Area to Apply the Patio
The first step when building a brick patio as a DIY project should be marking the edges. We strongly recommend using a mason’s line and stakes to enhance your overall accuracy. You can choose to drive two stakes at every corner or just use one stake per corner. Outlining the area allows you to run the perimeter of the patio and know the areas you’ll be working on.
Alternatively, you can also use a chalk line to mark the area where you plan to install the brick patio. Getting the right measurements is vital as it determines the quantity of supplies you’ll need for the entire project.
Choose the Shape of the Bricks from Available Designs
The next step as you prepare to lay your brick patio is choosing your preferred brick design. Bricks come in different patterns from running bond to basket weave, and herringbone.If you’re wondering how to lay a brick patio, you’ll be glad to learn that there is no perfect brick design. It’s up to you to choose a pattern that best suits your preferences. Point to note, though, some brick designs are easier to work with compared to others that may require potentially tricky cuts.
Calculate the Number of Materials You’ll Need
Once you’ve chosen your preferred brick design and outlined the target area, you should calculate the amount of materials you’ll require. As a good rule, you should ensure you have the right number of paving bricks, enough sand, a large enough landscape fabric, polymeric sand, and compactible gravel.
Some of the tools you’ll need for this DIY project include a mason’s line, shovel, rake, carpenter’s level, rubber mallet, plate compactor, broom, and garden hose. It’s best to ensure you have all the tools and materials needed before you start the actual job.
Read more: How To Clean Brick Patio
How To Lay a Brick Patio in 10 Steps
Once you have all the tools and supplies needed to lay a brick patio in place, you can now get started with the actual work. Below are 10 steps to lay your brick patio and bring it to life.
1. Mark the Ground With Wooden Sticks
Measure out the area where you want to lay bricks for your patio. As you get the measurements, you can use wooden sticks to mark the edges, which paints a better picture of where you’ll lay the bricks. Be sure to mark the areas accurately, as doing so boosts your chances of success despite having little to no experience. Once you’ve set up the stakes, you can use a mason’s line to better define the area you want to lay the bricks.
2. Dig the Ground with a Shovel
After you’ve marked the entire perimeter, you can now start the actual work. You’ll need a shovel for this step as you’ll be digging with the goal of removing 7-8 inches of soil. While this step might seem relatively straightforward, it’s vital to maintain consistency in terms of depth. Be sure to dig evenly across the entire area such that you have an evenly dug patio. Digging from side to side is highly advisable, as it allows you to maintain a good level of consistency compared to digging without any formula.
3. Compact and Smooth the Ground
The next step after you’ve dug the designated area is to compact the ground. We’d recommend using a hand tamp to compact the soil. You can also rent a plate compactor if you don’t fancy the labor that’s associated with hand tamps. A plate compactor will get the compacting job done faster and more effectively. But you can still use a hand tamp to tamp the soil and make it more dense and compact. The importance of compacting the ground to the DIY project cannot be overstated and should be done until the soil is smooth and well-evened out.
Read more: Limestone Paving for Patios and Driveways
4. Add the Gravel Base
Next, pour the compactible gravel inside the area you excavated. If you’re wondering how to lay a brick patio the right way, you should pour the compactible gravel to a depth of around 4 inches to act as a solid base. Once you’ve poured the gravel, take a rake to make the gravel level and extra smooth. Tamp the gravel base until you’re positive it’s properly compacted.
5. Place the Landscaping Fabric Over the Rock or Soil
After you’re done with adding the gravel base and it’s fully compacted and even, next is to place the landscaping fabric over the surface. The importance of a landscaping fabric to the outlook of your brick patio cannot be overstated, as it will prevent weeds from sprouting between the bricks. This secures your brick patio, giving you the guarantee that your patio will remain aesthetically appealing for several years.
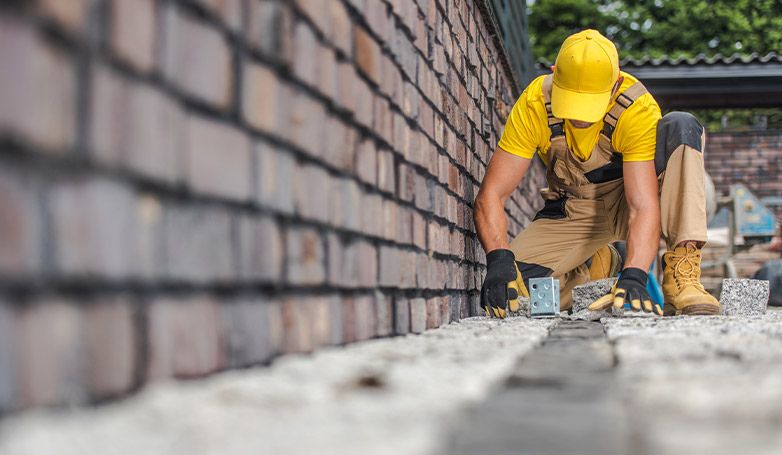
6. Install Patio Borders
Once the landscaping fabric is well installed, the next step is to install patio borders to maintain your patio’s shape. You can opt for plastic edging, as it’s easily available and perfectly suited for brick patios. It’s advisable to line up test-fit bricks along the edges to ensure you install the borders accurately. Once done with the edging and you’re confident it fits snugly, you can proceed to remove the test bricks.
Read more: How to Paint Concrete Patio
7. Ensure the Patio Surface is Level and Add Sand
Check to confirm that the entire surface is smooth and level after you’ve installed the patio borders. Once confident that everything is okay, it’s now time to pour sand over the landscaping fabric. We’d recommend pouring about 2 inches of sand gently over the fabric. Make sure you don’t pour too much sand, as it can prove problematic when laying the bricks. Experts recommend spritzing the sand with water to soak it and make it compact. After you’ve added sand to the landscaping fabric, you can now proceed to remove the stakes or strings that you may have set up as you were marking the perimeter.
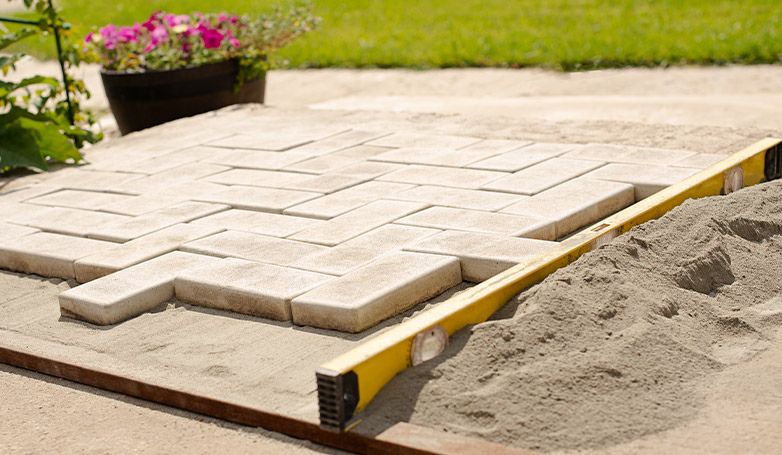
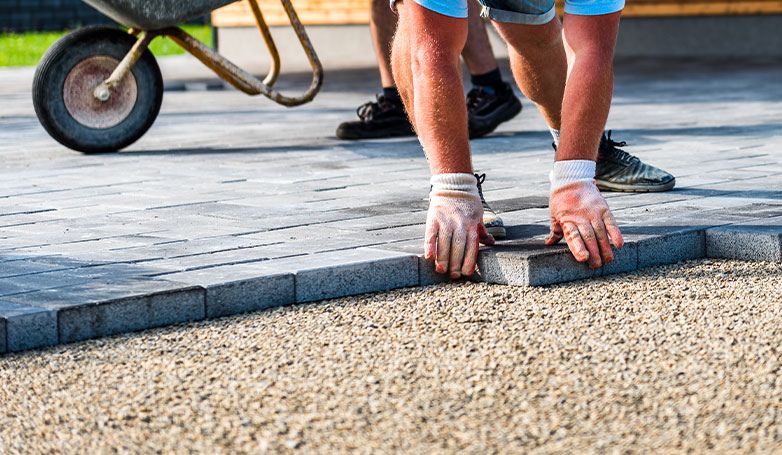
8. Start Laying Bricks on The Patio
Now we get to the fun part, laying bricks as you gradually see your design coming to life. The trick when laying bricks is to start from one corner and move along the set edging. If curious about how to lay a brick patio the right way, the general consensus is laying the bricks one by one, ensuring you complete a row before starting another one. Be sure to press the bricks into the moist sand and place them as close to each other as you can.
You can use the rubber mallet to make the bricks settle deeper into the moist sand. Tap the bricks gently, trying your best to maintain the shape and design. Most experts advise using a rubber mallet once you’re done with each row. This will ensure that the bricks are well-installed before you move to the next row.
9. Sprinkle Another Layer of Sand
Once done laying the bricks, next is to sprinkle polymeric sand, which helps lock and keep them in place by stiffening the joints. Spread the polymeric sand carefully over the bricks, paying special attention to the cracks. A broom will come in handy in ensuring the sand gets into the cracks. Keep adding sand until you’ve filled all the cracks. You can use a garden hose to spray water on the bricks, which activates the polymeric sand to start stiffening. Repeat the process until all the sand has settled into the cracks.
10. Clean Up the Patio
Most people assume that learning how to lay a brick patio is all about laying bricks. However, you’ll need to clean up your patio to complete the process. After applying polymeric sand to fill the cracks, you should allow the bricks some hours to dry before you kick-start the cleaning process. Use a broom to gently sweep over the bricks to leave your patio looking clean and attractive. Avoid using too much force, especially if you aren’t too sure that the polymeric sand has settled.
Read more: How To Paint Concrete Patio
How to Maintain Brick Patio?
Maintaining your brick patio shouldn’t prove too hard if you did a good installation job. Here are some tips to observe if you want your brick patio to look neat years after installation.
Sweep it Frequently
Sweeping your pavers regularly is easily the best way to keep your patio in good shape. It’s advisable to have your patio swept daily, especially if it is frequently used. Regular maintenance helps prevent the buildup of soil, dust, leaves, and other debris that can build up in those tiny spaces between the bricks. Sweeping your pavers before it rains is also a great tip, as it makes clean-up straightforward later on.
Rinse Your Pavers Regularly
After sweeping your brick pavers, we strongly recommend rinsing them using a garden hose. Rinsing with clean water ensures that all debris is cleared away as opposed to being moved from one place to another. A power washer can also come in handy if you live in an area prone to moss or mold. It’s also advisable to clean using cleaning solutions. Dish soap and water can get the job done, or you can opt for commercial products specifically designed for cleaning outdoor spaces.
Seal your Pavers
Learning how to lay a brick patio won’t be of much use if you don’t properly maintain your pavers. A great way to keep your brick pavers in top shape is to reseal them every once in a while, preferably every two years. This is especially true when your patio is frequently used. Sealing your pavers protects them from the elements that can enhance wear and tear. It also makes cleanup straightforward, allowing your patio to thrive for years.
You can choose between non-film-forming sealants and film-forming sealants. Non-film-forming paver sealants are durable and come with a matte finish that provides additional protection from the elements. Film-forming paver sealants have a gloss (or semi-gloss) finish but need frequent reapplication compared to non-film-forming sealants.
Read more: Decomposed Granite Patios
Replace Broken or Chipped Pavers
Broken brick pavers enhance the collection of debris, dirt, and standing water, which increases the chances of premature damage. Making instant repairs to damaged parts is the surest way to prevent your brick patio from becoming unsightly in a matter of months. Fortunately, installing replacement pavers isn’t difficult provided you have the replacement bricks, filler sand, and edging to keep the bricks in place as they cure.

FAQS About How To Lay A Brick Patio
What Do You Put Under A Brick Patio?
The most commonly used paver base is sand. A layer of sand is usually placed between the pavers and the base. You’ll first start by installing the sand before laying and pressing the pavers in place. A gravel base is often preferred due to its durability as it can serve you for years if properly installed. Other types of bases that can be used include synthetic bases and open-graded bases (preferred for commercial buildings and large projects).
Can You Lay Brick Directly on the Ground?
While some first-timers might think it’s okay to lay brick directly on the ground, doing so is ill-advised. Dirt isn’t a good base for brick patios as it doesn’t have good drainage properties. In addition to poor drainage, dirt can sink, shift, and swell, depending on prevailing weather conditions. Laying brick directly on the ground isn’t recommended if you want something that’ll last and serve you for long.
What Is The Best Base for a Brick Patio?
The best base for a brick patio is gravel. Most experts recommend using a gravel base for outdoor projects. While a sand base is known to last if well installed, using it alone to set pavers isn’t enough.

Conclusion
When looking to lay a brick patio as a DIY project, it’s crucial to take your time and prepare adequately. In addition to marking the ground you’ll work on, it’s advisable to have your materials and tools on standby before you get started.
Remember to compact and straighten the ground after digging the area with a shovel. You should also tramp the gravel base until it’s even and smooth enough before placing the landscaping fabric.

Leave a Reply
Want to join the discussion?Feel free to contribute!