Asphalt Over Concrete Driveway – 10-Step Procedure
Considering an upgrade for your driveway? Asphalt over concrete driveway is a popular choice, offering a durable and cost-effective solution. Learn about the advantages and considerations of this surfacing option.
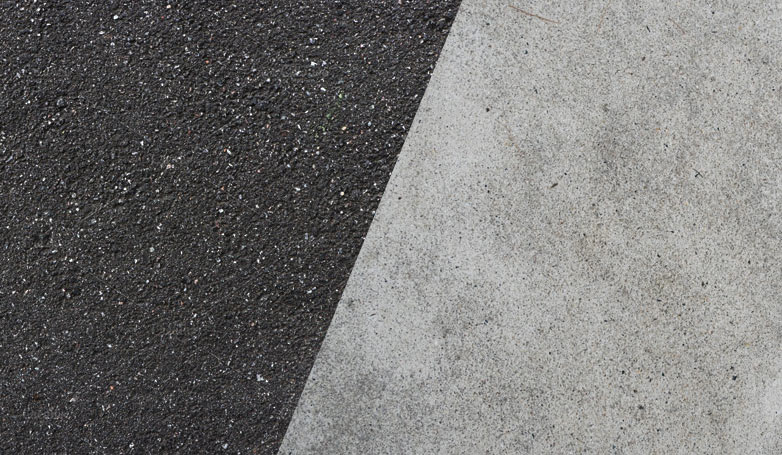
Asphalt over concrete driveway involves applying a layer of asphalt over an existing concrete surface, enhancing its appearance and performance. This method capitalizes on the durability of concrete while benefiting from the flexibility and weather resistance of asphalt. The process typically involves thorough cleaning, applying a bonding agent, and adding the asphalt layer. This combination results in a robust driveway that withstands varying weather conditions, providing a smooth and long-lasting surface.
Explore the practical advantages of choosing asphalt over a concrete driveway, uncovering enhanced aesthetics and improved longevity. Delve into the seamless integration of asphalt, guaranteeing a dependable and cost-efficient upgrade for your residential or commercial property.
10 Steps to Install an Asphalt Overlay on a Concrete Driveway
Embarking on the journey to enhance your concrete driveway with an asphalt overlay requires careful planning and execution. Follow these 10 comprehensive steps to ensure a successful installation of asphalt over a concrete driveway. From thorough cleaning to strategic maintenance, each step contributes to the longevity and performance of your upgraded driveway.
1. Clean the existing concrete surface thoroughly
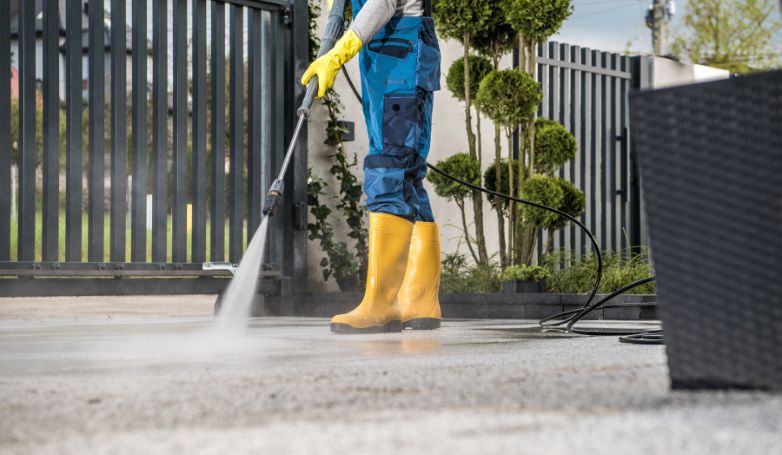
Start with a meticulous cleaning of the concrete surface to remove all debris, dirt, and contaminants. This foundational step ensures optimal adhesion for the asphalt overlay.
Use high-pressure washing and degreasing agents if necessary to tackle tough stains and ensure a pristine surface. Ensuring the concrete is free from oils, grease, and other substances that might impair bonding is crucial for the durability and effectiveness of the overlay.
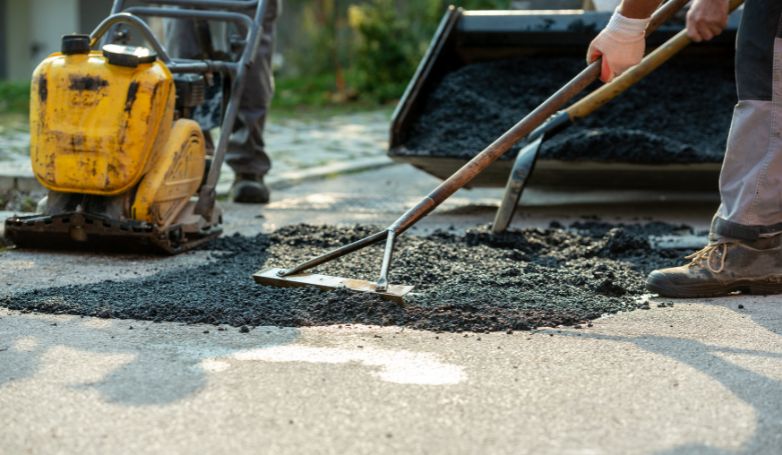
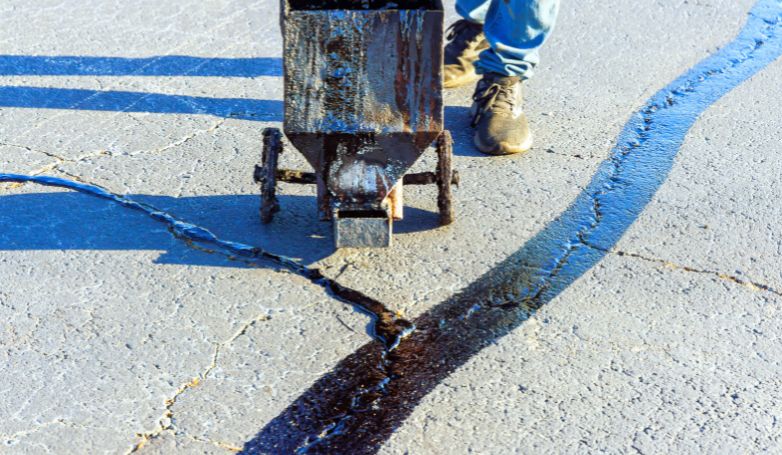
2. Repair any cracks or damage in the concrete
Examine the concrete surface carefully for any signs of cracks, holes, or structural damage. Use a high-quality concrete repair compound to fill in these defects, ensuring a smooth, even surface. It’s essential to address these issues promptly, as unattended cracks and damages can lead to water infiltration, further deteriorating the concrete and compromising the new overlay’s integrity.
Allow sufficient time for the repairs to cure fully, creating a solid and stable base for the asphalt overlay. Proper preparation at this stage can significantly extend the lifespan and performance of your driveway.
3. Apply a bonding agent to ensure adhesion
After repairing any concrete damage, the next step is to apply a bonding agent across the entire surface. This agent acts as a glue between the old concrete and the new asphalt overlay, ensuring a strong, seamless bond. Select a high-quality bonding agent specifically designed for asphalt-over-concrete applications. Apply it evenly according to the manufacturer’s instructions, paying extra attention to ensure complete coverage.
The bonding agent plays a crucial role in preventing delamination and enhancing the overlay’s durability, making it an essential step in the preparation process. Allow the bonding agent to dry to the recommended tackiness before proceeding with the asphalt installation, to maximize adhesion.
4. Install an asphalt leveling course if needed
Depending on the condition and levelness of the existing concrete surface, an asphalt leveling course might be necessary. This step involves applying a thin layer of asphalt to fill in low spots and create a uniformly level surface. The leveling course aids in ensuring that the final overlay has consistent thickness and smoothness, which is vital for the driveway’s appearance and functionality.
Use a high-grade asphalt mix suitable for leveling purposes, and spread it carefully to achieve the desired grade and contour. This preparatory layer also helps in addressing any minor imperfections left after the repairs, ensuring a flawless foundation for the main overlay. Allow the leveling course to properly settle and compact before moving on to the overlay application, to ensure a stable and even base.
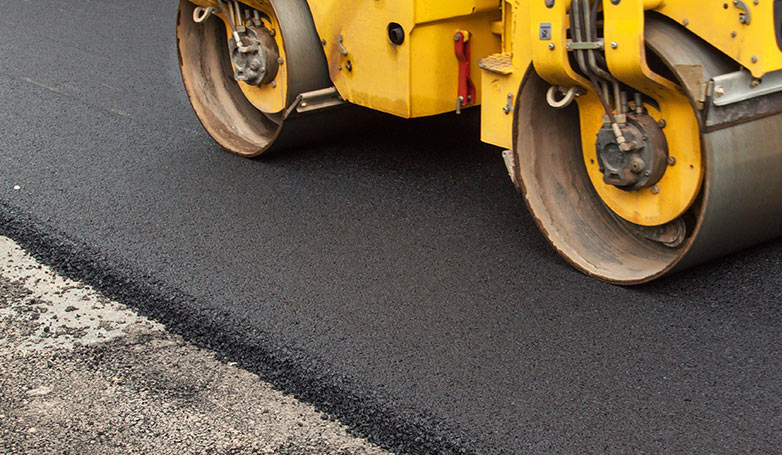
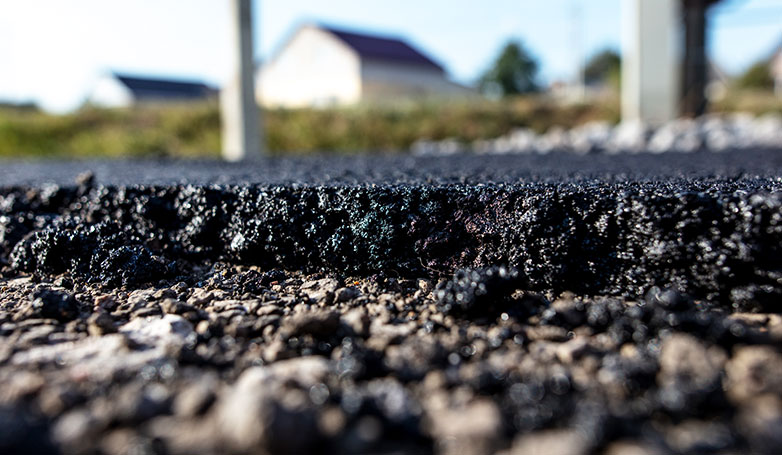
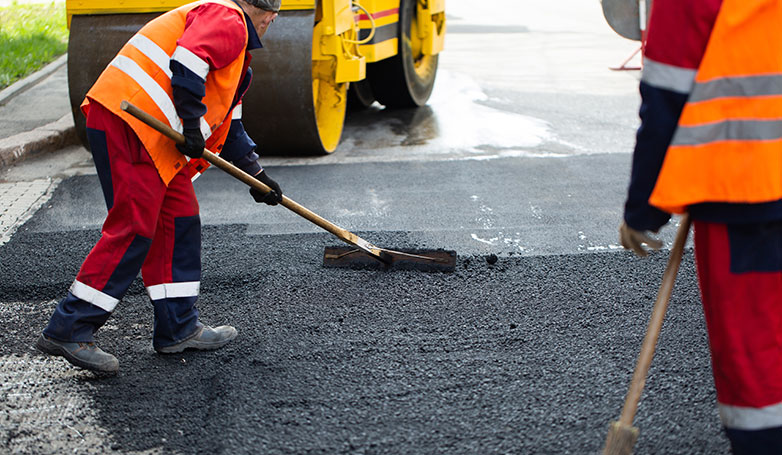
5. Spread a layer of hot mix asphalt evenly
Once the surface is prepared and the leveling course has set, it’s time to apply the main layer of hot mix asphalt. This material should be spread evenly across the concrete driveway, ensuring uniform thickness throughout. The hot mix asphalt should be applied at a temperature that allows it to be worked easily, yet cool enough to begin setting once in place.
Using specialized equipment, such as a paving machine, can help achieve a smooth, consistent layer. It’s crucial to work quickly and efficiently, as the asphalt begins to cool and harden soon after application. The thickness of the asphalt layer will depend on the expected traffic and use of the driveway, with a typical residential driveway requiring about 2 to 3 inches of asphalt for optimal durability and performance.
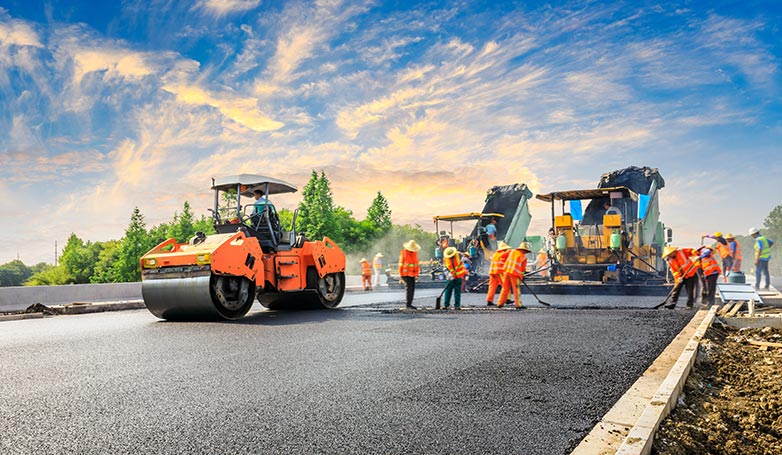
6. Compact the asphalt layer using a roller
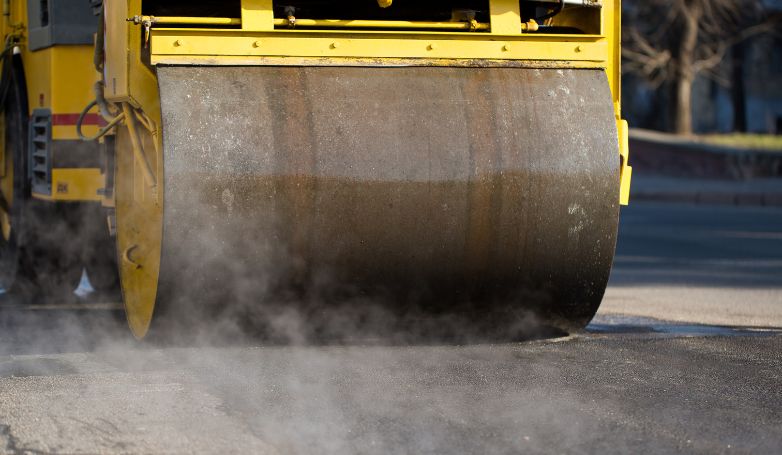
After spreading the hot mix asphalt evenly, the next critical step is compaction. Use a vibratory roller to compact the asphalt layer, starting from the edges and working your way inwards to eliminate any air pockets and ensure a dense, solid surface. Proper compaction is crucial for the longevity and resilience of the asphalt overlay, as it increases the material’s load-bearing capacity and resistance to weathering and traffic wear.
The roller should move at a steady, even pace to achieve uniform compaction across the entire driveway. Multiple passes may be necessary to reach the optimal density, particularly on the edges and any areas where the asphalt layer is thicker. Pay attention to the asphalt’s temperature during this process; it needs to be warm enough to allow for effective compaction but not so hot as to cause deformation.
Read more: Crushed asphalt driveway – 7-steps installation guide
7. Allow the asphalt to cure and harden
After the asphalt layer has been compacted, it’s essential to allow it sufficient time to cure and harden properly. This curing process is crucial for the asphalt to achieve its full strength and durability. Avoid using or applying any pressure on the surface during this period. The time required for curing can vary based on the temperature and humidity conditions but typically ranges from a few days to a week.
During this time, the asphalt will cool, harden, and adhere firmly to the underlying concrete and bonding agent, creating a robust and long-lasting driveway surface. It’s important to monitor the weather during this period and protect the new surface from any potential damage, such as heavy rain or extreme temperatures, which could affect the curing process.
8. Seal the asphalt for added protection
Once the asphalt overlay has fully cured and hardened, the final step in ensuring its longevity and durability is to apply a high-quality sealant. This protective layer serves as a barrier against water penetration, UV rays, oil spills, and other environmental factors that can degrade asphalt over time. Choose a sealant that is specifically designed for asphalt surfaces and follow the manufacturer’s application guidelines closely.
The sealant should be spread evenly across the entire surface, using tools like a squeegee or spray applicator for a uniform coat. This process not only enhances the aesthetic appeal of the driveway by giving it a fresh, finished look but also significantly extends its lifespan. Typically, it’s recommended to reapply the sealant every two to three years, depending on the driveway’s exposure to traffic and weather conditions, to maintain its protective qualities and keep your driveway looking great.
9. Ensure proper drainage for water runoff
An essential aspect of installing an asphalt overlay on a concrete driveway is ensuring that the new surface has adequate drainage. Proper water runoff prevents water accumulation, which can lead to asphalt deterioration, such as cracking and potholing over time.
Assess the slope of the driveway and, if necessary, incorporate slight gradients during the asphalt application to direct water away from the driveway and toward appropriate drainage areas. You may also need to install or adjust drainage systems, such as French drains or channel drains, to effectively manage water flow. Ensuring good drainage is a preventative measure that protects the structural integrity of the driveway and keeps it in good condition for years to come.
10. Regularly maintain and repair as needed
Ongoing maintenance is crucial to extend the lifespan of your asphalt over concrete driveway. Regular inspections can help identify potential issues early, such as small cracks or wear, before they escalate into more significant problems. Implement a maintenance routine that includes keeping the surface clean from debris, dirt, and chemicals, and promptly filling any cracks or holes with an appropriate asphalt repair material.
Additionally, consider a periodic reapplication of sealant as recommended by the product guidelines, usually every two to three years, to continuously protect the surface from water penetration and UV damage. Addressing minor repairs promptly and maintaining the sealant layer are key strategies to ensure your driveway remains durable, functional, and aesthetically pleasing for many years.
Is it Possible to Pave Asphalt over a Concrete Driveway?
As a homeowner, you are indeed searching for options that provide more stability, comprehensive services, and excellent weather resistance. For all this, asphalt pavement over existing concrete is an excellent idea because it gives you all that and lots more. Installing Asphalt over a concrete driveway is certainly possible. Many homeowners now pave asphalt over their concrete because it offers several advantages.
However, when doing so, you need to consider a few facts. Concrete is a strong and stable material, so you will have an even harder surface when you pave Asphalt over it. But this can only be successful if your existing concrete is in a stable and well-prepared sub-base, or else you will end up with an unstable and prone-to-cracking driveway. One cannot doubt that paving asphalt over a concrete driveway that has an appropriate compaction sub-base is always a superior pavement.
Why You Should Remove Concrete Before Installing an Asphalt Driveway
Even in today’s context, investing in an asphalt installation is a significant commitment that homeowners can’t undertake frequently. Therefore, when you opt for an Asphalt driveway, the expectation is that it will serve you well for at least two decades. Achieving this longevity requires adherence to proper installation and maintenance protocols.
The Critical Role of a Strong Base
For optimal durability, the paved asphalt driveway heavily relies on the strength of its underlying base. The approaches contractors use for robust driveways vary between Asphalt and concrete. In concrete scenarios, contractors aim for durability by laying thicker slabs. However, they often neglect proper preparation for accommodating an asphalt layer on top, potentially compromising the stability of the Asphalt Over Concrete Driveway.
Overcoming Challenges with Concrete Bases
This problem with the base may adversely affect the asphalt driveway’s durability and may reduce its life. Since no homeowner would enjoy a premature replacement of the Asphalt, it is, therefore, necessary to dig up your existing concrete drive to pour new Asphalt over it. With a more stable foundation, Asphalt has a higher lasting potential.
Furthermore, concrete has a fluctuating nature, which does not align well with Asphalt. When temperatures fluctuate, it is the nature of Asphalt to contract and expands and thus needs a stable base beneath. Only when you are confident of the concrete driveway condition underneath and its appropriate compaction and stability can you consider pouring Asphalt over it?
Why You May Want to Switch from Concrete to Asphalt
If you mainly live somewhere where the temperature fluctuates frequently, then Asphalt is ideal for paving. It can better handle fluctuations than concrete, which tends to crack a lot more than in severe winter weather.
In most cases, Asphalt performs just as well as concrete, provided you put it down the right way and maintain it well too. You will find repairs must be cheaper for Asphalt than concrete because patch and sealing holes and cracks do not weigh heavily on your pockets.
Besides, resurfacing layers work better when driveways begin to age and Asphalt again takes the lead. Resurfacing is advantageous for homeowners because it is cost-efficient and maximizes the life of the driveway.
Concrete cannot give you these two advantages because of the lack of resurfacing. Due to this, you have to replace the entire driveway once it reaches the end of its life. Hence, if you have been weighing the advantages of Asphalt over concrete, then as a summary, here is what you can base your decision upon:
- Concrete does not survive well under harsh colder climates
- Concrete is harder to repair
- It is more expensive
- Asphalt is budget-friendly
- It offers resurfacing facility, so you do not have to replace the entire driveway
- You can install asphalt faster
- Asphalt requires easy maintenance
Pros and Cons of Asphalt vs. Concrete
When ruts, stains, and cracks become increasingly evident on a driveway, homeowners cannot decide on a new installation. However, picking one out of the two most common solid materials for pavement is not that easy.
Concrete and Asphalt have their own sets of pros and cons. While they mostly contain a mixture of stone and sand and lay over a gravel substrate, their adhesive components differentiate the nature and functionality of the two.
Let’s look at the pros and cons of both materials below:
Concrete-Pros
- With concrete, you get more visual options. You will find concrete in a pale gray color in basic form, but it responds better to tinting or staining in any color you fancy. You may even stamp concrete with patterns if you want a textured finish.
- Concrete is the better option for regions where hot summers are typical. Asphalt does not work well in such places because the heat tends to make it sticky and gooey. Additionally, the process of softening in hot temperatures and re-hardening when it cools down causes cracks and sagging.
- Asphalt requires resealing every couple of years, but this is not necessary in the case of concrete driveways. You may seal concrete voluntarily to reduce fading, especially if you want a tinted driveway.
Concrete- Cons
- Typically, your driveway will have to endure rust, gas drips, and engine oil drips over its lifetime. Concrete has a lighter surface; hence you will find every spill and mark visible. If you want to maintain its good looks, you will have to degrease and clean aggressively.
- Concrete does not survive well in colder climates. You will find it cracking and buckling more every time winter sets in, and it snows. Concrete can also develop ugly marks from blotching, staining, or pitting from salt for melting the ice.
- Concrete may not give a streamlined appearance to match your streets.
- It requires tougher maintenance.
Asphalt- Pros
- Asphalt has a darker color, so it is good at concealing stains and signs of wear and tear.
- Asphalt installs faster, and you can use it within a couple of days of the process. In the case of concrete, you have to wait for enough for it to cure before you can use it.
- Asphalt is not as costly as concrete. It will cost you nearly less than forty to fifty percent than its counterpart.
Asphalt-Cons
- It does not last longer than a concrete driveway that you install well and maintain properly in favorable climates. The lifespan of a concrete driveway can be up to thirty or forty years, while an asphalt driveway, it is not more than thirty years at best.
- Asphalt does not survive well in hotter climates, and the expansion and contraction from melting and re-hardening can cause and widen cracks.
- It may be easy to maintain, but the maintenance does not last beyond three to four years. You will find yourself repairing your asphalt driveway more often than a concrete one.
The Cost of Switching from Concrete to Asphalt
One of the reasons why homeowners popularly prefer Asphalt over concrete these days is the cost difference. On average, a concrete driveway is more expensive than an asphalt one, with the former costing you approximately $4 or more per foot and the latter nearly $2 or more per foot.
The price of Asphalt largely depends on crude oil prices and fluctuations in those that cause the other to fluctuate. As a comparison, you will find the standard installation of a concrete driveway costs you approximately $4 to $6 per square foot.
Concrete Surface Removal Cost
Despite some of its drawbacks, one cannot doubt the long-lasting capacity and strength of the concrete material for driveways and other construction projects. It can serve you well for years, but as time advances, you will find it giving in to cracks from climatic changes, movements, and eventual unsettling.
In due time, concrete will fail when it has lived well and under aggressive conditions for long years. This is when you will need to replace it entirely. However, it would be best to prepare for the wide range of costs incurred in concrete removal.
These costs mount up considering the concrete’s location, thickness, and how much of it you remove. In terms of replacement, generally, you have to replace the entire driveway because resurfacing is not an option in concrete.
For this very reason, the national average cost range for concrete removal can fall anywhere between $500 to $5000. As an estimate, most homeowners pay approximately $1,846 for removing six hundred square feet of their concrete pavement.
Removal Price as per Concrete Type
The concrete installation has two types:
- With reinforced concrete- this is merely a concrete slab
- Or with unreinforced concrete- with rabar embedding
The cost of concrete removal also depends to a large extent on the type of concrete that went into your driveway. Both types differ in removal costs because they consider the location and size of your area. The contractors also have to include the costs of machinery they will employ and transport to your area for the removal process. For this, they have to measure the thickness and the existing concrete and the level of equipment they will have to use.
Ultimately, all these add up to the final cost of the process.
Asphalt Pavement Prep/Installation Cost
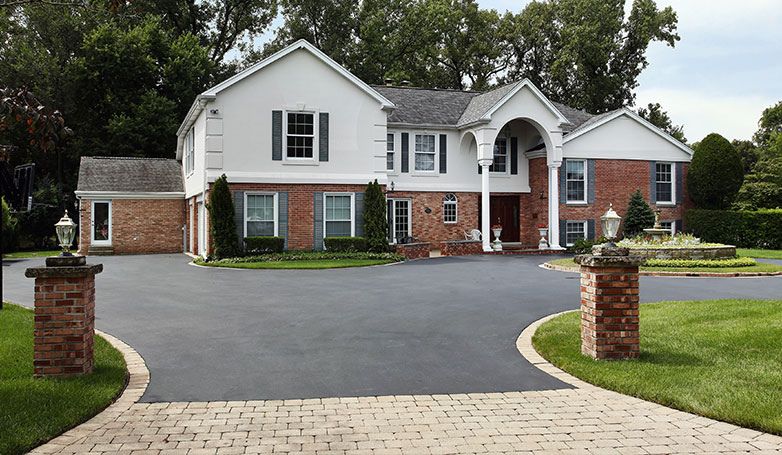
Asphalt installation is a prevalent trend because of the many advantages it gives to homeowners. From enhanced drivability to increasing your curb appeal, new asphalt pavement can increase your home’s resale value and give you many attractive benefits.
The cost-efficiency and easy maintenance win hands down with homeowners, while the eco-friendliness, higher tolerance of weather, and improved safety please all. But most importantly, its cost-friendliness is why most homeowners turn to this material.
Who can ever argue against the charm of acquiring a qualitative material for the home at affordable rates? None we believe!
Calculating the cost of asphalt installation
While it would be difficult to quote a definite figure, the truth remains that Asphalt falls much cheaper than concrete. The final cost takes into account the manufacturer and the kind of mix they use for the Asphalt, but even then, the final estimate fits into every homeowner’s budget.
The final cost also depends on the location, the size of your project, and the sort of equipment and workforce that will go into the process. The national cost range of paving an asphalt surface per square foot is generally around $6.
So if we look at the total, an asphalt driveway will roughly cost around $4,500 to $6,100. The installation would also consider factors such as the time it took, workforce, and the magnitude of the construction in addition to secondary factors. These include what it took to rip out your existing surface, how the contractors had to haul it away, and what other steps were required before laying down your new asphalt mix.
Deep dive into asphalt installation costs
The final cost of your asphalt installation will also include:
- Excavation of the existing surface
- Installing a gravel foundation
- The amount of tonnage
- The cost of transportation from the plant of asphalt production to your project’s location
- What other materials did the contractors need in addition to the Asphalt
- What base coat do they apply
- Market environments, including construction activity, permit requirements, and current prices of oil.
FAQs about Asphalt Over Concrete Driveway
Here are some key FAQs about asphalt over concrete driveways.
How thick should asphalt be over concrete?
The thickness of asphalt over concrete can vary depending on factors such as the intended use, local climate, and the condition of the existing concrete. Generally, a thickness of 2 to 3 inches is common for residential driveways.
How do you bond asphalt to concrete?
Proper bonding between asphalt and concrete is crucial for durability. The process typically involves cleaning the concrete surface thoroughly to remove any dirt or debris. A bonding agent or tack coat is then applied to the concrete before laying the asphalt. This helps the asphalt adhere securely to the concrete surface.
Will asphalt sealer stick to concrete?
Asphalt sealer is specifically designed for asphalt surfaces and may not adhere well to concrete. It is recommended to use a concrete sealer for concrete surfaces, as it is formulated to bond effectively with concrete. Mixing different types of sealers may not provide the desired results.
What do you put between asphalt and concrete?
A bond-breaking material, such as a geotextile fabric or a release agent, is often used between asphalt and concrete surfaces to prevent them from bonding together. This separation layer allows for the independent movement of the two materials, reducing the risk of cracking and other issues caused by temperature fluctuations and ground movement.
Final Thoughts
If you are considering pouring Asphalt over the concrete driveway, then the process is possible. However, you can only expect the surface to be stable and reliable if you have a properly compacted subbase beneath, or else resurfacing with Asphalt will fail.
From easy maintenance to being less costly, Asphalt is advantageous over concrete in multiple ways and can also increase your home’s resale value.