Infrared Asphalt Repair

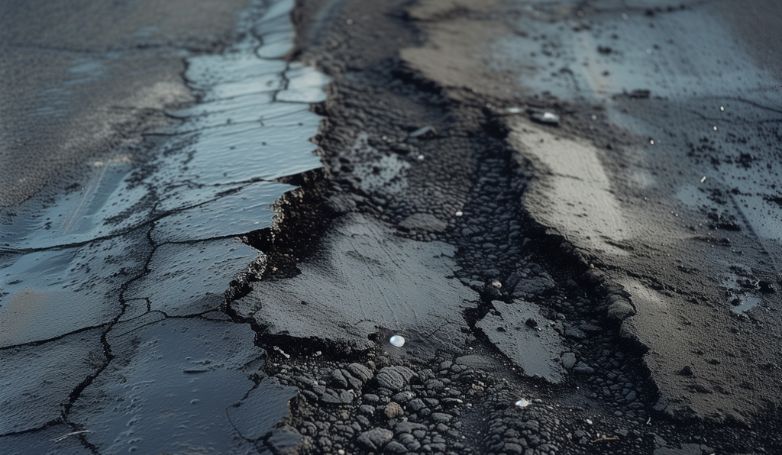
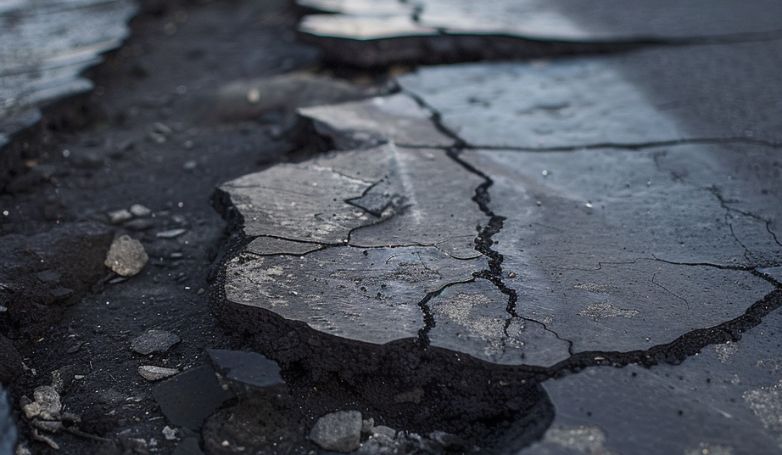
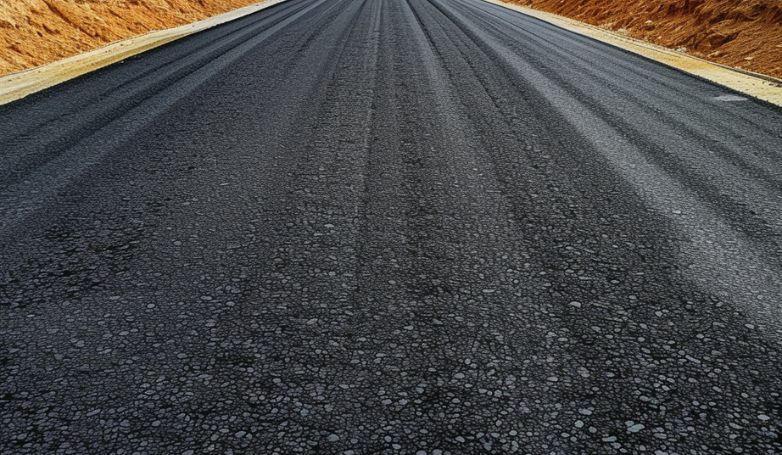
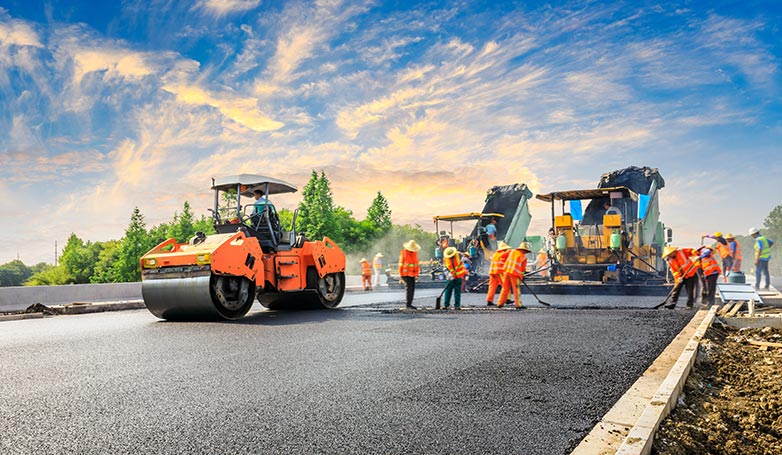
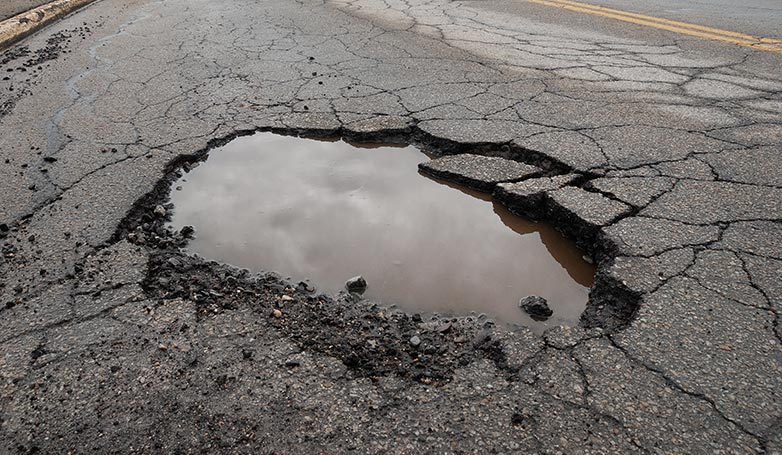
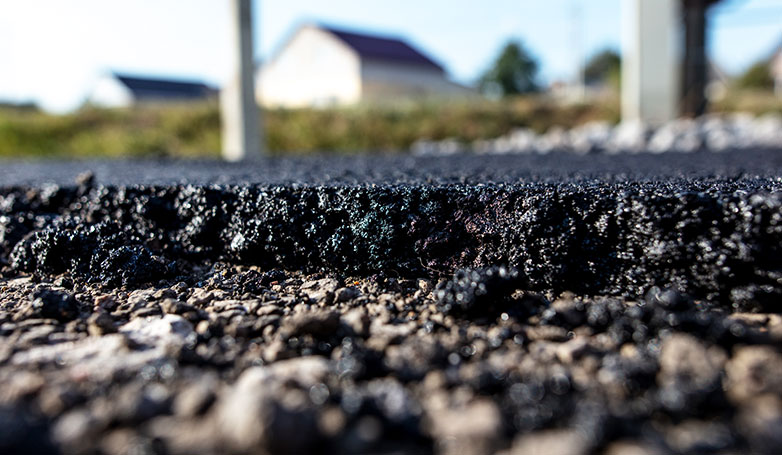
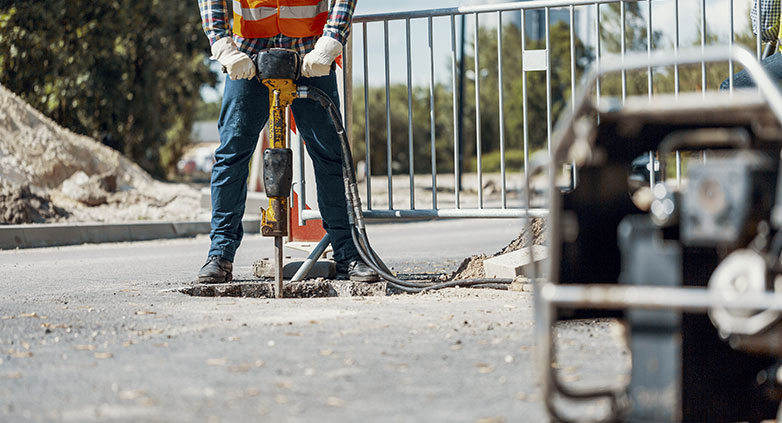
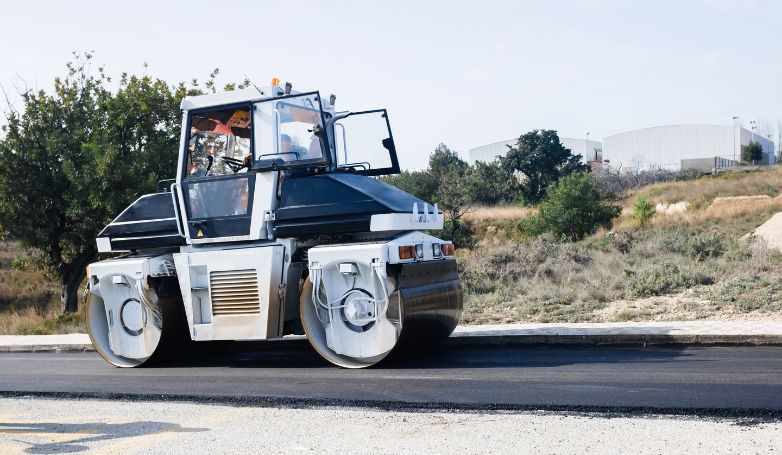
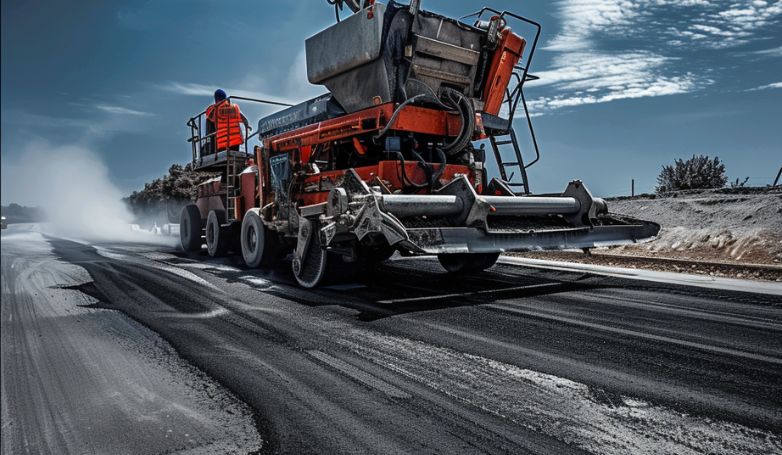
Infrared Asphalt Repair offers a cutting-edge solution for fixing pavement issues. This method is efficient, cost-effective, and ensures a seamless repair process.

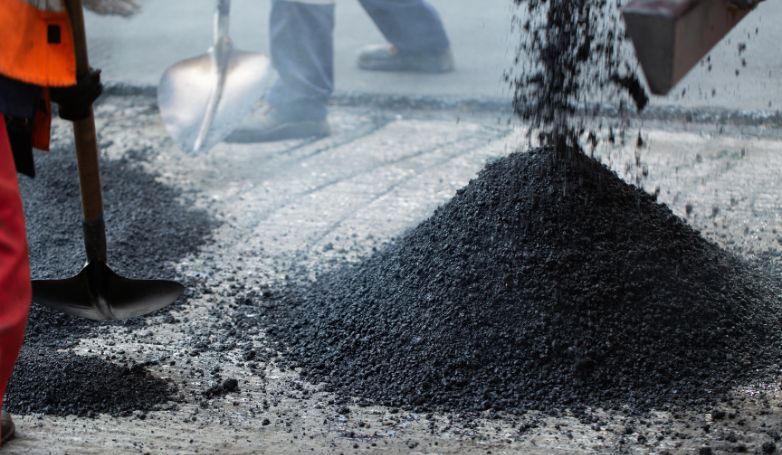
Infrared Asphalt Repair utilizes infrared technology to heat the damaged asphalt area, allowing for easy removal of the deteriorated asphalt. This process involves seven critical steps: heating the damaged area, removing the damaged asphalt, preparing the repair site, adding new asphalt mix, compacting the new mix, blending the repair area with the surrounding pavement, and finally, cooling the repaired site. This method not only repairs but also rejuvenates the asphalt, restoring its original condition while improving its longevity and appearance.

Discover more about how Infrared Asphalt Repair can transform your pavement, making it look and perform like new again.

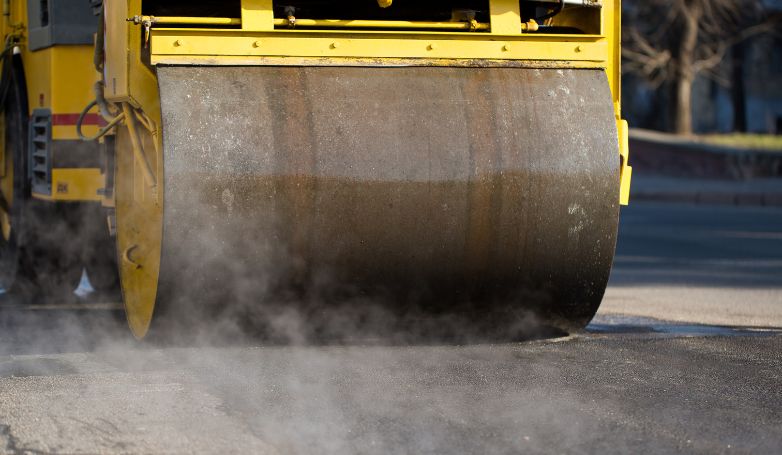
Explanation of the Infrared Heating Process

The worker is explaining how the Infrared Heating Process works

This repair method is an innovative technique, designed for efficient and seamless pavement restoration. This process uses infrared technology to evenly heat and soften the damaged asphalt layer, making it malleable for reshaping or integration with new material.

Unlike traditional methods that can be invasive and time-consuming, infrared heating is quick and non-disruptive to the surrounding pavement. It precisely targets the repair area, preserving the integrity of the existing asphalt while preparing it for the subsequent steps of the repair process. This method ensures a high-quality repair that merges seamlessly with the original pavement, extending its lifespan and enhancing its appearance.

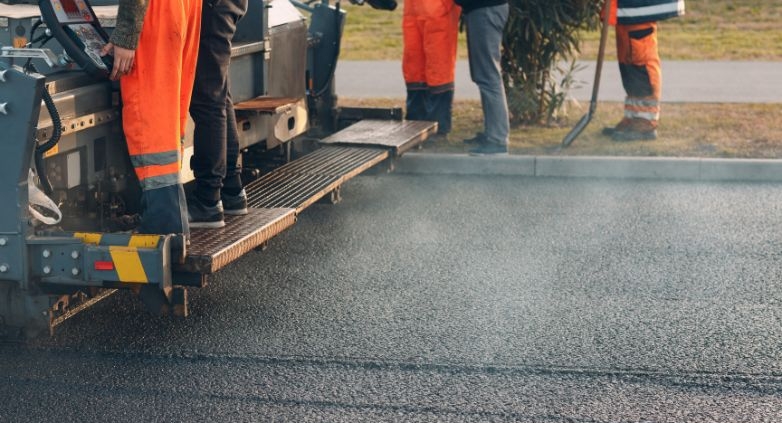
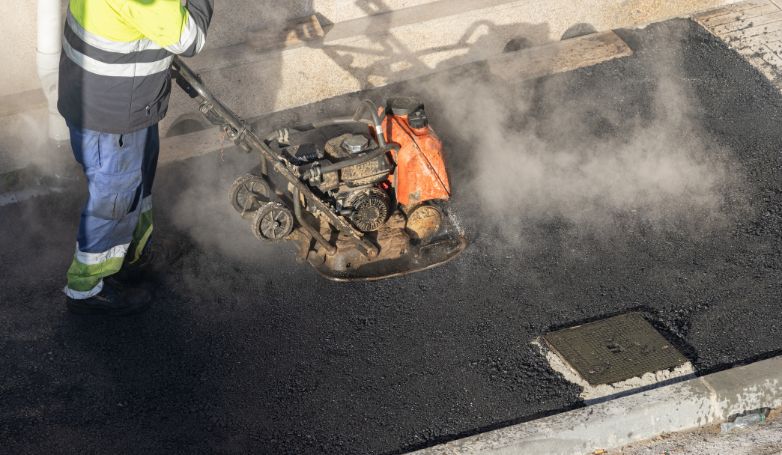
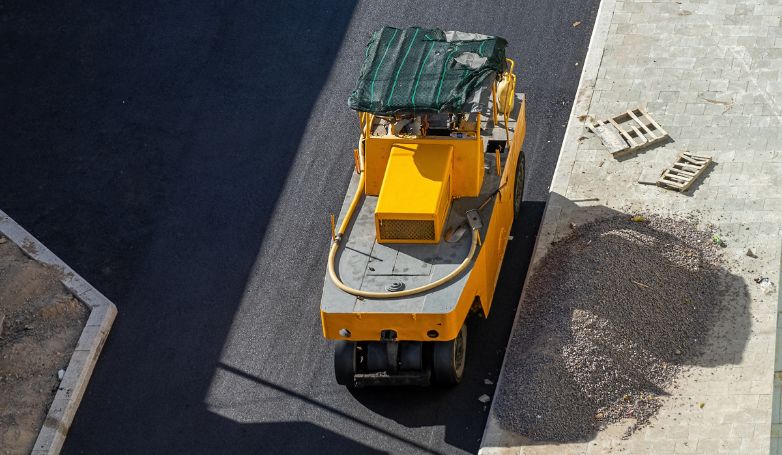
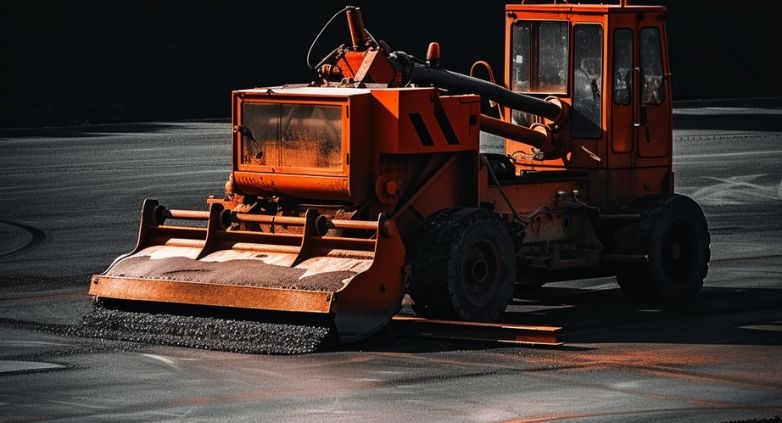
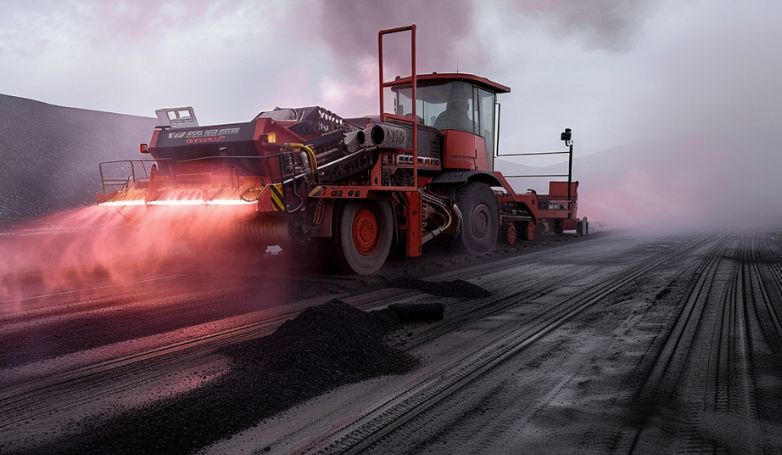
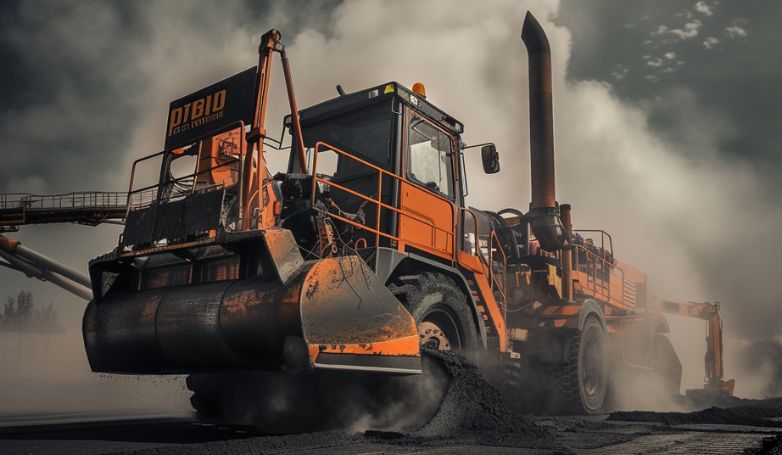
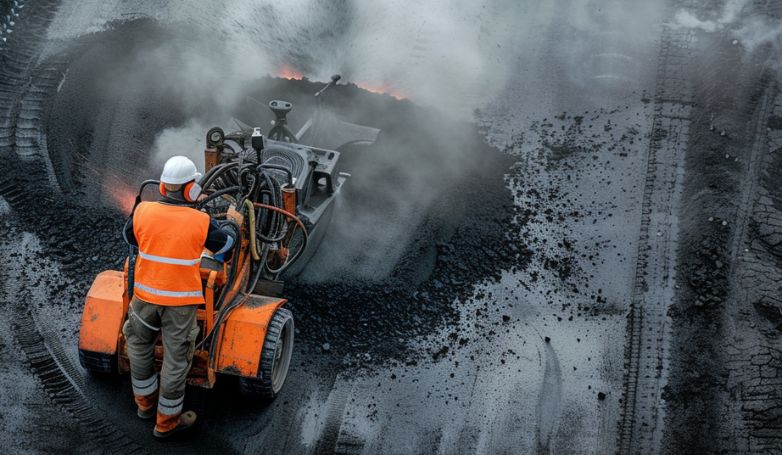
Types of equipment used in Infrared Asphalt Repair

To ensure the highest quality and efficiency in this repair method, a specific set of tools and equipment is essential. These tools are designed to address the unique requirements of heating, removing, and replacing the damaged asphalt. Let’s explore the key equipment:

Infrared heaters

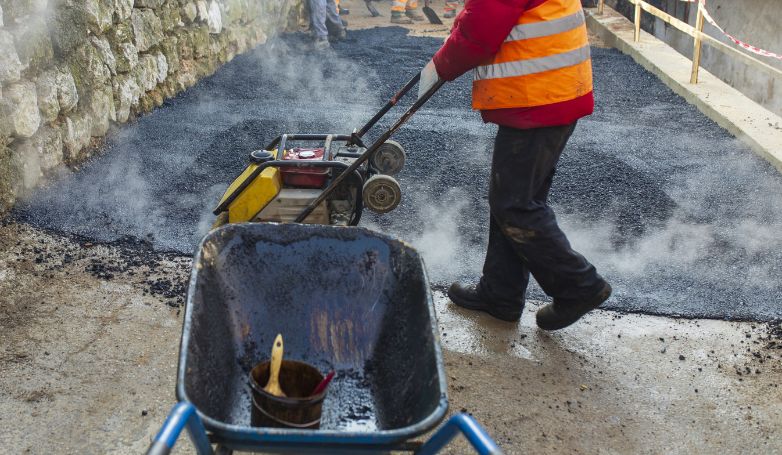
Central to the repair process, these devices emit precise infrared rays to uniformly heat the damaged pavement section. Targeted treatment of specific areas is ensured through adjustable settings, allowing the asphalt to be prepared without overheating or harming adjacent sections. Their versatility makes them suitable for various repair sizes, from small cracks to larger potholes.

Asphalt reclaimer

A machine is inspecting whether the asphalt is ready to be worked

Critical for maintaining the new asphalt mix at the optimal temperature, asphalt reclaimers ensure the material is ready for immediate use. This equipment is essential for keeping the repair process efficient, allowing for quick compaction and seamless blending with the existing pavement.

Other essential tools

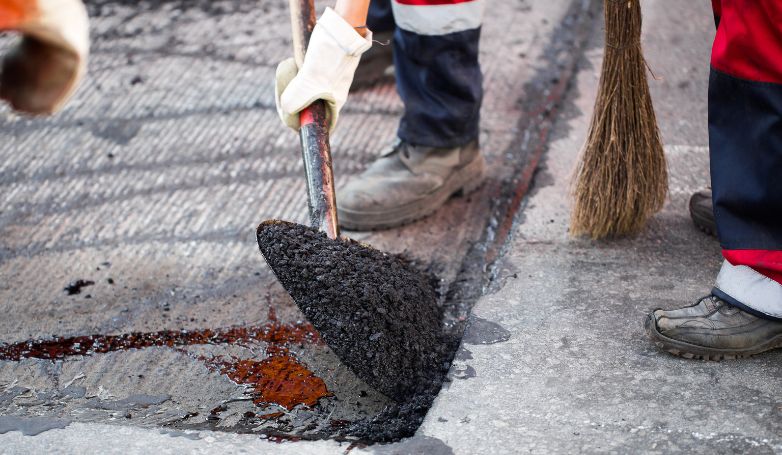
Completing the repair requires a suite of supporting tools. Rakes and lutes help evenly spread the new asphalt, while compactors ensure a smooth, dense finish. Infrared thermometers keep a close watch on temperatures, ensuring the material is within the ideal range for durability and adherence. Safety equipment protects workers from the intense heat and materials involved in the repair.

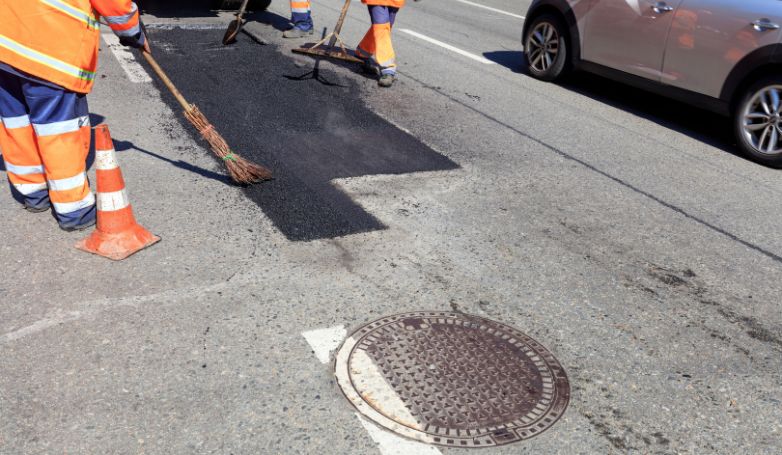
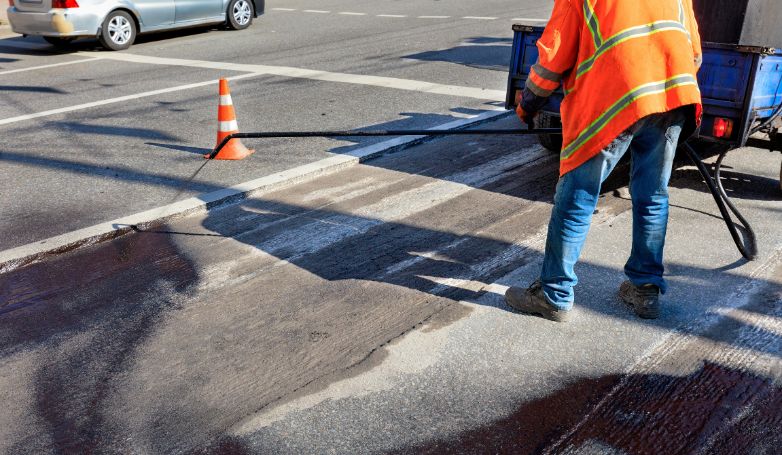
How to Perform Infrared Asphalt Repair in 7 Steps

Infrared Asphalt Repair is a cutting-edge technique designed to efficiently mend pavement damages, extending the lifespan of asphalt surfaces. Here are the seven critical steps that are involved in the process:

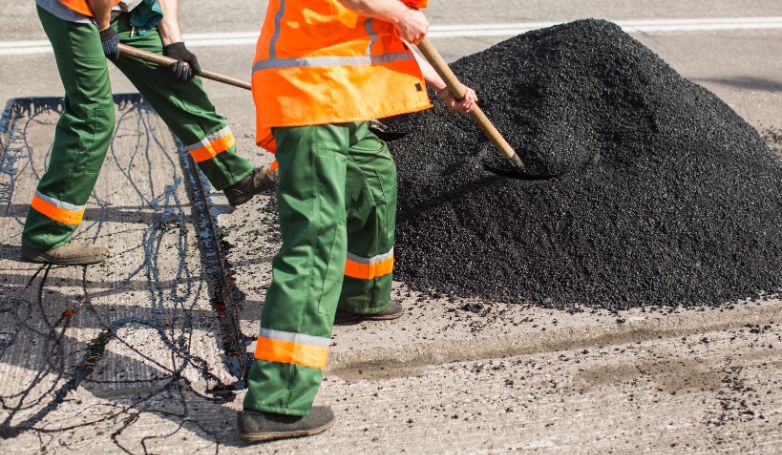
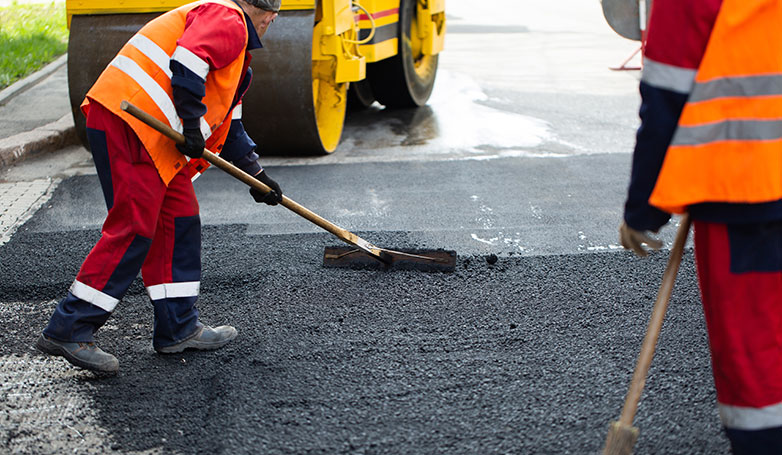
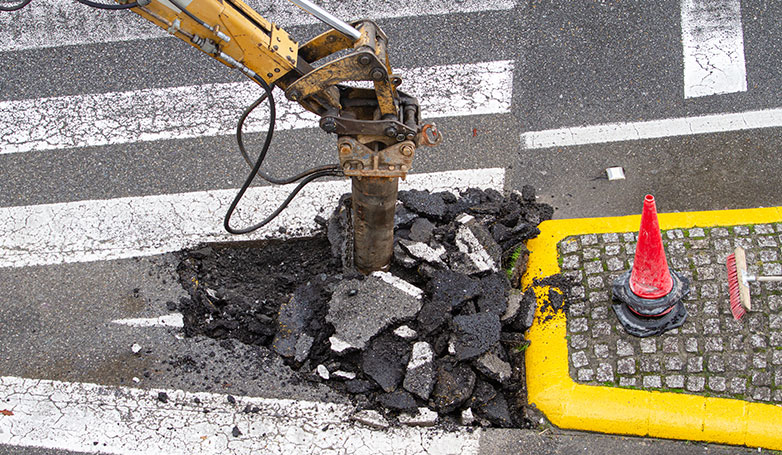
1. Clean the damaged area

The initial step in infrared asphalt repair involves meticulous cleaning of the area targeted for repair. It’s imperative to remove all forms of debris, including leaves, stones, and loose asphalt bits, to ensure a clean surface. This cleanliness is crucial for the effectiveness of the infrared heating process, as any remaining debris can hinder the proper adhesion of the new asphalt to the old layer. A clean surface also facilitates a more efficient heating process, allowing the infrared rays to penetrate the asphalt evenly and thoroughly, setting the stage for a successful repair.

2. Preheat the infrared asphalt repair equipment

The machine is preheating the asphalt

This involves activating the infrared heater ahead of the actual repair to bring it up to the optimal operating temperature. Proper preheating ensures that the equipment is ready to deliver consistent and effective heat distribution across the damaged asphalt area. This step is vital for achieving the desired softening of the existing asphalt, which is necessary for the removal of the deteriorated material and the successful incorporation of the new asphalt mix. Ensuring the equipment is preheated to the right temperature maximizes the efficiency of the repair process.

3. Place the infrared heater over the damaged area

Once the equipment is preheated, the next step is to position the infrared heater directly over the damaged section of the asphalt. This placement is critical for targeting the repair area with precise heat application. The infrared technology allows for deep penetration of heat, softening the asphalt without damaging the surrounding area. This targeted heating is what makes this restoration approach particularly effective for blending the repair seamlessly with the existing pavement. The heater’s design enables it to cover the exact dimensions of the damage, ensuring a focused and efficient repair process.

4. Heat the asphalt to the specified temperature

Heating the asphalt involves maintaining the heater over the damaged area for a predetermined amount of time to reach the specified temperature. This temperature control is essential for softening the asphalt to the correct consistency for repair, without overheating. The process relies on the infrared heater’s ability to evenly distribute heat, ensuring that the entire repair area is uniformly softened. This step is crucial for preparing the asphalt for the removal of damaged material and the addition of new asphalt, facilitating a smooth and effective repair.

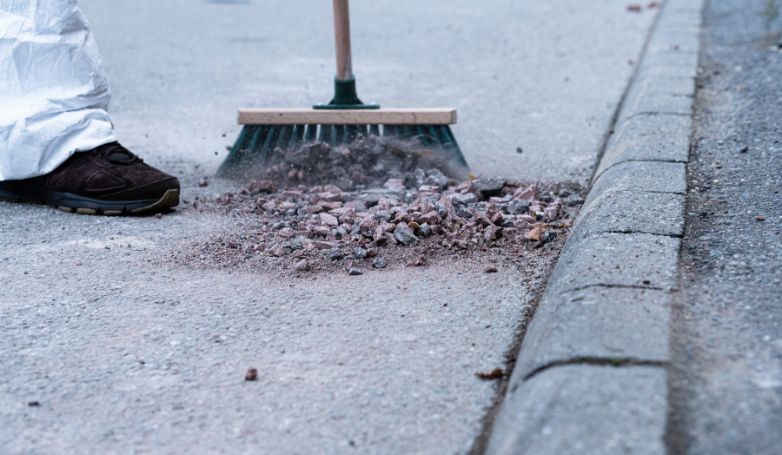
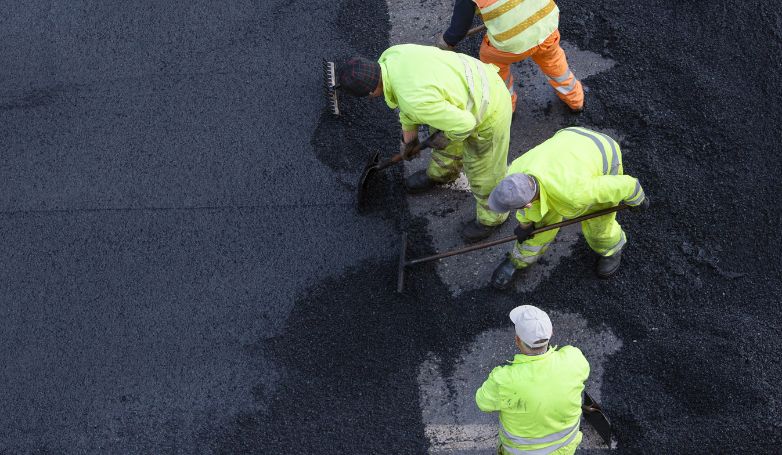
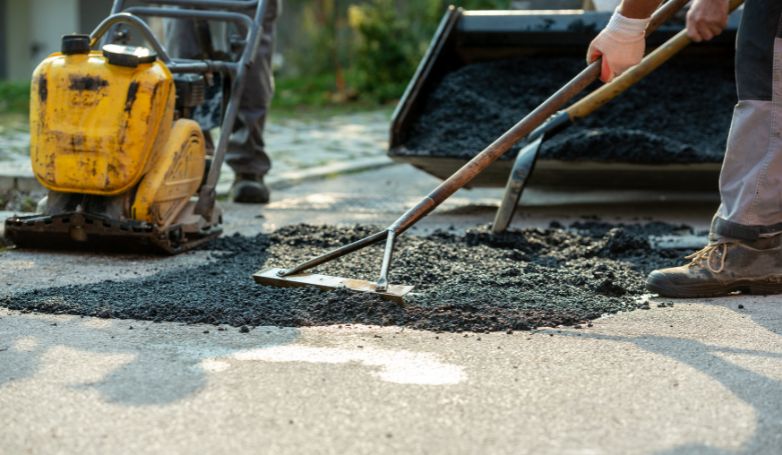
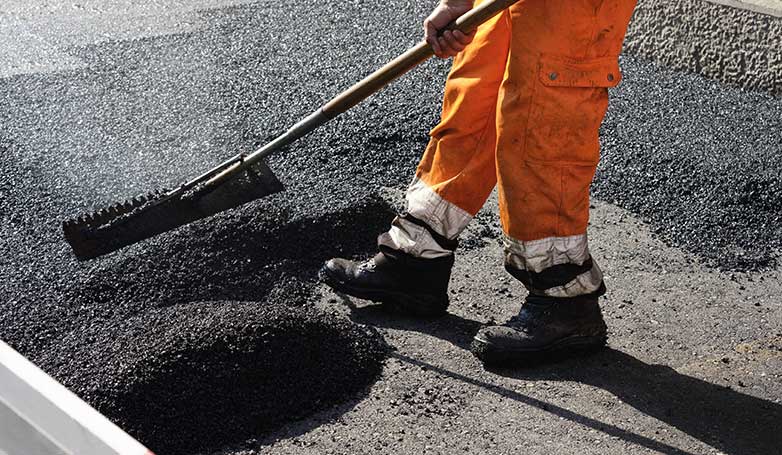
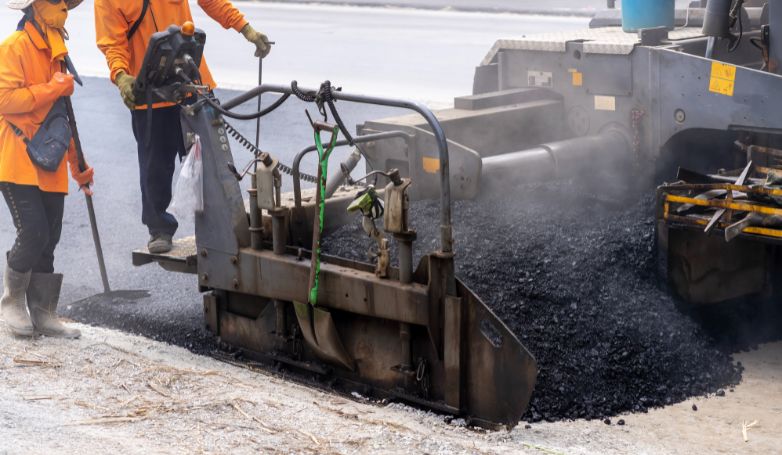
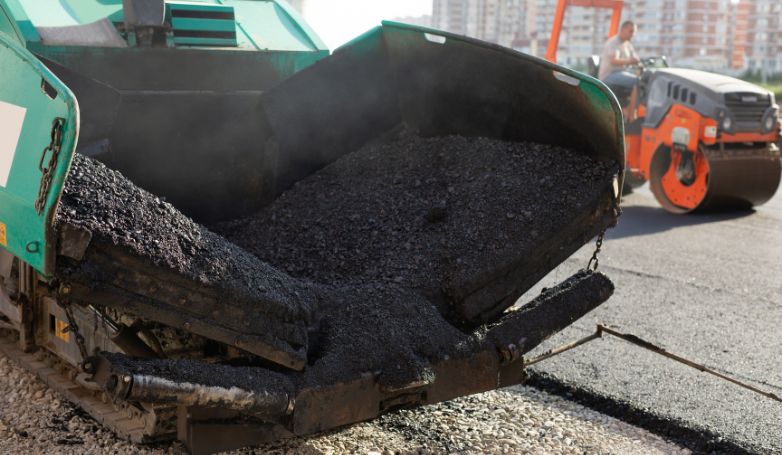
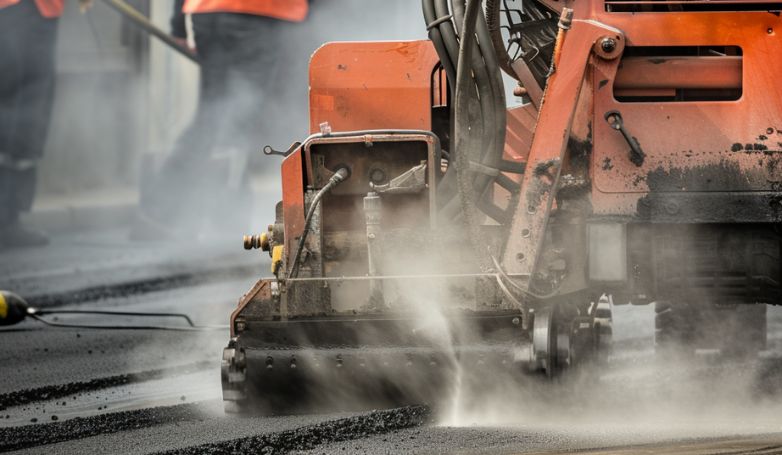
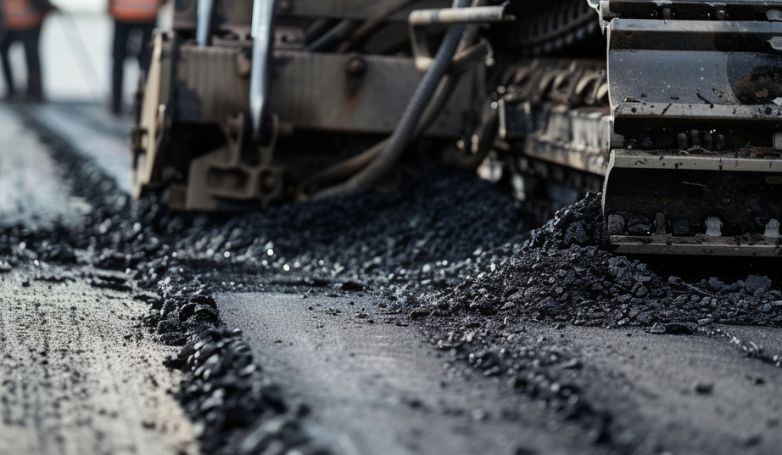
5. Rake and smooth the softened asphalt

The worker is flattening the asphalt to create a flat surface

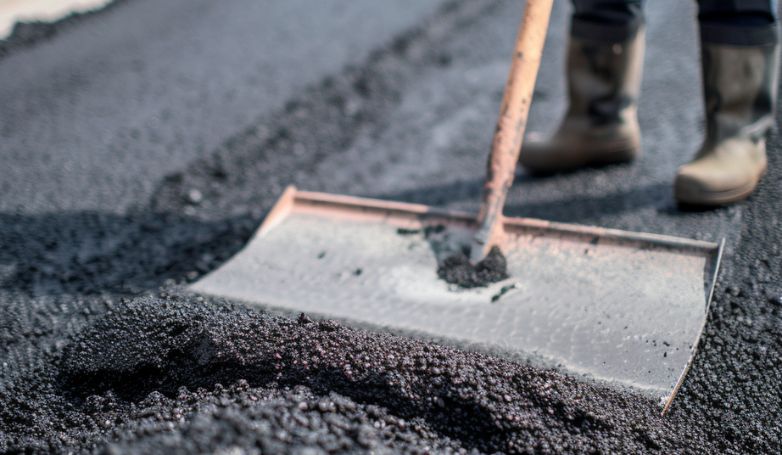
After the asphalt has been heated and softened, it is then raked to remove any deteriorated material and to prepare the base for the new asphalt. This step is crucial for creating a uniform and smooth surface, ensuring that the new asphalt will adhere properly and blend seamlessly with the existing pavement. The raking process also allows for the adjustment of the asphalt’s grade and contour, improving water drainage and the overall aesthetics of the repair area.

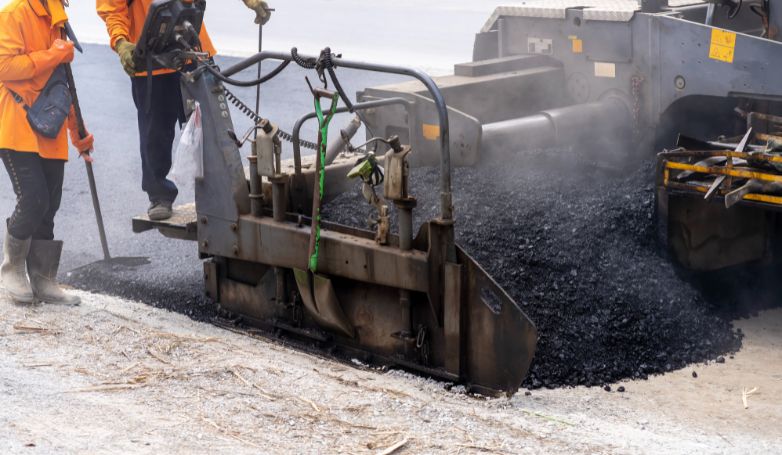
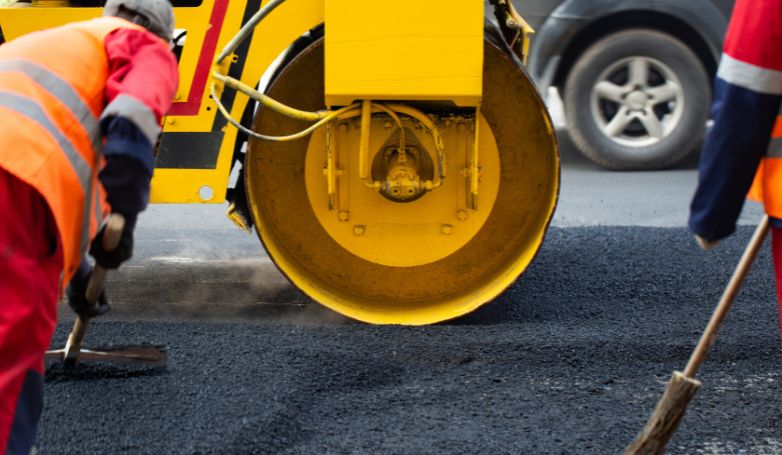
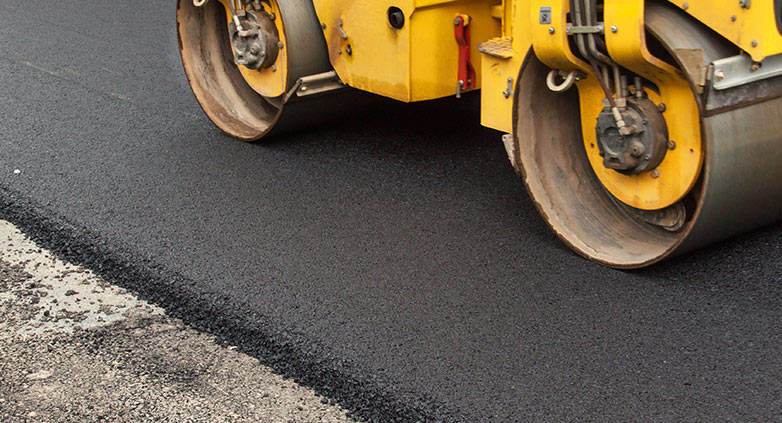
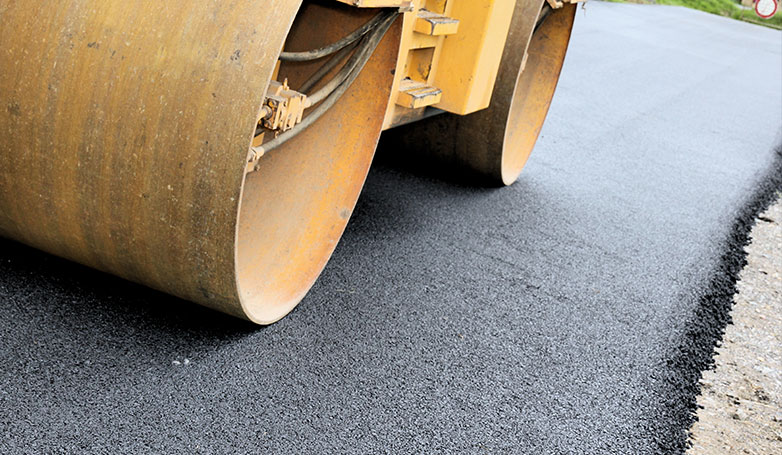
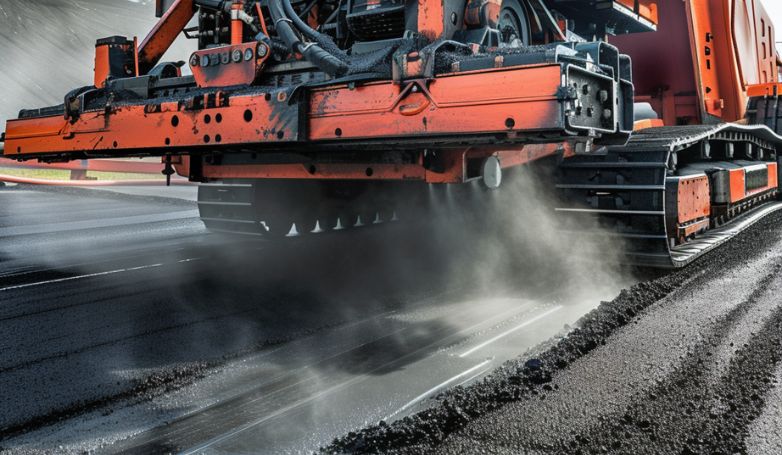
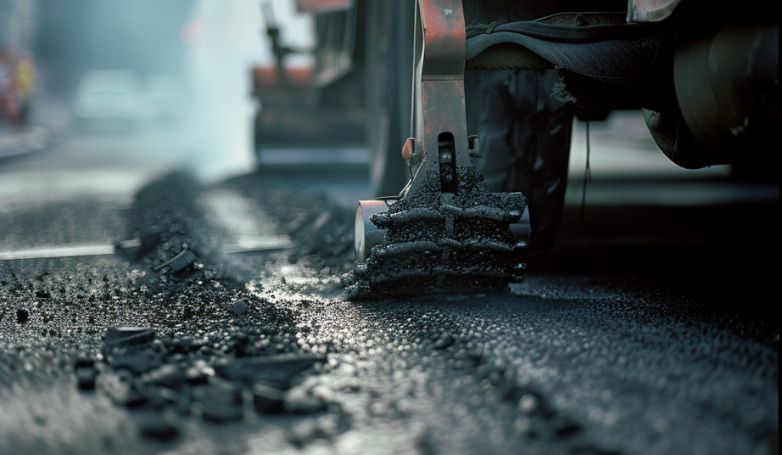
6. Compact the repaired area with a compactor

Once the new asphalt is applied and shaped to match the existing pavement, a compactor is used to densely press the material into place. This compaction ensures that the repaired area is solid, durable, and seamlessly integrated with the surrounding pavement. Proper compaction prevents future settlement or displacement of the new asphalt, extending the life of the repair and maintaining the smoothness of the pavement surface.

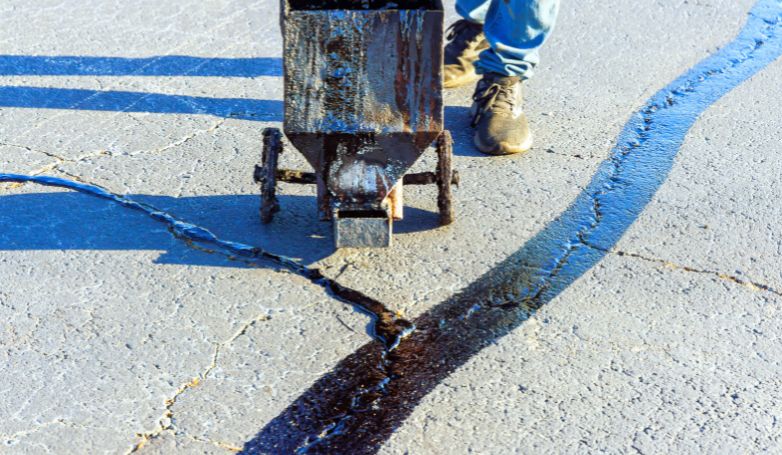
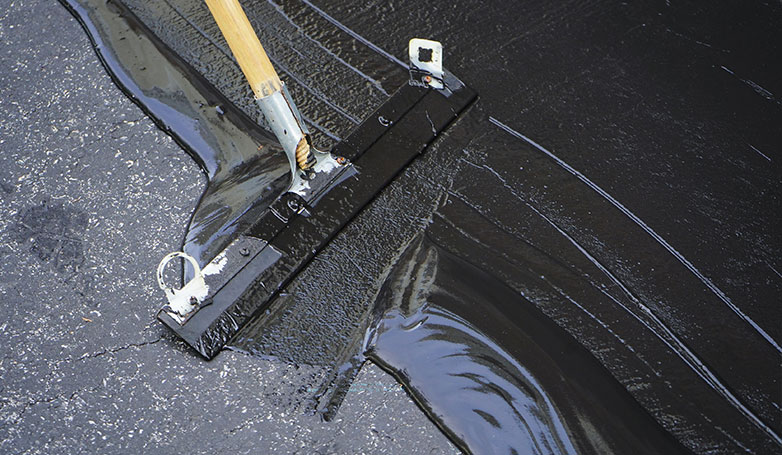
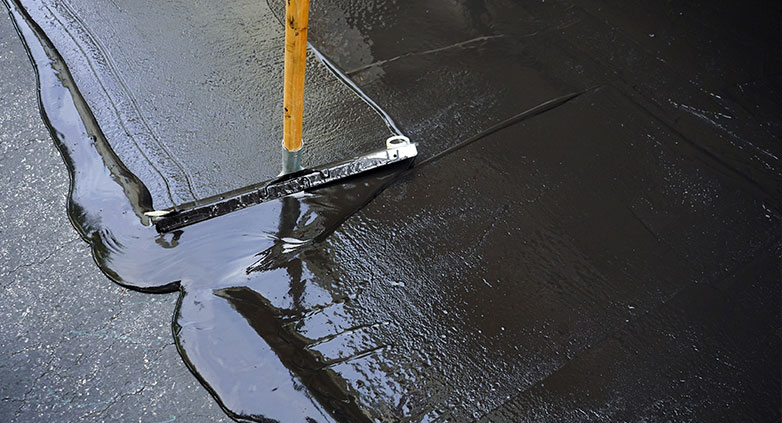
7. Seal the repaired section with asphalt sealer if necessary

The final step in this repair method may involve applying an asphalt sealer over the repaired area. This sealer acts as a protective layer, shielding the new asphalt from water penetration, UV damage, and chemical spills. While not always required, sealing can significantly extend the lifespan of the repair by preventing premature wear and tear. It also enhances the visual appeal of the asphalt, giving it a fresh, uniform look that matches the rest of the pavement.

Advantages of Infrared Asphalt Repair

The machine is applying Infrared Asphalt Repair on the road

It offers a host of benefits that make it a preferred choice for pavement maintenance and repair. Here are the key advantages:

Faster repair process

This restoration approach significantly accelerates the repair timeframe compared to traditional methods. By directly heating the damaged area, it allows for quick softening, reshaping, and compaction of the asphalt. This process streamlines repairs, enabling them to be completed in a fraction of the time, thereby swiftly restoring pavement functionality.

Cost-effective

This repair technique is notably cost-efficient, eliminating the extensive labor and material costs associated with full pavement replacement. By focusing on the damaged area alone and utilizing existing asphalt, it reduces the need for new materials, cutting down on expenses. Additionally, the longevity of repairs minimizes future spending on maintenance and repairs.

Seamless and durable repairs

The infrared method produces repairs that are not only aesthetically pleasing but also durable. The seamless integration of new and old asphalt prevents water penetration and future cracking, enhancing the repair’s resilience against wear and tear. This method ensures the repaired surface matches the surrounding area, maintaining pavement integrity.

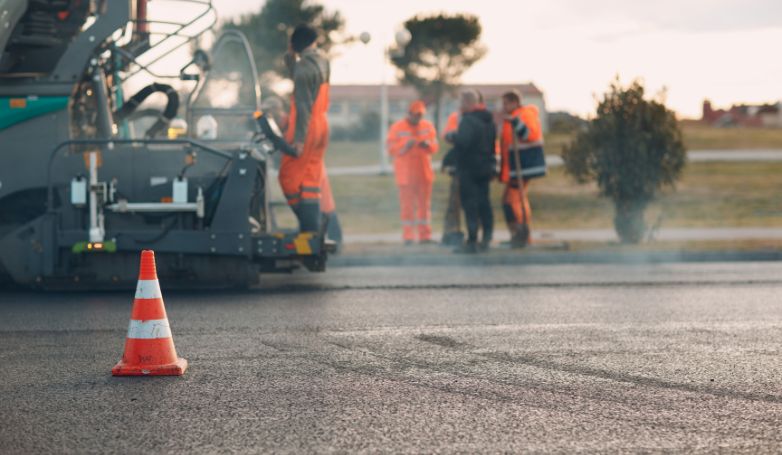
Minimizes traffic disruption

One of the key advantages is its minimal impact on traffic flow. Since repairs are completed quickly and often require only a small section of the road to be blocked off, disruptions are significantly reduced. This aspect is particularly beneficial in high-traffic areas, ensuring roads remain accessible while undergoing maintenance.

Improves pavement longevity

Infrared asphalt repair extends the life of pavement by addressing not just surface damage but also underlying issues without extensive excavation. By heating and blending the existing asphalt, it restores the structural integrity of the pavement, preventing future damages and prolonging its overall lifespan. This method sustains pavement condition over time, delaying the need for complete overhauls.

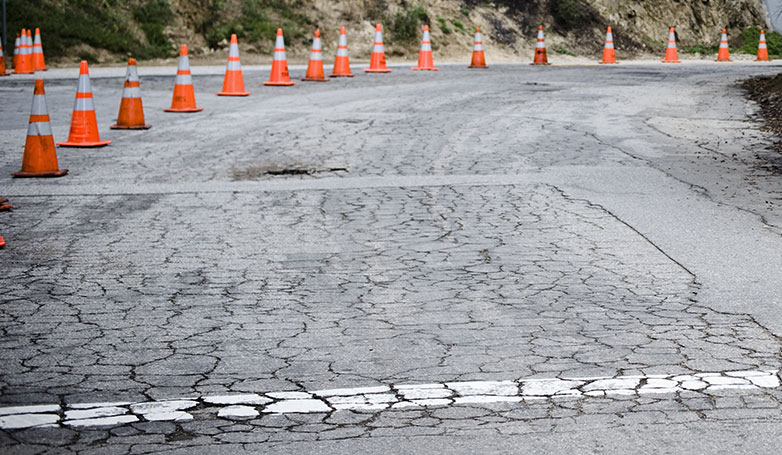
Disadvantages Of Infrared Asphalt Repair

Example of a disadvantage of the Infrared Asphalt Repair technique

While Infrared Asphalt Repair presents numerous advantages, it’s essential to consider its limitations and challenges. Here are some of the disadvantages:

Initial high equipment cost

The upfront cost for acquiring infrared asphalt repair equipment can be substantial. This includes the purchase of infrared heaters and other necessary tools for the repair process. For organizations or contractors just starting out, this initial investment might pose a financial challenge. However, it’s important to consider the long-term savings in labor and materials, which can offset the initial expense over time.

Skill and training required for proper application

Operating infrared repair equipment and executing the repair process efficiently require specialized skills and training. The effectiveness of the repair greatly depends on the operator’s ability to correctly apply the infrared technology, including temperature control and timing. Committing to ongoing training and education for personnel becomes necessary, which can entail additional costs and operational considerations.

Limited effectiveness for certain types of pavement distress

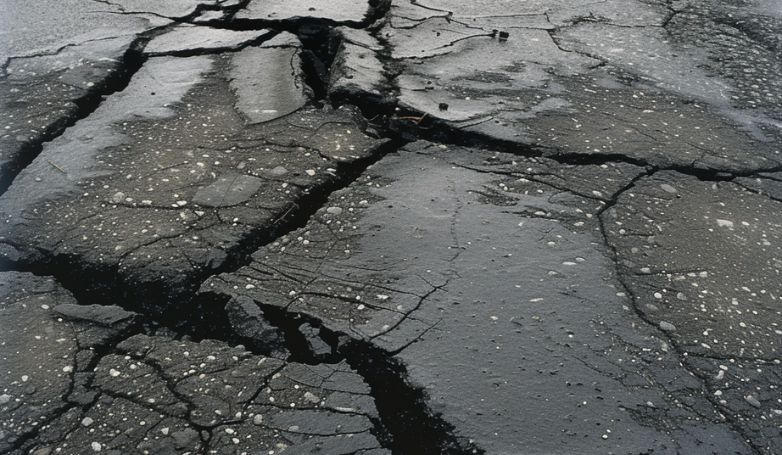
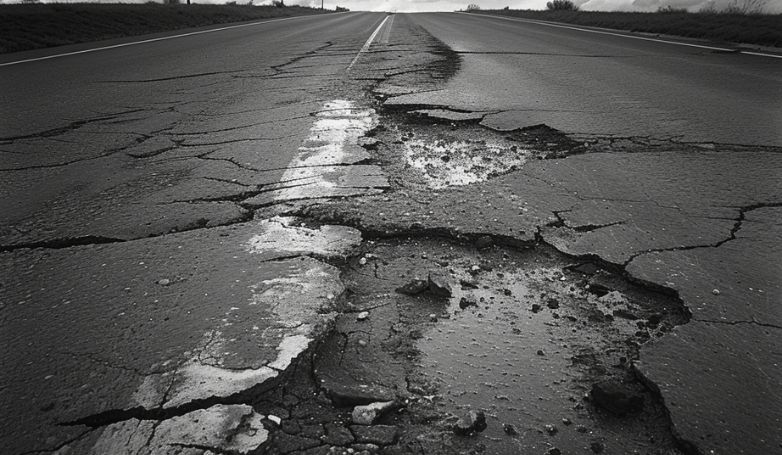
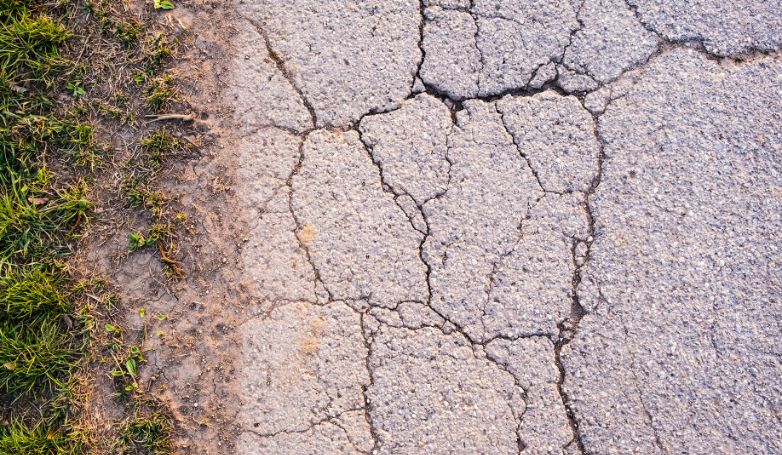
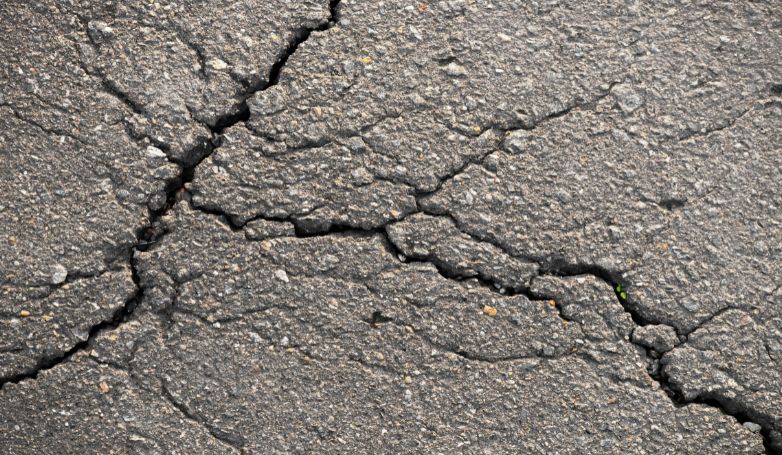
While highly effective for many repair scenarios, infrared asphalt repair is not a one-size-fits-all solution. It may not be the best method for addressing certain types of pavement distress, such as deep structural failures or issues extending beyond the asphalt layer into the base.In such cases, those specific situations might require more extensive repair methods, limiting the applicability of infrared technology.

Infrared Asphalt Repair Cost

Example of how much it costs to repair asphalt with infrared

The cost of Infrared Asphalt Repair varies widely, influenced by factors like location, damage extent, and contractor rates. Here’s a streamlined overview:

  • Small Repairs: Minor issues might cost between $100 to $300, reflecting the reduced materials and labor required.
  • Larger Areas: More extensive repairs can range from $2 to $4 per square foot, due to increased material, time, and labor.
  • Full Projects: For comprehensive work, including multiple patches or significant sections, costs could escalate to between $1,000 and $5,000 or beyond, encompassing setup, labor, materials, and equipment use.

Contractors facing high initial equipment costs, potentially between $30,000 to $150,000, might reflect this in service pricing. For precise, up-to-date rates, it is recommended to obtain direct quotes from local providers since they can offer detailed assessments tailored to specific project needs.

Considerations and Challenges 

The worker is facing some challenges of infrared technique

While offering a promising solution for pavement maintenance, Infrared Asphalt Repair needs to address several considerations and challenges for its successful application.

Temperature and weather constraints

The efficacy of infrared asphalt repair is highly dependent on ambient temperature and weather conditions. Optimal conditions are required for the infrared technology to effectively soften the asphalt for repair. Extremely cold or wet weather can hinder the heating process, making it difficult to achieve the desired asphalt consistency. This limitation can restrict the repair schedule to specific seasons or weather conditions, potentially delaying urgent repairs.

Training and expertise

Proficiency in infrared asphalt repair demands specialized training and expertise. Operators must be well-versed in handling the equipment, understanding the nuances of temperature control, and executing the repair process with precision. This expertise is crucial to avoid common pitfalls such as overheating the asphalt, which can compromise the repair’s integrity. Investing in comprehensive training programs is essential to equip personnel with the necessary skills, but this can pose a challenge for organizations with limited resources.

Material Compatibility

Ensuring compatibility between the existing asphalt and the new repair material is vital for a seamless and durable repair. The type of asphalt mix, its age, and its condition can affect the outcome of the repair process. In some cases, finding a compatible material that blends well with the old asphalt and adheres properly can be challenging. This consideration requires a thorough assessment of the pavement and, sometimes, custom solutions to match the repair material with the existing pavement, adding complexity to the repair process.

FAQs about Infrared Asphalt Repair

A machine for applying infrared asphalt

Here are some frequently asked questions that aim to provide clarity on this innovative repair technique:

What is infrared asphalt patching?

Infrared asphalt patching utilizes infrared technology to heat and soften existing damaged asphalt, enabling reworking or supplementation with new material. This process facilitates the blending of new and old asphalt seamlessly, repairing potholes, cracks, and other surface imperfections without the need for cutting out large sections of pavement. It’s a quick, efficient, and environmentally friendly way to extend the life of asphalt surfaces.

How do you heat up asphalt to repair?

Heating asphalt for repair involves using an infrared heater, which emits infrared rays directly onto the damaged asphalt surface. The heater is positioned over the area needing repair, and the asphalt is heated to a specific temperature that allows it to become malleable. This process typically takes about 7 to 10 minutes, depending on the existing asphalt’s condition and the ambient temperature. Once it softens, you can easily manipulate the asphalt, allowing for effective repairs.

How long does asphalt repair last?

The longevity of an infrared asphalt repair can vary based on several factors, including the quality of the repair work, the condition of the existing asphalt, and the environment. Generally, repairs made using infrared technology are long-lasting and can extend the life of the pavement significantly. When properly executed, infrared asphalt repairs can last for several years, often as long as the surrounding undamaged asphalt. This durability results from the seamless integration of the new and old asphalt, which reduces the likelihood of water penetration and future damage.

Conclusion

In conclusion, Infrared Asphalt Repair represents a significant advancement in pavement maintenance, offering a swift, cost-effective, and durable solution for repairing asphalt surfaces. While it comes with its set of challenges, such as initial equipment costs, the need for specialized training, and material compatibility, the benefits far outweigh these considerations. By addressing common concerns through FAQs and understanding the intricacies of the process, property owners and maintenance professionals can leverage this technology to extend the life of their pavements, ensuring a smooth, safe, and aesthetically pleasing surface for years to come.

Tim Dawson's Avatar

About the Author: James Brennan

James has over two decades of experience in the paving industry and has worked on a wide variety of projects, from large-scale commercial installations to small residential repairs.

The resilience of asphalt roadways is often overshadowed by inherent problems, presenting significant challenges to their longevity and safety.

Asphalt roadways face numerous problems that significantly affect their integrity and functionality, including:

  1. Alligator cracking
  2. Potholes
  3. Rutting
  4. Fatigue cracking
  5. Upheaval
  6. Reflection cracking
  7. Edge cracking
  8. Cracking
  9. Depressions
  10. Patch failures
  11. Shoving
  12. Corrugation and shoving
  13. Raveling
  14. Bleeding
  15. Polished aggregate
  16. Oil

These issues can compromise road safety, necessitate frequent repairs, and increase maintenance costs, highlighting the need for durable paving solutions and regular upkeep.

Dive deeper into the causes, prevention strategies, and innovative solutions for addressing these asphalt roadway challenges, ensuring safer and more resilient infrastructure.

1. Alligator cracking

Example of an alligator cracked asphalt road

Alligator cracking is a type of pavement distress that signifies structural failure of the asphalt surface, often due to a weakened base or subgrade, inadequate pavement thickness, and poor drainage. It appears as interconnected cracks resembling alligator skin, primarily caused by the fatigue of the asphalt layer under repeated loading.

How to Solve

The effective repair method involves removing the affected area and reconstructing the failed sections. This includes excavating the damaged asphalt and sub-base, improving subgrade support (potentially with geotextiles for stabilization), and replacing it with a new, properly compacted asphalt layer. Preventing alligator cracking requires ensuring adequate pavement design thickness, improving drainage, and using high-quality materials.

2. Potholes

A pothole created in the asphalt was filled with water

Potholes form when water infiltrates through cracks into the underlying pavement layers, freezes, expands, and then thaws, creating voids. Traffic over these voids causes the surface layer to collapse. They are a result of water damage, poor pavement maintenance, and the freeze-thaw cycle.

How to Solve

To repair potholes, remove debris and water from the hole, apply a tack coat to enhance adhesion, then fill with a high-performance patching material, and compact the patch to level it with the surrounding surface. Long-term solutions include improving drainage, sealing cracks to prevent water infiltration, and applying a pavement overlay to reinforce the surface.

Diving deeper, let’s explore another prevalent problem of asphalt roadways

3. Rutting

Example of a rutted asphalt road

Rutting is caused by deformation or consolidation of pavement layers or subgrade under the repeated pressure of traffic loads. It is often due to inadequate compaction of the pavement layers, poor mix design, or insufficient thickness of the pavement structure.

How to Solve

Repairing rutting may involve milling the affected surface and applying an overlay or, for severe cases, removing and reconstructing the damaged pavement layers. Ensuring proper initial pavement design, using rut-resistant asphalt mixes, and achieving through compaction during construction are crucial to prevent rutting.

4. Fatigue cracking

An asphalt road broke due to fatigue cracking

Fatigue cracking is primarily caused by the asphalt pavement’s deterioration under the stress of repetitive loading, beyond what it was designed to withstand. Factors contributing to this include inadequate pavement thickness, poor construction practices, and aging of the asphalt material. Over time, these cracks can evolve into interconnected patterns, resembling the skin of an alligator.

How to Solve

The remedy for fatigue cracking involves removing the damaged pavement layer and addressing any underlying structural issues. This may include reinforcing the base or subgrade to improve its load-bearing capacity. The area should then be filled with a new layer of asphalt mix, properly compacted to ensure durability. Preventive measures, such as selecting a suitable pavement design for the expected load and regular maintenance, are essential to mitigate future occurrences.

Next up, another critical issue among the myriad problems of asphalt roadways.

5. Upheaval

An asphalt road that has suffered Upheaval

Upheaval in asphalt pavements is typically caused by the expansion of subsoil due to moisture or frost action. This problem is most prevalent in areas where water can infiltrate the pavement layers and then freeze, expanding and pushing the pavement upward. Poor drainage and the presence of expansive clays in the subgrade can exacerbate this issue.

How to Solve

Correcting upheaval involves removing the affected section of pavement, correcting the moisture or frost issues, and then replacing the pavement. This may include improving drainage around the area, using water-resistant materials, and ensuring the subgrade is properly compacted and stabilized. A geotextile fabric barrier may also be used to separate the subgrade from the base material, preventing moisture migration.

6. Reflection cracking

A road with symmetrical cracks

Reflection cracking occurs when cracks in the underlying pavement layer or concrete slab propagate into the asphalt overlay. These cracks are caused by the movement and shifting of the pavement below, often due to temperature changes, moisture, and traffic loads. Inadequate bonding between the overlay and the existing pavement can also contribute to reflection cracking.

How to Solve

To address reflection cracking, a crack-relief layer or interlayer system can be used between the old pavement and the new overlay to absorb stresses and prevent cracks from reflecting upward. Applying a stress-absorbing membrane or using a highly flexible asphalt mix for the overlay can also help. Proper surface preparation and ensuring a good bond between the layers are crucial steps in preventing reflection cracks.

7. Edge cracking

The edge of an asphalt road has cracked

Edge cracking appears along the pavement edges, typically caused by weak edge support, heavy traffic loads, and lack of lateral support. These cracks can also result from poor drainage, leading to water accumulation and weakening of the pavement structure at the edges.

How to Solve

Repairing edge cracking involves sealing the cracks to prevent water infiltration and adding additional support along the pavement edges. This can include widening the pavement or improving the shoulder area with better materials to provide stronger support. Enhancing drainage along the edges to prevent water accumulation and ensuring the pavement has adequate thickness and compaction near the edges are also effective preventative measures.

Moving on, we uncover yet another significant problem of asphalt roadways.

8. Cracking

Example of a common problem on asphalt roads: cracks

Cracking in asphalt surfaces can result from various factors, including thermal expansion and contraction, moisture infiltration, oxidation from sun exposure, and the underlying base’s movement or settling. Cracks can be further categorized by their patterns, such as longitudinal, transverse, and block cracking, each indicative of specific underlying issues.

How to Solve

Addressing cracking involves first determining the crack type to apply the correct repair method. For surface-level cracks, crack sealing is an effective solution, using rubberized asphalt compounds that flex with the pavement’s movements. For more severe cracking, a full-depth patch may be necessary, removing and replacing the affected pavement area. Preventive measures include proper pavement design, using materials resistant to temperature and moisture changes, and regular maintenance to address issues early.

9. Depressions

An asphalt road with a depression

Depressions in asphalt pavements are localized low spots that collect water. They are often caused by insufficient compaction during construction, leading to a settling of the pavement surface, or by the failure of the underlying base or subgrade materials.

How to Solve

Repairing depressions typically involves removing the depressed area of the pavement, correcting any issues with the base or subgrade, such as by ensuring proper compaction or replacing weak materials, and then applying a new layer of asphalt. To prevent depressions, it’s crucial to ensure uniform compaction during the initial pavement installation and to address any drainage issues that could exacerbate settling.

10. Patch failures

A patch on the asphalt that got ruined again

Patch failures often occur due to poor adhesion between the patch material and the existing pavement, inadequate compaction of the patch, or the use of low-quality patching materials. Moisture infiltration and the presence of debris at the time of application can also lead to premature failure of the patch.

How to Solve

To effectively repair patch failures, it’s essential to remove any loose or failed material completely, clean the area thoroughly to ensure good adhesion, and apply a tack coat if necessary. Using high-quality, durable patching materials and ensuring proper compaction will help ensure the longevity of the repair. Regular monitoring and maintenance of patched areas can also prevent future failures.

Let’s not overlook this lesser-known problem of asphalt roadways.

11. Shoving

Shoving is a form of pavement distortion where the surface appears to have been pushed forward, creating ripples or bulges. This issue is typically caused by stopping or turning vehicles in hot weather, which can soften the asphalt, or by a weak or unstable base or subgrade. Poor aggregate gradation in the asphalt mix can also contribute to shoving.

How to Solve

Correcting shoving may involve milling the affected area and replacing it with a new, more stable asphalt mix, ensuring proper aggregate gradation to resist deformation. Strengthening the underlying base or subgrade can also help prevent future shoving by providing a more stable support structure. Employing designs that accommodate or distribute loads more effectively, such as thicker pavement sections or improved material selection, can mitigate shoving issues.

12. Corrugation and shoving

Corrugation and shoving occur when the asphalt surface develops waves or ripples due to traffic loading, especially in areas of acceleration or deceleration. These issues can be attributed to a weak or unstable base, insufficient pavement thickness, poor mix design, or excessive asphalt temperature during application.

How to Solve

The solution involves removing the affected pavement area and correcting the underlying cause, such as stabilizing the base or subgrade, improving the mix design to ensure proper aggregate interlock and asphalt binder stiffness, and ensuring the new pavement layer is properly compacted. Using asphalt mixes designed for high-stress areas can also prevent corrugation and shoving.

13. Raveling

The asphalt road is losing its paving material

Raveling is the loss of aggregate from the asphalt surface, leading to a rough and pitted appearance. It is often caused by a weak asphalt binder, poor aggregate quality, inadequate compaction, or aging of the pavement.

How to Solve

To repair raveled areas, it may be necessary to apply a thin overlay or surface treatment that reintroduces asphalt binder into the pavement. Ensuring the use of high-quality paving materials, proper compaction techniques, and protecting the pavement from water damage can help prevent raveling. Regular maintenance and sealcoating can also extend the pavement’s life by protecting the surface from the elements.

Now, let’s shift our focus to a more insidious problem of asphalt roadways.

14. Bleeding

A shiny surface was created on the asphalt road

Bleeding occurs when asphalt binder accumulates on the pavement surface, creating a slick, shiny surface. This issue is often the result of too much asphalt binder in the mix, inadequate aggregate absorption, or high temperatures softening the asphalt.

How to Solve

Addressing bleeding may involve applying a layer of sand or fine aggregate to absorb excess binder and restore surface texture. In severe cases, milling the affected surface and applying a new wearing course with a corrected mix design may be necessary. Adjusting future mix designs to ensure a proper balance between asphalt binder and aggregate can prevent bleeding.

15. Polished aggregate

Example of polished aggregate

Polished aggregate results from the wearing down of pavement surface aggregates, leading to a smooth and slippery surface. This condition is typically observed in areas with high traffic volumes, where the repeated action of tires polishes the aggregate.

How to Solve

Restoring surface texture can involve applying a surface treatment, such as slurry seal or microsurfacing, which adds new aggregate to the pavement surface. Selecting aggregates with higher resistance to polishing for use in asphalt mixes can also prevent this issue in new pavements. Implementing traffic calming measures to reduce vehicle speeds can decrease the rate of aggregate polishing.

Highlighting another challenge, we delve into a common problem of asphalt roadways.

16. Oil

The oil from the car engine has stained the asphalt road

Oil spots on asphalt pavements are usually due to vehicle leaks, which soften and degrade the asphalt binder, leading to pavement deterioration; these oil-induced pavement issues not only compromise structural integrity but also pose environmental risks as the leaked substances can contaminate surrounding soil and water.

How to Solve

Cleaning oil spills promptly can minimize damage. For small affected areas, removing the contaminated asphalt and patching with new material may be sufficient. For larger spills, specialized cleaning agents designed to break down oils before patching can be effective. Preventive measures include regular pavement cleaning and applying sealcoating to protect the asphalt surface from oil penetration.

Conclusion

In conclusion, maintaining asphalt pavements requires vigilance and an understanding of the various types of distresses they can experience, from fatigue cracking to oil contamination. Each problem, from the structural issues like corrugation and shoving, to surface degradation such as raveling and polished aggregate, has its specific causes and remediation strategies. By addressing the underlying causes, employing the right repair techniques, and taking preventive measures, the lifespan and performance of asphalt pavements can be significantly improved. Regular monitoring and maintenance, coupled with the use of quality materials and construction practices, are key to preventing pavement deterioration and ensuring safe, durable roads for the future.

Tim Dawson's Avatar

About the Author: Chris Hawk

Chris is a paver with more than 15 years' expertise in the field. He has established a reputation as an expert and trustworthy specialist with a track record of providing his clients with top-notch paving solutions.

Asphalt Paving

Asphalt paving offers a robust solution for creating durable surfaces, blending practicality with aesthetic appeal for roads, driveways, and parking areas.

Understanding the intricacies of asphalt paving is crucial for anyone considering this versatile material for their next project. To ensure your project stands the test of time and use, follow these essential steps:

  1. Clearing and Grading
  2. Sub-base and Base Preparation
  3. Asphalt Mix Design
  4. Paving Process
  5. Quality Control and Inspection
  6. Joint Construction
  7. Surface Finishing
  8. Cleanup and Debris Removal

This approach addresses every decision’s impact on the pavement’s longevity and performance, from selecting the right mix to the final maintenance steps. Whether you’re a property owner or a professional in the industry, adhering to these steps ensures a successful asphalt paving project.

Dive deeper into the world of asphalt paving, where we explore each step in detail, ensuring you’re equipped for a successful project.

Understanding Asphalt

The workers are using asphalt to pave a road.

Asphalt, a petroleum-based material, is prized for its waterproofing and adhesive properties. It comprises a mixture of bitumen (asphalt cement) and aggregates (sand, gravel, and stones), creating a flexible and resilient paving material.

Different Types of Asphalt Used in Paving

There are various asphalt mixes, each tailored for specific conditions and uses. Hot mix asphalt (HMA) is commonly used for roadways and parking lots due to its durability. Cold mix asphalt, suitable for low-traffic areas or temporary repairs, and warm mix asphalt, a more environmentally friendly option, are also available.

Importance of Proper Material Selection

Selecting the appropriate asphalt mix is crucial for the pavement’s performance. Factors such as climate, traffic load, and the pavement’s intended use guide this selection, ensuring the pavement can withstand its operational demands.

8 Steps to Achieve a Perfect Asphalt Surface

Let’s delve into these essential steps that ensure the durability, functionality, and visual appeal of asphalt pavements.

1. Clearing and Grading

The worker is cleaning the surface before applying the asphalt.

The initial step in achieving a flawless asphalt surface is the meticulous process of clearing and grading. This involves the removal of debris and vegetation, creating a clean slate for construction. Simultaneously, precise grading ensures proper water drainage, a crucial factor for the longevity and performance of the asphalt pavement. Attention to detail in this phase sets the foundation for subsequent steps, allowing for optimal results in the paving process.

2. Sub-base and Base Preparation

Following thorough clearing and grading, the focus shifts to sub-base and base preparation, where the emphasis lies in establishing a stable foundation. Utilizing high-quality aggregates and ensuring proper compaction of the sub-base materials are imperative to provide the necessary support for the asphalt surface. The uniformity and stability achieved during this phase play a critical role in the overall structural integrity of the pavement.

3. Asphalt Mix Design

Moving forward, the asphalt mix design phase demands precision in proportioning aggregates and selecting binders. This step is the key to formulating a mixture that balances durability and flexibility. Careful consideration is given to the role of aggregates in the mixture and the selection of an appropriate binder. Temperature control during the mixing process is also crucial, ensuring consistency in the mix and contributing to the quality of the final asphalt surface.

4. Paving Process

The machine is laying fresh asphalt to pave the road.

The actual paving process involves the use of suitable equipment and machinery, with a focus on proper calibration and maintenance to ensure optimal performance. Achieving the desired pavement thickness is paramount, as is ensuring adequate compaction for durability. This step requires a strategic approach to lay down the asphalt mixture evenly and efficiently, setting the stage for a robust and long-lasting surface.

5. Quality Control and Inspection

Quality control and inspection form a critical aspect of the asphalt paving process, involving rigorous measures to ensure the integrity of materials and mixtures. Implementing quality assurance measures and conducting regular tests at various stages of the process help identify and address any deviations promptly. Real-time monitoring of paving parameters ensures that the quality standards are met, contributing to the overall success of the project.

6. Joint Construction

Proper construction of joints is a pivotal step in preventing cracks in the asphalt surface. This phase emphasizes the importance of seamless joint construction, requiring techniques that ensure continuity and structural integrity. Additionally, timing and curing methods are carefully considered to optimize joint construction, contributing to the overall strength and durability of the asphalt pavement.

7. Surface Finishing

The team of workers is completing the final touches of the road made of asphalt.

The surface finishing phase of asphalt paving is an art that involves achieving a smooth, aesthetically pleasing surface. Proper finishing techniques are essential for both functionality and visual appeal. Attention to detail is crucial in addressing surface irregularities, and the incorporation of textures enhances skid resistance for improved safety. Surface finishing adds the final touches to the asphalt pavement, elevating its overall quality.

8. Cleanup and Debris Removal

The final steps in achieving a perfect asphalt surface involve cleanup and debris removal. This phase focuses on clearing excess materials left after the paving process, contributing to a clean and polished appearance. Thorough cleanup ensures that the finished asphalt surface is free from any hindrances, allowing it to showcase its durability and visual appeal. The attention to detail in this concluding step reflects the commitment to excellence in the entire asphalt paving process.

Asphalt Paving Pros

Workers are building an asphalt road

Explore the following key attributes that contribute to the widespread use and popularity of asphalt in the construction industry.

Durability

Asphalt paving is renowned for its durability, offering robust resistance against heavy traffic and environmental stresses. Its ability to withstand wear and tear over time makes it a reliable choice for long-lasting road surfaces, reducing the frequency of repairs and ensuring extended service life.

Smooth Surface

This material provides a seamlessly smooth surface, enhancing driving comfort and safety. Its even texture minimizes friction, promoting smoother vehicle movement. The smoothness of asphalt surfaces is crucial for optimizing fuel efficiency and reducing wear and tear on vehicles, contributing to a more comfortable and efficient transportation experience.

Quick Installation

One of the significant advantages is its rapid installation process. Compared to alternative materials, asphalt can be laid quickly, minimizing disruptions to traffic or business activities. The reduced curing time allows for swift access to the paved area, making it an efficient choice for projects that require timely completion without compromising on quality.

Cost-Effective

Asphalt paving stands out for its cost-effectiveness, offering an economical solution for various construction projects. The initial installation costs are often lower than alternatives like concrete. Additionally, ongoing maintenance expenses are typically more affordable. The ability to conduct localized repairs further contributes to its cost-effectiveness, saving both time and resources over the pavement’s lifecycle.

Factors Influencing Asphalt Paving

The paving expert is explaining the factors to consider before proceeding with the asphalt pavement.

These influential elements collectively shape the outcome of the paving endeavor, determining the asphalt’s durability, resilience, and overall performance.

Climate Considerations

The impact of climate on asphalt paving is profound, making it a key factor in the decision-making process. The dynamic nature of temperature fluctuations can lead to expansion and contraction in the asphalt, directly affecting its structural integrity. Selecting an asphalt mix tailored to the local climate becomes crucial, ensuring that the pavement can withstand the environmental challenges posed by varying weather conditions.

Traffic Load and Usage

Anticipating the volume and type of traffic a paved surface will encounter is fundamental in the asphalt paving equation. The wear and tear from different traffic loads demand a strategic approach to mix selection and pavement thickness. High-traffic areas, for instance, necessitate the use of denser and more durable asphalt mixes to withstand the continuous stress and prevent premature wear and deformation.

Soil Conditions and Preparation

This involves a comprehensive assessment of the soil’s bearing capacity, drainage capabilities, and overall stability. Enhancing these soil properties through meticulous preparation ensures a solid foundation for the asphalt, preventing potential issues like settling, shifting, or drainage problems. By addressing soil conditions upfront, the longevity and performance of the asphalt pavement are significantly enhanced.

Maintenance and Longevity of the Asphalt

The workers are performing maintenance on the road that was paved a few years ago.

Ensuring the prolonged life and resilience of asphalt pavements involves a comprehensive approach to maintenance. This strategy goes beyond reactive measures, emphasizing a proactive stance to prevent issues before they arise. By incorporating regular inspections, sealcoating, and resurfacing into a cohesive plan, the asphalt surface can endure the test of time, maintaining its functionality and appearance.

Regular Inspections and Repairs

The cornerstone of effective maintenance lies in regular inspections, acting as the first line of defense against wear, cracks, and other potential damages. Swift identification and immediate repair of these issues prevent further deterioration, preserving the structural integrity of the pavement and contributing to its long-term performance.

Sealcoating and Resurfacing

To safeguard against the elements, sealcoating becomes a shield, protecting the asphalt surface from water infiltration and UV damage. Complementing this, resurfacing acts as a rejuvenating process, replenishing the worn surface layer of pavements. Together, these measures not only extend the life of the asphalt but also enhance its overall resilience against environmental factors.

Strategies for Extending the Lifespan of Asphalt Pavement

The pursuit of longevity for asphalt pavement involves a strategic combination of routine maintenance and preventative measures. Implementing a proactive maintenance schedule, including regular inspections, sealcoating, and resurfacing, serves as a formidable strategy. These measures collectively contribute to extending the lifespan of the pavement, ensuring sustained performance and minimizing the need for extensive repairs or replacements.

Asphalt Paving Environmental Considerations

A road made of asphalt constructed with environmentally friendly materials.

Addressing environmental concerns in asphalt paving involves a holistic approach, integrating sustainable practices, recycling efforts, and the incorporation of eco-friendly alternatives. By aligning with environmentally conscious strategies, the asphalt industry can contribute to a greener future, minimizing its ecological footprint.

Sustainable Practices in Asphalt Paving

Committing to sustainability in asphalt paving is synonymous with responsible industry practices. This encompasses the utilization of recycled materials, a concerted effort to reduce energy consumption during production, and the careful selection of eco-friendly asphalt mixes. Embracing these sustainable practices not only supports environmental well-being but also underscores the industry’s commitment to responsible resource management.

Recycling and Reusing Asphalt Materials

At the heart of sustainable asphalt practices lies the efficient recycling and reusing of asphalt materials. The utilization of reclaimed asphalt pavement (RAP) in new paving projects is a testament to the industry’s dedication to minimizing waste and resource consumption. This circular approach not only conserves valuable resources but also significantly reduces the environmental impact of asphalt production.

Eco-friendly Alternatives in Asphalt Mixtures

The integration of eco-friendly alternatives becomes paramount. This involves exploring innovative options, such as bio-based binders and incorporating recycled plastics into asphalt mixtures. By adopting these eco-friendly alternatives, the asphalt industry actively contributes to the reduction of environmental impact, fostering a sustainable balance between infrastructure development and ecological preservation.

Asphalt Paving Cost

The owner of the asphalt company is explaining the costs related to the material.

By understanding how quality installation and ongoing maintenance can stretch the lifespan of your pavement, you’re essentially making an investment in durability that pays off over time, saving you from potential headaches and extra expenses down the road.

Initial Investment vs. Long-term Savings

Sure, the initial hit to your wallet for asphalt paving might raise some eyebrows, but think of it as a down payment on a future of savings. Proper installation and consistent maintenance are the unsung heroes here, working behind the scenes to extend the life of your pavement. It’s like investing in a vehicle with a stellar maintenance record – you’re in for a smooth ride that won’t burn a hole in your pocket with constant repairs.

Impact of Proper Paving on Property Value

A well-maintained asphalt pavement bumps up the overall value of your property. It’s not just about having a solid road; it’s about enhancing the entire vibe of your surroundings. The saying “first impressions matter” holds true here – a beautifully paved property can leave a lasting impression that translates into a worthwhile investment in the eyes of potential buyers or tenants.

Cost-effective Maintenance Strategies

Regular practices like crack filling and sealcoating aren’t just routine chores; they’re your pavement’s best friends. These simple yet effective strategies act as preventative measures, stopping potential issues in their tracks and sparing you from more extensive – and costly – repairs. It’s the equivalent of giving your pavement a health checkup, ensuring it stays in tip-top shape without draining your bank account.

FAQs about Asphalt Paving

The expert is answering frequently asked questions about asphalt roads.

Explore some common questions about asphalt paving here.

Can you asphalt over concrete?

Absolutely! Asphalt can be successfully applied over existing concrete surfaces, creating a fresh and durable top layer. This process, known as asphalt overlay, not only revitalizes the appearance but also provides a cost-effective solution for enhancing the structural integrity of the pavement. It’s a popular choice when looking to rejuvenate worn-out concrete areas without the need for extensive removal.

What’s under asphalt?

The foundation beneath asphalt is a crucial aspect of its performance. Typically, you’ll find multiple layers, starting with a sub-base composed of aggregates like crushed stone or gravel. Above this sits the base layer, often consisting of finer aggregates. These layers work in harmony to provide stability, drainage, and a robust support system for the asphalt surface, ensuring longevity and durability.

Is tarmac the same as asphalt?

While the terms “tarmac” and “asphalt” are often used interchangeably, they have subtle differences. “Tarmac” is a colloquial term derived from “tarmacadam,” a road surfacing material historically made with a tar binder. In modern usage, both tarmac and asphalt refer to road surfaces made with bitumen binders. However, asphalt is more commonly used today, made with bitumen mixed with aggregates like gravel or sand, offering improved flexibility and durability compared to traditional tarmacadam.

Conclusion

Proper asphalt paving is a multifaceted process that requires careful consideration of materials, techniques, and environmental impacts. By adhering to best practices in paving, maintenance, and sustainability, property owners and municipalities can ensure durable, cost-effective, and environmentally responsible asphalt pavements. This guide serves as a foundation for understanding the complexities of asphalt paving, emphasizing the importance of quality, maintenance, and sustainability in achieving long-lasting pavement solutions.

Tim Dawson's Avatar

About the Author: Chris Hawk

Chris is a paver with more than 15 years' expertise in the field. He has established a reputation as an expert and trustworthy specialist with a track record of providing his clients with top-notch paving solutions.

Asphalt Over Concrete Driveway

Considering an upgrade for your driveway? Asphalt over concrete driveway is a popular choice, offering a durable and cost-effective solution. Learn about the advantages and considerations of this surfacing option.

Asphalt over concrete driveway involves applying a layer of asphalt over an existing concrete surface, enhancing its appearance and performance. This method capitalizes on the durability of concrete while benefiting from the flexibility and weather resistance of asphalt. The process typically involves thorough cleaning, applying a bonding agent, and adding the asphalt layer. This combination results in a robust driveway that withstands varying weather conditions, providing a smooth and long-lasting surface.

Explore the practical advantages of choosing asphalt over a concrete driveway, uncovering enhanced aesthetics and improved longevity. Delve into the seamless integration of asphalt, guaranteeing a dependable and cost-efficient upgrade for your residential or commercial property.

10 Steps to Install an Asphalt Overlay on a Concrete Driveway

Embarking on the journey to enhance your concrete driveway with an asphalt overlay requires careful planning and execution. Follow these 10 comprehensive steps to ensure a successful installation of asphalt over a concrete driveway. From thorough cleaning to strategic maintenance, each step contributes to the longevity and performance of your upgraded driveway.

1. Clean the existing concrete surface thoroughly

The worker is cleaning the concrete driveway before applying asphalt

Start with a meticulous cleaning of the concrete surface to remove all debris, dirt, and contaminants. This foundational step ensures optimal adhesion for the asphalt overlay.

Use high-pressure washing and degreasing agents if necessary to tackle tough stains and ensure a pristine surface. Ensuring the concrete is free from oils, grease, and other substances that might impair bonding is crucial for the durability and effectiveness of the overlay.

2. Repair any cracks or damage in the concrete

Examine the concrete surface carefully for any signs of cracks, holes, or structural damage. Use a high-quality concrete repair compound to fill in these defects, ensuring a smooth, even surface. It’s essential to address these issues promptly, as unattended cracks and damages can lead to water infiltration, further deteriorating the concrete and compromising the new overlay’s integrity.

Allow sufficient time for the repairs to cure fully, creating a solid and stable base for the asphalt overlay. Proper preparation at this stage can significantly extend the lifespan and performance of your driveway.

3. Apply a bonding agent to ensure adhesion

After repairing any concrete damage, the next step is to apply a bonding agent across the entire surface. This agent acts as a glue between the old concrete and the new asphalt overlay, ensuring a strong, seamless bond. Select a high-quality bonding agent specifically designed for asphalt-over-concrete applications. Apply it evenly according to the manufacturer’s instructions, paying extra attention to ensure complete coverage.

The bonding agent plays a crucial role in preventing delamination and enhancing the overlay’s durability, making it an essential step in the preparation process. Allow the bonding agent to dry to the recommended tackiness before proceeding with the asphalt installation, to maximize adhesion.

4. Install an asphalt leveling course if needed

The workers are leveling the asphalt where it is needed

Depending on the condition and levelness of the existing concrete surface, an asphalt leveling course might be necessary. This step involves applying a thin layer of asphalt to fill in low spots and create a uniformly level surface. The leveling course aids in ensuring that the final overlay has consistent thickness and smoothness, which is vital for the driveway’s appearance and functionality.

Use a high-grade asphalt mix suitable for leveling purposes, and spread it carefully to achieve the desired grade and contour. This preparatory layer also helps in addressing any minor imperfections left after the repairs, ensuring a flawless foundation for the main overlay. Allow the leveling course to properly settle and compact before moving on to the overlay application, to ensure a stable and even base.

5. Spread a layer of hot mix asphalt evenly

Once the surface is prepared and the leveling course has set, it’s time to apply the main layer of hot mix asphalt. This material should be spread evenly across the concrete driveway, ensuring uniform thickness throughout. The hot mix asphalt should be applied at a temperature that allows it to be worked easily, yet cool enough to begin setting once in place.

Using specialized equipment, such as a paving machine, can help achieve a smooth, consistent layer. It’s crucial to work quickly and efficiently, as the asphalt begins to cool and harden soon after application. The thickness of the asphalt layer will depend on the expected traffic and use of the driveway, with a typical residential driveway requiring about 2 to 3 inches of asphalt for optimal durability and performance.

6. Compact the asphalt layer using a roller

The worker is compacting the new layer of asphalt over the old concrete driveway.

After spreading the hot mix asphalt evenly, the next critical step is compaction. Use a vibratory roller to compact the asphalt layer, starting from the edges and working your way inwards to eliminate any air pockets and ensure a dense, solid surface. Proper compaction is crucial for the longevity and resilience of the asphalt overlay, as it increases the material’s load-bearing capacity and resistance to weathering and traffic wear.

The roller should move at a steady, even pace to achieve uniform compaction across the entire driveway. Multiple passes may be necessary to reach the optimal density, particularly on the edges and any areas where the asphalt layer is thicker. Pay attention to the asphalt’s temperature during this process; it needs to be warm enough to allow for effective compaction but not so hot as to cause deformation.

Read more: Crushed asphalt driveway – 7-steps installation guide

7. Allow the asphalt to cure and harden

After the asphalt layer has been compacted, it’s essential to allow it sufficient time to cure and harden properly. This curing process is crucial for the asphalt to achieve its full strength and durability. Avoid using or applying any pressure on the surface during this period. The time required for curing can vary based on the temperature and humidity conditions but typically ranges from a few days to a week.

During this time, the asphalt will cool, harden, and adhere firmly to the underlying concrete and bonding agent, creating a robust and long-lasting driveway surface. It’s important to monitor the weather during this period and protect the new surface from any potential damage, such as heavy rain or extreme temperatures, which could affect the curing process.

8. Seal the asphalt for added protection

The worker is applying the sealant for longer life of the asphalt on the driveway


Once the asphalt overlay has fully cured and hardened, the final step in ensuring its longevity and durability is to apply a high-quality sealant. This protective layer serves as a barrier against water penetration, UV rays, oil spills, and other environmental factors that can degrade asphalt over time. Choose a sealant that is specifically designed for asphalt surfaces and follow the manufacturer’s application guidelines closely.

The sealant should be spread evenly across the entire surface, using tools like a squeegee or spray applicator for a uniform coat. This process not only enhances the aesthetic appeal of the driveway by giving it a fresh, finished look but also significantly extends its lifespan. Typically, it’s recommended to reapply the sealant every two to three years, depending on the driveway’s exposure to traffic and weather conditions, to maintain its protective qualities and keep your driveway looking great.

9. Ensure proper drainage for water runoff

An essential aspect of installing an asphalt overlay on a concrete driveway is ensuring that the new surface has adequate drainage. Proper water runoff prevents water accumulation, which can lead to asphalt deterioration, such as cracking and potholing over time.

Assess the slope of the driveway and, if necessary, incorporate slight gradients during the asphalt application to direct water away from the driveway and toward appropriate drainage areas. You may also need to install or adjust drainage systems, such as French drains or channel drains, to effectively manage water flow. Ensuring good drainage is a preventative measure that protects the structural integrity of the driveway and keeps it in good condition for years to come.

10. Regularly maintain and repair as needed

Example of an asphalt driveway after being inspected by some paving professionals

Ongoing maintenance is crucial to extend the lifespan of your asphalt over concrete driveway. Regular inspections can help identify potential issues early, such as small cracks or wear, before they escalate into more significant problems. Implement a maintenance routine that includes keeping the surface clean from debris, dirt, and chemicals, and promptly filling any cracks or holes with an appropriate asphalt repair material.

Additionally, consider a periodic reapplication of sealant as recommended by the product guidelines, usually every two to three years, to continuously protect the surface from water penetration and UV damage. Addressing minor repairs promptly and maintaining the sealant layer are key strategies to ensure your driveway remains durable, functional, and aesthetically pleasing for many years.

Is it Possible to Pave Asphalt over a Concrete Driveway?

As a homeowner, you are indeed searching for options that provide more stability, comprehensive services, and excellent weather resistance. For all this, asphalt pavement over existing concrete is an excellent idea because it gives you all that and lots more.  Installing Asphalt over a concrete driveway is certainly possible. Many homeowners now pave asphalt over their concrete because it offers several advantages.

However, when doing so, you need to consider a few facts. Concrete is a strong and stable material, so you will have an even harder surface when you pave Asphalt over it. But this can only be successful if your existing concrete is in a stable and well-prepared sub-base, or else you will end up with an unstable and prone-to-cracking driveway. One cannot doubt that paving asphalt over a concrete driveway that has an appropriate compaction sub-base is always a superior pavement.

Why You Should Remove Concrete Before Installing an Asphalt Driveway

The new asphalt over concrete driveway

Even in today’s context, investing in an asphalt installation is a significant commitment that homeowners can’t undertake frequently. Therefore, when you opt for an Asphalt driveway, the expectation is that it will serve you well for at least two decades. Achieving this longevity requires adherence to proper installation and maintenance protocols.

The Critical Role of a Strong Base

For optimal durability, the paved asphalt driveway heavily relies on the strength of its underlying base. The approaches contractors use for robust driveways vary between Asphalt and concrete. In concrete scenarios, contractors aim for durability by laying thicker slabs. However, they often neglect proper preparation for accommodating an asphalt layer on top, potentially compromising the stability of the Asphalt Over Concrete Driveway.

Overcoming Challenges with Concrete Bases

This problem with the base may adversely affect the asphalt driveway’s durability and may reduce its life. Since no homeowner would enjoy a premature replacement of the Asphalt, it is, therefore, necessary to dig up your existing concrete drive to pour new Asphalt over it. With a more stable foundation, Asphalt has a higher lasting potential. 

Furthermore, concrete has a fluctuating nature, which does not align well with Asphalt. When temperatures fluctuate, it is the nature of Asphalt to contract and expands and thus needs a stable base beneath. Only when you are confident of the concrete driveway condition underneath and its appropriate compaction and stability can you consider pouring Asphalt over it? 

Why You May Want to Switch from Concrete to Asphalt

A driveway that has been paved with asphalt over concrete.

If you mainly live somewhere where the temperature fluctuates frequently, then Asphalt is ideal for paving. It can better handle fluctuations than concrete, which tends to crack a lot more than in severe winter weather. 

In most cases, Asphalt performs just as well as concrete, provided you put it down the right way and maintain it well too. You will find repairs must be cheaper for Asphalt than concrete because patch and sealing holes and cracks do not weigh heavily on your pockets. 

Besides, resurfacing layers work better when driveways begin to age and Asphalt again takes the lead. Resurfacing is advantageous for homeowners because it is cost-efficient and maximizes the life of the driveway.

Concrete cannot give you these two advantages because of the lack of resurfacing. Due to this, you have to replace the entire driveway once it reaches the end of its life. Hence, if you have been weighing the advantages of Asphalt over concrete, then as a summary, here is what you can base your decision upon:

  • Concrete does not survive well under harsh colder climates
  • Concrete is harder to repair
  • It is more expensive
  • Asphalt is budget-friendly
  • It offers resurfacing facility, so you do not have to replace the entire driveway
  • You can install asphalt faster
  • Asphalt requires easy maintenance

Pros and Cons of Asphalt vs. Concrete

The image shows the asphalt and concrete

When ruts, stains, and cracks become increasingly evident on a driveway, homeowners cannot decide on a new installation. However, picking one out of the two most common solid materials for pavement is not that easy.

Concrete and Asphalt have their own sets of pros and cons. While they mostly contain a mixture of stone and sand and lay over a gravel substrate, their adhesive components differentiate the nature and functionality of the two.

Let’s look at the pros and cons of both materials below:

Concrete-Pros

  • With concrete, you get more visual options. You will find concrete in a pale gray color in basic form, but it responds better to tinting or staining in any color you fancy. You may even stamp concrete with patterns if you want a textured finish. 
  • Concrete is the better option for regions where hot summers are typical. Asphalt does not work well in such places because the heat tends to make it sticky and gooey. Additionally, the process of softening in hot temperatures and re-hardening when it cools down causes cracks and sagging. 
  • Asphalt requires resealing every couple of years, but this is not necessary in the case of concrete driveways. You may seal concrete voluntarily to reduce fading, especially if you want a tinted driveway. 

Concrete- Cons

  • Typically, your driveway will have to endure rust, gas drips, and engine oil drips over its lifetime. Concrete has a lighter surface; hence you will find every spill and mark visible. If you want to maintain its good looks, you will have to degrease and clean aggressively
  • Concrete does not survive well in colder climates. You will find it cracking and buckling more every time winter sets in, and it snows. Concrete can also develop ugly marks from blotching, staining, or pitting from salt for melting the ice
  • Concrete may not give a streamlined appearance to match your streets. 
  • It requires tougher maintenance. 

Asphalt- Pros

  • Asphalt has a darker color, so it is good at concealing stains and signs of wear and tear. 
  • Asphalt installs faster, and you can use it within a couple of days of the process. In the case of concrete, you have to wait for enough for it to cure before you can use it. 
  • Asphalt is not as costly as concrete. It will cost you nearly less than forty to fifty percent than its counterpart.

Asphalt-Cons

  • It does not last longer than a concrete driveway that you install well and maintain properly in favorable climates. The lifespan of a concrete driveway can be up to thirty or forty years, while an asphalt driveway, it is not more than thirty years at best.
  • Asphalt does not survive well in hotter climates, and the expansion and contraction from melting and re-hardening can cause and widen cracks. 
  • It may be easy to maintain, but the maintenance does not last beyond three to four years. You will find yourself repairing your asphalt driveway more often than a concrete one. 

The Cost of Switching from Concrete to Asphalt

The workers installing asphalt over concrete driveway

One of the reasons why homeowners popularly prefer Asphalt over concrete these days is the cost difference. On average, a concrete driveway is more expensive than an asphalt one, with the former costing you approximately $4 or more per foot and the latter nearly $2 or more per foot. 

The price of Asphalt largely depends on crude oil prices and fluctuations in those that cause the other to fluctuate. As a comparison, you will find the standard installation of a concrete driveway costs you approximately $4 to $6 per square foot. 

Concrete Surface Removal Cost

Despite some of its drawbacks, one cannot doubt the long-lasting capacity and strength of the concrete material for driveways and other construction projects. It can serve you well for years, but as time advances, you will find it giving in to cracks from climatic changes, movements, and eventual unsettling. 

In due time, concrete will fail when it has lived well and under aggressive conditions for long years. This is when you will need to replace it entirely. However, it would be best to prepare for the wide range of costs incurred in concrete removal. 

These costs mount up considering the concrete’s location, thickness, and how much of it you remove. In terms of replacement, generally, you have to replace the entire driveway because resurfacing is not an option in concrete. 

For this very reason, the national average cost range for concrete removal can fall anywhere between $500 to $5000. As an estimate, most homeowners pay approximately $1,846 for removing six hundred square feet of their concrete pavement. 

Removal Price as per Concrete Type

The concrete installation has two types:

  • With reinforced concrete- this is merely a concrete slab
  • Or with unreinforced concrete- with rabar embedding

The cost of concrete removal also depends to a large extent on the type of concrete that went into your driveway. Both types differ in removal costs because they consider the location and size of your area. The contractors also have to include the costs of machinery they will employ and transport to your area for the removal process. For this, they have to measure the thickness and the existing concrete and the level of equipment they will have to use.

Ultimately, all these add up to the final cost of the process. 

Asphalt Pavement Prep/Installation Cost

Asphalt installation is a prevalent trend because of the many advantages it gives to homeowners. From enhanced drivability to increasing your curb appeal, new asphalt pavement can increase your home’s resale value and give you many attractive benefits. 

The cost-efficiency and easy maintenance win hands down with homeowners, while the eco-friendliness, higher tolerance of weather, and improved safety please all. But most importantly, its cost-friendliness is why most homeowners turn to this material.

Who can ever argue against the charm of acquiring a qualitative material for the home at affordable rates? None we believe!

Calculating the cost of asphalt installation

The road under constructions for asphalt installation over the old concrete driveway

While it would be difficult to quote a definite figure, the truth remains that Asphalt falls much cheaper than concrete. The final cost takes into account the manufacturer and the kind of mix they use for the Asphalt, but even then, the final estimate fits into every homeowner’s budget. 

The final cost also depends on the location, the size of your project, and the sort of equipment and workforce that will go into the process. The national cost range of paving an asphalt surface per square foot is generally around $6. 

So if we look at the total, an asphalt driveway will roughly cost around $4,500 to $6,100. The installation would also consider factors such as the time it took, workforce, and the magnitude of the construction in addition to secondary factors. These include what it took to rip out your existing surface, how the contractors had to haul it away, and what other steps were required before laying down your new asphalt mix. 

Deep dive into asphalt installation costs

The final cost of your asphalt installation will also include:

  • Excavation of the existing surface
  • Installing a gravel foundation
  • The amount of tonnage
  • The cost of transportation from the plant of asphalt production to your project’s location
  • What other materials did the contractors need in addition to the Asphalt
  • What base coat do they apply
  • Market environments, including construction activity, permit requirements, and current prices of oil. 

FAQs about Asphalt Over Concrete Driveway

The worker is answering to FAQs regarding asphalt over concrete on the driveway.

Here are some key FAQs about asphalt over concrete driveways.

How thick should asphalt be over concrete?

The thickness of asphalt over concrete can vary depending on factors such as the intended use, local climate, and the condition of the existing concrete. Generally, a thickness of 2 to 3 inches is common for residential driveways.

How do you bond asphalt to concrete?

Proper bonding between asphalt and concrete is crucial for durability. The process typically involves cleaning the concrete surface thoroughly to remove any dirt or debris. A bonding agent or tack coat is then applied to the concrete before laying the asphalt. This helps the asphalt adhere securely to the concrete surface.

Will asphalt sealer stick to concrete?

Asphalt sealer is specifically designed for asphalt surfaces and may not adhere well to concrete. It is recommended to use a concrete sealer for concrete surfaces, as it is formulated to bond effectively with concrete. Mixing different types of sealers may not provide the desired results.

What do you put between asphalt and concrete?

A bond-breaking material, such as a geotextile fabric or a release agent, is often used between asphalt and concrete surfaces to prevent them from bonding together. This separation layer allows for the independent movement of the two materials, reducing the risk of cracking and other issues caused by temperature fluctuations and ground movement.

Final Thoughts 

If you are considering pouring Asphalt over the concrete driveway, then the process is possible. However, you can only expect the surface to be stable and reliable if you have a properly compacted subbase beneath, or else resurfacing with Asphalt will fail. 

From easy maintenance to being less costly, Asphalt is advantageous over concrete in multiple ways and can also increase your home’s resale value.

Tim Dawson's Avatar

About the Author: Chris Hawk

Chris is a paver with more than 15 years' expertise in the field. He has established a reputation as an expert and trustworthy specialist with a track record of providing his clients with top-notch paving solutions.

Asphalt Water Guide

In the battle against rain, every homeowner and business owner faces the challenge of protecting their asphalt surfaces. Ensuring proper drainage is crucial for preventing water-related havoc and potential damage.

Asphalt pavements face a formidable foe in water. Excess water, often underestimated, can erode and break down even the sturdiest asphalt, turning it hazardous. Proper drainage is paramount for safeguarding your property from water-related issues. Whether installing a new asphalt pavement or maintaining an existing one, prioritizing drainage is the key to longevity and performance.

Explore effective drainage systems to shield your asphalt from rain-induced damage. Uncover installation insights and maintenance strategies, ensuring your pavement stays resilient against water challenges for a prolonged lifespan.

How do you plan for and prevent water damage on your asphalt surfaces?

A big pothole on the asphalt road

When preparing for a paving project, you should ensure you have a good drainage plan in place. Your paving contractor should build the pavement in a way that allows water to flow across the layers at a natural rate without compromising the whole structure. 

Your pavement builder should account for a free water level that will penetrate the pavement structure and surface free water/runoff. Also, it is their responsibility to establish a plan for subgrade moisture. 

This implies that your contractor should install the pavement itself alongside the subgrade in a manner that can redirect the water away before any damage happens. Paving professionals should take it upon themselves to offer an asphalt water guide to property owners embarking on a pavement project to avoid water-related damage in the long run.

So, what should you do to prevent water from damaging your asphalt?

A damaged asphalt road due to water.

Standing water has the tendency to expand and shrink, causing the pavement to weaken. It can also damage your pavement’s full structural integrity when it gets into the sub-layers of your surface. So, to prevent water damage to your asphalt, the things you should do include:

Fill cracks 

To prevent water infiltration and subsequent damage to your asphalt, prioritize crack filling. Water can seep into cracks, leading to erosion and compromising the pavement’s integrity. Utilize quality crack fillers to seal these vulnerabilities, reducing the risk of water-induced deterioration and extending the lifespan of your asphalt surfaces.

Plan adequate drainage

Strategically planning and implementing proper drainage systems is essential. This includes designing slopes and grading to direct water away from the asphalt surface. Installing effective drainage channels, such as French drains or gutters, helps prevent water accumulation, reducing the potential for erosion and damage to your asphalt pavement during heavy rainfall.

Investing in Sealcoating

Sealcoating acts as a protective shield for your asphalt, preventing water penetration and enhancing its resilience. Regularly applying a high-quality sealcoat forms a waterproof barrier, safeguarding the pavement from rainwater, UV rays, and other environmental factors. This proactive measure not only extends the life of your asphalt but also maintains its aesthetic appeal.

Regular Maintenance

The workers are performing maintenance on the asphalt road after studying the Asphalt Water Guide.

Consistent and routine maintenance is key to preventing water-related issues. Regularly inspect your asphalt surfaces for signs of wear, damage, or inadequate drainage. Addressing any issues promptly, such as clearing debris from drainage systems or repairing minor damages, ensures optimal performance and minimizes the risk of extensive water damage over time.

Pothole Repair

Potholes are a direct consequence of water damage and should be promptly addressed. Neglecting potholes allows water to penetrate deeper into the asphalt layers, exacerbating structural issues. Invest in quality pothole repair materials and techniques to promptly fill and seal these voids, preventing further water infiltration and maintaining the overall integrity of your asphalt pavement.

The more water is allowed to remain on top of your pavement or creep into the pavement itself, the worse the issue can get.

How water can damage asphalt surfaces

Although it might sound odd, water on driveways and other asphalt surfaces is probably the most significant cause of damage.

When cracks develop in asphalt pavement, they let water penetrate under the surface, deteriorating the ground below. Water can penetrate an asphalt pavement through cracks any time it rains, snows, or becomes damp, causing significant damage. Sometimes, this damage is not noticeable from the surface but can still be very widespread. It can result in potholes and other consequential types of damage that need expensive repairs if left for far too long.

Also, asphalt surfaces may be infiltrated by moisture, helping to weaken both the surface and the soil below. Especially with major driveways or parking lots, pooling or standing water areas may end up causing asphalt damage.

The importance of having proper drainage systems

Asphalt parking lot with proper drainage

Every asphalt pavement’s foundation plays an essential part in its rigidity and structure. And because the substructure has a lot of roles, It is vital to follow a useful asphalt water guide so that it remains in the best possible shape with frequent maintenance aimed at keeping water away from the base and the rest of the home generally. Below are the importance of having adequate drainage systems

  • It helps maintain the bearing capacity in the road structures and subgrade
  • A good drainage system helps prolong the service life of the pavement
  • A proper drainage system also reduces the pavement management costs
  • A well-drained road surface increases friction, leading to shorter distances required to brake vehicles
  • It controls erosion that may be a threat to the pavement

Proper drainage for asphalt driveways 

An excellent drainage system used for an asphalt driveway.

Quite a few individuals outside experts think about the significance of a driveway’s drainage planning. In contrast, most others fail to consider how important it is to step in the process. Your driveway can not correctly control water runoff without an adequate drainage plan, which can result in a flooded garage or funneling water in your driveway itself.

Your paving contractor should implement a good drainage system during the sub-floor installation before laying on asphalt. When you plan, it makes the installation process a smooth and easy one for the asphalt itself. 

The most significant part of the planning process is to make sure that the driveway is graded, creating positive drainage flow away from the house. An adequately planned drainage remedy should lead to little or no pooling water on the driveway surface itself. 

If the driveway is flat, water should all flow naturally either down each side or to the driveway’s slope. This is the reason contractors usually offer asphalt water guide to property owners before commencing the paving project.

Asphalt driveways drainage systems and design

With a trench drain system, standing water weakened bases and rotted siding can be prevented.

Trench drains (also referred to as channel drains) are ideal for diverting water away from your garage and base. You can avoid flooding and other collateral damage by building a channel at the opening of your driveway. It is possible to redirect stormwater into a lower point or established drainage runs.

Consider where the water is going to be directed, the amount of water you might deal with, and what kind of traffic is going to be crossing the grates.

A driveway trench drain is an incredibly efficient method, but lots of people have problems with it. Although they come in decorative designs, they are heavy and bulky to move. They can easily break when you have to clean out the drain.

Proper drainage for asphalt parking lots

A lonely car at wet parking lot.

One important aspect is overlooked when constructing a parking lot, and that is a drainage system for parking lots. If the drainage system is not well laid out, it can result in groundwater problems. Therefore, adequate drainage of the parking lot is necessary to ensure the parking lot’s prolonged service life.

Asphalt parking lots’ drainage systems and design

After establishing the plan of the parking lot, a feasible pattern of parking space should be developed. Once you determine this pattern, you can then design drainage grades to prevent customers from stepping into gutters from their cars. You may also call in a professional to provide you with an adequate asphalt water guide.

A minimum 2% (1/4′ per foot) grade is required for all areas used by pedestrians in order to prevent puddles from forming in rainy weather. This grade’s implementation poses no issue on sloping terrain, but the built-in drainage valleys can possibly lead to a gently undulating surface on flat sites.

Buried conduits may well be needed to stop undesirable ponding on the paved area or excess flow. For current runoff conditions, the flows to the planned inlets should be determined, and, if appropriate, the spacing should be changed to provide satisfactory outcomes. Inlet spacing of no more than 200-400 feet will be suitable under average conditions.

Proper drainage for asphalt roads

Good roadway drainage is highly essential to ensure road safety. If you want to avoid flooding, roads must be well-drained.

Asphalt roads drainage systems and design

Drainage ditches are built around the roadway’s sides to collect the runoff from the surface of the asphalt pavement along with water from subsurface drains. These ditches often block and carry away water that would otherwise enter the roadbed, where the nearby region’s slope is toward the roadway

V-shaped ditches should be avoided because they encourage erosion by focusing water flow at their bottoms.

If you want to increase the drainage ditch’s efficiency, it is typically better to widen it rather than deepen. Such ditches side slopes usually range from about 4 to 1 (for the slope nearer the roadway) to about 8 to 1 or flatter (for the far side). 

Make the ditch large enough to hold all the surface runoff from the design storm. Furthermore, the ditch should be built to a steady, smooth grade without pockets or depression that will receive water. An asphalt water guide is essential in a nutshell, ensuring that your roads are devoid of potential water-related damages.

Asphalt maintenance to avoid water damage

The process of asphalt sealcoating

The following are a few maintenance practices you can do to avoid water damage:

  • Add drainage
  • Regular seal coating
  • Quickly attend to cracks/other failures

Many homeowners and business owners only think of asphalt pavement repair once there is a severe issue on their pavement, including a pothole, rough surfaces, or hollow ground. This is, sadly, the wrong way to go about ensuring the pavement’s longer service life. 

Because it can be very costly and difficult to fix if this type of damage happens, and you will spend more if you allow water damage to get out of control.

Practicing continuous asphalt maintenance and preventative measures to shield it against water damage is the smartest way to asphalt repair. Although this involves more regular work and checks, it can end up saving you a significant amount of time and money in the long run. 

Taking timely action to protect your asphalt pavement from water damage can prolong the pavement’s service life, ensure safety on your property, and even save you money.

You can routinely use basic maintenance practices to guarantee your pavement’s longevity. 

Add drainage

The worker added a grate to allow water drainage from the asphalt and facilitate the quickest possible drying of the road.

Adequate drainage is part of an efficient asphalt pavement. Therefore, ensure your pavement has a correct drainage system away from your pavement, as this will prevent any water from accumulating on your asphalt, causing cracks and deterioration. One way of doing this is to construct your driveway on a slope to drain off all the water. Doing this without an asphalt water guide in place will sometimes be difficult. 

Your asphalt pavement will last for a very long period if correctly drained. Water that is allowed to pool on asphalt pavement surface due to improper drainage is highly detrimental. Without adequate drainage, pooled water from snow and rain can cause damage to the asphalt.

If you have adequate drainage in place, water will be impossible to settle on the asphalt. When water is correctly directed, your pavement will not encounter cracks and deterioration. Hence, ensure you maintain a sloped asphalt driveway to drain off the water that might pool and settle on it.

Regular seal coating

One effective way of preventing water damage and elongating your pavement’s service life is seal coating. This involves applying a protective sealant to the surface of the asphalt to seal cracks and keep the surface protected from moisture efficiently. When you apply sealant properly, it is also a protective solution against UV rays, snow, and other elements that causes damage to the pavement surface.

Sealcoat is an excellent way of making your asphalt pavement look good and protected from damage. It is a cost-effective approach used by property owners to avoid the formation of potholes and other severe damage. 

Sealcoating is a highly recommended practice that you need to do every 2, 3, to 5 years, depending on the use and state of your asphalt driveway, parking lot, etc.

Quickly attend to cracks/other failures

If there are early signs of damage, repair them immediately. By frequently doing this, you will address any repairs and damages before they get out of control. With the right crack filling, water can be prevented from entering into the asphalt pavement, protecting the pavement from damage from the ground beneath. Following the asphalt water guide and having an adequate drainage system is a better way of preventing asphalt failure

Potholes are usually the result of water damage, but they can trigger water damage as well. When potholes develop on the surface of your asphalt pavement, water can quickly flood in, causing worsening types of damage to your pavement. Hence, pothole repair should be treated with urgency whenever you notice it.

How porous asphalt can help deal with water

The worker is leveling the porous asphalt on the roads.

Porous asphalt pavement consists of an absorbent asphalt surface laid on top of a broad stone reservoir over a granulated working platform. By constructing the asphalt with an open-grade friction course, its surface is rendered porous. 

An asphalt pavement that is correctly built will greatly minimize stormwater runoff by absorbing rainwater into the pavement system. High gaps in the porous asphalt pavement allow the water to drain into the stone recharge bed beneath the pavement(via the pavement structure) then into the water table.

Porous asphalt parking lots that are well built are attractive and cost-effective, with a lifespan of at least 20 years. Similarly, porous asphalt parking areas can offer efficient stormwater management, facilitate infiltration, remove the need for detention basins, and improve water quality.

Porous Asphalt Environmental Factors

Environmental factors and climate affects the design of porous asphalt pavement. And when you talk of critical porous asphalt environmental factors, dust should highly be considered. 

Consistently blowing dust tends to clog the openings of the surface of the porous asphalt and seriously limit percolation through the system’s top layer. Going through a porous asphalt water guide can also help facilitate the percolation of water.

Due to this reason, porous asphalt pavement structures are not ideal for barren areas with medium to high winds. Therefore, Parking lots and recreation areas such as tennis courts, basketball, or playgrounds are the typical use of porous asphalt pavements.

Cost of Repairing Water Damaged Asphalt

Explore the following table for a detailed breakdown of the costs involved in repairing water-damaged asphalt. Whether you’re dealing with small cracks or contemplating resurfacing, these estimated costs per linear foot or square foot provide a practical guide for budgeting and decision-making in asphalt maintenance.

Repair MethodEstimated Cost
Small Cracks Filling$0.50 to $1.00 per linear foot
Medium Cracks Filling$1.50 to $2.50 per linear foot
Large cracks Filling$3.00 to $5.00 per linear foot
French Drains$1,500 to $3,500 per drain
Grading and slope adjustments$1,000 to $2,500
Sealcoating Application$0.15 to $0.25 per square foot
Small Potholes Repair$50 to $100 per pothole
Larger Potholes Repair$100 to $300 per pothole
Resurfacing or Overlay Per square foot$2.00 to $3.50

These cost breakdowns provide a comprehensive overview of the financial considerations associated with repairing water-damaged asphalt, offering insights into the investment required for each specific repair method.

FAQs about Asphalt Water Guide

Here are the most common questions about water and asphalt.

Does asphalt need to be watered?

No, asphalt does not require watering. In fact, excessive water can be detrimental to asphalt surfaces, leading to issues like erosion, cracking, and a reduced lifespan. Proper drainage systems are essential to manage rainwater effectively without causing damage.

Does water flow through asphalt?

While asphalt itself is impermeable, water can infiltrate through cracks or poorly maintained surfaces. To prevent water from flowing through asphalt and causing damage, it’s crucial to address cracks promptly, maintain proper drainage, and consider sealcoating as a protective measure.

How long does asphalt need to dry before rain?

Newly laid asphalt typically needs sufficient time to cure before exposure to rain. The drying time varies based on factors such as weather conditions and the type of asphalt mix used. Generally, it’s advisable to wait at least 24 to 48 hours before subjecting fresh asphalt to rain to ensure optimal curing and durability.

Is standing water bad for asphalt?

Yes, standing water poses a significant threat to asphalt. It can lead to deterioration, weakening the pavement structure over time. Proper drainage is crucial to prevent standing water, as it can contribute to issues like potholes, cracks, and other forms of damage.

Does rain ruin asphalt?

While rain alone may not ruin asphalt, its impact can be detrimental when combined with poor drainage or existing pavement issues. Over time, constant exposure to rain without proper drainage and maintenance can lead to erosion, cracking, and other forms of deterioration, compromising the integrity of the asphalt surface.

Conclusion

Water is the primary enemy of asphalt pavement. Hence, you need to properly plan for an adequate drainage system that would prevent water from pooling on your pavement. Suppose you neglect to install a proper drainage system on your pavement. In that case, water will inevitably pool on it (especially during the rainy season), resulting in quick degradation and then severe damage.

Therefore, as you are planning for your asphalt project, make sure you also have a good drainage system in place to prevent the impact of water damage to your asphalt. 

You can also call in a professional paving contractor to advise you on the drainage plan that would be best for your pavement.

Tim Dawson's Avatar

About the Author: Chris Hawk

Chris is a paver with more than 15 years' expertise in the field. He has established a reputation as an expert and trustworthy specialist with a track record of providing his clients with top-notch paving solutions.

Asphalt Parking Lot

Why should you choose an asphalt parking lot for your business? Among the many decisions, you’ll make for your business is what kind of parking lot you want for your customers. While you also have options like gravel or concrete, asphalt is arguably the best choice for parking lot paving due to its versatility, cost, safety, and longevity.

Compared to concrete, asphalt parking lots cost less to install and repair, take less time to install, last nearly as long, are better for the environment, and look equally as professional as their counterparts. Asphalt also performs better than concrete in climates subject to freeze and thaw. Overall, asphalt parking lot paving simply offers more benefits and a better value for your money than the other available options.

Read on to learn nine essential elements of asphalt parking lot paving in this comprehensive guide.

8 Steps to Pave an Asphalt Parking Lot

Paving an asphalt parking lot is a significant project that requires careful planning, precise execution, and a thorough understanding of construction materials and techniques. Here, we’ll delve into an eight-step process that outlines how to pave an asphalt parking lot effectively.

1. Clear the existing site

Workers are removing all debris and vegetation so they can build the asphalt parking lot

Clearing the site is the first and most critical step in asphalt parking lot paving. This involves meticulously removing existing structures, debris, or vegetation. The aim is to establish a pristine and level area for construction. Removing all obstacles is essential to prevent future structural problems in the parking lot, ensuring a solid foundation for the upcoming work.

2. Grade and level the ground

Ground grading is pivotal for achieving stability and efficient drainage. This step encompasses the careful leveling of the ground and crafting a gentle slope for optimal water runoff. Proper grading is a defense against water accumulation, which can significantly impair the integrity and lifespan of the asphalt over time.

3. Install geotextile fabric

The installation of geotextile fabric is a crucial step in parking lot construction. This fabric acts as a barrier between the subsoil and the aggregate base, enhancing overall stability, preventing material intermixing, and facilitating better drainage. It plays a significant role in prolonging the parking lot’s lifespan by protecting the underlying layers.

4. Spread aggregate base

Applying the aggregate base is fundamental in creating a stable foundation for the asphalt. This layer, typically made of crushed stone or gravel, is compacted to form a robust base. The choice of material and its thickness are tailored to suit the anticipated load and traffic volume, ensuring a durable and resilient parking lot surface.

5. Apply asphalt

Workers are applying asphalt to the new parking lot

The meticulous application of the asphalt layer is a critical step in creating a durable and aesthetically pleasing parking lot. This delicate process involves carefully selecting the appropriate mix, closely monitoring temperature conditions, and ensuring precision in thickness. These factors collectively contribute to the structural integrity and overall quality of the asphalt parking lot’s surface.

6. Use paving machine

Utilizing a paving machine is critical for the even and uniform application of asphalt. This machine streamlines the process, ensuring consistent thickness and surface smoothness. It is an indispensable tool in the paving process, instrumental in achieving professional-grade and enduring results.

7. Compact the asphalt

Compacting the asphalt with a roller is a necessary step post-application. This process is key to eliminating air pockets and ensuring the asphalt is compactly packed. Effective compaction not only enhances the parking lot’s durability but also prepares it to withstand heavy and continuous use.

8. Allow for curing

The final phase is the curing of the asphalt, requiring a period of waiting for the asphalt to fully harden and set. During this crucial time, it’s imperative to keep the area devoid of traffic to ensure the integrity of the newly laid surface. Proper curing is essential for achieving a flawless and durable finish.

How much does it cost to pave a parking lot with asphalt?

The ultimate cost-determining factor is the project’s square footage, but with an asphalt cost calculator, you can do the math for how much your project will cost per square foot. While the price fluctuates with the market, in general, you can expect to pay between:

Cost per square footmaterial
$2 to $4.50Asphalt paving
$4 to $7Concrete paving
$1.25 to $1.80Gravel

Several other factors could impact your project costs, such as density of asphalt, recycled vs. virgin asphalt, required site preparation, drainage needs, and more. Your contractor should explain any issues affecting your price.

Asphalt parking lot cost calculator

The following asphalt cost calculator helps you determine the volume of asphalt you’ll need for your project by using the area’s dimensions, desired thickness, and type of asphalt to figure the total cost. You can calculate your project’s asphalt weight by multiplying the length by the width by the thickness by the asphalt density. On average, expect a tonne of asphalt to cost between $80 and $200, varying with your location, quality/density, and current oil price.

Asphalt parking lot cost calculator

You should also consider the cost of preparing your future parking lot before asphalt is applied. Debris must be cleared, the area leveled, herbicide applied, a layer of gravel laid down as a solid base material, and a drainage system put into place, all of which you should factor into your budget. After the asphalt sets, you must hire someone to paint the pavement striping to ensure the safety of drivers and pedestrians on your property. 

Recycled asphalt: an option to consider

Asphalt is the most recycled product in America. According to the National Asphalt Pavement Association, reclaimed asphalt pavement (RAP) has long been incorporated into new asphalt along with other recycled materials. In addition to its significant environmental impact, asphalt created with RAP incorporated has proven stronger and more durable than virgin asphalt alone.

    Important Facts About Recycled Asphalt

  • Minimizes environmental impact
  • Produces a stronger product than virgin asphalt
  • Significant cost savings, even as oil prices rise
  • Recycled asphalt saves taxpayers up to $2.5 billion per year
  • Less space taken in landfill with material that will never biodegrade
  • Promotes the conservation of other natural resources with less aggregate mining
  • Decreased probability of cracking and less frequent future maintenance
  • Can be used for roads, roof shingles, parking lots, landscaping, driveways, etc.

The Federal Highway Administration declared its support for using RAP materials in pavement construction to “preserve the natural environment, reduce waste, and provide a cost-effective material” for paving construction.

How often should you seal an asphalt parking lot?

To give your lot the best protection possible, you should reseal it every two to four years as a routine part of your asphalt parking lot maintenance. Pay attention to the oxidation levels and general health of your parking lot to decide when your parking lot needs a sealcoat application.

If your business is in an area with heavy rainfall or frequent freezes and thaws, you may notice more cracks in your parking lot and might want to consider sealcoating more frequently to prevent future repairs. 

Does sealing asphalt extend life?

Sealcoating your asphalt will extend its lifespan by preventing major cracks from forming in your parking lot’s foundation. Always ensure cracks are properly repaired before sealcoating, as it is only a protective measure for the surface. 

Sealcoating not only renews the appearance of your parking lot but also reduces oxidation levels and water entry, provides oil and gas resistance, makes it easier to clean and maintain, and offers a more pliable surface to drivers during hot weather.

Asphalt parking lot maintenance

The process of seal coating on asphalt parking lot

According to the experts, proper asphalt parking lot maintenance can extend the life of your lot to as much as thirty years. Your parking lot is often the first aspect of your business a potential customer sees. A properly maintained lot conveys the impression you care about the appearance of your property. 

Maintenance tasks range from simply sweeping the asphalt parking lot and weeding any vegetation growing through cracks to patching cracks before they become potholes and flushing your draining system if necessary. Set a schedule and stay consistent in caring for your parking lot to reach its maximum longevity.

The life expectancy of an asphalt parking lot

An asphalt parking lot won’t last forever, even with perfect site preparation and maintenance. Like most things, your parking lot has a general life cycle it will follow. With proper maintenance, you can expect your asphalt parking lot to last between fifteen and thirty years, at the extremes. Your parking lot will go through several phases during its life. 

0-5 Years

Your asphalt parking lot will require little maintenance or repair during the first phase. The parking lot surface should have no trouble standing up to heavy traffic and inclement weather— as long as you have proper drainage. Keep it clean and free of debris, and remove any vegetation you see to prevent future issues

5-7 Years

Routine maintenance is key. Properly fill any cracks before seal coating your asphalt parking lot. Sealcoating and crack sealing will extend your parking lot’s lifespan, especially if you start early and stay consistent with maintenance. Continue to keep the lot clean and free of weeds.

7-15 Years

Example of an asphalt parking lot that lasted for 20 years

As your parking lot reaches roughly middle age, you may need to do some more intensive maintenance and repair. Cracks may expand to become holes if not dealt with promptly. A neglected asphalt parking lot will show rapidly in the form of growing cracks and potholes

15-25 Years

Repairs will become more frequent and intensive. You will likely face large cracks and potholes. Customers may complain about the risk of injury or damage to their vehicles. It may be time to consider resurfacing your parking lot. 

25+ Years

If your asphalt parking lot made it to 25 years or beyond, you got a fantastic value for your investment. At this point in your parking lot’s life, repair and maintenance costs will be similar to the cost of a new parking lot.

Asphalt parking lot repair

The workers are busy repairing an asphalt parking lot

You may be wondering what issues you might face with asphalt parking lot repair. For the most part, cracks and potholes are the bulk of repairs, both of which can be dealt with easily if you take swift action. A parking lot in disrepair gives your potential customers a poor impression of your business before they ever make it through the door.

Cracks are the most common type of asphalt parking lot repair. They can be longitude cracks, which appear in a long straight line; block cracks, which look like a rectangle or square shape and may intersect at right angles; or alligator cracks, which are haphazard patterns. Cracks between a quarter-inch and one inch can be repaired with crack sealing. 

Potholes occur when water seeps down through cracks and erodes the roadbed beneath the surface. Vehicle traffic then breaks the surface asphalt and pushes it into the cavity. Potholes can be filled or patched using premium hot or cold mix asphalt after cutting a square around the hole down to the aggregate sub-base. Compacting the new asphalt properly and sealing the repaired area, preventing further water damage is critical.

Asphalt Vs. Concrete: Value Comparison

After learning about the many benefits of choosing asphalt over concrete for your parking lot, it can be useful to see a side-by-side comparison. This chart compares several factors impacting the overall value of your paved parking lot.

Value factorAsphalt Parking LotConcrete Parking Lot
Aesthetic Appeal✶✶✶✶✶✶✶✶✶✶
Installation Time✶✶✶✶✶✶✶
Longevity✶✶✶✶✶✶✶✶✶
Environmental Impact✶✶✶✶✶✶✶
Maintenance Frequency✶✶✶✶✶✶✶✶
Maintenance Intensity/Cost✶✶✶✶✶✶

The United States Geological Survey conducted an in-depth study on the potential environmental benefits permeable pavement has on the quantity and quality of stormwater runoff. Asphalt and concrete are included in the study, showing the many ways your paved parking lot can help the environment if you have a proper drainage and runoff system. 

FAQs about Asphalt Parking Lot

Here are some frequently asked questions (FAQs) to guide you through key aspects such as asphalt types, thickness, and the layers involved in their construction.

e

What type of asphalt is best for parking lots?

The type of asphalt best suited for parking lots is typically dense-graded asphalt mix. This mix consists of a well-graded aggregate, binder, and filler, providing durability and resistance to wear and tear.

How thick is an asphalt parking lot?

The thickness of an asphalt parking lot can vary based on factors such as the intended use, soil conditions, and climate. Typically, the asphalt layer itself can range from 2 to 4 inches thick. However, the overall thickness, including the base and subbase layers, can range from 4 to 12 inches or more.

What are the layers of an asphalt parking lot?

An asphalt parking lot typically consists of several layers:

  1. Subgrade: The native soil on which the parking lot is constructed.
  2. Subbase: A layer of aggregate material placed on the subgrade to enhance stability and drainage.
  3. Base Course: An additional layer of aggregate material that provides further support and load distribution.
  4. Binder Course: This layer contains a coarser mix of asphalt that contributes to the structural integrity of the parking lot.
  5. Surface Course: The top layer of asphalt, often a finer mix, designed to withstand traffic and provide a smooth driving surface.

Each layer contributes to the overall strength and durability of the asphalt parking lot. The specific design and thickness of these layers depend on factors such as traffic load, climate, and soil conditions.

Conclusion

When you need a place for your customers’ cars, an asphalt parking lot is the clear choice in terms of value, reliability, speed, and cost. With proper maintenance, repair, and cleaning, you can extend your asphalt parking lot’s lifespan to nearly equal to a concrete lot, with far less time and money invested.

Tim Dawson's Avatar

About the Author: Chris Hawk

Chris is a paver with more than 15 years' expertise in the field. He has established a reputation as an expert and trustworthy specialist with a track record of providing his clients with top-notch paving solutions.

How long does an asphalt road last?

Curious about the durability of asphalt roads? Discover the average lifespan and factors influencing the longevity of these essential surfaces in our comprehensive guide.

Asphalt roads are engineered for endurance, generally lasting 20 to 30 years. However, their lifespan can significantly vary based on maintenance quality, traffic volume, climate conditions, and underlying soil characteristics. Poor drainage in the soil, for example, can substantially reduce an asphalt road’s durability. Understanding these factors is key to maximizing the life of asphalt pavements.

Next, we delve deeper into what affects asphalt road longevity, offering insights on maintenance strategies and tips to prolong the life of your asphalt surfaces.

The Factors That Can Affect the Life of an Asphalt Road

The new asphalt driveway with leaves on top.

Many factors play a role in how long an asphalt road will last, including some that we touched on in the intro. Let’s elaborate further in this section.

What’s Underneath

Many asphalt roads start from grassy surfaces. Not all soil is necessarily suitable to build atop of. Soils that are considered weaker include loose saturated sand, peat, silt, and clay.

As we’re certain you know if you’ve taken a barefoot walk on the beach, sand shifts under pressure. Enough particles of sand are sturdy enough that your foot doesn’t sink right into it, but the lack of structural soundness makes sand a poor base for an asphalt road.

Peat, silt, and clay are all soil deposits. They share another thing in common: you find these materials most often by bay perimeters and river mouths. These soil deposits often have high quantities of organic content, and building asphalt roads on them makes the road prone to flooding.

Soil Drainage

The underlying soil’s ability to drain water is a critical factor. Poor drainage leads to water pooling and seepage beneath the asphalt, compromising the subgrade and base layers. This water retention can cause swelling, heaving, and eventual cracking of the asphalt surface.

Properly engineered drainage systems, including grading and sub-surface drainage solutions, are vital to prevent such issues and ensure the asphalt’s structural integrity over time.

Paving Thickness

The life of the asphalt road is increased as the new cast asphalt has an excellent thickness

The depth of the asphalt layer significantly affects its durability. Thinner layers are more susceptible to wear and tear, particularly under heavy traffic. Conversely, thicker asphalt provides better resistance to rutting, cracking, and other forms of distress.

The appropriate thickness varies based on expected traffic loads and environmental conditions. For high-traffic areas, increasing the pavement thickness during initial construction can be a cost-effective way to extend the road’s lifespan.

Traffic

The volume and type of traffic greatly influence asphalt road longevity. Heavy vehicles like trucks and buses exert much more stress on the road surface than passenger cars, leading to quicker degradation. Constant heavy traffic can cause rutting, surface fatigue, and eventual structural failure.

Designing roads to accommodate anticipated traffic types and volumes, including reinforcing areas subjected to static loads such as bus stops, is crucial for durability.

Climate

The seasons and the climate in which you live can also influence the condition of the asphalt road. In very hot temperatures, cracks can develop in the asphalt. Water seepage then occurs, which can affect any asphalt sub-surface layers. When this happens, air gaps develop across the asphalt surface.

The next time someone drives over one of these roads, the asphalt’s top layer can crumble, collapse, or sag. The result is a pothole, which is dangerous to drive on and a sign of an asphalt road that’s badly cared for. 

It’s not only heat that can affect asphalt, by the way, but cold as well. If you often experience bone-chilling winters where the temperature is well under freezing, the asphalt can freeze in two places: underneath and on top. Cracks are likely to follow, as is water when the temperatures are somewhat less frigid.

If the temps dip back down from there and the water freezes again, it will expand. This strains the asphalt and can also contribute to the formation of potholes

Lack of Maintenance

Example of an asphalt road that has not been properly maintained

Regular maintenance is essential for prolonging asphalt road life. Activities like sealing cracks, patching potholes, and applying sealcoat prevent water infiltration and UV damage.

Neglecting these practices allows minor issues to escalate into major structural problems, drastically shortening the road’s useful life. A proactive maintenance approach, including regular inspections and timely repairs, can significantly extend the road’s serviceability.

Use of de-icing agents

De-icing chemicals, while essential for safety in icy conditions, can be detrimental to asphalt roads. These agents, particularly those containing chlorides, can penetrate asphalt and attack the binder, leading to increased brittleness and cracking.

They can also exacerbate freeze-thaw cycles in the pavement structure. Alternatives like sand or less corrosive agents, along with prompt removal of snow and ice, can mitigate these effects.

Quality of asphalt mix

The composition and quality of the asphalt mix are foundational to road longevity. A mix with the right balance of aggregates, binder, and filler, tailored to the specific climate and traffic conditions, will have higher resistance to rutting, cracking, and weathering.

Using polymer-modified binders, for instance, can enhance flexibility and durability. Poor quality or improperly designed mixes lead to premature failure, necessitating more frequent repairs and resurfacing.

Methods for Extending the Life of an Asphalt Road

A lonely black car on the wet parking lot asphalt.

As we’ve shown you, lots of things can weaken asphalt roads, but you do have options for making asphalt last longer. Here are some suggestions.

Repair Issues Right Away

Small cracks in the asphalt will inevitably get bigger, and sometimes it doesn’t take as long as you would expect. Thus, as soon as you or someone else spots even a small crack in the road, you’ll want to repair it posthaste. You can use more asphalt to seal the cracks before they go deeper or spread wider. 

Apply Sealcoat 

A sealcoat product covers the asphalt, adding a second layer atop it that acts as a protectant. Sealcoats can ward off water damage as well as fading from UV rays and even fluids from passing vehicles.

If the asphalt road in question has a rather faded look from years of use and sun exposure, sealcoat restores the appearance of the asphalt. It’ll almost be like paving anew. 

Use a Graphene Additive

In 2017, New Atlas, a science and tech news resource, published a piece about graphene. If you’re not familiar with graphene, it’s a carbon allotrope that stacks in layers. Graphene-based asphalt additives are supposed to make asphalt roads more sustainable and durable. 

Graphene does have good thermal conductivity, so it could reduce cold-induced cracking as well as asphalt softening from the heat. The article also mentions that these additives can make asphalt stronger and more elastic, even in high-load situations such as heavy, consistent traffic. Some graphene additives may be to add 12 or 14 years more to an asphalt road’s lifespan. 

Asphalt Maintenance Tips

A wet and damaged asphalt.

To reiterate what we mentioned in an earlier section, maintaining asphalt roads is one of the most recommended ways to increase the road’s lifespan. Here are some asphalt maintenance tips to use in addition to the information above.

Limit Load

Speaking of high-load situations as we did before, it helps if you can reduce these kinds of scenarios as much as possible. If you have heavy vehicles like commercial-grade trucks, construction vehicles, garbage trucks, and the like, you might limit their parking time in your lot or even encourage them to use another road. 

Sweep Asphalt Often

Sweeping, especially if you own a commercial parking lot, is one of the most important parts of a good asphalt maintenance routine. When sweeping, you’re removing all obstructions from your asphalt. This gives you a chance to look at your asphalt objectively. You’re removing sand and other aggregate materials that could degrade the asphalt’s quality as well.

Install a Drainage System

Since water can cause both heat-related and cold-related potholes, if your asphalt road doesn’t have a suitable drainage system, that should be high on your priority list too. Drainage system options include under-drains and drain inlets.

FAQs about how long does an asphalt road last

A beautiful asphalt road that lasted for approximately 25 years following the maintenance works that were carried out

To better understand the longevity and maintenance of asphalt surfaces, let’s delve into some frequently asked questions:

How long will an asphalt overlay last?

An asphalt overlay, which is a new layer of asphalt applied over an existing pavement, typically lasts between 10 to 15 years. The lifespan depends on factors such as the condition of the underlying pavement, the environment, and traffic loads. Proper preparation of the existing surface, including repairing any major cracks or potholes, is crucial for maximizing the overlay’s durability.

How long does 2 inch asphalt last?

A 2-inch asphalt layer is often used for residential driveways or low-traffic areas. Under these conditions, it can last around 15 to 20 years. However, this duration can be shorter in high-traffic or commercial areas. The lifespan is influenced by the quality of the asphalt mix, the thoroughness of the installation process, and the consistency of maintenance practices.

Does asphalt need to be sealed every year?

It is not necessary to seal asphalt every year. Typically, asphalt driveways should be sealed every 2 to 5 years, depending on the climate, the amount of traffic they receive, and the condition of the asphalt. Sealing too frequently can lead to a buildup of layers that might crack or peel. Regular inspections can guide the appropriate frequency for sealing to protect the asphalt from water penetration, UV rays, and chemicals.

Conclusion

The lifespan of asphalt roads, typically ranging from 20 to 30 years, is not entirely predetermined but can be significantly influenced by proactive measures. Establishing a robust preventative maintenance routine plays a pivotal role in extending this lifespan.

Timely addressing issues like cracks and potholes, coupled with consistent cleaning and proper care, can dramatically enhance the durability and functionality of asphalt surfaces. By being vigilant and responsive to the needs of the asphalt, its longevity can be maximized, ensuring it remains a reliable and resilient infrastructure for years to come.

Tim Dawson's Avatar

About the Author: Chris Hawk

Chris is a paver with more than 15 years' expertise in the field. He has established a reputation as an expert and trustworthy specialist with a track record of providing his clients with top-notch paving solutions.

Asphalt Sealcoating is an essential process for maintaining the longevity and appearance of your driveway or parking lot. It involves applying a protective coating to shield the asphalt from harmful elements.

Sealcoating is the practice of applying a protective layer over asphalt pavements, like driveways and parking lots. This coating, typically made from a mixture of water, sand, polymers, and other additives, protects the asphalt from oxidation, UV rays, and chemical spills. Regular sealcoating not only doubles the lifespan of the pavement but also enhances its appearance, providing a moisture-resistant, skid-free surface. Economically viable, sealcoating is a preventive maintenance option far less expensive than complete pavement replacement.

Explore further to understand the crucial benefits of sealcoating, how it prolongs pavement life, and the cost-effectiveness of this method compared to total driveway replacement.

Composition of Sealcoat

The worker is explaining the composition of the sealcoat

Let’s break down the composition of sealcoat to understand its pivotal role in pavement maintenance.

Key Ingredients of Sealcoat

Sealcoat is a unique mixture designed to protect and enhance asphalt pavements. The primary components of most sealcoat formulas include a liquid base, usually bituminous or acrylic-based, combined with water. This blend forms the foundation of the material, ensuring a smooth and even application over the asphalt surface.

Additives for Enhanced Performance

To the base mixture, various additives are incorporated. Polymer additives are crucial, offering extra strength and flexibility to the sealcoat, improving its durability against traffic and environmental conditions. Other common additives might include anti-oxidants and UV blockers, which help in protecting the asphalt from sun damage and oxidation, a primary cause of pavement aging.

Fillers for Stability and Texture

Silica sand and other similar fillers are also mixed into sealcoat. These fillers provide stability to the mixture and contribute to the texture of the finished surface. The presence of sand and fillers also aids in making the surface skid-resistant, a vital safety feature for both vehicles and pedestrians.

Colorants and Aesthetic Enhancers

Though not always included, some sealcoat products may contain colorants or other aesthetic enhancers. These components are used to improve the appearance of the asphalt, making it look more vibrant and new. They can also contribute to the overall uniformity of the coating, ensuring a consistently attractive finish across the entire pavement.

Eco-Friendly and Safe Options

In recent years, the composition of this solution has evolved to include more eco-friendly and safer options. These formulations are designed to minimize environmental impact and health risks, especially concerning volatile organic compounds (VOCs) emissions. Such advancements in sealcoat composition demonstrate the industry’s commitment to sustainability and safety without compromising on performance.

Types of Asphalt Sealers

Example of an asphalt surface that needs to be fixed with sealant

The adhesive used in road building, asphalt bitumen, is a naturally occurring byproduct of crude oil. Asphalt bitumen is the main component of the seal coat. It is heated to a temperature exceeding 240 degrees Fahrenheit to make the material viscose. Other seal coats on the market don’t require heating up and are constructed of synthetic tar materials.

To keep ice and water from entering and affecting the integrity of your driveway or parking lot, asphalt sealcoating entails sealing asphalt cracks. Asphalt deteriorates with time due to rain, oil, and other pollutants, leaving a brittle surface that is dangerous and unappealing. 

With a pavement sealing strategy, many homeowners opt to maintain their asphalt. You’ll save time and money when you repair your driveway instead of replacing it for thousands of dollars. 

Examples of asphalt sealers are:

Fast Dry Sealers

Fast dry sealants repair heavily traveled portions of the road, such as parking lots and main thoroughfares leading to public buildings like hospitals and gas stations. Due to the additional geotextile fibers incorporated into the sealant, the most excellent part about using rapid dry sealers is that they cure in less than an hour. 

Fast dry sealers are significantly more expensive than other varieties of asphalt sealers as a result of this, nevertheless. Small-scale purchases of this sealer will also be complex because most fast dry sealer producers only do business with road construction firms. You might wish to buy in quantity and split the cost with your neighbors when you eventually locate a provider that sells this sealer kind. 

Coal Tar Sealers

The most widely used asphalt sealer on the market is coal tar because it offers a long-lasting, lustrous sheen and is weather-proof. As their name implies, coal tar sealers include a significant proportion of coal tar and additional polymers and strengthening agents. By baking coal, this water-based sealant is created. Coke is then removed from the baking process and used as the primary ingredient in coal tar sealers, which is why they are resistant to chemicals derived from petroleum.

Acrylic Sealers

Acrylic sealers, another pricey variety of asphalt sealers, are the pinnacle of what a good asphalt sealer ought to be. They can be colored in black, red, green, or transparent shades, making them easy to identify. They are UV-resistant, robust, and resistant to extreme weather conditions. These sealers are often applied to outdoor basketball courts, tennis courts, and parking lots at retail centers.

Acrylic sealers are also environmentally harmless because they don’t contain any petroleum byproducts. The fact that this sealer only needs to be treated once every seven years adds to its many beautiful advantages and helps to save maintenance expenses.

Asphalt Emulsion Sealers

Since they are made of asphalt, asphalt emulsion sealers are frequently referred to as an eco-friendly driveway protection option. It should be emphasized, however, that no studies or recognized research have established the dangers or pollutants brought on by using coal tar-based sealers when paving one’s road. Asphalt-based sealants do a better job of maintaining the air quality, smell nicer, stop oxidation, and do not irritate the skin. 

However, one disadvantage of using asphalt emulsion sealers is that they are susceptible to stains from oil or gas leaks. This sealer can only be used between May and September for best curing, and it is tough to apply it at night when the temperature is at its lowest. 

How to Apply Seal Coat to Asphalt in 7 Steps

Here’s a step-by-step guide to ensure your asphalt gets the protection and enhancement it deserves:

  1. Cleaning the Asphalt Surface: Start by giving your asphalt a good, thorough clean. Sweep away loose debris, then tackle those tough stains with a pressure washer or a specialized cleaner. It’s like prepping a canvas before painting – crucial for ensuring the sealcoat adheres properly and lasts longer.
  2. Repairing Cracks and Damages: Think of this as healing your asphalt’s wounds before applying a protective coat. Fill in those cracks and mend any holes. This step is vital for a smooth finish and prevents water from seeping in and causing further damage.
  3. Preparing the Sealcoat Mixture: Now, it’s time to mix your sealcoat. Follow the product’s recipe closely – it’s like baking; the right proportions matter a lot. Get the consistency just right for an even, effective application.
  4. Applying the Sealcoat: With your tools in hand, apply the sealcoat gently and evenly across the asphalt. It’s like painting a large canvas, requiring steady hands and a keen eye to cover every inch evenly without overdoing it.
  5. Allowing for Drying and Curing: Patience is key here. Give the sealcoat time to dry and cure completely. This step is essential for the longevity of your work, ensuring the sealcoat sets properly to protect your pavement.
  6. Inspecting and Touching Up: After drying, inspect your work. Look for any spots you might have missed or areas that need a bit more sealcoat. This attention to detail ensures a top-notch finish and comprehensive protection.
  7. Applying a Second Coat (if necessary): Sometimes, a second coat is needed for that extra layer of protection, especially in areas with heavy traffic. If you go this route, repeat the application process with the same care and attention as the first coat.

Each step in this process is crucial for ensuring a long-lasting, protective sealcoat that keeps your asphalt in top condition for years. Remember, a well-maintained asphalt surface is not just about looks; it’s about longevity and safety too.

Which type of seal coat should you choose?

Workers are fixing an asphalt road with sealcoating

The following qualities will be present in a quality sealer: 

  • Quick Drying: For the highest quality, look for a drying period of three to four hours. 
  • Long-Lasting: For asphalt maintenance, look for a seal coat lasting at least two to three years. 
  • Airport Grade: For protection against aviation fuel spills, airports must utilize the best asphalt seal coat. Looking for airport-grade asphalt only confirms you are purchasing the best available stock.
  • High-Demand Clients’ Usage: Look for positive seal coating reviews online from high-demand clients like golf courses, churches, and mall parking lots. 

You want to be sure that the money you spend on maintaining your asphalt is a good investment. Make sure you choose the appropriate asphalt seal coat for your pavement by keeping in mind the subpar sealer projects you’ve seen in your neighborhood. To determine whether a sealer is good or bad, look for the essential positive and bad characteristics.

Benefits of seal coating asphalt driveways and parking lots

The final result of a fixed and painted asphalt parking lot

One of the many reasons homeowners or business owners choose asphalt pavement over other paving materials is how effortless it is to maintain. Sealcoating asphalt is an essential part of maintaining your asphalt driveways and parking lots; some of its benefits include the following; 

Extends pavement durability

Proper installation of asphalt pavement is not enough to keep it from wearing away. To extend its lifespan, you must seal your asphalt pavement. A vital benefit of seal coating is its ability to preserve and prolong driveway lifespan. 

Protects you from extra cost

An asphalt driveway is naturally appealing to the eyes; if you want it to remain attractive, you will have to put in some effort to seal your entire driveway. This helps you save money on repairs and other maintenance measures.

It makes cleaning easy and fun

Asphalt-sealed pavement allows you to clean the surface without much effort. Also, washing away with water and a broom is easy when you have oil spills. Sealed pavement won’t stay tugged to your broom when you try to clean. 

Protects pavement from harmful elements

Due to asphalt nature, a harmful element can easily bind to asphalt pavement and cause it to deteriorate faster. A sealed pavement prevents harmful or petroleum-based elements from binding to asphalt. 

Prevent water from softening the surface

Asphalt pavement is not permeable and does not allow water to penetrate the surface. However, when your asphalt pavement starts to wear out, it develops cracks that give water access or even create puddles. Sealcoating your asphalt doesn’t just prevent them from cracking. Also, it prevents moisture or water from getting beneath the pavement surface. 

What is the average cost to seal coat a driveway?

The homeowner is explaining how much he spent to seal the asphalt on his driveway

Driveway sealing costs might vary depending on several factors. Due to factors including square driveway footage, driveway material, driveway condition and accessibility, sealant type and the number of applications, labor cost, and location, prices may vary from the national average. 

The nationwide average price for driveway sealing is $486, according to Angi and HomeAdvisor, with charges ranging from $250 to $768. Products for sealing asphalt typically cost between $0.06 and $0.38 per square foot. With this price range, 5 gallons of effect can cover up to 500 square feet of driveway surface for between $40 and $165. 

The thickness of the sealant can affect the coverage of the driveway sealing. While covering less surface area, thicker goods offer a more concentrated layer of security than thinner ones.

FAQs about what is sealcoating

Here are some frequently asked questions to help clarify the role and importance of sealcoating.

Is sealcoating worth the money?

Absolutely, sealcoating is a cost-effective method to extend the lifespan and maintain the appearance of asphalt pavements. It acts as a barrier against elements that can degrade asphalt, such as UV rays, water, and oil spills. By regularly applying sealcoat, you can avoid the more substantial costs associated with repairing or replacing damaged asphalt.

What is the difference between seal coat and asphalt?

Asphalt is a durable material used for paving roads, driveways, and parking lots, primarily composed of bitumen and aggregates like sand, gravel, and stones. Sealcoat, on the other hand, is a protective coating applied over asphalt. It’s designed to shield the asphalt from environmental damage and wear, not to build the pavement structure itself.

What happens if you don’t seal asphalt?

Unsealed asphalt is susceptible to various forms of damage, including oxidation, UV ray damage, water penetration, and chemical spills. Over time, this can lead to fading, cracking, and potholes, making the pavement less safe and more costly to repair.

How long does asphalt sealer last?

The lifespan of asphalt sealer typically ranges between 2 to 5 years, depending on the traffic volume, the quality of the sealant used, the climate, and how well the asphalt has been maintained.

What are the cons of sealcoating?

While sealcoating offers numerous benefits, there are a few drawbacks. It requires regular reapplication, can be sensitive to weather conditions during application, and the process can emit strong odors. Additionally, if not properly applied, it can peel or wear unevenly.

Does sealcoating prevent cracks?

Sealcoating helps prevent the formation of small cracks by protecting the asphalt from elements that can cause deterioration. However, it’s not a solution for repairing existing large cracks or structural issues. Regular sealcoating is part of preventative maintenance that keeps minor issues from becoming major problems.

Conclusion  

So, what is sealcoating? Now you know it and maybe you are planning to fix and maintain your driveway. Before doing that, do your research and spend some time learning to prepare the asphalt sealer before applying it. Some asphalt sealers can be put straight to the pathway, while others might need to be thinned, handled differently, or allowed to cure before being applied. When in doubt, starting your endeavor is always preferable by consulting a specialist.

Tim Dawson's Avatar

About the Author: Chris Hawk

Chris is a paver with more than 15 years' expertise in the field. He has established a reputation as an expert and trustworthy specialist with a track record of providing his clients with top-notch paving solutions.

Asphalt Alligator Crack Repair

Alligator cracks in asphalt surfaces are a major concern, threatening the durability and aesthetics of driveways and roads.

Asphalt alligator crack repair involves addressing the web-like surface damage typical in aged or stressed asphalt. For minor issues, a DIY approach with crack filler products can be effective. However, extensive damage often requires professional intervention, including removing the affected area and addressing underlying issues for a lasting solution. Timely repair is crucial to prevent the spread of damage and maintain the structural integrity of the asphalt.

Learn more about effective techniques, tools, and materials for asphalt alligator crack repair in our detailed guide, ensuring your pavement’s longevity and reliability.

What Causes Alligator Cracks in Asphalt?

The asphalt was ruined due to alligator crack

To know what causes alligator cracks in asphalt, you must understand what alligator crack is. Alligator crack is the type of damage in asphalt when the surface is cracked like the back of a gator. This is common on highways and roads but is also seen in private places. Several reasons cause asphalt alligator crack, and here are some of them:

Driving Heavy Vehicles On The Road Before It Is Cured

While it takes about two to three days for asphalt to dry, curing it is a different matter entirely. Experts agree that it takes between six to twelve months for asphalt to cure fully. The difference between dried asphalt and cured asphalt is basically in the firmness. When an asphalt pavement dries, it becomes suitable to drive on. However, the surface is not yet strong enough to withstand heavy loads.

A cured asphalt, on the other hand, is solid and ready to withstand the weight. It takes between six to twelve months to achieve this status. Therefore, it is vital that you take proper care when using your asphalt pavement within the first year. 

For private spaces, it’s recommended not to park in the same spot daily. If it is a public road, you can put a notice for drivers to slow down when they reach the path. If there is another way, you can divert heavy-duty trucks to take that.

Leaving Some Cracks Untreated

Once you start noticing small cracks in your asphalt pavement, make moves to fix it immediately. Leaving those small cracks for a long time will expand the cracks and make them more challenging to deal with.  Asphalt alligator crack repair does not come cheap, especially if it is left for too long.

Inadequate Pavement Thickness

Example of an asphalt with an inadequate height

Many reasons determine the quality of asphalt pavement. One of those reasons is the thickness of the asphalt. When the asphalt is spread too thin, it becomes easy to develop problems. Such problems include depression, unraveling, alligator cracks, and so on. Alligator cracks often occur when the asphalt isn’t durable. This is because it is unable to withstand weather conditions and heavy loads.

Leaving The Asphalt Pavement Uncared For

Asphalt is known to last a long time, usually between 20 to 30 years. If the pavement receives adequate care, it will increase its lifespan. The maintenance of asphalt pavement requires preventing snow and ice from accumulating.

Whenever it snows, use a shovel to lightly scrape the snow without putting too much strain on the asphalt. This simple practice helps preserve the integrity of the surface. Another crucial aspect of asphalt care involves addressing common issues like cracks, commonly referred to as “alligator cracks.” Regular inspection and timely asphalt alligator crack repair are essential to prevent these cracks from worsening over time.

Other ways to care for asphalt include removing plants from the surface and applying sealants occasionally. This comprehensive approach ensures the longevity and durability of your asphalt pavement.

Weakened Sub-grade

A weak base course or subgrade is one of the most common causes of asphalt alligator crack. When the base is weak, it caves in under the pressure of heavy load and weather changes. 

To put it in context, installing an asphalt pavement is like building a pyramid. When there is a problem with the base, it affects the surface. This results in issues such as alligator cracks.

The International Union of Laboratories and Experts in Construction Materials, Systems and Structures opines that the primary cause of alligator crack is the weakness in the sub-base. This weakness is emphasized when the weight on the asphalt is unevenly distributed. The weight near cars’ wheels tends to make indentures in the asphalt, especially before it is cured. 

Read more: Infrared Asphalt Repair

Cold Weather Conditions

The ice ruined the asphalt due to the low temperatures

Before installing asphalt, you should know the number one enemy of asphalt. It is none other than cold weather and all its attendant occurrences. During the cold weather, asphalt pavements suffer more damage than during other seasons. 

It is also more challenging to care for asphalt during the cold seasons. This is why asphalt pavements in cold territories tend to crack more often. Cold weather phenomenons such as snow, ice, and water seep into the asphalt cause cracks.

Improper Installation

Most of the problems with asphalt pavements come from mistakes made during installation. Installing asphalt may look simple at first, but it is not always so. A lot of people take the do-it-yourself way and install their asphalt by themselves. This is especially the situation if it is in a private space such as driveways. 

However, a mistake in laying the sub-base may result in cracks later in the future. This way, it may be better to hire a paving company when you need a space paved.

A Combination Of Several Factors

Any of the factors listed above may cause alligator cracks. However, there are times when several of these factors come together to result in a crack. When this happens, it becomes very urgent to get the crack treated. This is also why it is crucial to take proper care of your asphalt pavement. You should constantly be on the lookout for the above-listed causes. 

10 Steps to Asphalt Alligator Crack Repair

To fix asphalt alligator cracks effectively, follow these 10 steps. This guide covers everything, from safety precautions to regular upkeep, ensuring a lasting and attractive repair. Dive in to revitalize your pavement for durability and visual appeal.

1. Safety

The worker is putting on gloves before repairing alligator cracks on the asphalt

Before beginning asphalt alligator crack repair, prioritize safety. Wear protective gear like gloves, goggles, and appropriate footwear. Set up warning signs or barriers around the work area to alert passersby. Safety also involves preparing the right tools and equipment, ensuring they are in good condition to prevent accidents or injuries during the repair process.

2. Area Cleaning

Start by thoroughly cleaning the area. Remove all loose debris, dirt, and vegetation from the cracks and surrounding asphalt surface. A power washer or a stiff-bristled broom can be effective in clearing out tough grime. Ensuring the area is clean is crucial for the bonding agents and fillers to adhere properly, leading to a more durable and lasting repair.

3. Subbase Inspection

Carefully inspect the subbase under the cracked asphalt. It’s essential to determine if the damage extends beneath the surface. If the subbase is compromised, it may require additional repair or reinforcement. Addressing subbase issues is vital to prevent future alligator cracking and to maintain the structural integrity of the pavement.

4. Cutting and Removing Damaged Asphalt

Use an asphalt saw or a chisel to cut around the damaged area. This step involves removing the affected asphalt carefully to prepare for the new fill. Ensure the cuts are deep enough to remove all the weakened asphalt, but avoid causing unnecessary damage to the surrounding good pavement.

5. Removal of Residual Debris

The worker is removing debris from alligator cracks in the asphalt

After cutting, remove all the residual debris from the area. This might involve using a vacuum or blower to clear out fine particles that could hinder the adhesion of new materials. A clean, debris-free surface is essential for the proper application of repair materials, especially when addressing issues like alligator cracks in asphalt. This meticulous cleanup ensures a smooth, even finish and contributes to the effectiveness of asphalt alligator crack repair efforts, ultimately enhancing the longevity and appearance of the pavement.

6. Application of Bonding Agent

Apply a high-quality bonding agent to the clean, exposed surfaces. This agent acts as a glue between the old and new asphalt, ensuring a strong bond and preventing future separation. Make sure to cover all surfaces evenly and allow the agent to become tacky before proceeding to the next step.

7. Filling the Cracks

Fill the prepared cracks with an asphalt patching compound. The compound should be specifically designed for alligator crack repairs, offering flexibility and durability. Tamp down the compound thoroughly to remove air pockets, ensuring a compact and level fill that closely matches the existing asphalt surface.

8. Compacting the Filler

The worker is compacting new asphalt after repairing alligator cracks

Compact the filler material using a tamper or a vibrating plate compactor. This step is crucial to ensure the filler material is densely packed and properly adheres to the existing asphalt. A well-compacted repair area will be more resistant to traffic and weather, extending the life of the repair.

9. Surface Sealing

Once the filler is compacted and cured, apply a sealant over the repaired area. This sealant protects the new repair from water infiltration, UV rays, and other environmental factors. It also helps to blend the repair with the surrounding asphalt, giving a uniform and aesthetically pleasing finish.

10. Routine Maintenance

After completing the repair, it’s important to establish a routine maintenance plan. Regularly inspect the repaired area and surrounding asphalt for any signs of wear or damage. Promptly addressing small issues will prevent them from escalating into more significant problems, ensuring the longevity of your asphalt pavement.

Why You Should Get Asphalt Alligator Crack Repaired

On the road there has an alligator cracks with road guides.

It is advisable to have asphalt alligator cracks repaired as soon as possible. This is because leaving the damage untended can lead to several mishaps.  Here are some reasons you should get asphalt alligator crack repaired swiftly:

Dangerous For Cars

Here is the most obvious. When you leave alligator cracks unrepaired, it endangers the cars driving on it. Cars and their drivers can suffer damages while going on cracked asphalt. It also damages vehicles, and the damage may accumulate over time and cause accidents and loss of properties.

It Puts People At Risk

Alligator crack on asphalt is not only dangerous to cars but also pedestrians. People walking over a cracked pavement may trip and sustain injuries. In addition, if the asphalt pavement happens to be in a business environment, it may lead to financial loss.

It Worsens Over Time

Example of an asphalt road that was not repaired in time and caused more noticeable alligator cracks

When asphalt alligator crack is left untreated for a long time, it worsens. What started as cracks may degenerate into potholes or worse. It is no brainer that potholes are more dangerous than cracks. They are also more expensive to fix.

Property Aesthetics

Unaddressed cracks in asphalt can significantly detract from the overall appearance of the pavement, negatively impacting the aesthetics of the surrounding area. This not only affects the visual appeal of the property but also diminishes the perceived value of the entire space.

Preventing Costly Repairs

Timely repair of alligator cracks is essential in preventing more extensive and expensive damage to the pavement. Addressing these issues promptly can save money in the long run, as neglecting them may lead to structural deterioration, necessitating more substantial repairs and reconstruction.

Cost to Repair Alligator Cracks

The asphalt road is under constructions

Repairing alligator cracks is not necessarily expensive. Depending on your budget and the intensity of the crack, you can fix it quickly. If you plan to repair the damage by yourself, it would not cost you much. All you have to do is buy the necessary materials and get to work.

Materials

The materials needed to repair a gator crack include:

  • Alligator asphalt patch
  • Asphalt sealer
  • Asphalt squeegee

Labor

The cost of the repair goes up if you have to hire some labor. You may have to pay per hour for hired hands, but it will make your work faster. Hiring labor would also reduce the workload on you and allow you to work more effectively, especially when undertaking tasks like asphalt alligator crack repair.

If you are hiring a paving company, it may cost slightly more. However, the cost is justified in the quality of the work. Paving companies usually charge per square foot for their services, encompassing various aspects like asphalt repair and maintenance. It’s a good idea to inquire about specific services, including asphalt alligator crack repair, when obtaining a quote from your contractor. This ensures that you have a comprehensive understanding of the overall cost and the value you’ll receive for the investment in professional pavement care.

Prevention

Prevention is better than cure. This goes to say that it is better to prevent your asphalt pavement from getting cracks. It is undoubtedly cheaper to maintain the space before it gets cracked than to fix cracks. You can extend the lifespan of asphalt surfaces if you take proper care of them. Here are some of the ways to extend the life of asphalt surfaces.

To prevent asphalt alligator cracks, you need to care for your asphalt surface properly. This is especially important during cold weather. The cold weather can significantly damage asphalt pavements, and you must be on alert. It is also more difficult to repair asphalt during cold weather. Therefore, you should try to know more about repairing asphalt in cold weather.

Even if you have experienced asphalt alligator cracks, you can prevent it from happening again. You can do this by applying a sealant to your asphalt pavement occasionally. You can seal your asphalt every two to three years.

What is the best product for alligator cracks in asphalt?

The product manages to repair this alligator crack in the asphalt

The choice of the best product for repairing alligator cracks in asphalt depends on the severity of the damage and the specific conditions of the pavement. However, a commonly recommended solution is the use of asphalt emulsion crack fillers or sealants. These products are designed to effectively fill and seal small to moderately sized cracks, preventing water penetration and further deterioration.

For more extensive damage, professional-grade hot-applied crack fillers, asphalt patching compounds, or asphalt resurfacing may be necessary. It’s crucial to consult with a pavement professional or supplier to determine the most suitable product for your specific situation, considering factors like climate, traffic load, and the overall condition of the pavement.

Paving Companies Around

If you are looking to hire experts to pave your driveway or fix alligator cracks, look no further. There is a list of paving companies in our directory to help you. Our directory contains paving companies from every state in the country. Next, you can look through the websites of the ones closest to you. After that, all you have to do is sit back and let the experts do their job.

Conclusion

By now, you must have seen that asphalt alligator crack repair is no rocket science. Once you know the cause and intensity of the crack, the rest is simple. Fix the crack either by yourself or hire a paving company. 

Also, fix alligator cracks before they expand to prevent them from worsening. You may save costs if you know how to maintain the asphalt pavement so it may last. You should also take preventive measures where necessary. 

Tim Dawson's Avatar

About the Author: Chris Hawk

Chris is a paver with more than 15 years' expertise in the field. He has established a reputation as an expert and trustworthy specialist with a track record of providing his clients with top-notch paving solutions.

Asphalt Recycling

Asphalt recycling breathes new life into old roads, melding sustainability with efficiency. It’s a game-changer in modern road maintenance and construction.

Asphalt recycling involves reprocessing old asphalt into new paving material. This process includes milling or breaking up existing asphalt, combining it with additives, and rejuvenating it. Key benefits include reduced material waste, lower costs, and less environmental impact. It uses less new bitumen, relying instead on the recycled material’s existing binder, making it a greener choice for road construction.

Discover the intricacies of asphalt recycling, from innovative techniques to environmental benefits. This comprehensive guide illuminates the path to sustainable road construction.

How is Asphalt Made?

The machine is producing excellent quality asphalt

You will find asphalt just about everywhere you go on a daily basis. From roads and parking lots to playgrounds and sidewalks, it is the most common material in construction projects. In fact, even the coating on your roofs, carriages, and pipes is asphalt-based.

To explain it in simple words, asphalt binds the aggregate material, which consists of gravel and crushed stone, forming our hard surfaces. Technically speaking, the asphalt mixture falls into the category of bitumen-class hydrocarbons. It is typically found in dark brown or close to black color. Geologically, bitumen refers to naturally occurring deposits of petroleum, either in semi-solid or solid form.

Asphalt Manufacturing Steps

The process of asphalt manufacturing consists of several steps:

Distillation

Manufacturers heat crude oil rapidly for the initial distillation. After heating it, they transfer the crude oil to a distillation container from where they can extract the lighter-weight and volatile components. We call these fractions whose removal includes a series of cooling and condensing mechanisms. The distillation process leaves a heavy deposit we call “topped” crude that makes asphalt. 

Cutting back

A roller is flattening freshly poured recycled asphalt

Manufacturers add a volatile substance like kerosene to asphalt, creating a softer, more pliable mixture at lower temperatures. This fluid material variant is especially useful in cold climates, preventing the rigidity that hampers standard asphalt application. This method ensures a smoother, more adaptable product, ideal for diverse construction scenarios, from residential driveways to large-scale road projects, providing flexibility and efficiency in varied temperature conditions.

Emulsifying

Emulsification creates an easier product to combine with aggregate. During emulsification, experts grind the asphalt into globules that must be smaller than five microns. After mixing it with water, they add the emulsifying agent to reduce asphalt and water’s potential to separate. Some of the most common emulsifying, asphalt-producing agents include vegetable oils, soap, silicates, and clay. 

Pulverizing

In the pulverizing stage, manufacturers turn hardened asphalt into fine powder, then sieve it to achieve uniform granules, crucial for quality recycling. This step is vital in transforming discarded material into a resource for new paving materials, significantly reducing waste and promoting environmental sustainability. This process underlines the industry’s commitment to eco-friendly practices, ensuring old asphalt finds new life in roads and paths, contributing to a circular economy in construction materials.

How to Recycle Asphalt in 5 Steps

New asphalt with recycle logo on it.

Recycling asphalt is like giving an old road a new lease on life. It’s a smart, eco-friendly approach that converts worn-out surfaces into a valuable asset for new construction. Let’s take a journey through the five essential steps that breathe new life into old asphalt, making it a sustainable and cost-effective choice for paving.

1. Milling

In milling, the top layer of asphalt is expertly removed, ensuring the sub-base remains undamaged. This process is crucial for salvaging high-quality asphalt material, vital for sustainable construction. Specialized machinery meticulously strips the asphalt, effectively preserving the sub-base while maximizing material recovery. This stage not only sets the foundation for efficient recycling but also underscores the commitment to sustainable construction practices.

2. Transportation and Screening

Once milled, the asphalt is transported to a recycling plant, where it’s rigorously screened and sized. This step is key to ensuring consistency in the recycled material, as uniform asphalt pieces are crucial for high-quality recycling. It involves careful sorting to remove impurities and achieve uniform granularity, setting the stage for the subsequent recycling steps and ensuring the end product meets stringent quality standards.

3. Diverse Recycling Methods

Workers are throwing recycled asphalt onto the road

Asphalt recycling adapts to various needs and situations, offering multiple techniques to suit different paving projects. This flexibility ensures that recycled asphalt not only meets the specific requirements of each task but also enhances its overall utility and sustainability. Here are some of the key methods used in asphalt recycling, each tailored to address distinct requirements:

  • Full-depth recycling: transforms completely worn-out pavements into reusable materials.
  • Hot recycling: involves heating the asphalt mixture, enhancing its workability.
  • Cold recycling: is an energy-efficient method that bypasses the heating process.

4. Mixing and Additive Integration

In this phase, asphalt millings are combined with additives and water in a reclaimer or recycler. This process is critical for integrating the old with the new, ensuring the recycled material retains essential binding properties. The careful selection of additives enhances the mixture’s quality, preparing it for new paving projects. This step exemplifies the innovative approach to recycling, turning old asphalt into a robust, functional paving material.

5. Ensuring Quality and Durability

The potential for asphalt to be recycled multiple times without quality compromise is a significant advantage. This aspect underscores its sustainability and cost-effectiveness, making it a favored choice for modern paving. Recycled asphalt maintains its durability, ensuring long-lasting pavements. This not only benefits the environment by reducing waste but also offers a reliable, long-term solution for infrastructure development.

Benefits of Recycling Asphalt

Asphalt recycling stands out as a beacon of sustainability and efficiency in the construction industry. It’s not just about reusing old material; it’s a commitment to preserving our planet and optimizing our resources. Let’s explore the significant benefits that come with recycling asphalt:

Conservation of natural resources

Recycled asphalt still retains its properties after being used in the construction of a road

Embracing asphalt recycling is akin to giving Mother Nature a helping hand. By reusing existing materials, we drastically cut down on the need for new aggregates and bitumen, traditionally sourced from the earth through mining and quarrying. This conservation of natural resources helps maintain ecological balance and supports sustainable development, ensuring that our planet’s resources are available for future generations.

Reduction of landfill waste

The beauty of asphalt recycling lies in its ability to turn what would be waste into something valuable. Instead of old roads ending up in landfills, contributing to the growing waste management crisis, they get a second life. This significant reduction in landfill waste not only alleviates environmental stress but also symbolizes a step towards a more circular economy in construction.

Energy savings during production

Asphalt recycling is a testament to efficiency, consuming far less energy compared to producing new asphalt. This reduction in energy use leads to lower greenhouse gas emissions, making it a much greener choice. In a world where energy conservation is paramount, recycling asphalt showcases how sustainable practices can align with industry needs.

Cost-effective material for road construction

A machine used to asphalt the road of a driveway

From a financial standpoint, asphalt recycling is a boon. It offers a high-quality, yet cost-effective alternative to new materials, slashing production and transportation expenses. This affordability doesn’t just ease budget constraints for governments and contractors; it also means more resources can be allocated to other critical infrastructure projects.

Extended lifespan of roads

Roads built with recycled asphalt don’t just save money; they stand the test of time. This durability translates to fewer repairs and a longer life cycle, making it a smart choice for long-term infrastructure planning. It’s a win-win situation: economically prudent and environmentally sustainable, ensuring roads last longer while keeping costs in check.

Asphalt Surface: Weighing the Pros and Cons

A newly asphalt over concrete driveway

The quality of your asphalt pavement would also improve with recycled material. The additional mineral fillers would produce stronger resistance to cracking, and so would the organic fibers in the recycled materials. 

But like every other good thing, it has some disadvantages too. Reclaimed asphalt is environmentally friendly, and you can use it for paving projects. However, when it comes down to a choice between reclaimed asphalt pavement and a new asphalt one, you have to consider some important factors. 

Below is a comparison of reclaimed asphalt pavement and new asphalt. 

Recycled Asphalt Cost

Recycled asphalt offers an economical alternative to new asphalt, with costs ranging from $10 to $20 per ton. The installation cost varies between $1.50 to $2.50 per square foot, depending on factors like the project’s complexity and geographical location. While these figures provide a basic estimate, the total cost for a typical project can differ significantly. Factors influencing the overall expense include project size, site accessibility, and local labor rates, making it essential to consider these aspects for a more accurate budget assessment.

ItemCost
Recycled Asphalt Cost (per ton)$10 – $20
Installation Cost (per square foot)$1.50 – $2.50
Total Cost for Typical ProjectVaries based on project size and complexity

Reclaimed Asphalt Pavement VS. New Asphalt

When deciding between reclaimed asphalt pavement and new asphalt for your project, it’s important to understand the differences and unique benefits each option offers. Here’s a detailed comparison to help guide your decision:

Cost and Environmental Impact: Reclaimed Asphalt

Reclaimed asphalt stands out as a cost-effective and environmentally friendly choice. It significantly reduces the expenses associated with mining and production that are typical of new asphalt. Additionally, its production process demands less labor, making it a more budget-friendly option. In terms of environmental benefits, using reclaimed asphalt minimizes the extraction of natural resources, aligning with sustainable practices.

Aesthetics and Suitability

Aesthetically, reclaimed asphalt often holds an advantage. Many find its appearance, which closely resembles traditional surfaces, visually appealing. This factor, combined with its functionality, makes reclaimed asphalt a practical choice for those seeking both utility and beauty in their pavement.

Permeability and Climate Considerations

Water has accumulated on the road surface

Another notable benefit of reclaimed asphalt is its permeability. It allows water to pass through more effectively than new asphalt, making it an ideal option for areas with wetter climates. This permeability can lead to better water management and reduced surface water accumulation.

Quality and Appearance: New Asphalt

On the other hand, new asphalt typically leads in terms of quality. It offers a uniform composition, ensuring consistent performance and durability. The recycling process can sometimes affect the material’s properties, and the outcome may vary depending on the recycling facility’s standards.

Personal Preferences in Appearance

The choice between reclaimed and new asphalt may also come down to personal aesthetic preference. While some may not favor the gravelly appearance of reclaimed asphalt, others might prefer the smooth, dark look of new asphalt. This difference in appearance can be a deciding factor for individuals prioritizing specific aesthetic qualities in their pavement.

Concrete Recycling: A Sustainable Solution

Image of half asphalt and half concrete

Concrete, a major component of the solid waste stream, has been transformed by the innovative concept of concrete recycling. This environmentally conscious approach repurposes concrete rubble as aggregates, offering a viable alternative to traditional disposal methods.

Concrete recycling emerges as a strong contender next to recycled asphalt, particularly appealing to homeowners and builders for various construction projects. If asphalt isn’t the preferred choice, recycled concrete offers a practical alternative for pavements and other solid surfaces.

Interestingly, these recycled aggregates typically exhibit different properties compared to new aggregates. They often have lower crushing strength, specific gravity, and impact resistance, but higher absorption value, which can influence their use in certain applications.

The Driving Factors Behind Concrete Recycling

The move towards recycling concrete is driven by several compelling reasons:

  • Daily demolition activities result in tons of waste concrete. While demolishing old and unsafe structures is necessary, the resulting concrete waste poses a significant disposal challenge.
  • The need to remove and repurpose useless concrete from roads, buildings, and other structures.
  • Earthquakes and natural disasters often leave behind a trail of destruction, including damaged concrete structures.
  • Concrete waste also arises from cylinder testing, concrete cube tests, and other destructive testing methods in construction.

Like asphalt recycling, concrete recycling represents a positive shift in the construction industry, bringing several unique benefits to the table. Let’s explore these benefits and understand why concrete recycling is becoming an increasingly popular choice.

Benefits of Concrete Recycling

The worker is loading concrete into the back of a truck to have it recycled

Concrete recycling is a far better option than letting it go to a landfill or merely dumping it. Like reclaimed asphalt, recycled concrete benefits the economy and environment in multiple ways, including:

  • Freeing up a lot of landfill space that debris from concrete otherwise occupies
  • You will find recycled a far more cost-friendly source of aggregate than the one newly mined
  • It reduces tippage and the charges of freight relatively.
  • Recycling concrete reduces the demand for gravel mining and hence, conserves natural resources. 
  • When you have recycled gravel available at convenient distances, you will not have to spend a lot of money on haulage. We can consider this as an economic and environmental advantage because high-grade aggregate for construction projects is usually available at greater distances. To acquire that, you have to go all-out in terms of longer haulage distances and costs. 
  • The recycled concrete is also a high-quality aggregate and enhances the strength of your construction. This results from the meticulous process of crushing, sorting, pre-sizing, screening, and eliminating contaminants from the mixture for the final product. Hence, you can rest assured of top-most quality even if it is recycled aggregate. 

FAQs about Recycled Asphalt

Example of an excellent recycled asphalt

When considering the use of recycled asphalt for your project, you may have several questions about its application, quality, and advantages. Here are some frequently asked questions about recycled asphalt to provide you with clearer insights:

How can you reuse asphalt?

Reusing asphalt involves collecting and processing old asphalt material from roads, driveways, and other surfaces. This recycled asphalt can be used in various ways, such as a base or subbase material for road construction, an aggregate in the production of new asphalt, or as a cost-effective and sturdy material for residential driveways and paths. The process typically includes milling, crushing, and screening to ensure the material meets specific quality standards.

Is recycled asphalt good?

Absolutely! Recycled asphalt is not only good but also an environmentally friendly and cost-effective alternative to new asphalt. It offers comparable durability and quality, making it suitable for a wide range of construction projects. By reusing existing asphalt, it reduces the need for new raw materials and minimizes waste in landfills. Additionally, the energy consumed in processing recycled asphalt is significantly lower than that required for producing new asphalt.

Is recycled asphalt better than gravel?

Recycled asphalt has several advantages over gravel. Firstly, it tends to bind together better than gravel, leading to a smoother, more stable surface that’s less prone to washouts and potholes. Secondly, recycled asphalt offers better durability and requires less maintenance compared to gravel. It’s also more eco-friendly, as it repurposes existing materials. However, the choice between recycled asphalt and gravel may depend on specific project needs, budget, and personal preferences.

Final Thoughts

Recycling asphalt, involving milling and additive integration, offers a sustainable path in construction. It’s economically and environmentally advantageous, ideal for those seeking cost-effective and durable pavement solutions. This method is a testament to blending ecological responsibility with practical construction needs, marking a significant shift towards greener practices in the industry.

Tim Dawson's Avatar

About the Author: Chris Hawk

Chris is a paver with more than 15 years' expertise in the field. He has established a reputation as an expert and trustworthy specialist with a track record of providing his clients with top-notch paving solutions.