Resurfacing Concrete Parking Lot – A Step-by-Step Guide

Resurfacing a concrete parking lot is vital for maintaining its durability and aesthetics. Over time, exposure to traffic and elements can cause damage, necessitating a thoughtful repair approach.
Identifying the root cause of damage is crucial in resurfacing a concrete parking lot. Factors like heavy traffic, weather conditions, and material aging contribute to issues such as cracking, discoloration, and scaling. Selecting the appropriate resurfacing method, tailored to address specific damages, ensures the parking lot regains its structural integrity and visual appeal, extending its lifespan and functionality.
Discover detailed insights on effective repair methods for resurfacing concrete parking lots, ensuring lasting durability and enhanced appearance.
Resurface a parking lot with concrete in 6 steps

If you are considering resurfacing a concrete parking lot for your next project and you are contemplating between using concrete or asphalt, keep reading to learn how straightforward it can be to offer your parking lot a new life.
Six steps are involved in concrete resurfacing:
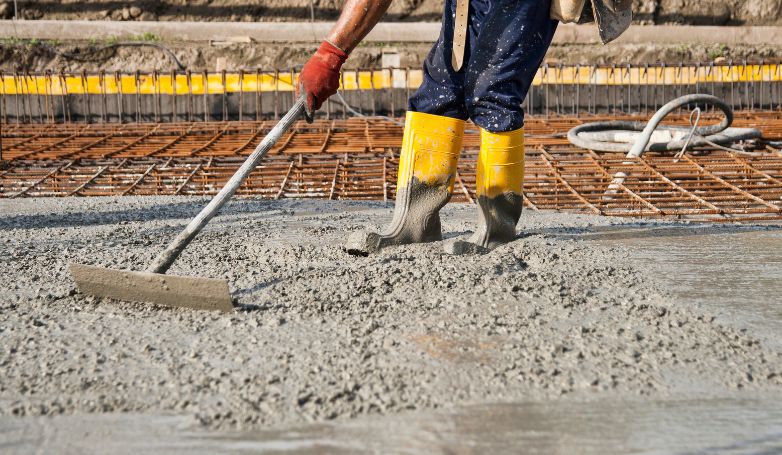
1. Clean your concrete parking lot and patch as needed
The first and crucial step involves preparing the concrete surface for resurfacing. Begin with an exhaustive cleaning process to remove all dirt, debris, and contaminants like oil and grease. This might require specialized cleaning agents to tackle tough stains.
After cleaning, meticulously inspect the parking lot for any significant damages like deep cracks or worn areas. Use a high-quality concrete patching material to repair these flaws. The integrity of the resurfacing depends on the solidity of the base. Lastly, saturate the surface with water to ensure a good bond with the resurfacing material, but ensure to remove any standing water using a broom or squeegee.
2. Mix the concrete resurfacer
Use a 1/2-inch drill and a paddle mixer to mix the resurfacing compound in a 5-gallon bucket. It’s vital to avoid barrel-type mixers or hand mixing, as they don’t achieve the necessary consistency. The key is to reach a homogeneous mix that will ensure an even application and durable finish.
When undertaking a project for resurfacing a concrete parking lot, it’s crucial to follow the manufacturer’s guidelines precisely. The correct ratios and mixing technique are essential to ensure the optimal performance of the resurfacing compound, leading to a successful and durable finish.
3. Measure and pour
Measure and mix the concrete resurfacer with water to achieve the right consistency. Aim for a lump-free, pourable mixture, similar to syrup. This consistency is essential for easy application and uniform coverage. If the mix is too thick, add water incrementally; if too thin, additional powder may be necessary.
This step requires attention to detail, as the consistency of the mix significantly impacts the application process and the final appearance of the resurfaced parking lot.
4. Application of Resurfacing Material
Pour the resurfacing material onto the parking lot in one-foot wide strips. Employ a long-handled squeegee to spread the mixture evenly over the concrete surface. This process requires a steady hand and a keen eye for detail to ensure the resurfacer covers the entire area uniformly without leaving any gaps or uneven spots.
The quality of this application will directly affect the smoothness and levelness of the finished surface.
5. Uniform Spreading and Non-Slip Finish
Uniformly spread the resurfacing compound across the slab with careful back-and-forth motions. After about five minutes, when the mixture starts to set, use a concrete broom to create a non-slip texture. This not only enhances safety but also adds to the aesthetic appeal of the parking lot.
The timing of this step is critical – too early, and the texture might not form properly; too late, and the material may be too hard to work with.
6. Curing Process
The final step is the curing process, crucial for the longevity and strength of the resurfaced concrete. In temperatures above 90°, use a fine water mist to keep the surface moist for 24 to 48 hours. This prevents the material from drying too quickly, which can lead to cracks or weakened spots.
After approximately 6 hours, the surface can handle foot traffic, but it’s advisable to wait at least 24 hours before allowing vehicle traffic. This patience ensures the resurfaced parking lot is durable and ready to withstand regular use.
Resurfacing concrete parking lot with asphalt in 6 steps
Below are the six steps involved in asphalt resurfacing:
1. Prepare the surface
The initial stage in resurfacing a concrete parking lot with asphalt involves meticulous preparation. This step is crucial for ensuring a solid foundation for the asphalt layer. Begin by thoroughly cleaning the parking lot to remove debris, dirt, and oil stains. This might require power washing for stubborn stains.
Next, assess the condition of the concrete. It’s essential to repair significant cracks or damages in the concrete to prevent them from affecting the new asphalt layer. In some scenarios, concrete speed bumps and other structures might need demolition or alteration to accommodate the new surface. This preparation phase is vital for the longevity of the resurfaced parking lot.
2. Asphalt milling
Asphalt milling involves removing the top layer of the existing asphalt to make room for the new material. This process is crucial for ensuring proper bonding and levelness of the new asphalt layer. Milling can vary in depth, depending on the project’s requirements and the condition of the existing asphalt.
This phase can be quite extensive and typically requires heavy machinery like milling machines. It’s imperative to plan for traffic redirection and inform users of the parking lot about the expected downtime, as this stage can significantly impact accessibility.
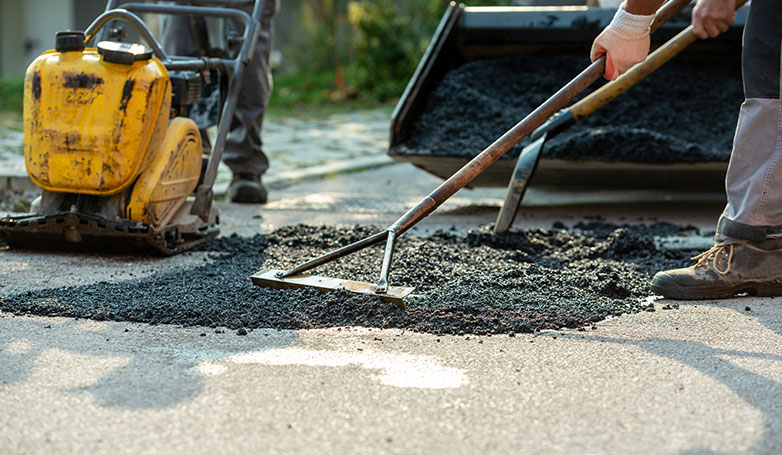
3. Fix any pavement issue
Once the top layer is removed, it’s essential to inspect and repair the underlying pavement. This may involve additional milling to even out rough patches or uneven areas. Small cracks and holes should be filled using a high-quality crack filler, and larger areas of damage might require more extensive repair.
The goal is to create a uniformly smooth surface that will support the new asphalt layer effectively. Paying attention to these details helps in preventing future problems and extending the lifespan of the resurfaced parking lot.
4. Asphalt resurfacing
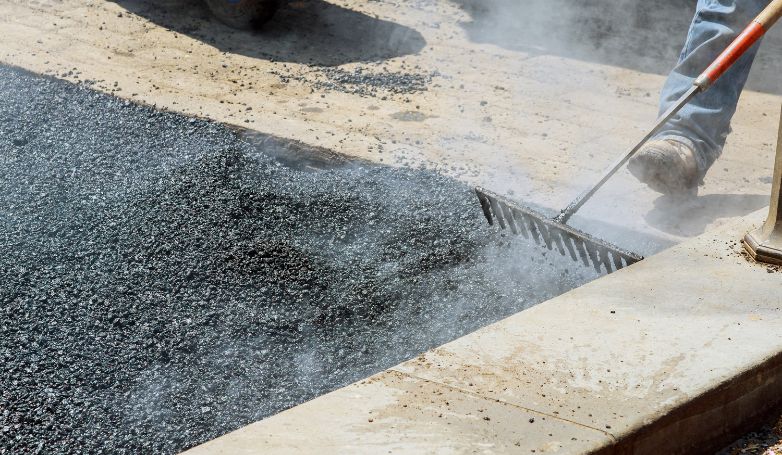
The asphalt resurfacing process begins with the application of a tack coat. This adhesive layer is crucial for binding the new asphalt to the existing surface. Following the tack coat, a roller truck and paver methodically lay the new asphalt layer.
It’s vital to ensure even spreading and compacting of the asphalt to avoid any unevenness. This process may require multiple layers, depending on the thickness needed and the specific conditions of the parking lot. The expertise of the resurfacing team plays a significant role in this stage, as precision and skill are necessary for a smooth, durable finish.
5. Curing
After laying the asphalt, it’s essential to allow ample time for curing. This step is critical for the asphalt to harden and gain its full strength. During this phase, keep the parking lot free from traffic and other disturbances.
The curing time can vary based on weather conditions and the thickness of the asphalt layer. Proper curing ensures a resilient and long-lasting surface that can withstand the demands of a busy parking lot
6. Sealing
The final step in the resurfacing process is sealing the asphalt. A quality seal coat is applied to protect the new surface from weather elements, oil spills, and wear and tear. This layer not only extends the life of the asphalt but also enhances its appearance.
Once the seal coat is dry, the parking lot can be repainted with lines and markings for traffic patterns, parking spaces, and safety zones. This not only improves functionality but also boosts the aesthetic appeal of the parking area.
Pros and cons of resurfacing a concrete parking lot vs. replacing it
If your parking lot has stayed for a long time, you could find signs of aging on it, including cracks and potholes. When your parking lot is in poor shape, you might be asking if you should do some moderate resurfacing or have the whole lot replaced. The fact is, everything depends on how serious the damage is, the material (concrete or asphalt), the time of year, and the budget.
If your home or business’s parking lot displays aging signs, do not immediately presume that your only choice is concrete removal. For a justifiable reason, resurfacing is rapidly creeping into the mainstream.
There is no point in paying for a completely new parking lot when you can resurface it for a lower price. In some instances, concrete resurfacing could be the optimal solution over concrete replacement.
There are many reasons why resurfacing your concrete parking lot is a perfect alternative to fully replacing it. If you are considering concrete resurfacing vs. replacement for your parking lot, below are some of the advantages and drawbacks that will help you make an informed decision:
Pros
The advantages of parking lot resurfacing include:
It requires lower cost, minimal time, and effort
I apologize for the misunderstanding. Here’s a revised version with only one mention of “resurfacing”:
Tiny cracks and depressions won’t escalate into more significant decay, necessitating costly repairs, if addressed at the right time. The financial advantage is a key factor motivating the choice of resurfacing over repairing concrete. This approach not only saves money but also time, proving far more economical than replacing the entire structure for your home’s concrete surface.
Furthermore, fewer materials, workforce, and machinery are required for concrete resurfacing, leading to lower upfront costs. Although this is undoubtedly appealing to homeowners wanting to save money, it is essential for property owners, including apartment complexes, because concrete surfaces in apartments can grow wear and tear quite easily as they are exposed to the movement of many individuals.
It extends the parking lot’s life
Maintaining a parking lot effectively often involves a key procedure: resurfacing. While concrete parking lots are typically designed to last about 30 years, this practice can significantly extend their working life. Neglecting to address cracks and wear through timely intervention leads to further deterioration.
It restores your concrete surface
A common misconception is that resurfacing a concrete parking lot won’t match the aesthetic appeal of fresh concrete, leaving little impact on residents. However, this process can effectively revitalize the area, making it look as fresh and new as if the concrete were completely replaced. Moreover, it offers an ideal opportunity to introduce decorative elements, adding a sparkling, brand-new look to the space.
Don’t let anyone fool you by claiming that resurfacing your concrete parking lot will not make it look great except if it is replaced; the truth is that by resurfacing your concrete, you are indeed bringing new life into it. The improvement will be visible for years to come.
It can be performed without inconveniences
If you are an apartment complex owner, you will find it a big deal to replace your concrete surfaces because it will require inconveniencing your tenants. When replacing concrete, you would need to dismantle it first, which can take up to two days, meaning you may have to ask your tenant to park somewhere for the night or restrict their movement to a specific space for a significant period.
Resurfacing concrete is a swift and efficient process compared to complete replacement. It eliminates the need to remove the entire existing concrete and pour large volumes of new material, which then requires curing. This approach is also more considerate of your tenants, minimizing disruption and inconvenience.
Cons
Irrespective of the many benefits of concrete resurfacing, there are, however, a few drawbacks as well, including:
It can not address cracked crumbling concrete
For a concrete parking lot, patching and filling cracks is essential prior to undertaking a resurfacing project. However, if the concrete surface is crumbling, resurfacing is not advisable, as the weakened structure may not support the weight of new concrete, potentially leading to further deterioration.
It can only be performed on Plain Concrete Surfaces.
The other drawback of resurfacing concrete parking lots is that it can normally be performed only on bare concrete surfaces. If the concrete surface has been epoxy-sealed, colored, engraved, stained with acid, or stamped, concrete resurfacing will not stick correctly to the existing surface.
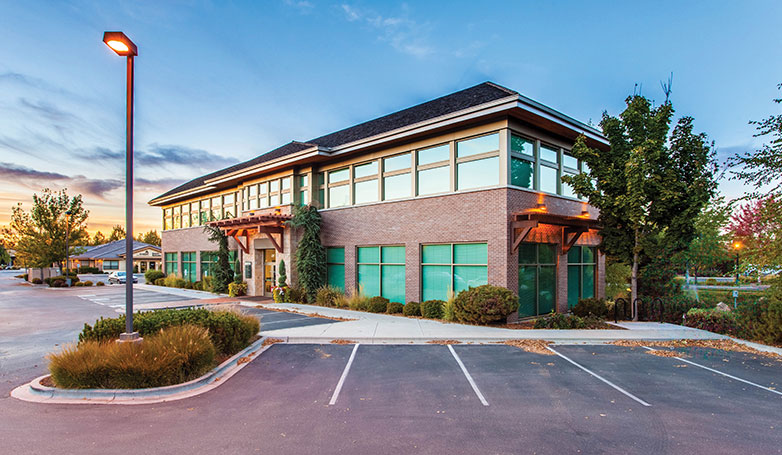
When is it time to resurface your concrete parking lot?
Concrete parking lots are standard in different neighborhoods because they provide unsurpassed durability. While it’s built to last, some factors, such as elements and heavy foot traffic, could still trigger it to wear-and-tear. Once you observe crumbling edges, cracks, sunken places, or dull colors on your parking lot, it asks for resurfacing.
If your parking lot begins to experience more than just a few cracks or holes, or the cracks and gaps are broader, then the time for resurfacing has fully come for it. Furthermore, if you consider patching but fear that soon, more tiny holes or cracks will develop, you will gain more by resurfacing it.
Resurfacing is better suited for patching up small holes and shallow cracks. It can be a more cost-effective alternative if you want to introduce a new layer of texture to your parking lot’s surfaces, making it an excellent option for restoring a parking lot’s shine and look.
The cost of resurfacing a concrete parking lot
| Resurfacing Type | Estimated Cost for 100 sq. ft. | Cost Range per sq. ft. | Standard Area Considered (sq. ft.) | Cost Range for Standard Area | Average Cost for Standard Area |
|---|---|---|---|---|---|
| Concrete Resurfacing | $400 | $3 to $5 | 100 | $300 to $500 | $400 (as estimated) |
| Asphalt Resurfacing | $1,800 to $4,200 (for 600 sq. ft.) | $3 to $7 | 600 | $1,800 to $4,200 | $3,000 |
Several factors can affect the cost of resurfacing your parking lot. Among all, location is always the main factor. For instance, materials used by contracting companies and labor costs vary per location. Also, the type of soil in an area can impact the price.
With that said, the estimated cost of resurfacing with concrete is $400 for a 100 square feet surface; less costly and more expensive projects can run as low as $300 and $500, respectively. The price may vary between $3 and $5 per square foot.
While the cost of resurfacing with asphalt can range between $1,800 and $4,200, or $3,000 on average. This rate is split into $3 to $7 per square foot for the standard 600 square feet area.
What are the typical causes of concrete parking lot distress or damage?
Causes of distress or degradation in a parking lot include but are not limited to, the following:
- A wrongly compacted subgrade
- Using an inadequate concrete mix
- Exposure to extreme weather conditions
- Bad placement processes
The key reason many homeowners and business owners use concrete for their parking lot is that it is recognized for its resilience, flexibility, and durability, in addition to being economical. You can customize concrete to obtain the appearance you want and still count on that look to last for years.
Instead of just excavating the concrete and beginning over, you can always save some money by resurfacing your parking lot; so far, the concrete is sound structural.
Difference between concrete resurfacing and concrete replacement
If you are considering resurfacing a concrete parking lot or replacing it for your next repair project, it is good to know the difference to make the right decision.
Concrete Resurfacing
- It includes applying a thin mortar overlay over the old concrete slab
- It helps restore the surface; however, large cracks, significant breakage, or pitting are not fixed
- It can be finished in a few hours,
- Usually, half the cost of replacing concrete
- Offer additional layer, reducing wear and tear
Concrete Replacement
- Removing and replacing damaged slabs with new ones
- offer a more permanent solution for high-traffic surfaces
- The project can run for two days
- Cost more than resurfacing
- Eliminates the possibility of regular concrete repair
Conclusion
If your parking lot is due for repair, it would be best for you to evaluate the pros and cons of resurfacing and replacement before deciding which one to opt for. For the best recommendation, you can call in a concrete paving contractor to find the cause of the deterioration in order to decide whether concrete replacement or resurfacing would be a better choice for your property.