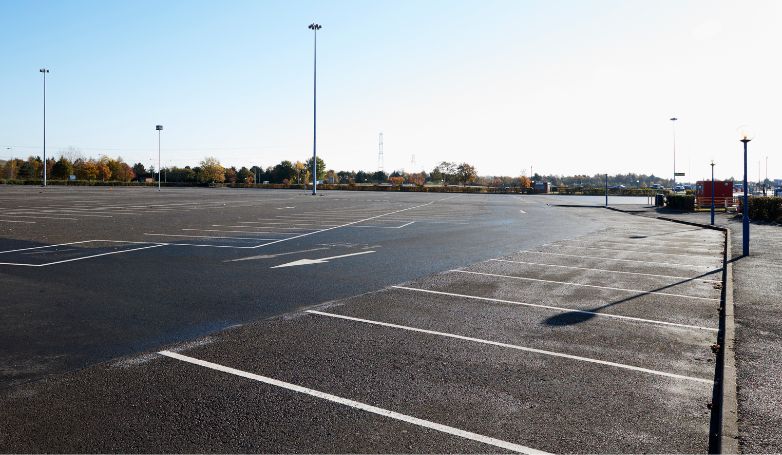
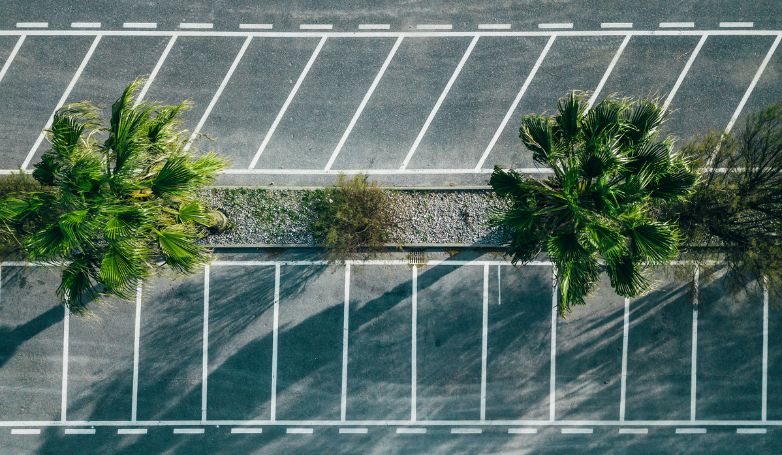
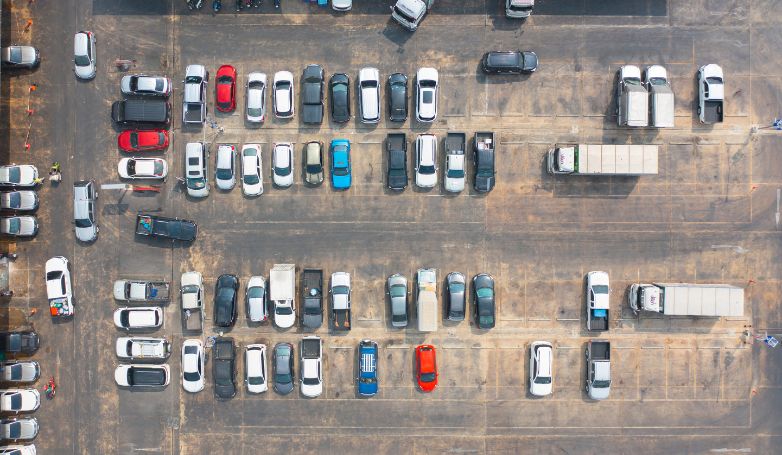
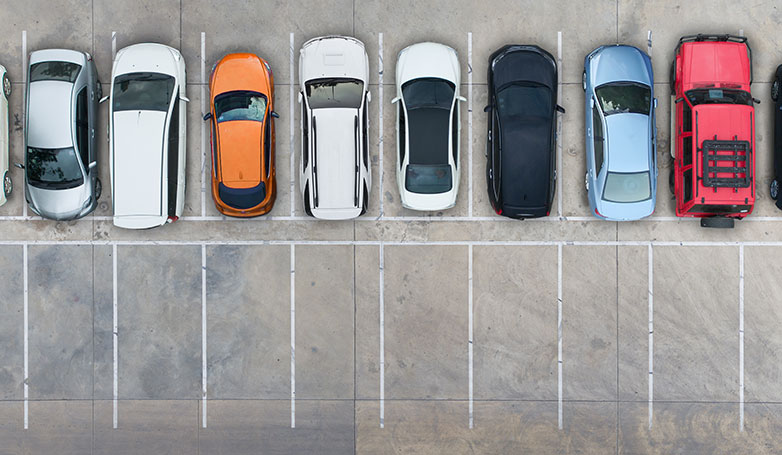
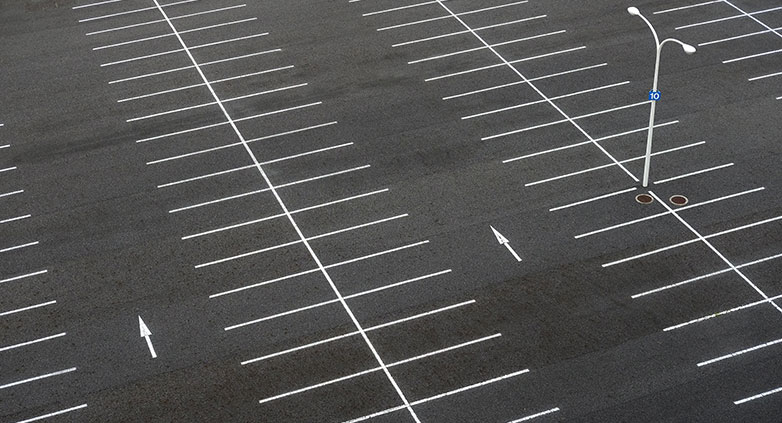
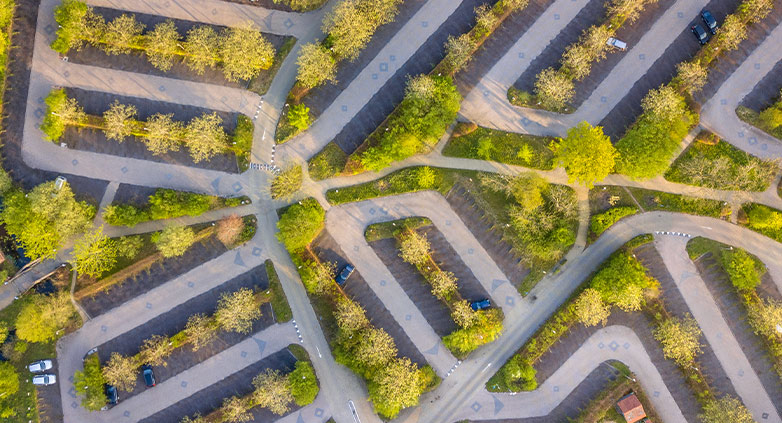
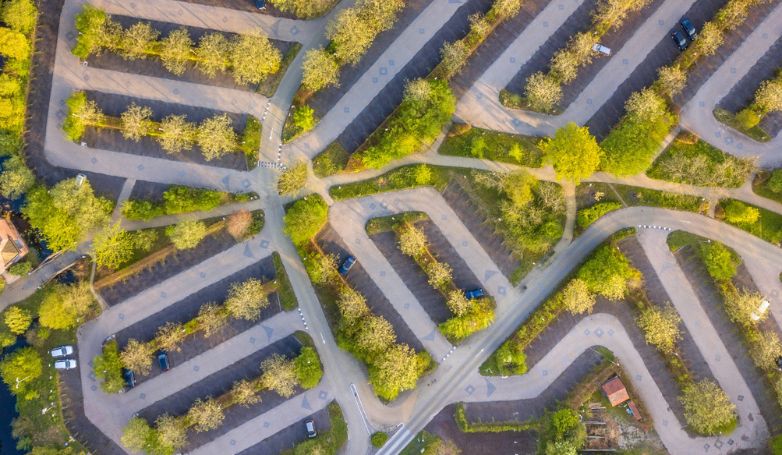
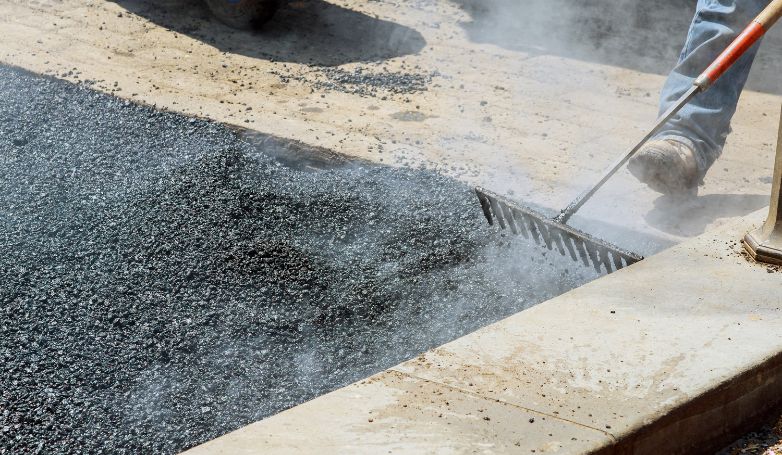
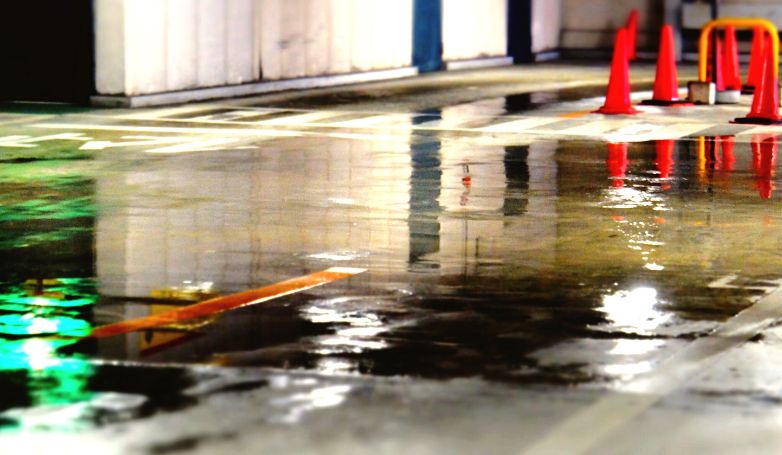
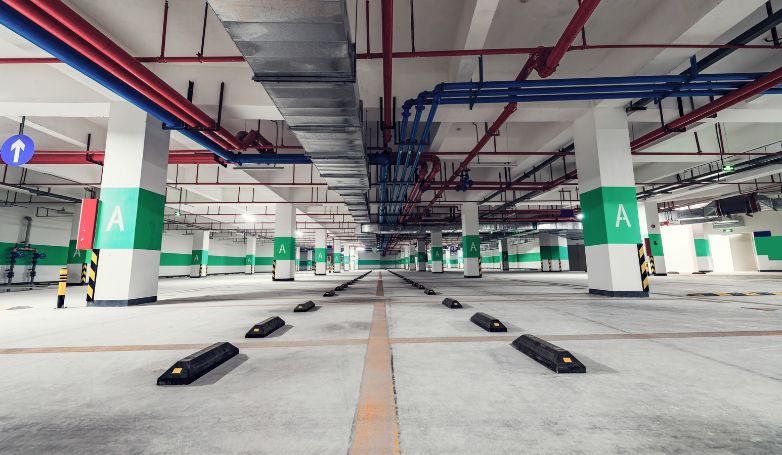
Keeping a parking lot clean is crucial for making a positive first impression and ensuring safety. It’s about more than just aesthetics; it’s about maintenance and care.
Effective parking lot cleaning involves removing debris, treating stains, and regular maintenance to prevent damage. Regular sweeping, prompt repair of cracks and potholes, and sealcoating are key to extending the life of the parking area. Additionally, proper drainage systems prevent water accumulation, protecting the surface from water damage and erosion. These steps not only enhance appearance but also ensure the longevity and safety of the parking lot.
For detailed strategies and the best tools for maintaining a pristine parking lot, dive deeper into our comprehensive guide.
Tools and Equipment for Effective Parking Lot Cleaning
Maintaining a clean and well-presented parking lot plays a crucial role in safety and longevity of the surface. The right tools and equipment can make this task more efficient and effective, ensuring that your parking area remains in top condition.
Here’s a look at some essential tools for the job:
Industrial Sweepers
Powerful Blower
Asphalt Broom
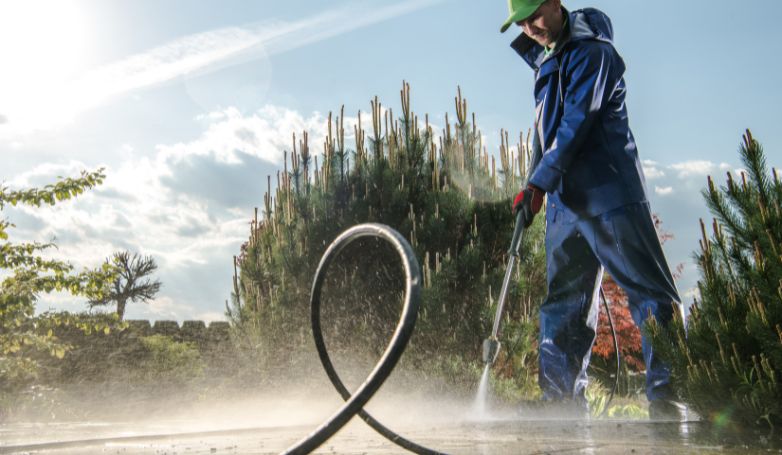
Pressure Washer
Degreaser/Cleaner
Wire Brush
Crack Filling Equipment
Sealcoating Sprayer
Now that you have the tools, let’s see how to clean the parking lot effectively and maintain its pristine condition.
How to clean the parking lot in 8 steps
Follow these steps to ensure thorough cleaning and upkeep.
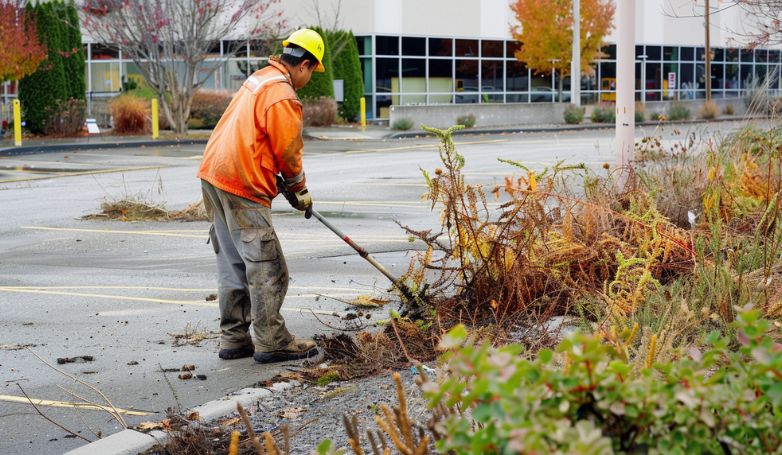
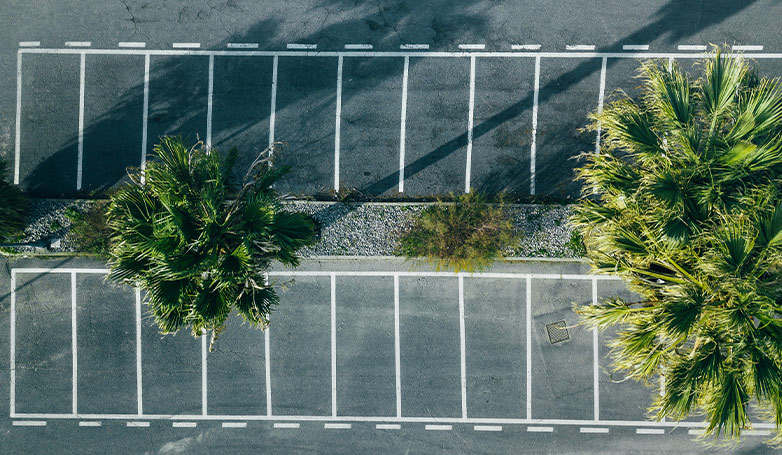
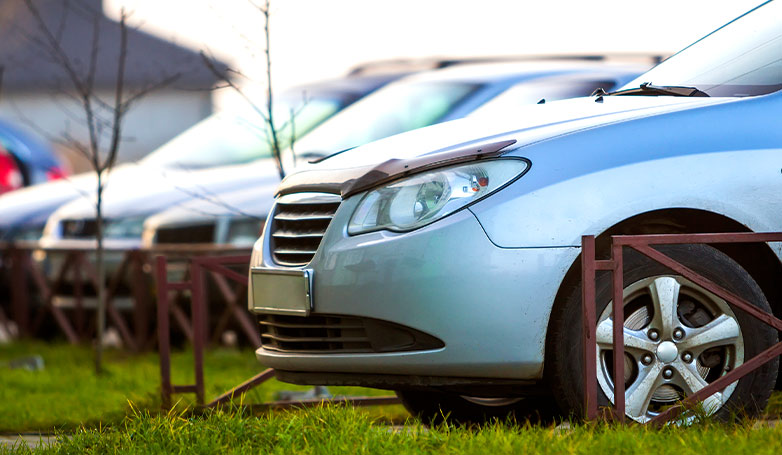
1. Get rid of unwanted vegetation
Begin by identifying and removing all forms of vegetation encroaching on the parking lot, such as weeds growing through cracks. This step is vital for preventing further damage to the asphalt or concrete surfaces. Use a combination of manual pulling and environmentally safe herbicides to eliminate these plants effectively. Ensuring the removal of roots will decrease the likelihood of regrowth, maintaining the integrity of the parking lot’s surface.
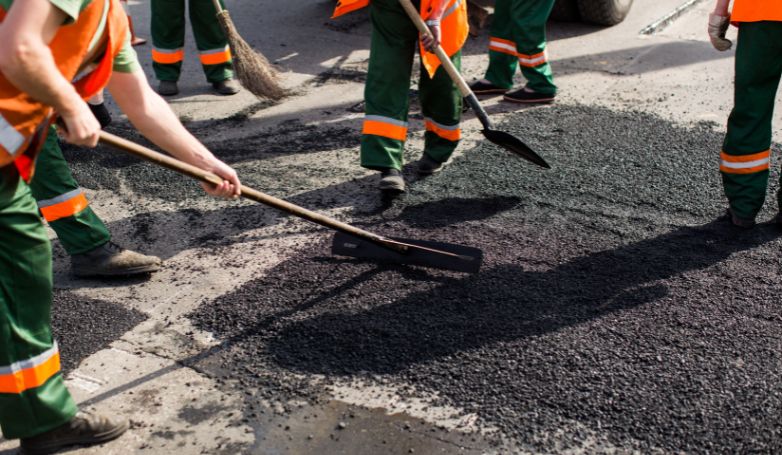
2. Clear loose debris
Utilize industrial sweepers and powerful blowers to remove all forms of loose debris, including leaves, trash, and dirt. This not only improves the parking lot’s appearance but also prevents the accumulation of materials that could obstruct drainage systems. Keeping the lot free from debris reduces the risk of slip hazards and potential damage to vehicles, creating a safer environment for pedestrians and drivers alike.
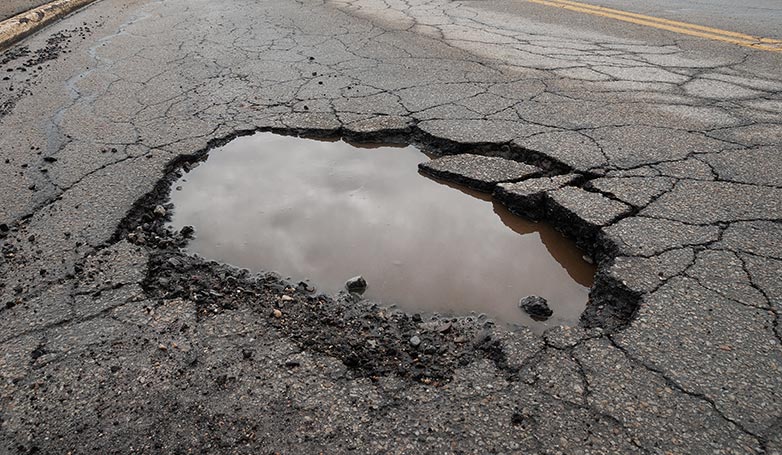
3. Clean cracks and potholes before filling
Before proceeding with repairs, thoroughly clean out cracks and potholes. This can be achieved by using a wire brush or specialized tools to remove all debris, ensuring that repair materials adhere properly. Cleaning these areas prevents water infiltration and further degradation. For deeper potholes, consider using a blower to expel all dust and particles, creating a clean base for the filling material.
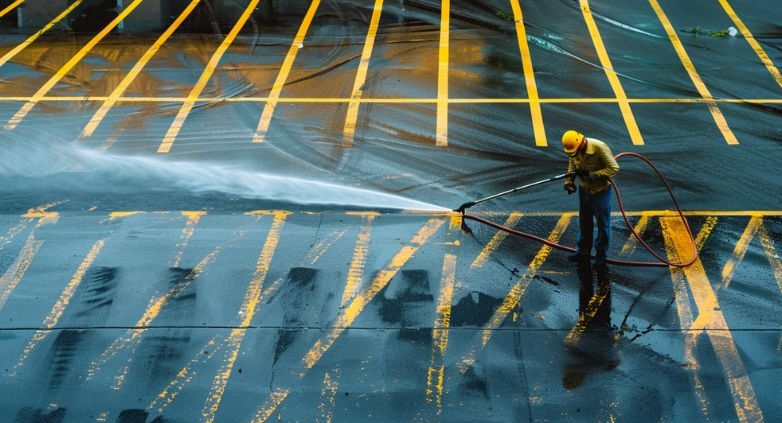
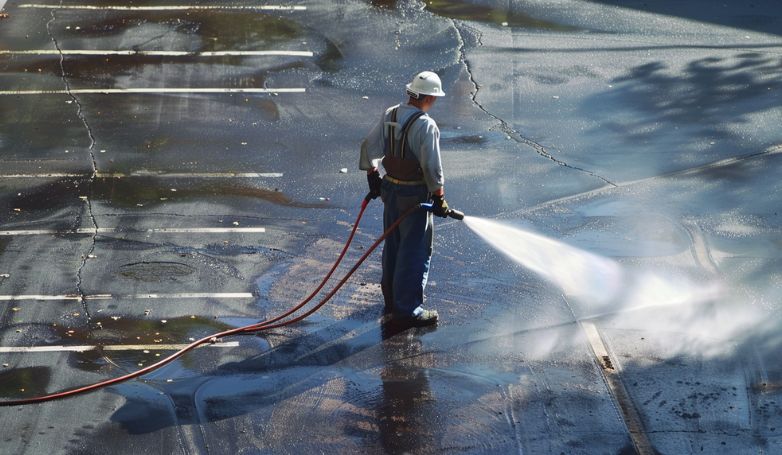
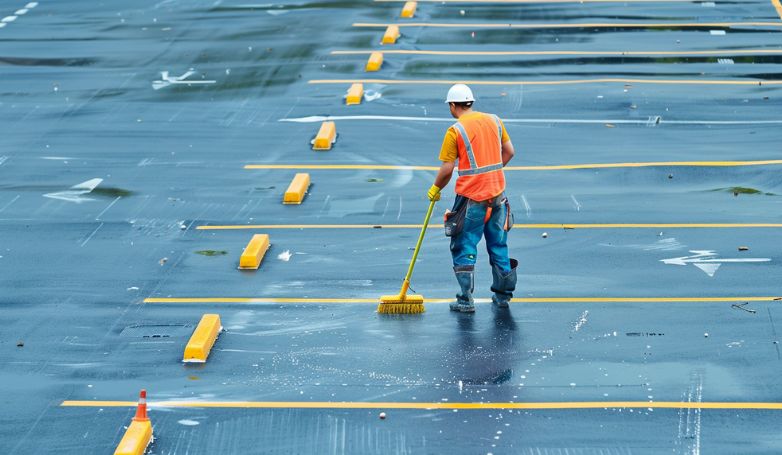
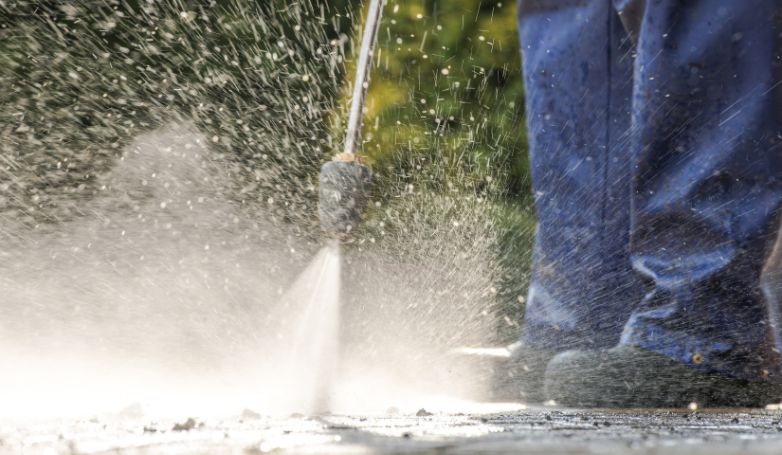
4. Power wash
Employ a pressure washer to deeply cleanse the parking lot surface, removing tough stains, oil spills, and embedded dirt. This step is crucial for restoring the appearance of the parking lot and preparing it for further maintenance tasks. Choose the appropriate pressure setting to avoid damage to the pavement while ensuring a thorough clean. This process also helps to reveal any unnoticed damage that requires attention.
5. Remove stains
Address specific stains such as oil, grease, and tire marks using targeted cleaners or degreasers. Apply these products according to the manufacturer’s instructions, allowing them to sit for the recommended time before scrubbing with a stiff brush. This focused approach ensures the effective removal of stubborn stains, enhancing the overall cleanliness and appearance of the parking lot.
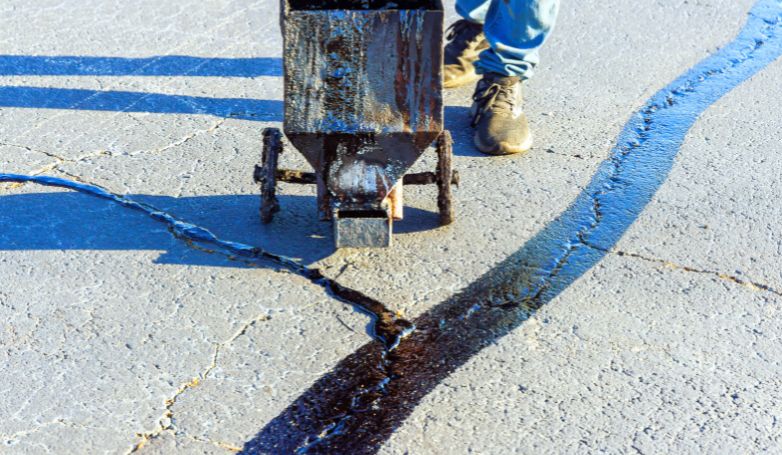
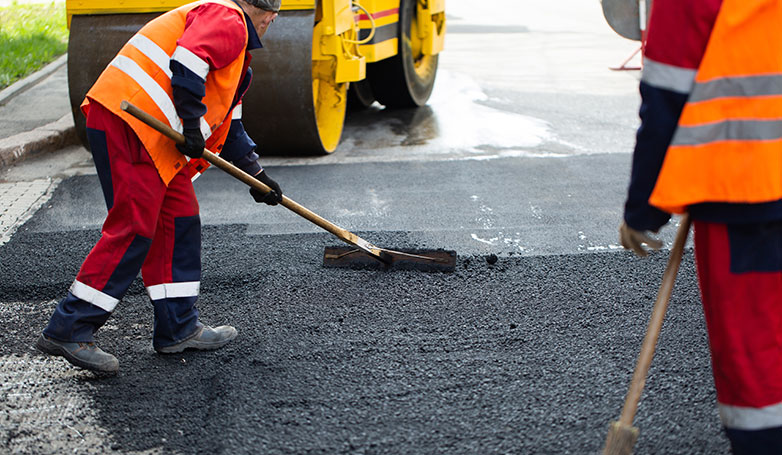
6. Fill cracks
After cleaning, fill cracks with a suitable crack filler. Select a product designed for the type of pavement in your lot, ensuring it can accommodate the climate and traffic levels. Properly filling cracks prevents water penetration that can lead to freeze-thaw damage and further deterioration. Smooth the filler with a squeegee or trowel for a seamless finish, ensuring the longevity of the repair.
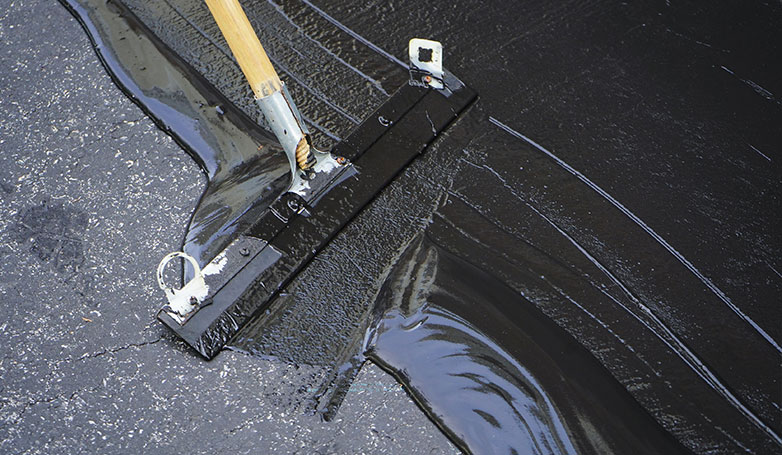
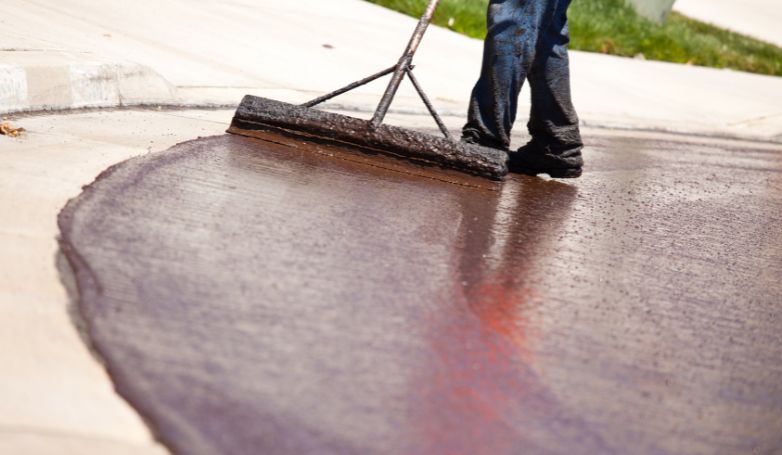
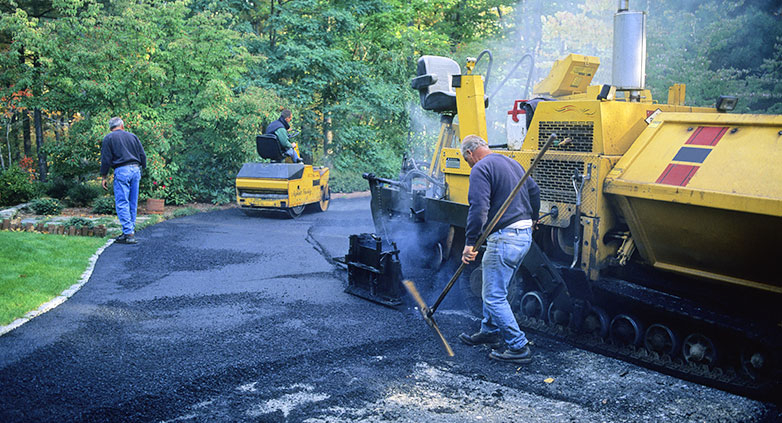
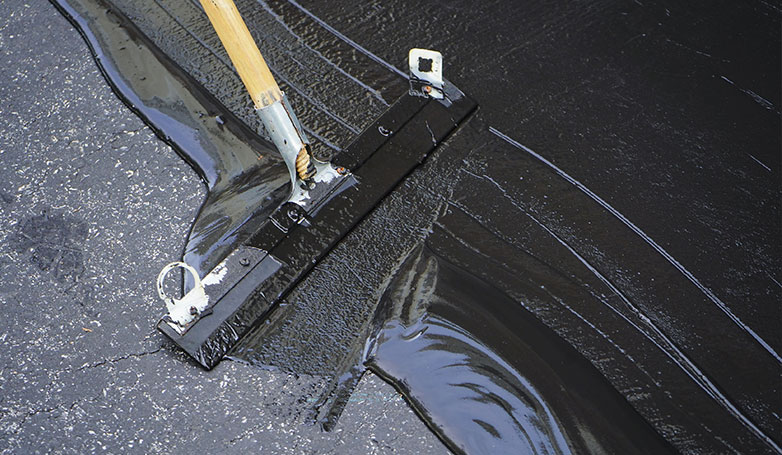
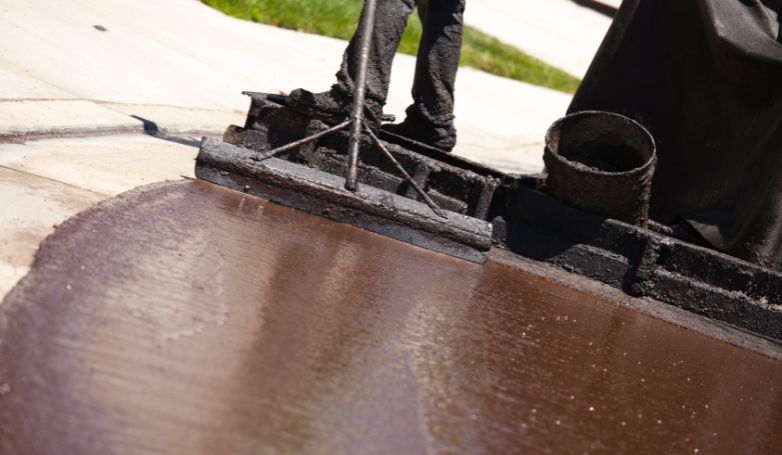
7. Sealcoat, as needed
Apply a sealcoat to the entire parking lot surface to protect it from weather, oil, and UV damage. This preventive maintenance step not only extends the life of the parking lot but also enhances its appearance with a fresh, uniform look. Follow the sealant manufacturer’s guidelines for application and drying times to achieve the best results.
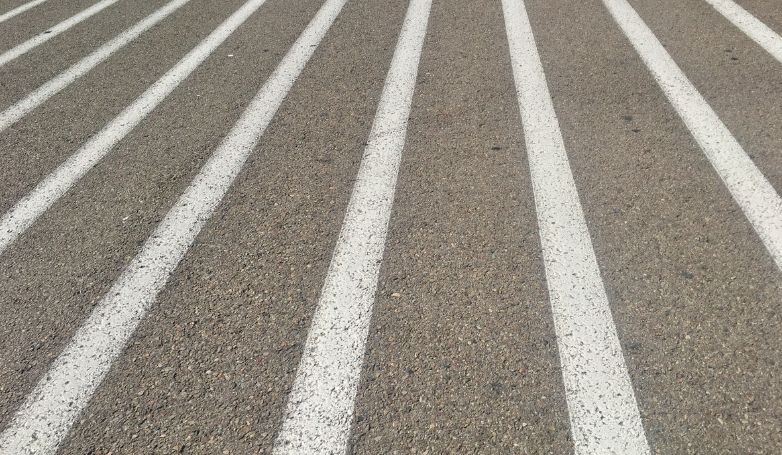
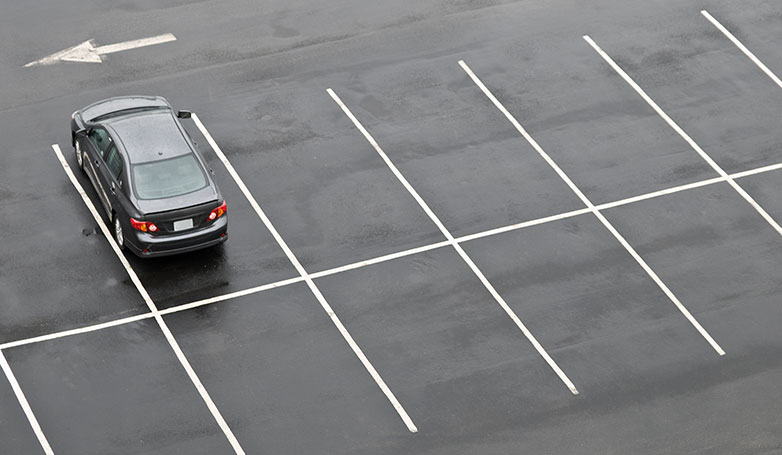
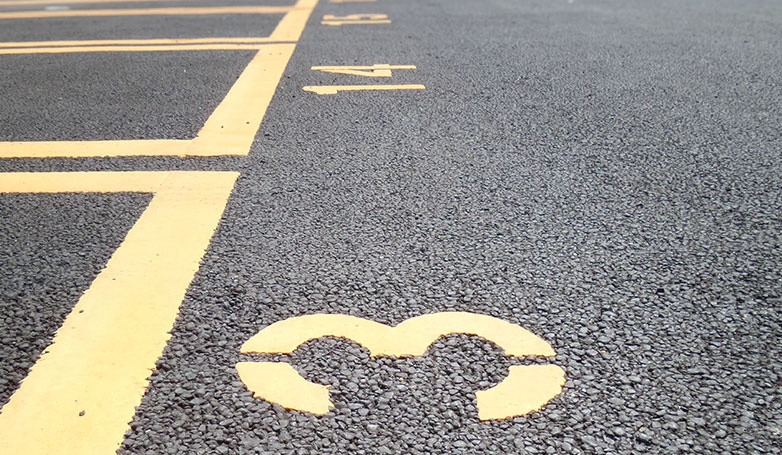
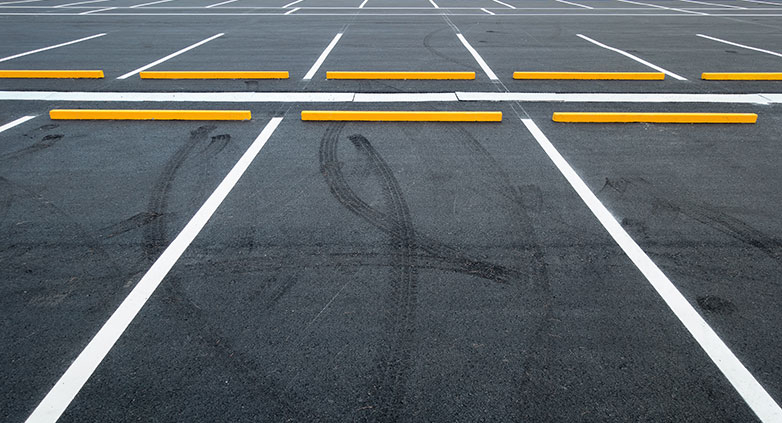
8. Restriping the lot
The final step is to restripe parking lines, handicapped spaces, and crosswalks to ensure clear visibility and compliance with local regulations. Use high-quality, weather-resistant paint and professional striping equipment for crisp, durable lines. Restriping not only improves the functionality and safety of the parking lot but also contributes to its aesthetic appeal.
Cost Considerations for Parking Lot Cleaning
For parking lot cleaning, both DIY and professional services have their costs, which can vary based on several factors such as the size of the parking lot, its current condition, and the frequency of cleaning required.
DIY
The costs for DIY parking lot cleaning can include equipment rental or purchase, such as pressure washers, industrial sweepers, asphalt brooms, powerful blowers, wire brushes, and degreasers/cleaners. While specific prices for these items can vary widely based on quality and where you buy or rent them, the primary cost-saving comes from avoiding labor costs. However, consider the time investment and potential for less professional results.
Professional
The cost for professional parking lot sweeping services varies across the country but offers a guideline for budgeting. For example, sweeping a 500-space parking lot averages about $83.21 per service, but this can increase or decrease based on the parking lot size and other factors. Additional services like resealing asphalt can range from $0.14 to $0.25 per square foot, with the lot needing resealing every 2-4 years and resurfacing approximately every 20-25 years. For concrete lots, resealing is necessary every 3 years, with costs ranging from $0.10 to $0.30 per square foot, and resurfacing needed every 15-25 years at $3 to $10 per square foot.
When deciding between DIY and professional cleaning, consider not only the upfront costs but also the long-term maintenance and care of your parking lot to ensure safety and longevity.
Maintenance Tips to Keep Your Parking Lot Clean Longer
To ensure your parking lot remains in top condition, extending its usability and enhancing curb appeal, adhere to these essential maintenance tips:
Regular sweeping
Implementing a routine sweeping schedule is crucial for removing debris, leaves, and trash. This not only maintains the aesthetic appeal of your parking lot but also prevents the accumulation of materials that could damage the asphalt or concrete surface, thereby extending its lifespan and reducing the need for frequent repairs.
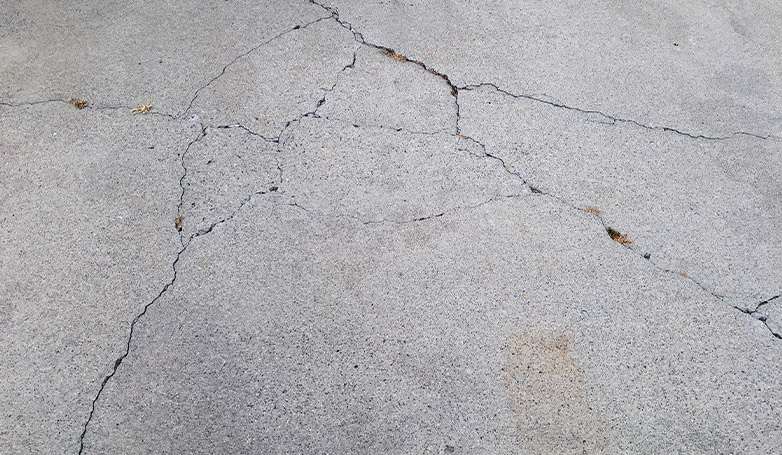
Prompt crack and pothole repair
Addressing cracks and potholes as soon as they are noticed prevents minor issues from escalating into major repairs. Timely maintenance ensures the structural integrity of the parking lot, enhances safety for users, and prevents water from penetrating the surface, which can cause further damage.
Stain removal
Immediate action to remove oil, grease, and other stains helps to preserve the parking lot’s appearance and prevent the stains from becoming permanent. Regular cleaning of these blemishes not only enhances the lot’s aesthetic but also protects the surface from potential chemical damage.
Sealcoating application
Applying a sealcoat every few years protects the parking lot from the elements, including water penetration, UV rays, and chemical spills. This preventive measure significantly extends the life of the parking lot, maintains its appearance, and saves money on long-term maintenance costs.
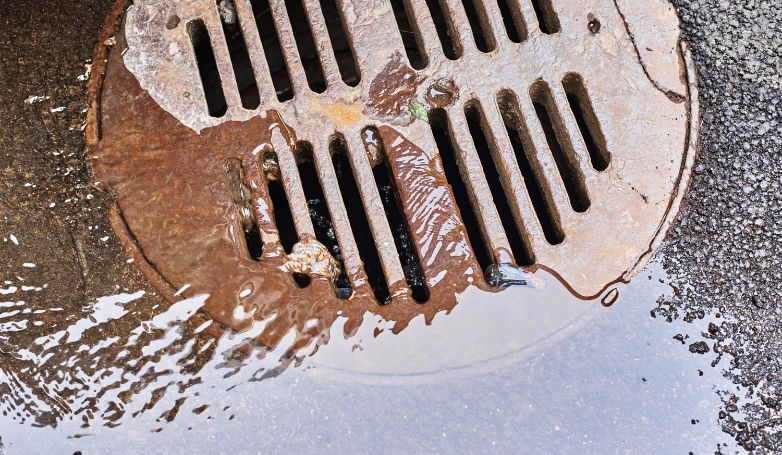
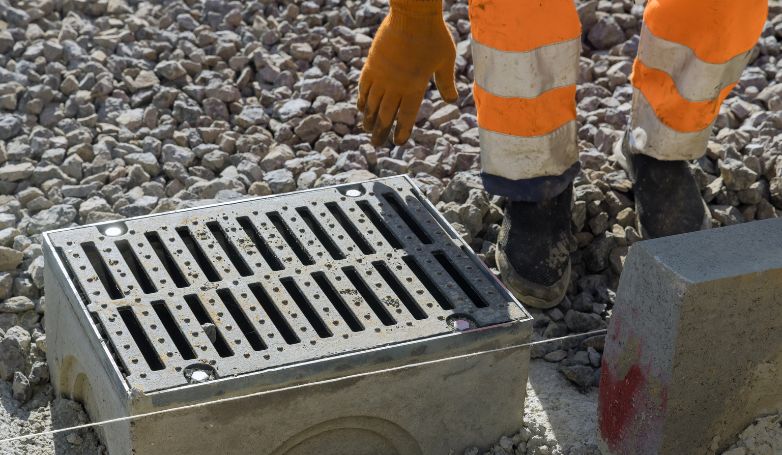
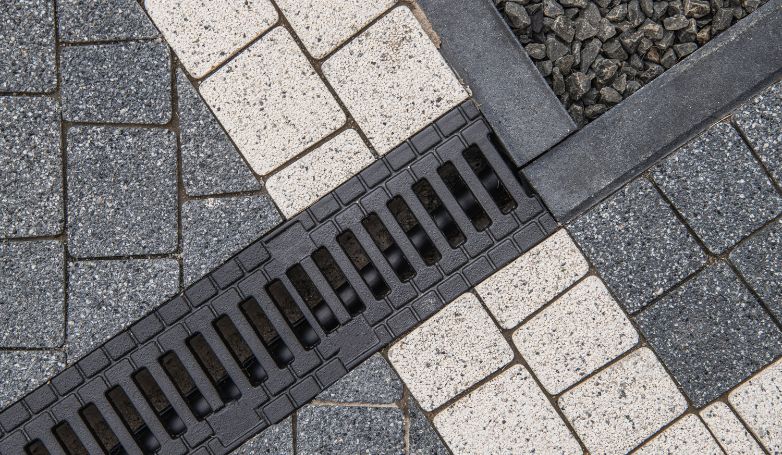
Effective drainage
Ensuring proper drainage within the parking lot is essential to avoid standing water, which can lead to surface damage and create hazards for users. Regular inspection and cleaning of drainage systems prevent water accumulation, protecting the lot from water-related damage and erosion.
FAQs about parking lot cleaning
For those managing parking lots, ensuring they stay clean and maintained is a top priority. Here’s how to address common concerns effectively:
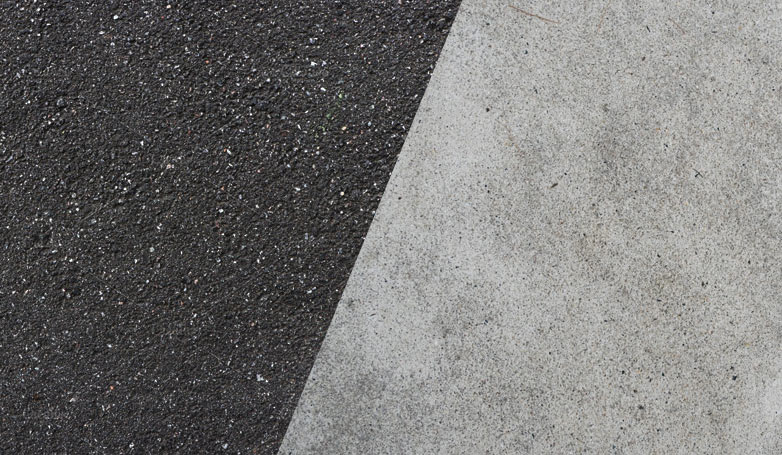
How do you clean an asphalt parking lot?
Start by removing all debris and vegetation. Sweeping is crucial for loose material, followed by addressing any stains with a degreaser. Power washing can help with deeper cleans. Finally, fill any cracks to prevent further damage.
How do you clean a concrete parking lot?
Similar to asphalt, begin with debris removal. Use a power washer for surface cleaning and a concrete-safe cleaner for stains. Seal any cracks to protect against water infiltration and prolong the lot’s lifespan.
Conclusion
In conclusion, maintaining a clean parking lot is crucial for safety, aesthetics, and longevity. Regularly sweeping, promptly repairing cracks and potholes, removing stains, applying sealcoat, and ensuring effective drainage are key steps. These practices not only enhance the appearance and usability of parking areas but also prevent costly repairs in the long run. Adopting a comprehensive maintenance strategy ensures a welcoming and safe environment for all users, reflecting positively on the property’s management.
Tim is a seasoned paving expert with 30+ years of experience in the industry. He has worked on countless projects, from small residential driveways to large commercial parking lots.
https://pavingfinder.com/wp-content/uploads/2020/12/Parking-Lot-Cleaning-.jpg455782admin123https://pavingfinder.com/wp-content/uploads/2020/10/logo.jpgadmin1232024-03-01 11:03:152024-03-01 11:04:55Parking Lot Cleaning – 8 Steps to Spotless Splendor
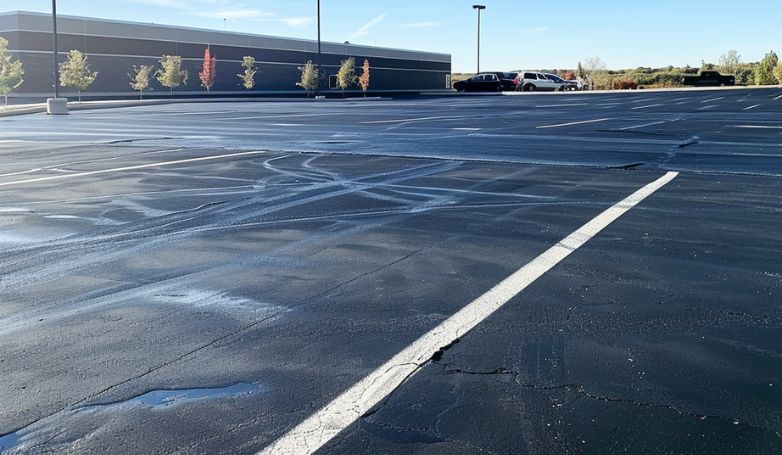
Parking lot sealcoating is a crucial process that keeps your asphalt surface looking new and significantly extends its lifespan.
Parking lot sealcoating involves applying a protective layer to asphalt surfaces to shield them from elements like water, oils, and UV damage. This process not only prevents cracks and potholes from forming but also maintains the lot’s dark, rich color, enhancing its overall appearance. By creating a barrier against the elements, sealcoating effectively slows the wear and tear on your parking lot, saving you money on extensive repairs and replacements in the long run.
Discover the benefits, the installation, the ideal frequency of application, and maintenance tips to ensure your parking lot remains in top condition year after year.
The Benefits of Sealcoating Your Parking Lot
Sealcoating acts as a shield for your parking lot, protecting against weather, chemicals, and traffic wear. This preventative maintenance can significantly extend the life of your asphalt, saving on costly repairs down the line. It’s an investment in durability and longevity, ensuring your parking area remains functional and appealing.
Extend Asphalt Life
It prevents water penetration, oxidation, and damage from oil or gas spills, which are primary causes of asphalt degradation. This protective layer keeps the foundational integrity intact, delaying the need for extensive repaving projects.
Improve Appearance
A fresh sealcoat gives your parking lot a dark, rich color, much like new asphalt. This not only enhances curb appeal but also marks your property as well-maintained. An attractive parking area can leave a positive impression on customers and visitors, contributing to the overall image of your business.
Cost-Effective Maintenance
Investing in sealcoating is far more cost-effective than dealing with the consequences of neglect. By preventing severe asphalt damages, you reduce the need for expensive repairs and replacements. Regular sealcoating maintains your parking lot’s condition at a fraction of the cost of major rehabilitation or reconstruction work.
When to Sealcoat Your Parking Lot
To ensure your parking lot remains in prime condition, it’s important to understand the optimal timing and indicators for sealcoating.
Ideal Timing
The best time to sealcoat your parking lot is during warmer months, typically from late spring to early fall. During this period, temperatures are more conducive for the sealant to adhere and cure properly. Aim for dry weather with low chances of rain and temperatures above 50°F to ensure optimal application and drying conditions.
Frequency
Experts recommend sealcoating every 2-3 years to maintain their integrity and appearance. However, this can vary based on traffic volume, climate, and the current condition of the asphalt. Regular assessments can help determine the appropriate frequency for your specific parking lot.
Signs Your Parking Lot Needs Sealcoating
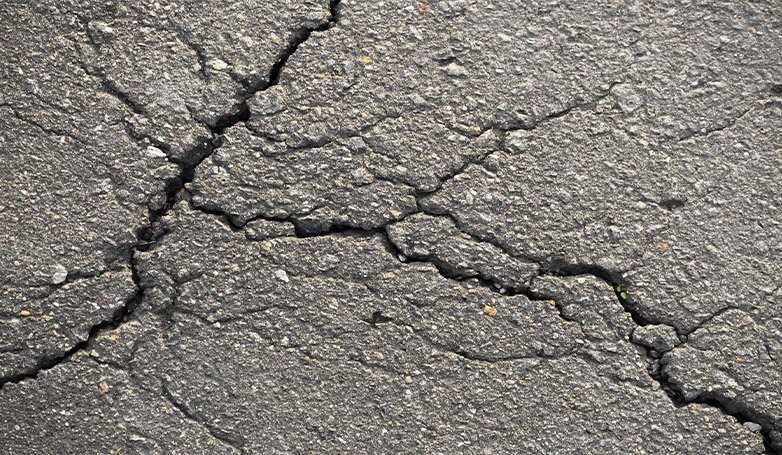
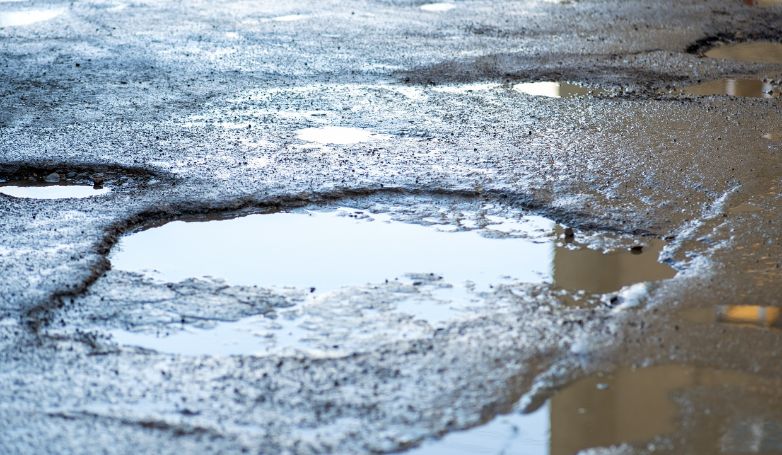
Visible signs indicating the need for sealcoating include fading color, surface cracks, and areas where the asphalt appears dry or brittle. Water pooling and the presence of potholes are also clear indicators that the protective layer is wearing off and the asphalt is susceptible to damage. If the surface looks worn or you can see the aggregate, it’s time to plan for sealcoating.
How to Sealcoat your Parking Lot in 10 Steps
Sealcoating your parking lot is a straightforward process that, when done correctly, can significantly extend its lifespan and improve its appearance.
1. Evaluate and Document Condition
Begin by conducting a detailed assessment of your parking lot, noting any damage, including cracks, potholes, and areas of significant wear. This initial step is critical for tailoring the sealcoating process to your parking lot’s specific needs. Documenting the current condition helps in planning the extent of repairs needed and ensures a comprehensive approach to the sealcoating process, aiming for a uniform and effective application.
2. Debris and Stain Removal
Prioritize the complete removal of debris, dirt, and stains from the parking lot surface using power washing and specialized cleaning agents. This step is essential for ensuring that the sealcoat adheres properly to the asphalt. Removing stains, especially oil and chemical spills, prevents them from seeping through the new sealcoat. A clean surface ensures a smoother application and a more visually appealing finish.
3. Crack Filling
Address all cracks in the asphalt to prevent water infiltration and further deterioration of the parking lot. Use a high-quality crack filler compatible with your asphalt to fill and seal cracks, creating a smooth, unified surface. This preventive measure is crucial for maintaining the structural integrity of the parking space and maximizing the effectiveness of the sealcoating.
4. Pothole Repair
Repair potholes by cleaning out the debris and filling them with an asphalt patching compound. Proper pothole repair is vital for preventing vehicle damage and enhancing the safety and appearance of your parking space. This step ensures a level surface, which is essential for the uniform application of the sealcoat and the longevity of the parking lot’s surface.
5. Oil Spot Treatment
Treat oil spots with a primer or oil spot sealer to ensure the sealcoat adheres properly. Oil spots can prevent the sealcoat from bonding correctly, leading to premature wear and potential damage. This targeted treatment creates a uniform surface for sealcoating, enhancing the durability and appearance of the final product.
6. Edge Trimming
Trim grass and vegetation along the parking lot edges to prevent overgrowth onto the asphalt surface. This step not only improves the appearance of the parking space but also prevents root damage to the asphalt. A clean edge allows for a more precise and effective sealcoating application, ensuring complete coverage.
7. Sealant Mixing and Preparation
Mix the sealant according to the manufacturer’s instructions to ensure it has the proper consistency for application. Proper mixing and preparation are crucial for achieving a uniform texture and optimal adhesion to the parking lot surface. This step ensures that the sealcoat will provide maximum protection and aesthetic appeal.
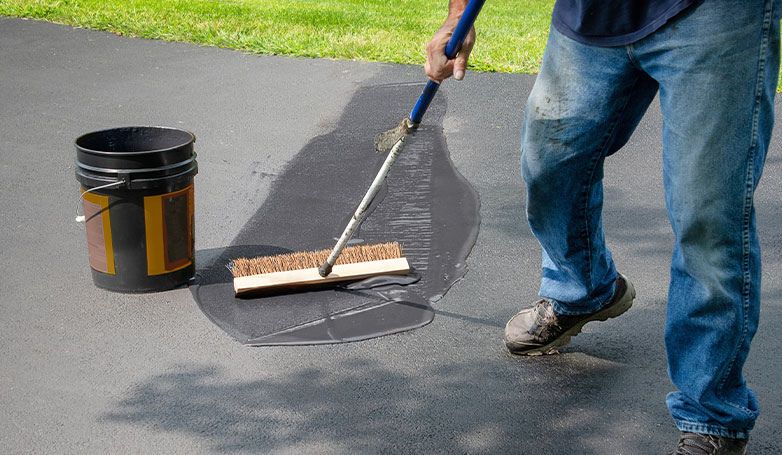
8. Sealcoat Application
Apply the sealcoat evenly across the parking lot using a sprayer or squeegee, ensuring thorough coverage. The technique used should provide a consistent layer of sealant, protecting the asphalt from the elements and extending its lifespan. This step is critical for enhancing the parking lot’s durability and resistance to wear and tear.
9. Curing Time Observation
Allow the sealcoat to dry and cure completely before reopening the parking lot to traffic. The curing process is essential for the sealcoat to fully bond to the asphalt, providing a durable protective layer. Observing the recommended curing time prevents damage to the sealcoat and ensures its longevity.
10. Line Striping and Marking
After the sealcoat has cured, apply fresh line striping and markings to clearly define parking spaces and traffic flow. This final touch enhances the parking lot’s functionality and safety, providing a visually appealing and well-organized space. Proper line striping and marking are essential for maximizing the usability and navigability of your parking lot.
Cost of Sealcoating a Parking Lot
Cost Component
Cost Range (per sq ft or linear ft)
Example for 10,000 sq ft Lot
Material Costs
$0.08 – $0.18 (per sq ft)
$800 – $1,800
Labor Costs
$0.10 – $0.25 (per sq ft)
$1,000 – $2,500
Preparation and Application Costs
$0.05 – $0.15 (per sq ft)
$500 – $1,500
Additional Expenses
Line Striping: $0.20 – $0.60 (per linear ft)
Line Striping (1,000 linear ft): $200 – $600
Understanding the costs involved in sealcoating a parking lot is crucial for effective budgeting and planning to ensure your parking area remains in top condition.
Material Costs
Sealcoating materials typically cost between $0.08 and $0.18 per square foot, depending on the quality and type of sealant used. For a 10,000-square-foot parking lot, material costs can range from $800 to $1,800. This price can vary based on the sealant’s grade and any bulk purchase discounts.
Labor Costs
Labor costs for professional sealcoating services usually range from $0.10 to $0.25 per square foot. This means labor for a 10,000-square-foot lot could cost between $1,000 and $2,500. These costs can vary based on the complexity of the job and the geographical location.
Preparation and Application Costs
Preparation, including cleaning, crack filling, and minor repairs, can add an additional $0.05 to $0.15 per square foot to the overall cost. For a lot of the same size, this would be an additional $500 to $1,500. Equipment rental for DIY projects can also fall within this range.
Additional Expenses
Additional costs may include line striping, which averages between $0.20 and $0.60 per linear foot, potentially adding $200 to $600 for a standard-sized parking lot with 1,000 linear feet of markings. Special treatments, such as crack sealing or patching, can add $1 to $2 per square foot for extensive repairs.
How to Choose the Right Sealcoating Contractor
Choosing the right sealcoating contractor is crucial to ensuring a high-quality job that extends the life of your parking lot. Here’s how to navigate the selection process:
What to Look For
Experience and Reputation: Seek out contractors with extensive experience in sealcoating and a positive reputation in the community. Look for online reviews, testimonials, and before-and-after photos of their previous projects.
Insurance and Licensing: Ensure the contractor is fully licensed and insured to protect against any liabilities. This is a sign of professionalism and dedication to their craft.
Quality of Materials: Inquire about the type of sealcoating materials they use. High-quality materials lead to longer-lasting results. Contractors committed to quality will be transparent about their products.
Detailed Quotes: A reliable contractor provides detailed quotes that break down the costs, scope of work, and timeline. This transparency helps avoid any unexpected charges or misunderstandings.
Warranty and Service Guarantees: Look for contractors who stand behind their work with a warranty or service guarantee. This shows they are confident in the quality of their work and committed to customer satisfaction.
Questions to Ask
How long have you been in the sealcoating business? This question helps gauge their experience and reliability in the field.
Can you provide references or photos of past projects? References and photos offer insight into their work quality and customer satisfaction.
What type of sealcoating material do you use, and why? Understanding the materials they use can indicate the durability and quality of the finished job.
How do you prepare the surface before applying sealcoat? Proper preparation is key to a successful sealcoating job. Their process should include cleaning, crack filling, and addressing oil spots.
What is included in your quote? Confirm that the quote includes all necessary work and there are no hidden fees.
What is your process if weather affects the job schedule? Weather can impact sealcoating projects. A reputable contractor will have a clear policy for rescheduling due to weather.
Do you offer a warranty on your work? A warranty indicates they are willing to stand behind the quality of their work.
Maintenance Tips After Sealcoating
Maintaining your sealcoated parking lot is essential to extend its lifespan and keep it looking its best. Here are some tips to ensure your investment remains protected:
Regularly clean the surface to remove dirt and debris
Keeping your parking lot clean is crucial. Regular sweeping and washing remove harmful materials and prevent them from breaking down the sealcoat. A clean surface not only looks better but also extends the life of the sealcoating.
Avoid using harsh chemicals or deicers on the sealcoated area
Harsh chemicals, including some deicers, can damage the sealcoat. Instead, use sand for traction in winter. If deicers are necessary, opt for products that are safe for asphalt and follow the manufacturer’s guidelines for the least harmful options.
Perform routine inspections for cracks or damage
Regularly inspect your parking lot for any signs of wear, such as cracks or potholes. Early detection of these issues allows for timely repairs, preventing minor problems from becoming major ones.
Seal cracks promptly to prevent water infiltration
Water is a major enemy of asphalt, leading to further damage and deterioration. Sealing cracks as soon as they appear prevents water from penetrating the base layer, which can cause more extensive damage.
Reapply sealcoat as recommended, typically every 2-3 years
The frequency of sealcoating depends on various factors, including traffic volume and weather conditions. Generally, reapplying sealcoat every 2-3 years maintains its protective layer, keeping your parking lot in optimal condition.
Following these maintenance tips after sealcoating ensures that your parking lot remains durable and visually appealing, maximizing the return on your investment.
FAQs about Parking Lot Sealcoating
Navigating the intricacies of parking lot sealcoating can raise several questions; here are some of the most frequently asked to help clarify the process.
What does it mean to seal coat a parking lot?
Sealcoating a parking lot involves applying a protective layer over the asphalt to shield it from damage caused by water, oils, UV rays, and traffic wear. This process not only extends the lifespan of the asphalt but also enhances its appearance, giving it a fresh, new look.
What is the best parking lot sealer?
The best parking lot sealer depends on the specific needs of your parking lot, including traffic volume and local weather conditions. Generally, high-quality acrylic or asphalt-based sealers are preferred for their durability and effectiveness in protecting against the elements and chemical spills.
How do you reseal an asphalt parking lot?
Resealing an asphalt parking lot involves thoroughly cleaning the surface, repairing any cracks or potholes, and then applying a new layer of sealant over the entire area. The process requires proper preparation and application techniques to ensure the sealant adheres correctly and provides maximum protection.
What material is used to seal parking lots?
Parking lots are typically sealed with either coal tar emulsion or asphalt emulsion sealers. Coal tar sealers provide excellent resistance to water, oil, and UV damage but are subject to environmental concerns. Asphalt emulsion sealers are more environmentally friendly and offer good protection, making them a popular choice for many property owners.
Conclusion
In conclusion, parking lot sealcoating is an indispensable maintenance procedure that not only preserves the longevity and aesthetics of your asphalt but also saves you money on future repairs. By understanding the right time for sealcoating, selecting a reliable contractor, adhering to post-sealcoating maintenance tips, and navigating common questions, you can ensure your parking lot remains in top condition. Remember, a well-maintained parking lot reflects positively on your property, enhancing its appeal and value.
Tim is a seasoned paving expert with 30+ years of experience in the industry. He has worked on countless projects, from small residential driveways to large commercial parking lots.
https://pavingfinder.com/wp-content/uploads/2022/06/Parking-Lot-Sealcoating-Featured.jpg455782admin123https://pavingfinder.com/wp-content/uploads/2020/10/logo.jpgadmin1232024-02-28 13:56:162024-02-28 13:56:19Parking Lot Sealcoating – Guide to Protection & Maintenance
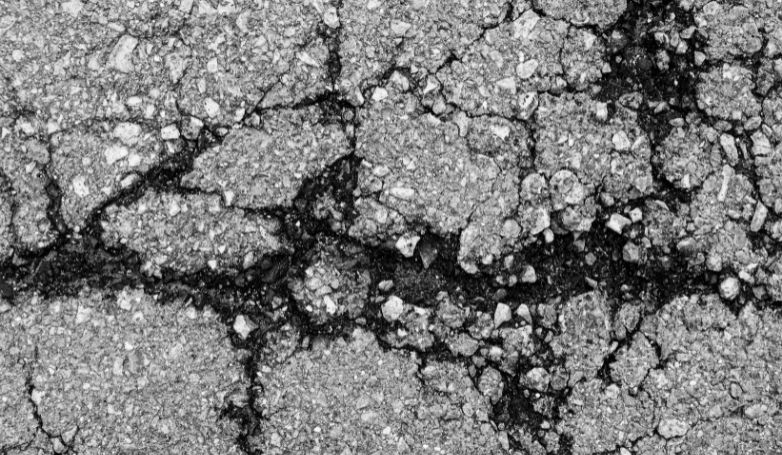
Asphalt parking lot repair is essential for maintaining a safe, aesthetically pleasing, and functional space. Ignoring minor issues can lead to significant, costly problems over time.
Addressing asphalt parking lot repair promptly can prevent small cracks and holes from evolving into larger, more hazardous issues. The repair process often involves patching potholes, sealing cracks, and applying a fresh coat of sealant to protect the surface from water infiltration, oxidation, and further damage. Regular maintenance, including cleaning and inspections, is crucial for extending the lifespan of an asphalt parking lot. By taking proactive steps, property owners can ensure a durable, smooth, and visually appealing parking area for visitors and employees.
For more insights on maintaining your asphalt parking lot and preventing future damages, continue exploring our comprehensive guide.
How to Repair Cracks in Asphalt Parking Lots in 7 Steps
Here’s a 7-step guide to repairing cracks in your asphalt parking lot!
1. Clean the crack thoroughly
Initiating a successful asphalt parking lot repair begins with meticulous cleaning. Prioritize a thorough removal of debris, dirt, and loose particles using a wire brush or compressed air. This ensures an optimal surface for the subsequent crack filler to adhere effectively, setting the stage for a durable and resilient repair that can withstand the daily stresses of vehicular traffic and environmental elements.
2. Use a high-quality crack filler
Choosing the right crack filler is paramount for a lasting solution. Opt for a high-quality product specifically formulated for asphalt surfaces. Premium-grade fillers offer superior adhesion and durability, forming a protective barrier that not only addresses the existing crack but also helps prevent further deterioration. This strategic choice contributes significantly to the overall longevity and structural integrity of your parking lot.
3. Apply the filler
Achieving a precise asphalt parking lot repair is crucial for optimal results. Employ a caulking gun for a uniform application of crack filler along the entire crack length. This meticulous approach guarantees a consistent and well-sealed repair, reducing the possibility of water infiltration and potential structural damage. The controlled application process with a caulking gun enhances the overall effectiveness of the repair.
4. Smooth the surface
Post-filling, use a trowel to level and smooth the repaired surface. Beyond its aesthetic benefits, a smooth finish promotes seamless integration with the surrounding asphalt, contributing to the overall durability and performance of the repaired area. This meticulous approach not only enhances visual appeal but also plays a crucial role in the long-term effectiveness of the repair.
5. Allow proper drying time
Exercising patience during the repair process is imperative for optimal results. Allow the applied filler sufficient time to dry and cure according to the manufacturer’s recommendations. Considering environmental factors such as temperature and humidity, adhering to the prescribed drying time ensures a robust and resilient repair. Patience in this phase is a key investment in the long-term stability of your parking lot.
6. Seal the repaired cracks for durability
To fortify the repair and safeguard against future damage, consider applying a sealant over the mended cracks. This additional layer of protection prevents water intrusion and environmental wear, ensuring the longevity of the repair. Sealing the repaired areas is a proactive measure that enhances the overall durability and resistance of your asphalt surface, contributing to its sustained performance over time.
7. Regularly inspect and maintain asphalt surface
Incorporating a routine inspection schedule is essential for proactive asphalt parking lot maintenance. Utilize a caulking gun for precision in crack filling, conducting regular inspections to promptly identify and address any cracks that may arise. Beyond the repair phase, consistent maintenance practices like crack filling and sealcoating play a crucial role in enhancing the overall longevity and performance of your parking lot. This proactive approach effectively mitigates potential issues, ensuring a safe and well-maintained surface for both vehicles and pedestrians.
Types of Cracks in Asphalt Parking Lot
Cracks in an asphalt parking lot not only mar its appearance but also pose a threat to its structural integrity. Understanding the various types of cracks that can afflict your pavement is crucial for effective maintenance and repair.
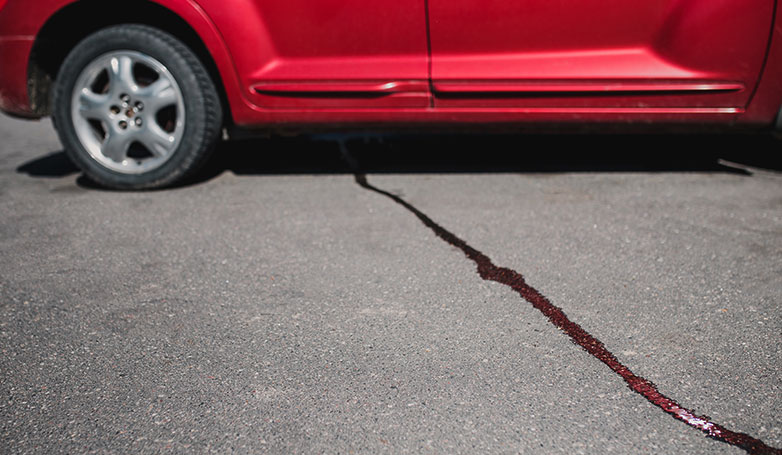
Longitude cracks
These linear cracks, often running parallel to the pavement’s direction, are a common sight on neglected asphalt surfaces. Caused by natural aging, traffic loads, or temperature fluctuations, these cracks can compromise the structural integrity of your parking lot. Addressing them promptly through crack sealing helps prevent water infiltration and further damage.
Block cracks
When the asphalt surface breaks into rectangular pieces resembling a shattered window, block cracks emerge. Usually caused by the pavement’s inability to accommodate thermal expansion and contraction, this type of cracking demands attention. Proper repair methods involve filling and sealing the gaps to prevent water penetration and inhibit the progression of damage.
Alligator cracks
Resembling the scales of an alligator’s skin, these interconnected cracks signal severe distress in the pavement. Often resulting from a weakened foundation, heavy traffic, or insufficient pavement thickness, alligator cracks demand immediate action. Ignoring these can lead to extensive damage, including potholes. Resurfacing or complete removal and replacement may be necessary to rectify this advanced form of cracking.
What causes these cracks
Cracks in asphalt parking lot pavement, regardless of geographic location, allow water to seep through the surface to the underlying base. Parking lots exposed to typical winter weather will experience water inside the asphalt that freezes and then thaws several times, causing expansion and contraction of cracks. In turn, the cracks widen and ultimately break up the surrounding asphalt. And, before you know it, the potential for slip-and-fall or other injuries exists.
Water runoff can damage the subgrade, resulting in raveling, rutting, or widespread areas of cracking.
Repairing Cracks and Its Cost
Cracks in your asphalt parking lot can be more than just an eyesore; they can lead to significant damage if not addressed promptly. Fortunately, there are cost-effective methods to repair and protect your investment.
Crack Sealing
Cost Range per Unit
Key Factors Influencing Cost
$0.50 – $3.00 per linear foot
Severity of cracks, accessibility, type of sealant
Crack sealing typically ranges from $0.50 to $3.00 per linear foot, depending on factors such as the severity of the cracks, accessibility, and the type of sealant used. Investing in crack sealing is a budget-friendly preventive measure that not only addresses current issues but also saves you from potentially expensive repairs down the road.
Sealcoating
Cost Range per Unit
Key Factors Influencing Cost
$0.15 – $0.30 per square foot
Lot size, condition, type of sealant applied
Sealcoating costs vary based on factors like lot size, condition, and the type of sealant applied. On average, you can expect to pay between $0.15 to $0.30 per square foot for sealcoating. While the initial cost is modest, the long-term savings by preventing cracks and enhancing the lifespan of your asphalt make sealcoating a cost-effective solution for parking lot maintenance. It not only enhances the aesthetics but acts as a protective shield, reducing the need for extensive repairs and ensuring a resilient surface over time.
Types of Potholes in Asphalt Parking Lot
Here are some common types of potholes encountered in asphalt parking lots: Chuckhole Potholes, Edge Potholes, and Slippage Potholes. Let’s take a look!
Chuckhole Potholes
Chuckhole potholes, characterized by their irregular shape and depth, often result from localized pavement distress. These nuisances pose a hazard to vehicles and pedestrians alike. Repairing chuckhole potholes involves meticulous cleaning, filling, and compacting to restore a smooth and safe surface.
Edge Potholes
Found along the perimeter of the parking lot, edge potholes typically develop due to water runoff and insufficient edge support. Repairing edge potholes entails addressing drainage issues and reinforcing the pavement’s edge to prevent further deterioration.
Slippage Potholes
Slippage potholes occur when the upper layer of asphalt loses its bond with the underlying surface, leading to dislodged sections. Repairing slippage potholes involves removing the compromised asphalt, applying a tack coat, and reapplying a new layer to ensure a secure and lasting repair.
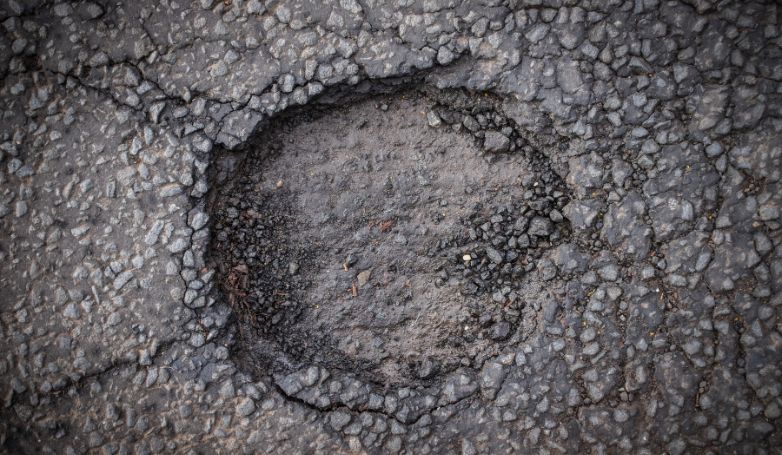
What causes potholes in asphalt parking lots
Potholes are bowl-shaped cvities that result from the localized break-up of the pavement.Moisture intrusion is the leading cause of pavement deterioration. Rainwater seeps into small cracks in the asphalt and puddles between the asphalt layer and the road. Low temperatures freeze the water, forcing the asphalt upwards.
Once the ice thaws, the water is absorbed into the weakened roadbed and leaves behind a cavity. Vehicle traffic breaks the surface apart and pushes it down into the weakened roadbed. Larger cracks and potholes form when the crumbling asphalt fills the cavity.
Repairing Potholes and Its Cost
Repairing potholes in your asphalt parking lot is not just about addressing immediate issues but also a strategic investment in the long-term stability of your surface. Understanding the methods and associated costs is crucial for effective maintenance.
Pothole Patching
Cost Range per Unit
Key Factors Influencing Cost
$50 – $300 per pothole
Size, depth, and extent of pothole damage
Pothole patching costs can vary based on the size and depth of the potholes, ranging from $50 to $300 per pothole. This method involves filling the pothole with suitable asphalt material, ensuring a durable and level repair.
Infrared Asphalt Repair
Cost Range per Unit
Key Factors Influencing Cost
$100 – $150 per square foot
Size of the repair area and extent of asphalt damage
Infrared asphalt repair, where existing asphalt is heated and recycled, can cost between $100 and $150 per square foot. While relatively pricier, this method offers a seamless and long-lasting solution, blending the repair seamlessly with the surrounding pavement.
Other common asphalt issues that require asphalt parking lot repair
Let’s take a look at common asphalt issues that require asphalt parking lot repair.
Deteriorated Joints
Poorly constructed asphalt parking lot joints result in joint failure. Joint failure begins when air, water, and contaminants enter the joint through segregation, not enough compaction, or a lack of bonding between adjacent strips.
Many types of pavements suffer structural failure due to deterioration from heavy load traffic. Failure shows up initially as “alligator cracking,” a form of fatigue cracking. Cracking occurs under repeated traffic from heavy loads due to subgrade weakness, insufficient pavement thickness, excessive loading, or a combination of these factors.
When a base failure occurs, remove the failed pavement, shore up the material underneath and replace the asphalt. You need to know what caused the asphalt failure and address it. If the problem is a weakness in the subgrade, you must repair the weakness. If the problem was too little pavement thickness, thin pavement should be undercut, and a thicker layer of asphalt added.
Raveling
Raveling is the loss of aggregate particulates from the pavement surface of the asphalt parking lot. In fact, raveling occurs when the asphalt binder hardens and loses its grip on the stone or when you use a poor-quality mix.
If caught early, you can address raveling by seal coating. If the condition is severe, an asphalt overlay or surface treatment is needed.
Rutting in an asphalt parking lot is a channeled depression from wheel-tracks. It is caused by:
too thin pavement;
lack of compaction of the asphalt, soil, stone base;
a weak mix of asphalt; or
moisture infiltration.
If rutting is minor or has stabilized, the depressions can be filled and overlaid with either hot or cold asphalt mix. If deformations are severe, the rutted area should be undercut, removed, and then replaced with suitable asphalt material.
Slippage
Slippage cracks are small crescent-shaped cracks or tears in the surface layers of the asphalt parking lot where the new material has slipped over the underlying existing pavement. A lack of bonding between layers causes this problem.
The lack of bond could occur because the installer did not develop a bond between the asphalt layers with a tack coat. The lack of bond could also be because they did not bond the asphalt with a prime coat of the underlying stone. Contaminants like oil and dirt will prevent the asphalt layers from bonding or adhering together.
Remove all of the pavement layers showing slippage. After removing the failed pavement layer, wait until the remaining pavement is clean and dry. Then, apply a tack coat to hold the old and new material together. Place and compact the new layers of asphalt.
How to avoid common parking lot issues
Here are some tips to avoid the most common problems of parking lots.
Routine inspections
Routine asphalt parking lot inspections are the best way to be proactive and prioritize repairs, thus saving money over time. But, the time of year matters, too. Isolated cracks that are ¼” to ¾” wide are good candidates for crack sealing. As soon as the weather permits, it would help if you sealed the asphalt cracks. However, if you notice rutting, alligator cracking, or potholes, call your preferred paving contractor.
A typical maintenance plan for an asphalt parking lot will include routine crack sealing, a seal coat, and lot marking. A maintenance plan can save $0.10-$0.30/SF per year over ten years.
Proper Drainage
Water is the #1 enemy of asphalt parking lots. Supplement your drainage system by installing new catch basins in low-lying areas. Routinely inspect existing catch basins to keep drains clear of debris and to perform any adjustments or other maintenance. Having proper drainage installed is one of the best ways to avoid needing asphalt parking lot repair.
Proper maintenance
Routine maintenance slows the deterioration of your asphalt parking lot pavement by protecting it from its natural Enemies, sun, water, and air. Parking lots that are maintained last for a more extended period when compared to those without any maintenance plan.
Be sure to follow these maintenance best practices to ensure your parking lot is properly cared for. If you want to avoid the need for potentially costly asphalt parking lot repair, do not overlook the importance of proper maintenance.
Perform monthly inspections, so you don’t miss anything that requires attention. You should also schedule an annual check-up of your asphalt parking lot once every year.
Keep it Clean. Sweep away the dirt and debris or hire a parking lot cleaning company to keep it clean for you. Trash makes a parking lot look abandoned, and that’s the last thing you want your customers to think as they drive past.
Clean Oil Stains. Oil will break down the components in asphalt, making it wear out more quickly.
Keep current with repairs, such as crack filling and seal coating. It is essential to extending your asphalt parking lot’s lifespan.
Annually before each rainy season, fill the cracks in your parking lot to reduce damage from all water sources.
Make sure all storm drains are working correctly. Water should drain away from the pavement. Water left on the surface can seep through the asphalt openings and cause damage.
Repair any tripping hazards in your asphalt parking lot to prevent accidental falls. Tree roots can lift asphalt and make it very uneven, resulting in a trip and fall hazard for your customers.
Every two or three years, your parking lot should be seal coated. Sealing revitalizes old asphalt parking lot surfaces that have become dry and brittle with age. Small surface cracks and voids need to be sealed to prevent more extensive damage and expensive pavement replacement.
Conclusion
Protecting your asphalt parking lot investment should include planning a regularly scheduled pavement maintenance and repair program with a qualified paving professional in your area.
Most professional paving contractors offer inspection and maintenance plans that will fit your budget and keep your asphalt parking lot clean and in good repair. Local paving contractors will be familiar with the weather patterns in your area and schedule parking lot maintenance when you need it most. They will help you prevent damage to our parking lot by providing regular preventative maintenance.
Asphalt parking lot repair and maintenance is an ongoing commercial service. Trust us to help you locate a paving contractor near you to handle your asphalt parking lot maintenance and repair needs.
Chris is a paver with more than 15 years' expertise in the field. He has established a reputation as an expert and trustworthy specialist with a track record of providing his clients with top-notch paving solutions.
https://pavingfinder.com/wp-content/uploads/2021/02/Asphalt-Parking-Lot-Repair-Featured.jpg455782admin123https://pavingfinder.com/wp-content/uploads/2020/10/logo.jpgadmin1232024-02-07 11:31:142024-02-23 11:17:29Asphalt Parking Lot Repair – Your Guide to Fixing Cracks
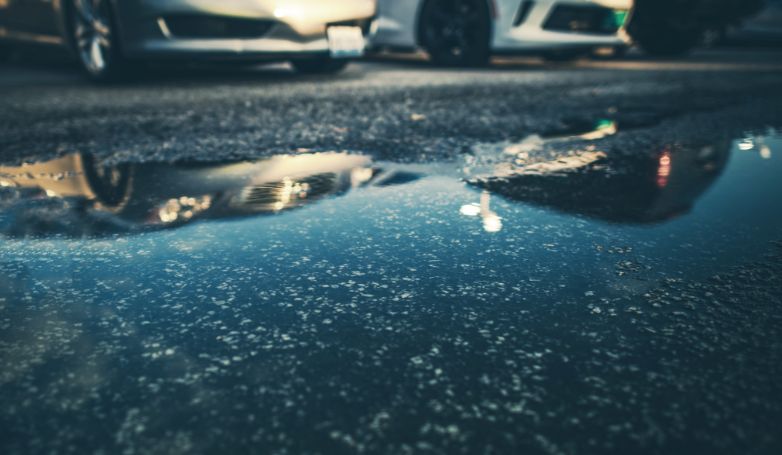
A well-maintained concrete parking lot is crucial for safety and aesthetics. Regular repairs prevent potential hazards and enhance your business’s first impression.
Concrete parking lot repair involves fixing cracks, potholes, and wear to maintain a smooth, safe surface. Timely repairs prevent minor damages from escalating into major issues, saving costs in the long run. It’s not just about aesthetics; it’s a safety matter. Addressing issues promptly ensures a welcoming and secure environment for visitors and protects vehicles from damage.
Discover the importance of timely repairs, best practices, and maintenance tips to keep your concrete parking lot in top condition.
How to Repair a Concrete Parking Lot in 12 Steps
To help you navigate this process, here’s a comprehensive 12-step guide for concrete parking lot repair. These steps cover everything from initial assessment to the final markings, ensuring a thorough and professional approach to maintaining your parking area.
1. Assessment
Begin by thoroughly assessing the condition of the parking lot. Look for visible signs of damage such as cracks, potholes, and areas of wear and tear. This step is crucial in determining the extent of the repair work needed. Note the severity and location of damages, as this will guide your repair strategy and material requirements, ensuring a comprehensive and effective repair process.
2. Safety Precautions
Before starting repairs, implement necessary safety precautions. Set up barriers and signs to redirect traffic and pedestrians, ensuring no one inadvertently enters the repair area. Safety is paramount, not only for the workers but also for the general public. Wear appropriate personal protective equipment such as gloves, safety glasses, and hard hats to prevent accidents and injuries during the repair process.
3. Cleaning
To initiate a successful concrete parking lot repair, it’s crucial to start with a clean surface. Thoroughly remove debris, dirt, and loose particles using a broom, pressure washer, or blower. This meticulous cleaning ensures the repair materials adhere properly to the existing concrete. It also aids in uncovering smaller cracks and damages concealed under dirt or debris, leading to a more comprehensive and enduring repair of the concrete parking lot.
4. Crack Repair
Address all cracks in the concrete. For smaller cracks, use a crack filler or sealant. For larger cracks, a more robust concrete patching compound may be needed. Apply the repair material carefully, filling the cracks completely, and smooth it out for an even surface. Proper crack repair prevents water infiltration and further deterioration, extending the lifespan of the parking lot.
5. Pothole Repair
Repair potholes by first removing any loose material. Then, fill them with a high-quality concrete patching compound. Tamp down the patch to ensure it is compact and level with the surrounding surface. Pothole repair is crucial as they pose significant tripping hazards and can cause damage to vehicles, potentially leading to liability issues for the property owner.
6. Surface Preparation
Prepare the surface by etching or grinding, especially where new concrete will adhere to old. This roughens the surface, improving the bond between the old and new concrete. Ensure the surface is dry and free of any substances that could hinder adhesion. Proper surface preparation is key to the longevity and effectiveness of the repair.
7. Bonding Agent
Apply a concrete bonding agent to the area to be repaired. This agent enhances the adhesion between the existing concrete and the new repair material. Ensure an even application and allow it to become tacky before proceeding. The bonding agent is crucial for a seamless repair and prevents future delamination of the repair area.
8. Concrete Mix
For effective concrete parking lot repair, it’s essential to prepare the concrete mix as per the manufacturer’s guidelines, targeting the ideal consistency. The mix should be pliable but not overly fluid. Opt for a high-quality mix that aligns with the strength and endurance of the existing parking lot surface. Accurate mixing is key to ensuring that the repaired area can endure the same conditions as the rest of the parking lot, maintaining uniformity in durability and appearance.
9. Pouring and Finishing
Pour the concrete mix into the prepared areas. Use tools like trowels and floats to spread the material evenly, ensuring a smooth, level surface. This step requires precision and care to match the level and texture of the surrounding area. A well-finished surface ensures a uniform look and prevents future issues like water pooling.
10. Curing
Allow the concrete to cure properly, a process that can take several days. Keep the area moist or covered to ensure even curing and prevent cracking. Curing is critical for the material to reach its maximum strength and durability, making it crucial for the longevity of the repair.
11. Sealing
After curing, apply a concrete sealer. This protects the surface from water penetration, stains, and wear. Sealing extends the lifespan of the material and maintains its appearance. It also reduces maintenance costs by protecting the surface from elements that cause deterioration.
12. Striping and Marking
Concluding the concrete parking lot repair, it’s important to reapply any essential striping and marking. This step encompasses redoing parking spaces, handicap zones, and directional arrows. Employ high-quality, weather-resistant paint to ensure the markings are clear and enduring. Properly executed striping and marking are crucial for maintaining efficient traffic flow and compliance with legal standards for parking lots.
Why choose a concrete Parking Lot?
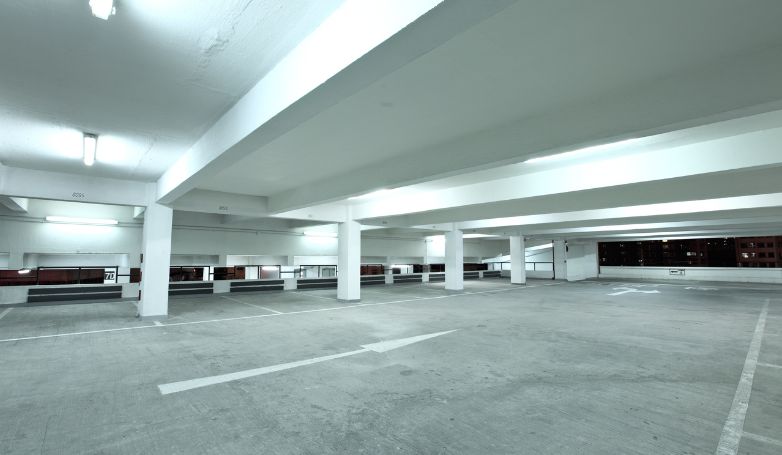
Concrete parking lots provide a clean, durable parking surface inviting to prospective tenants and their customers. A concrete parking lot offers many desirable qualities for large areas.
Concrete stands out as a robust material, ideal for areas with high traffic and heavy truck use, due to its resilience under substantial loads. It’s particularly effective in colder climates, resistant to issues like rutting and frost heaves. Additionally, its durability against the constant impact of heavy vehicles is a significant advantage.
This material is low-maintenance compared to other types of pavement, making repairs more cost-effective. Furthermore, concrete is immune to rusting, rotting, or burning, which translates to energy and resource savings in terms of building and infrastructure maintenance.
A Department of Transportation study highlights concrete’s minimal environmental impact over its lifespan, credited to lower energy requirements. Moreover, the Construction Materials Recycling Association notes that approximately 140 million tons of concrete are recycled annually in the U.S., significantly reducing the environmental footprint of construction projects.
Concrete also offers enhanced reflectivity, contributing to brighter and more energy-efficient spaces.
The most common concrete parking lot issues
Unlike asphalt, this material is not pliable, making it much less forgiving when it comes to heaving from freeze and thaw cycles. The elements cause deterioration. Oxidization from the sun, rain, and snow, freeze and thaw cycles and the amount of traffic the parking lot receives cause issues that make concrete parking lot repair necessary.
Cracking
Concrete, while robust, is susceptible to cracking under extreme pressure, with major repairs potentially costly. In colder climates, the freeze-thaw cycle can cause the material to expand and contract, leading to cracks. Early detection and immediate patching are vital to prevent the spread and worsening of these cracks, ensuring the longevity and safety of the parking lot.
Salt Damage
This material can suffer significant damage from road salt. Over time, salt induces corrosion beneath the surface, leading to crumbling or more extensive cracking. This issue is particularly prevalent in areas with heavy winter salt use, making regular inspections and maintenance essential to mitigate the harmful effects of salt on concrete surfaces.
Flaking
In areas subject to freeze-thaw cycles, concrete parking lot repair becomes necessary when flaking occurs. This flaking can also result from too much water in the concrete mix at the time of installation. Not only does flaking diminish the aesthetic of the parking lot, but it may also indicate more serious structural issues. Addressing this promptly is crucial to halt further deterioration and maintain the integrity of the concrete parking lot.
Potholes
Potholes occur when contraction and expansion of the soil under the pavement take place. These happen when there has been significant rain or snow. Water will seep down through cracks and can settle underneath pavement surfaces. In winter, water freezes and expands. As temperatures warm, the ice may melt to create a void. Potholes will form as the paving material and soil over the opening breaks down.
Tips on how to maintain a concrete parking lot
The goal of any concrete parking lot repair should be to maximize the life expectancy as much as possible before removing and replacing it completely. Regular upkeep, including timely repairs, is vital for the long-term health of any paved area. Studies consistently show that such ongoing attention can substantially increase the lifespan of these surfaces.
Here are things you should plan on regularly doing:
Remove oil stains
Oil, grease, and other petroleum substances can damage the surface of the parking lot. While grime will not cause severe structural damage, these stains can worsen over time and become permanent. Cleaning your parking lot will ensure your concrete’s appearance. Clean concrete lasts longer and creates a better impression on your potential customers.
Clean oil spots with a commercial de-greaser, a rigid bristle broom or brush, and some hot water. You’ll need to brush and rinse a few times to get all of the oil off, but in the end, it’s well worth the effort. Just be sure to rinse off all of the de-greaser when you’re finished.
Standard dry methods include sandblasting, flame cleaning and shot blasting, grinding, scabbing, planing, and scouring. Use Steel-wire brushes with care because they can leave metal particles on the surface that later will rust and stain concrete surfaces.
Wet stain removal methods require the application of specific chemicals tailored to the nature of the stain. The chemical treatment will either dissolve the staining substance to be blotted up from the concrete’s surface or bleach the staining substance so it will not show.
Seal the cracks in the concrete
When cracks do develop, you should seal them with a concrete crack sealer. Sealing the cracks will help to prevent further damage and failures like potholes by avoiding or minimizing the amount of water entering them. The best maintenance plan should include concrete parking lot repair by crack sealing services each year.
Ensure Proper Drainage
Good drainage is essential for preventing water accumulation that can weaken the parking lot surface. Ensure your lot has adequate slopes and drains to avoid puddles. Regularly check and clean these drains to prevent blockages, which can cause water to pool and seep into the concrete, leading to potential damage.
Sweep and power wash regularly
Consistent sweeping removes harmful debris and dirt, while yearly power washing keeps the surface clean and minimizes wear. This regular maintenance can significantly prevent the deterioration of the concrete, keeping it in prime condition. Think of it as a regular health check-up for your parking lot, ensuring it stays functional and visually appealing for years.
Trim Vegetation Along the Edges
Regularly trimming vegetation around your parking lot’s edges not only enhances its appearance but also prevents root growth from damaging the concrete. Overgrown roots can cause cracks and uplifts, so keeping bushes and trees neatly trimmed is as much about aesthetics as it is about maintaining the structural integrity of your parking area.
Re-surface the concrete parking lot
To maintain your concrete parking lot in top condition, consider resurfacing it every 2 to 3 years. This process effectively slows down deterioration and is more economical compared to extensive repairs or complete replacement. It’s important to select a high-quality commercial-grade sealer and collaborate with a reputable pavement contractor to achieve the best results for your concrete parking lot repair and maintenance.
The cost of concrete parking or repairs and maintenance
Concrete parking lot repair and maintenance costs vary depending on many factors. The prices of services are not the same nationwide. You can expect to pay more in a city location than you will in a rural or suburban area.
Concrete parking lot repair costs
There is no one best way to estimate the cost of many concrete parking lot repairs. A pavement maintenance contractor will conduct an on-site inspection to assess the damage and determine the best course of action. A contractor will take several factors into consideration that may impact the cost of your project, including:
Current condition of the parking area
Type and Severity of the damage
Local labor and material rates
Square footage of the lot
Repair method used
Materials that will be required
For commercial seal coating, the average cost nationwide is about $0.19 per square foot.
Most concrete paving contractors will base their quotes on the square footage of the parking area. A larger parking lot will require more labor and materials to prepare the surface and seal coat the parking lot.
Resurfacing your concrete lot costs between $3 to $10 per square foot on average. It is cheaper than new installation and can extend the concrete’s life beyond its initial 30 to 40 years.
Concrete parking lot maintenance costs
A commercial sweeping company‘s rates ranges between $70 per application for a 25 car lot ,and $150 per application for a 300 car lot. The nature of your business and your parking lot’s size will affect the frequency and length of time of each visit.
Similar to concrete parking lot repair contractors, sweeping and maintenance contractors typically base their quotes on:
Type of Business. Sweeping companies provide parking lot sweeping services to schools, restaurants, hospitals, apartment buildings, grocery stores, service business, trade business, and shopping. Parking lots are not one size and design. The quantity and quality of trash and debris varies greatly. Parking lots with more trash or heavier trash take longer to clean.
Parking lot size. How many spaces does the lot have? Are there 25 or over 1,000? It should be no surprise that larger parking lots are going to be more expensive to clean.
Frequency. How often will you need them to clean the parking lot? How long will it take to clean the lot? Most local companies will work with you to determine the best schedule for your needs. While some businesses may require nightly service, others may be able to go weeks between cleaning visits. More frequent visits will add to the cost, however, it typically takes less time to clean a lot more frequently.
The parking lot’s condition. It is usually cheaper to clean a parking lot that has been well maintained in the past. If the parking lot’s surface is full of crack and potholes, this may increase the time required to clean the area, which means more money out of your pocket.
FAQs about Concrete Parking Lot Repair
Here are some frequently asked questions (FAQs) about concrete parking lot repair, providing insights and solutions to common challenges:
How do you repair concrete paving?
Repairing concrete paving typically involves several steps: identifying the extent of the damage, cleaning the area, fixing cracks and potholes, and applying a sealant. The process starts with a thorough assessment to determine the type and severity of the damage. Cracks are filled with a suitable concrete filler or sealant. For larger issues like potholes, a concrete patching compound is used. Once repairs are made, sealing the surface protects it from future damage and extends its lifespan.
How do you repair outdoor concrete?
Repairing outdoor concrete involves cleaning the damaged area, removing any loose or crumbling concrete, and then applying a concrete repair mix. For cracks, a concrete crack filler is used. If the surface is uneven or has extensive damage, resurfacing may be necessary. It’s important to choose a repair material that matches the existing concrete in terms of texture and color for a seamless repair. Finally, sealing the repaired area helps to protect it from weather elements.
How can deteriorated concrete be repaired?
Deteriorated concrete can be repaired by first removing any loose or damaged concrete. The area should then be cleaned thoroughly to remove dirt and debris. For small areas, a concrete patching compound can be used to fill in the gaps. For more extensive deterioration, a complete resurfacing might be needed. After the repair material has been applied and has cured, sealing the surface is recommended to protect against future deterioration.
Can crumbling concrete be repaired?
Yes, crumbling concrete can be repaired. The process involves removing the crumbled pieces and cleaning the area thoroughly. Afterward, apply a concrete bonding agent before filling the area with a high-quality concrete repair mix. For larger areas of crumbling, it may be necessary to use a form to hold the repair material in place as it sets. Once the repair has cured, applying a sealant will help to protect the area from further damage.
Conclusion
Prevention is the key to saving you time and money. By addressing concrete parking lot repairs as soon as issues occur, you’ll be able to extend the life of your parking lot for years to come. Following a regular parking lot maintenance schedule, you will improve your concrete parking lot’s appearance and keep it safe for pedestrian and vehicular traffic. Concrete parking lot repair and maintenance is an ongoing process that should be handled by a professional contractor.
Chris is a paver with more than 15 years' expertise in the field. He has established a reputation as an expert and trustworthy specialist with a track record of providing his clients with top-notch paving solutions.
https://pavingfinder.com/wp-content/uploads/2021/02/Concrete-Parking-Lot-Repair-Featured.jpg455782admin123https://pavingfinder.com/wp-content/uploads/2020/10/logo.jpgadmin1232024-01-25 09:41:172024-02-16 11:06:42Concrete Parking Lot Repair – 12 Steps to Ensure Safety
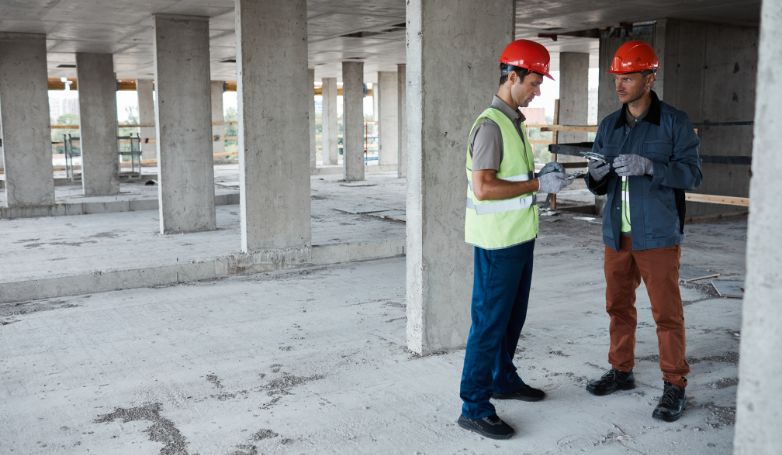
Choosing the right parking lot surface is crucial for any business. From asphalt to pavers, each option offers unique benefits. Let’s explore these to find your perfect fit.
The top five parking lot surface options include asphalt, known for its durability and cost-effectiveness; concrete, offering longevity and strength; gravel, a budget-friendly choice; tar-and-chip, providing a rustic look; and pavers, for a customizable, aesthetic appeal. Each material has its pros and cons, tailored to different needs and budgets.
Dive deeper into each option’s advantages and limitations. Understanding these details helps you make an informed decision that aligns with your business’s specific requirements.
#1: Asphalt Parking Lots
Asphalt, a composite material predominantly made from aggregates like stone and sand, mixed with a binder (usually bitumen), is a go-to choice for many when it comes to paving parking lots. This combination creates a durable and flexible surface that can withstand various weather conditions and heavy traffic.
The Aesthetic and Functional Appeal
Asphalt parking lots offer a sleek, uniform look that contributes to the overall aesthetic appeal of a business environment. The dark color of asphalt provides a strong visual contrast, making parking lines and signage stand out, which is essential for safety and ease of navigation. Its smooth surface also enhances driving comfort and reduces the noise associated with vehicular traffic.
Adaptability to Weather Conditions
One of the key characteristics of asphalt is its adaptability to different weather conditions. In colder climates, asphalt’s black color absorbs heat from the sun, aiding in the melting of snow and ice, which can be a significant advantage. Additionally, its flexible nature allows it to expand and contract with temperature changes, reducing the likelihood of cracking.
Environmentally Friendly Options
Asphalt is also recognized for its environmental benefits. It is 100% recyclable, and modern techniques allow for old asphalt to be removed and reused, reducing the need for new materials and minimizing waste. Furthermore, innovations in asphalt production have led to the development of porous or permeable asphalt, which helps in managing stormwater runoff, a significant environmental consideration.
Maintenance and Upkeep
While asphalt is known for its durability, like any surface designated for vehicles, it demands consistent maintenance. Routine care, including seal coating, crack filling, and pothole repair, becomes essential to prolong the lifespan of an asphalt parking area. When properly maintained, this surface can endure for numerous years, ensuring a dependable and functional space for businesses.
Asphalt Parking Lot Pros And Cons
When considering a parking lot for your business, it’s crucial to weigh the pros and cons of different surface materials. Asphalt, a popular choice, offers a unique set of advantages and drawbacks. Here’s a detailed comparison to help you understand whether asphalt is the right fit for your parking needs:
Pros
Cons
Durability: Asphalt surfaces last 25-30 years with proper maintenance.
Regular Maintenance: Requires cleaning at least twice a year and seal-coating every 2-5 years.
Immediate Usability: Asphalt parking lots can be used almost immediately after installation.
Limited Aesthetics: Asphalt might not align with specific aesthetic preferences.
Cost-Effective: Costs range from $2.50 to $4.50 per square foot.
#2: Concrete Parking Lots
Concrete, a highly durable and robust material, is composed of cement, water, and aggregates like gravel and sand. It’s a preferred choice for many commercial and industrial parking lots due to its strength and longevity. Concrete surfaces can withstand heavy loads and high traffic without significant wear and tear, making them an ideal choice for areas with high vehicular usage.
Cost Considerations
Concrete parking lots are generally more expensive than other surface options like asphalt. This higher cost is due to the material’s strength and durability, as well as the labor-intensive installation process. While the initial investment is higher, the long-term benefits often justify the expense, as concrete lots require fewer repairs and have a longer lifespan.
Installation Process
The installation of a concrete parking lot is more time-consuming compared to asphalt. It requires careful preparation of the base, precise mixing of the concrete, and adequate time for curing. This extended installation period can lead to longer downtimes for businesses, but the result is a highly durable and stable surface.
Longevity and Maintenance
One of the significant advantages of concrete is its extreme durability. A well-installed and properly maintained concrete parking lot can last for several decades, often outlasting asphalt surfaces. Maintenance requirements are minimal, typically involving basic cleaning and occasional sealing to prevent stains and enhance durability.
Customization and Aesthetic Appeal
Concrete offers diverse customization options, which is a significant advantage for businesses looking to achieve a specific aesthetic. It can be colored, stamped, or textured to create various designs, from a simple, elegant look to more intricate patterns that complement the architectural style of the surrounding buildings. This versatility allows business owners to tailor their parking lots to fit their branding and aesthetic goals, creating a visually appealing first impression for customers and visitors.
Concrete Parking Lot Pros And Cons
When deciding on a surface material for your parking lot, it’s important to consider both the advantages and disadvantages of each option. Concrete is a popular choice due to its durability and low maintenance requirements, but it also comes with certain drawbacks such as cost and installation time. Here’s a summary of the pros and cons to help you evaluate if a concrete parking lot is suitable for your needs:
Pros
Cons
Durability: Concrete surfaces are extremely durable and can last up to 30 years.
Cost: Concrete lots are more expensive, costing between $4.00 and $7.00 per square foot.
Little Maintenance: Requires minimal upkeep.
Delayed Usability: Concrete parking lots need about one week to set,.
More Finish Options: Offers a range of customizable finishes.
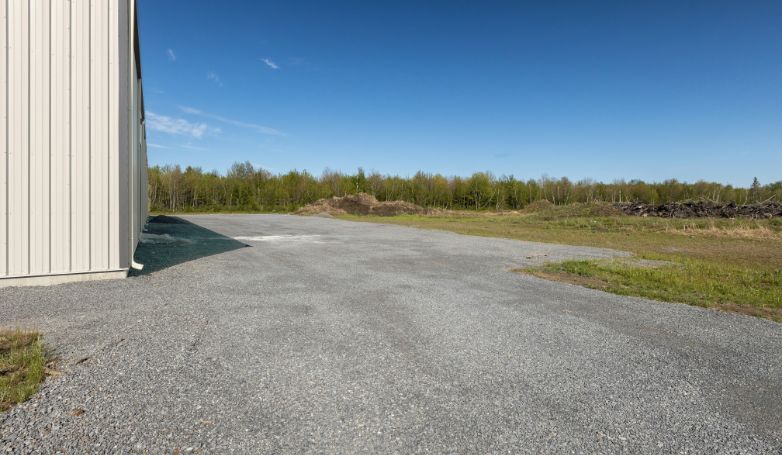
#3: Gravel Parking Lots
Gravel stands out as one of the most cost-effective options for parking lot surfaces. It is significantly less expensive than other materials like asphalt and concrete, making it an attractive choice for businesses with limited budgets or for temporary parking solutions. The lower cost also makes gravel an ideal option for larger areas where the expense of other materials might be prohibitive.
Immediate Usability
One of the appealing aspects of gravel parking lots is their immediate usability post-construction. Unlike asphalt or concrete that require curing or setting time, gravel lots can be used as soon as they are laid and compacted. This immediate functionality is particularly beneficial for businesses that cannot afford downtime.
Durability Concerns
While gravel is an economical choice, it is less durable compared to more solid surfaces like asphalt and concrete. Gravel can shift and disperse under regular use, especially in areas with high traffic or heavy vehicles. This can lead to uneven surfaces and the need for frequent leveling and replenishment.
Maintenance Requirements
Gravel lots are maintenance-heavy. They require regular attention to maintain a level surface and to manage issues like potholes, ruts, and erosion. Additionally, gravel can be displaced by vehicles or washed away by rain, necessitating periodic topping up. Regular maintenance is crucial to ensure a safe and navigable parking area.
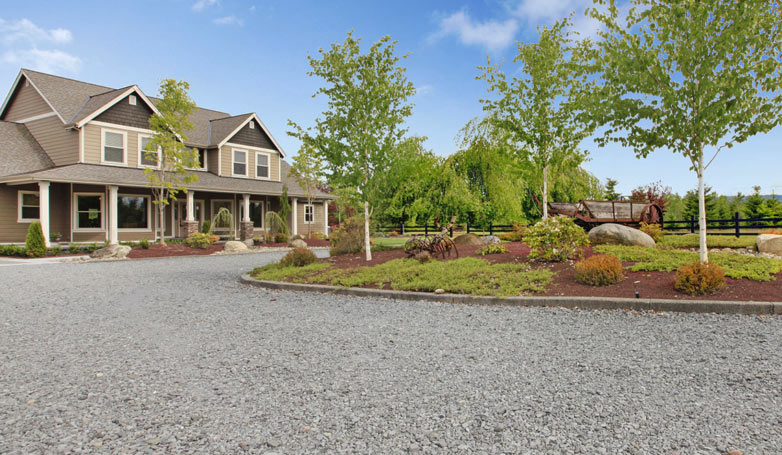
Aesthetic Considerations
In terms of aesthetics, gravel lots generally do not offer the same visual appeal as paved surfaces. They can appear less formal or polished, which might not align with the desired image of some businesses. However, for rural settings or businesses aiming for a more natural or rustic look, gravel can be an appropriate and harmonious choice.
Gravel Parking Lot Pros And Cons
When selecting a material for your parking lot, understanding the strengths and weaknesses of each option is crucial. Gravel, while being an affordable and immediately usable choice, also presents challenges in terms of durability, maintenance, and aesthetics. Here’s a concise overview of the pros and cons of gravel parking lots to guide you in making an informed decision:
Pros
Cons
Cost: Gravel is one of the least expensive options, costing $1.25 to $2.00 per square foot.
Durability: Gravel lots often lasting less than 7 years without extensive maintenance.
Immediately Usable: Gravel lots can be used right after installation.
Poor Aesthetics: Gravel lots often appear less formal and can create dust and dirt issues.
#4: Tar And Chip Parking Surfaces
Tar and chip, also known as chip-and-seal or seal chip, offers a cost-effective alternative to more traditional parking lot surfaces like asphalt or concrete. It’s particularly favored for its lower installation costs, making it a viable option for businesses looking to minimize initial expenditures on their parking areas. The affordability of tar and chip surfaces makes them an attractive choice for larger areas where cost is a significant factor.
Durability and Lifespan
While tar and chip surfaces are less expensive, they typically do not have the same longevity as asphalt or concrete. These surfaces are more prone to wear and tear over time, especially in high-traffic areas. However, with proper installation and moderate usage, a tar and chip parking lot can still provide a reliable surface for a considerable number of years.
Customization Options
A notable advantage of tar and chip surfaces is the ability to customize them in various colors. This customization is achieved by using different types of stones for the ‘chip’ part of the installation. This flexibility allows businesses to match the parking lot’s appearance with the building’s aesthetics or corporate branding, offering a unique and customized look.
Maintenance Requirements
Tar and chip surfaces require relatively low maintenance compared to asphalt or concrete. However, they do need specific care to maintain their appearance and functionality. While they do not typically require regular sealing like asphalt, they may need occasional attention to address any loose stones or wear patterns that develop over time.
Immediate Usability
Another significant advantage of tar and chip surfaces is their quick usability after installation. Similar to gravel, these surfaces can be used almost immediately after they are laid, reducing downtime for businesses. This feature is particularly beneficial for operations that cannot afford to close their parking areas for extended periods.
Tar And Chip Parking Lot Pros And Cons
When exploring some parking lot surface options, tar and chip provides a unique set of characteristics to consider. It’s a cost-effective solution with certain aesthetic and maintenance advantages, but it also comes with considerations regarding durability and initial wait time for use. Here’s a detailed breakdown of the pros and cons of tar and chip parking lots to aid you in your decision-making process:
Pros
Cons
Cost: Tar and chip is a budget-friendly option, costing only $1.00 to $3.00 per square foot.
Durability: lasting 7-10 years.
Easy Maintenance: Little maintenance needed.
Short Wait Time Required: A setting period of 24 hours is needed.
Aesthetics: Offers versatility with different stone colors,
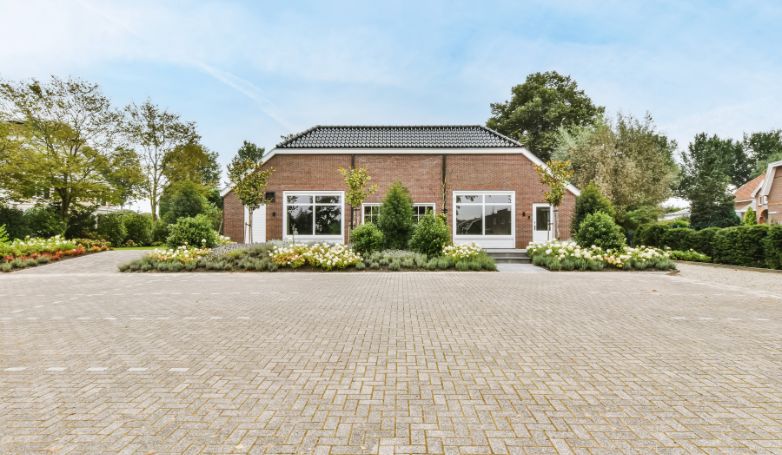
#5: Parking Lot Pavers
Parking lot pavers offer a high degree of customization, allowing business owners to select from a wide range of materials, colors, shapes, and patterns. This versatility enables you to tailor the parking lot to match your business’s aesthetic and functional needs precisely. Whether seeking a traditional, elegant look or a more modern, distinctive design, pavers provide the flexibility to achieve your desired outcome.
Durability of Different Materials
Pavers are generally known for their durability, with a lifespan that can rival that of concrete and asphalt when properly installed and maintained. However, the durability can vary significantly based on the type of material chosen. Options like brick, concrete, and natural stone each have different strengths and lifespans, with some being more suitable for high-traffic areas than others.
Cost Considerations
While offering numerous benefits, paver parking lots are typically more expensive than other surface options like asphalt or gravel. The higher cost is attributed to the materials used and the labor-intensive installation process, which often involves meticulous placement and alignment. This investment, however, can significantly enhance the property’s value and curb appeal.
Minimal Maintenance Requirements
One of the appealing aspects of paver parking lots is their low maintenance requirements. Unlike asphalt that needs periodic sealing or gravel that requires regular leveling, pavers need minimal upkeep. Routine maintenance mainly involves keeping the surface clean and occasionally replacing individual pavers if they become damaged or stained.
Immediate Usability Post-Installation
Pavers have the advantage of being immediately usable after installation. Unlike concrete, which requires time to cure, paver parking lots can be opened for use as soon as the installation process is completed, minimizing downtime for your business.
Need for Thorough Research
Choosing the right pavers requires careful consideration and research. Factors such as climate, the expected traffic load, maintenance capabilities, and aesthetic preferences play a crucial role in determining the most suitable type of paver for your parking lot. This research is vital to ensure that you invest in a parking solution that not only looks good but also meets your long-term functional requirements.
Paver Parking Lot Pros And Cons
When considering parking lot surface options, paver parking lots stand out for their customization options and durability. However, they come with specific considerations regarding cost and the need for thorough research before installation. Here’s a detailed breakdown of the pros and cons of paver parking lots to help you determine if they align with your business requirements and aesthetic preferences:
Pros
Cons
Different Types of Pavers to Choose From: Highly customizable with various types.
Cost: around $2.50 to $4.50 per square foot.
Durability: Very durable.
In-Depth Research is Necessary: Proper selection and installation require thorough research.
Maintenance: Require minimal maintenance.
Immediately Usable: Can be used right after construction.
FAQs about Parking Lot Surface Options
When selecting a parking lot surface, several common questions arise regarding the best material choices, their cost-effectiveness, and overall suitability for specific needs. Here are some frequently asked questions to provide clarity on parking lot surface options:
What is the best surface for car parking?
The best surface for car parking depends on various factors including budget, climate, traffic volume, and maintenance capabilities. Asphalt is widely regarded as a versatile and durable option, suitable for a range of climates and traffic conditions. It’s cost-effective and relatively easy to maintain, making it a popular choice for many commercial parking lots.
Which material is optimal for constructing a parking lot?
The best material for a parking lot can vary based on specific needs. For durability and longevity, concrete is a top contender, though it comes at a higher cost. For a balance of cost and durability, asphalt is often preferred, while for eco-friendly alternatives, permeable pavers are ideal due to their ability to facilitate water drainage and reduce runoff. The choice ultimately hinges on budget, maintenance considerations, and aesthetic preferences.
What is the cheapest material for parking lots?
Gravel is generally the cheapest material for parking lots. It’s cost-effective in terms of initial installation and is quick to lay down. However, it requires more maintenance compared to other surfaces and may not offer the same level of durability or professional appearance as asphalt or concrete. It’s a practical choice for areas with low traffic volume or where temporary parking solutions are needed.
Conclusion
Selecting the appropriate parking lot surface is a crucial decision that involves evaluating factors such as cost, durability, and aesthetics. Will you opt for the robust and long-lasting concrete, the budget-friendly yet simple gravel, or the popular and dependable asphalt? Each option has its unique strengths and considerations. We recommend a thorough comparison of these choices to determine the best fit for your specific requirements, ensuring your parking lot meets both your functional and aesthetic needs effectively.
Chris is a paver with more than 15 years' expertise in the field. He has established a reputation as an expert and trustworthy specialist with a track record of providing his clients with top-notch paving solutions.
https://pavingfinder.com/wp-content/uploads/2020/12/Parking-Lot-Surface-Options-Featured.jpg455782admin123https://pavingfinder.com/wp-content/uploads/2020/10/logo.jpgadmin1232024-01-22 10:21:382024-02-16 11:04:00Parking Lot Surface Options – Unveiling 5 Premier Solutions
In today’s world, as we embrace eco-friendly choices in every aspect of our lives, it’s crucial to consider the construction of eco-friendly parking lots.
Eco-friendly parking lots, using materials like eco-friendly pavers and pervious concrete, help in managing water runoff effectively. These materials allow rainwater to percolate into the ground, reducing flooding and pollution. Such parking lots also contribute to reducing the urban heat island effect, making them an environmentally responsible choice. With thoughtful designs, they offer a practical solution for parking needs while protecting our planet.
Join us as we explore some top eco-friendly parking lot solutions that balance functionality with environmental care.
How Do You Make an Eco-Friendly Parking Lot?
Here are 10 effective strategies to make your parking lot more environmentally conscious and contribute to a greener urban landscape:
1. Use Eco-Friendly Paint
Paint is one of the most common air pollutants. Many types of paint contain Volatile Organic Compounds, such as xylene, toluene hydrocarbons, ammonia, and glycol. These paints are far from eco-friendly and can wreak havoc on the health of humans, animals, and plants.
Consider bio-degradable paints for your parking lot, containing little to no VOCs.
2. Direct Water Runoff
Focus on where the rainwater will go when constructing your parking lot. Water will go its natural course if you don’t, eroding soil, damaging your asphalt, and bringing pollutants. Therefore, it’s a good idea to construct some type of drainage system that directs rainwater to an area that’s appropriate, such as a lake, swamp, or stream.
3. Use Eco-Friendly Pavers
The best solution for an eco-friendly parking lot is permeable locking pavers. These unique pavers allow for water infiltration, unlike your standard asphalt or concrete tarmacking. With these kinds of pavers, you don’t need to worry about flooding nearly as much, as rainwater slowly seeps into the ground to recharge local streams and groundwater supply.
4. Use Pervious Concrete
While not as green as the pavers mentioned above, pervious concrete provides an element of infiltration when well-maintained. Similar to a plastic pavement system, pervious concrete provides natural rainwater filtration and reduces the number of pollutants found in runoff.
5. Plant Grass
Not only do grass parking lots look great, but they are also wonderfully sustainable. Of course, you can’t just plant any only grass, as regular grass attract rut and mud. Instead, we recommend planting plastic pavers to stabilize the grass you plant, thereby improving drainage while keeping your infrastructure intact.
DO NOTE:Grass is best for parking lots with light traffic. Heavy traffic can kill the grass, leaving you with a bare, ugly, and dead parking lot.
6. Plant the Correct Plants
It’s a good idea to plant plants native to your parking lot’s region, as these plants should be well-adapted to the moisture of the soil and the local climate. For example, consider planting trees and shrubs for islands or planting long flower beds or strips atop raised curbing. Not only will this make your parking lot more eco-friendly, but it will also make it far more inviting.
7. Use Recycled Concrete or Asphalt
You can produce an eco-friendly parking lot with recycled concrete and asphalt. The beauty of this process is that it is far less resource-intensive compared to using new materials. In addition, it’s often easy to recycle these materials from old roadways on-site as well, getting rid of the need for environmentally impactful outsourcing.
8. Use a Bio-Based Sealant
Regular asphalt can take a mighty toll on the environment, which is why it’s a good idea to find ways to make your asphalt as eco-friendly as possible. We recommend finding PAH-free, low-VOC bio-based asphalt sealants. Not only do these work wonders in repairing and resealing surfaces, but they are also much better for the environment than standard products.
9. Maximize Shading
Not only do shade trees and landscaping make for a more aesthetically-pleasing parking lot, but they can also lessen ground heat, enhance air quality, and reduce rainwater runoff. With pervious ground materials and proper shading, you can mitigate the negative impacts of the “urban heat island.”
10. Use Sustainable Lighting
While you should absolutely have lighting in your parking lot to provide safety and security for pedestrians, it’s important that you choose the correct typeof lighting to retain energy-efficiency. We often recommend energy-efficient exterior LED lights, as they last a long time (up to 50,000 hours) and have far less impact on energy sources.
You can even implement an efficient lighting layout that maintains higher brightness levels in areas with more traffic while placing other lights in low-traffic areas on a motion system.
Factors to Consider When Creating a Sustainable Parking Lot
Creating a sustainable parking lot involves a careful consideration of various factors to ensure environmental responsibility, long-term cost-effectiveness, and overall functionality. From construction costs to location selection and drainage systems, every aspect plays a crucial role in achieving an eco-friendly and efficient parking facility. In this context, it is imperative to weigh the following key factors
Costs
Modern eco-friendly parking lot construction costs around $69 per square foot, while a simple asphalt paving job costs around $3.85 per square foot. Beyond that, you can expect a few other standard costs for building a sustainable parking lot:
Of course, the main benefit of building an eco-friendly parking lot is that you can reduce your maintenance and energy costs over time.
Location
It’s important to select the right location to build your parking lot, as it can significantly impact cost, safety, durability, and effectiveness. Make sure to consider a few things:
Accessibility – How easy it is to reach the site
Topography – The higher ground your parking lot sits on, the better your natural drainage will be
Quality of Earth – Don’t build on hilly topography or muddy areas
Soil – Find soil that is dry and compact enough to build on
Drainage and Water Management
Beyond basic runoff handling, effective drainage systems in eco-friendly parking lots play a vital role in local ecosystems. Permeable paving options like interlocking pavers or porous concrete allow rainwater to seep through, reducing runoff and recharging groundwater.
Bioswales, strategically placed along the lot’s perimeter, use natural vegetation to filter pollutants from the water. Rain gardens, with their deep-root roots, act as natural water filters and habitats for beneficial insects and birds. Advanced systems can even collect and reuse rainwater for landscaping, further conserving water resources.
Materials
When selecting materials, it’s crucial to consider their lifecycle impact. Recycled pavers can be made from post-consumer plastics or rubber, turning waste into valuable resources. Porous asphalt, a mixture of traditional asphalt and aggregate, creates a permeable surface that reduces runoff and improves water quality.
Pervious concrete, with its unique porous structure, allows water to pass through, making it an ideal choice for an eco-friendly parking lot as it prevents the heat island effect often seen in urban areas. These materials not only support environmental goals but can also offer aesthetic variety, enhancing the parking lot’s visual appeal.
Energy Efficiency
Solar-powered lights are a sustainable lighting solution, reducing electricity consumption and greenhouse gas emissions. The integration of electric vehicle (EV) charging stations caters to the growing number of EV drivers, encouraging eco-friendly transportation.
These stations can be powered by solar panels, further enhancing the parking lot’s green credentials. Smart lighting systems, using LEDs and motion sensors, can optimize energy use, illuminating the lot only when needed and thus conserving energy.
Size and Capacity
Balancing size and capacity involves careful planning to meet parking demand without overbuilding. This can include designing multi-level structures to reduce land footprint or using shared parking strategies with nearby facilities to optimize space usage.
The use of space-efficient parking layouts and driving lanes can maximize parking availability while minimizing land disturbance. This approach not only conserves natural habitats but also helps in maintaining the local ecological balance.
Durability and Maintenance
Choosing durable materials for an eco-friendly parking lot reduces the long-term environmental impact by minimizing the frequency of replacements. Long-lasting materials like high-quality concrete or toughened recycled plastics are ideal for eco-friendly parking lots as they require less maintenance, saving resources and reducing maintenance-related emissions.
Innovative coatings and treatments can extend the lifespan of paving materials. Additionally, implementing a regular maintenance schedule helps in early identification of issues, preventing costly overhauls and ensuring the longevity of the parking lot.
Accessibility and Safety
A sustainable parking lot should be universally accessible, with well-designed spaces for differently-abled individuals, including adequate wheelchair ramps and marked parking spaces. Effective lighting ensures safety for both drivers and pedestrians, reducing the risk of accidents.
The layout should facilitate smooth traffic flow to minimize congestion and emissions. Safety features like clear signage, speed bumps, and pedestrian crosswalks enhance the overall functionality and safety of the parking lot.
How Do Parking Lots Affect The Environment?
Did you know that the environmental costs of a parking structure can exceed the environmental costs of cars?
Creating and maintaining a parking lot requires a large amount of energy and produces an even greater amount of emissions over the course of its lifetime. Beyond that, parking lots often accumulate pollutants, including grease, oils, sediment, and heavy metals.
When it rains, the water washes these pollutants off into waterways, creating a significant environmental impact.
Furthermore, the more parking lots we have, the less green space we have room to maintain.
FAQs about Eco-Friendly Parking Lot
As we delve into the frequently asked questions about eco-friendly parking lots, let’s explore how these green spaces are redefining our approach to urban development and environmental stewardship.
How do you make an efficient parking lot?
To create an efficient parking lot, it’s crucial to optimize the use of space through smart design and layout. Efficiency can be enhanced by incorporating features like LED lighting, solar panels, and efficient drainage systems.
The use of intelligent parking systems that guide drivers to available spaces can reduce the time spent looking for parking, thereby reducing emissions. Additionally, materials like permeable pavement can be used to manage stormwater effectively and minimize environmental impact.
How can I make my parking lot more sustainable?
Making your parking lot more sustainable involves several strategies. Use environmentally friendly materials like recycled pavers or pervious concrete to reduce runoff and heat absorption. Implement green landscaping with native plants to improve air quality and support biodiversity.
Incorporate renewable energy sources, such as solar panels for lighting and electric vehicle charging stations. Regular maintenance and using durable materials also contribute to sustainability by extending the lifespan of the parking lot and reducing the need for frequent repairs.
What is a green parking lot?
A green parking lot refers to a parking area designed with environmental sustainability in mind. Key features include the use of permeable surfaces to allow water infiltration, the incorporation of green spaces, and the integration of renewable energy sources.
These parking lots are designed to minimize their ecological footprint by reducing runoff, improving water quality, and enhancing the urban green space. They often include elements like electric vehicle charging stations, efficient lighting, and materials that are environmentally friendly and durable.
Final Thoughts
With the right amount of research and proper planning, constructing an eco-friendly parking lot can be cost-effective. Environmental protection and conservation start at ground level. YOU can make the change today.
James has over two decades of experience in the paving industry and has worked on a wide variety of projects, from large-scale commercial installations to small residential repairs.
https://pavingfinder.com/wp-content/uploads/2022/03/Eco-Friendly-Parking-Lot-.jpg455782admin123https://pavingfinder.com/wp-content/uploads/2020/10/logo.jpgadmin1232024-01-05 10:45:472024-02-16 09:52:07Eco-Friendly Parking Lot – 10 Ways to Be Sustainable
Resurfacing a concrete parking lot is vital for maintaining its durability and aesthetics. Over time, exposure to traffic and elements can cause damage, necessitating a thoughtful repair approach.
Identifying the root cause of damage is crucial in resurfacing a concrete parking lot. Factors like heavy traffic, weather conditions, and material aging contribute to issues such as cracking, discoloration, and scaling. Selecting the appropriate resurfacing method, tailored to address specific damages, ensures the parking lot regains its structural integrity and visual appeal, extending its lifespan and functionality.
Discover detailed insights on effective repair methods for resurfacing concrete parking lots, ensuring lasting durability and enhanced appearance.
Resurface a parking lot with concrete in 6 steps
If you are considering resurfacing a concrete parking lot for your next project and you are contemplating between using concrete or asphalt, keep reading to learn how straightforward it can be to offer your parking lot a new life.
Six steps are involved in concrete resurfacing:
1. Clean your concrete parking lot and patch as needed
The first and crucial step involves preparing the concrete surface for resurfacing. Begin with an exhaustive cleaning process to remove all dirt, debris, and contaminants like oil and grease. This might require specialized cleaning agents to tackle tough stains.
After cleaning, meticulously inspect the parking lot for any significant damages like deep cracks or worn areas. Use a high-quality concrete patching material to repair these flaws. The integrity of the resurfacing depends on the solidity of the base. Lastly, saturate the surface with water to ensure a good bond with the resurfacing material, but ensure to remove any standing water using a broom or squeegee.
2. Mix the concrete resurfacer
Use a 1/2-inch drill and a paddle mixer to mix the resurfacing compound in a 5-gallon bucket. It’s vital to avoid barrel-type mixers or hand mixing, as they don’t achieve the necessary consistency. The key is to reach a homogeneous mix that will ensure an even application and durable finish.
When undertaking a project for resurfacing a concrete parking lot, it’s crucial to follow the manufacturer’s guidelines precisely. The correct ratios and mixing technique are essential to ensure the optimal performance of the resurfacing compound, leading to a successful and durable finish.
3. Measure and pour
Measure and mix the concrete resurfacer with water to achieve the right consistency. Aim for a lump-free, pourable mixture, similar to syrup. This consistency is essential for easy application and uniform coverage. If the mix is too thick, add water incrementally; if too thin, additional powder may be necessary.
This step requires attention to detail, as the consistency of the mix significantly impacts the application process and the final appearance of the resurfaced parking lot.
4. Application of Resurfacing Material
Pour the resurfacing material onto the parking lot in one-foot wide strips. Employ a long-handled squeegee to spread the mixture evenly over the concrete surface. This process requires a steady hand and a keen eye for detail to ensure the resurfacer covers the entire area uniformly without leaving any gaps or uneven spots.
The quality of this application will directly affect the smoothness and levelness of the finished surface.
5. Uniform Spreading and Non-Slip Finish
Uniformly spread the resurfacing compound across the slab with careful back-and-forth motions. After about five minutes, when the mixture starts to set, use a concrete broom to create a non-slip texture. This not only enhances safety but also adds to the aesthetic appeal of the parking lot.
The timing of this step is critical – too early, and the texture might not form properly; too late, and the material may be too hard to work with.
6. Curing Process
The final step is the curing process, crucial for the longevity and strength of the resurfaced concrete. In temperatures above 90°, use a fine water mist to keep the surface moist for 24 to 48 hours. This prevents the material from drying too quickly, which can lead to cracks or weakened spots.
After approximately 6 hours, the surface can handle foot traffic, but it’s advisable to wait at least 24 hours before allowing vehicle traffic. This patience ensures the resurfaced parking lot is durable and ready to withstand regular use.
Resurfacing concrete parking lot with asphalt in 6 steps
Below are the six steps involved in asphalt resurfacing:
1. Prepare the surface
The initial stage in resurfacing a concrete parking lot with asphalt involves meticulous preparation. This step is crucial for ensuring a solid foundation for the asphalt layer. Begin by thoroughly cleaning the parking lot to remove debris, dirt, and oil stains. This might require power washing for stubborn stains.
Next, assess the condition of the concrete. It’s essential to repair significant cracks or damages in the concrete to prevent them from affecting the new asphalt layer. In some scenarios, concrete speed bumps and other structures might need demolition or alteration to accommodate the new surface. This preparation phase is vital for the longevity of the resurfaced parking lot.
2. Asphalt milling
Asphalt milling involves removing the top layer of the existing asphalt to make room for the new material. This process is crucial for ensuring proper bonding and levelness of the new asphalt layer. Milling can vary in depth, depending on the project’s requirements and the condition of the existing asphalt.
This phase can be quite extensive and typically requires heavy machinery like milling machines. It’s imperative to plan for traffic redirection and inform users of the parking lot about the expected downtime, as this stage can significantly impact accessibility.
3. Fix any pavement issue
Once the top layer is removed, it’s essential to inspect and repair the underlying pavement. This may involve additional milling to even out rough patches or uneven areas. Small cracks and holes should be filled using a high-quality crack filler, and larger areas of damage might require more extensive repair.
The goal is to create a uniformly smooth surface that will support the new asphalt layer effectively. Paying attention to these details helps in preventing future problems and extending the lifespan of the resurfaced parking lot.
4. Asphalt resurfacing
The asphalt resurfacing process begins with the application of a tack coat. This adhesive layer is crucial for binding the new asphalt to the existing surface. Following the tack coat, a roller truck and paver methodically lay the new asphalt layer.
It’s vital to ensure even spreading and compacting of the asphalt to avoid any unevenness. This process may require multiple layers, depending on the thickness needed and the specific conditions of the parking lot. The expertise of the resurfacing team plays a significant role in this stage, as precision and skill are necessary for a smooth, durable finish.
5. Curing
After laying the asphalt, it’s essential to allow ample time for curing. This step is critical for the asphalt to harden and gain its full strength. During this phase, keep the parking lot free from traffic and other disturbances.
The curing time can vary based on weather conditions and the thickness of the asphalt layer. Proper curing ensures a resilient and long-lasting surface that can withstand the demands of a busy parking lot
6. Sealing
The final step in the resurfacing process is sealing the asphalt. A quality seal coat is applied to protect the new surface from weather elements, oil spills, and wear and tear. This layer not only extends the life of the asphalt but also enhances its appearance.
Once the seal coat is dry, the parking lot can be repainted with lines and markings for traffic patterns, parking spaces, and safety zones. This not only improves functionality but also boosts the aesthetic appeal of the parking area.
Pros and cons of resurfacing a concrete parking lot vs. replacing it
If your parking lot has stayed for a long time, you could find signs of aging on it, including cracks and potholes. When your parking lot is in poor shape, you might be asking if you should do some moderate resurfacing or have the whole lot replaced. The fact is, everything depends on how serious the damage is, the material (concrete or asphalt), the time of year, and the budget.
If your home or business’s parking lot displays aging signs, do not immediately presume that your only choice is concrete removal. For a justifiable reason, resurfacing is rapidly creeping into the mainstream.
There is no point in paying for a completely new parking lot when you can resurface it for a lower price. In some instances, concrete resurfacing could be the optimal solution over concrete replacement.
There are many reasons why resurfacing your concrete parking lot is a perfect alternative to fully replacing it. If you are considering concrete resurfacing vs. replacement for your parking lot, below are some of the advantages and drawbacks that will help you make an informed decision:
Pros
The advantages of parking lot resurfacing include:
It requires lower cost, minimal time, and effort
I apologize for the misunderstanding. Here’s a revised version with only one mention of “resurfacing”:
Tiny cracks and depressions won’t escalate into more significant decay, necessitating costly repairs, if addressed at the right time. The financial advantage is a key factor motivating the choice of resurfacing over repairing concrete. This approach not only saves money but also time, proving far more economical than replacing the entire structure for your home’s concrete surface.
Furthermore, fewer materials, workforce, and machinery are required for concrete resurfacing, leading to lower upfront costs. Although this is undoubtedly appealing to homeowners wanting to save money, it is essential for property owners, including apartment complexes, because concrete surfaces in apartments can grow wear and tear quite easily as they are exposed to the movement of many individuals.
It extends the parking lot’s life
Maintaining a parking lot effectively often involves a key procedure: resurfacing. While concrete parking lots are typically designed to last about 30 years, this practice can significantly extend their working life. Neglecting to address cracks and wear through timely intervention leads to further deterioration.
It restores your concrete surface
A common misconception is that resurfacing a concrete parking lot won’t match the aesthetic appeal of fresh concrete, leaving little impact on residents. However, this process can effectively revitalize the area, making it look as fresh and new as if the concrete were completely replaced. Moreover, it offers an ideal opportunity to introduce decorative elements, adding a sparkling, brand-new look to the space.
Don’t let anyone fool you by claiming that resurfacing your concrete parking lot will not make it look great except if it is replaced; the truth is that by resurfacing your concrete, you are indeed bringing new life into it. The improvement will be visible for years to come.
It can be performed without inconveniences
If you are an apartment complex owner, you will find it a big deal to replace your concrete surfaces because it will require inconveniencing your tenants. When replacing concrete, you would need to dismantle it first, which can take up to two days, meaning you may have to ask your tenant to park somewhere for the night or restrict their movement to a specific space for a significant period.
Resurfacing concrete is a swift and efficient process compared to complete replacement. It eliminates the need to remove the entire existing concrete and pour large volumes of new material, which then requires curing. This approach is also more considerate of your tenants, minimizing disruption and inconvenience.
Cons
Irrespective of the many benefits of concrete resurfacing, there are, however, a few drawbacks as well, including:
It can not address cracked crumbling concrete
For a concrete parking lot, patching and filling cracks is essential prior to undertaking a resurfacing project. However, if the concrete surface is crumbling, resurfacing is not advisable, as the weakened structure may not support the weight of new concrete, potentially leading to further deterioration.
It can only be performed on Plain Concrete Surfaces.
The other drawback of resurfacing concrete parking lots is that it can normally be performed only on bare concrete surfaces. If the concrete surface has been epoxy-sealed, colored, engraved, stained with acid, or stamped, concrete resurfacing will not stick correctly to the existing surface.
When is it time to resurface your concrete parking lot?
Concrete parking lots are standard in different neighborhoods because they provide unsurpassed durability. While it’s built to last, some factors, such as elements and heavy foot traffic, could still trigger it to wear-and-tear. Once you observe crumbling edges, cracks, sunken places, or dull colors on your parking lot, it asks for resurfacing.
If your parking lot begins to experience more than just a few cracks or holes, or the cracks and gaps are broader, then the time for resurfacing has fully come for it. Furthermore, if you consider patching but fear that soon, more tiny holes or cracks will develop, you will gain more by resurfacing it.
Resurfacing is better suited for patching up small holes and shallow cracks. It can be a more cost-effective alternative if you want to introduce a new layer of texture to your parking lot’s surfaces, making it an excellent option for restoring a parking lot’s shine and look.
The cost of resurfacing a concrete parking lot
Resurfacing Type
Estimated Cost for 100 sq. ft.
Cost Range per sq. ft.
Standard Area Considered (sq. ft.)
Cost Range for Standard Area
Average Cost for Standard Area
Concrete Resurfacing
$400
$3 to $5
100
$300 to $500
$400 (as estimated)
Asphalt Resurfacing
$1,800 to $4,200 (for 600 sq. ft.)
$3 to $7
600
$1,800 to $4,200
$3,000
Several factors can affect the cost of resurfacing your parking lot. Among all, location is always the main factor. For instance, materials used by contracting companies and labor costs vary per location. Also, the type of soil in an area can impact the price.
With that said, the estimated cost of resurfacing with concrete is $400 for a 100 square feet surface; less costly and more expensive projects can run as low as $300 and $500, respectively. The price may vary between $3 and $5 per square foot.
While the cost of resurfacing with asphalt can range between $1,800 and $4,200, or $3,000 on average. This rate is split into $3 to $7 per square foot for the standard 600 square feet area.
What are the typical causes of concrete parking lot distress or damage?
The key reason many homeowners and business owners use concrete for their parking lot is that it is recognized for its resilience, flexibility, and durability, in addition to being economical. You can customize concrete to obtain the appearance you want and still count on that look to last for years.
Instead of just excavating the concrete and beginning over, you can always save some money by resurfacing your parking lot; so far, the concrete is sound structural.
Difference between concrete resurfacing and concrete replacement
If you are considering resurfacing a concrete parking lot or replacing it for your next repair project, it is good to know the difference to make the right decision.
Concrete Resurfacing
It includes applying a thin mortar overlay over the old concrete slab
It helps restore the surface; however, large cracks, significant breakage, or pitting are not fixed
It can be finished in a few hours,
Usually, half the cost of replacing concrete
Offer additional layer, reducing wear and tear
Concrete Replacement
Removing and replacing damaged slabs with new ones
offer a more permanent solution for high-traffic surfaces
Eliminates the possibility of regular concrete repair
Conclusion
If your parking lot is due for repair, it would be best for you to evaluate the pros and cons of resurfacing and replacement before deciding which one to opt for. For the best recommendation, you can call in a concrete paving contractor to find the cause of the deterioration in order to decide whether concrete replacement or resurfacing would be a better choice for your property.
James has over two decades of experience in the paving industry and has worked on a wide variety of projects, from large-scale commercial installations to small residential repairs.
https://pavingfinder.com/wp-content/uploads/2021/01/Resurfacing-Concrete-Parking-Lot-Featured.jpg455782admin123https://pavingfinder.com/wp-content/uploads/2020/10/logo.jpgadmin1232023-12-29 10:37:182024-02-16 09:37:05Resurfacing Concrete Parking Lot – A Step-by-Step Guide
Parking lot drainage problems often go unnoticed until a heavy rain reveals the significant challenges they pose to businesses and customers alike.
Efficiently addressing parking lot drainage problems is crucial for maintaining your business’s aesthetic appeal and operational safety. Solutions include adding internal curbing, correcting the slope, and installing drains. These methods not only enhance the appearance of your parking area but also prevent costly repairs and ensure customer convenience and safety, especially during adverse weather conditions.
Explore further to learn about the nine most common parking lot drainage problems and how to effectively address them, ensuring your business’s parking area remains safe and welcoming, free from water damage and hindrances for your customers.
9 most common parking lot drainage problems
Effective drainage is crucial for maintaining the integrity and usability of parking lots. However, several issues can compromise this system, leading to a variety of problems that affect both the functionality and longevity of the parking area. Here are the most common drainage issues encountered:
1. Inadequate Slope or Grading
A well-designed slope is vital for efficient water drainage in parking lots. Inadequate slope or improper grading leads to water stagnation, creating risks of surface deterioration and potential safety hazards. Ensuring a correctly angled slope is fundamental to facilitate smooth water runoff and prevent accumulation, thereby extending the lifespan of the parking lot.
2. Clogged or Insufficient Drainage Systems
Drainage systems are crucial for channeling water away from parking surfaces. When these systems become clogged with debris, or if they are insufficiently designed for heavy rainfall, they can lead to water accumulation. This not only poses a flooding risk but also accelerates wear and tear on the parking lot surface, necessitating frequent maintenance.
3. Poorly Designed or Damaged Curbing
Curbing serves as a boundary and a guide for water flow. If curbing is poorly designed, incorrectly installed, or damaged, it can fail to direct water effectively, leading to overflow and adjacent landscape erosion. Regular inspection and repair of curbing are essential to maintain effective water management in parking areas.
4. Ineffective Stormwater Management
Addressing parking lot drainage problems is essential for effective stormwater management. Without proper systems in place, heavy rains can overwhelm the parking area, leading to surface erosion, potential flooding, and long-term structural damage. Implementing comprehensive stormwater solutions is critical for maintaining the integrity of the parking lot and preventing water-related damage.
5. Surface Erosion and Sediment Buildup
Continuous water flow, especially during heavy rains, can lead to surface erosion, compromising the integrity of the parking lot. This erosion often results in sediment buildup, which can clog drainage systems, further exacerbating water drainage problems. Regular cleaning and maintenance are necessary to prevent these issues.
6. Cracked or Uneven Asphalt Surfaces
Cracks and unevenness in asphalt impede efficient water drainage, leading to water pooling and further surface damage. These imperfections can develop into larger cracks and potholes, presenting safety risks and potentially costly repairs. Regular monitoring and maintenance are crucial to address these issues promptly.
7. Inadequate Catch Basins or Grates
Catch basins and grates are essential for capturing and redirecting water away from the parking surface. If these elements are inadequate or poorly maintained, they can fail to manage water effectively, resulting in persistent puddles and potential slip hazards. Ensuring these components are appropriately sized and regularly maintained is critical for effective drainage.
8. Water Pooling and Standing Puddles
Persistent water pooling and standing puddles are clear indicators of drainage issues. These can lead to slip hazards, vehicle damage, and deterioration of the parking lot’s surface. Addressing the root causes of these puddles, such as poor grading or blocked drainage, is essential for a safe and well-maintained parking area.
9. Subsurface Water Intrusion
Subsurface water intrusion can compromise the foundational integrity of the parking lot. This issue often goes unnoticed until significant damage has occurred. It can lead to sinkholes, subsidence, and extensive structural damage, necessitating costly repairs. Effective surface drainage and waterproofing measures are key to preventing these severe issues.
9 Ways to fix the most common parking lot drainage problems
When evaluating solutions for parking lot drainage problems, you may need to consider one or a combination of these strategies. The choice depends on the location of your parking lot and the extent of the damage caused by poor drainage over the years. Effectively addressing these issues is crucial to prevent further deterioration and maintain the long-term functionality of the parking area.
Be sure to consult a professional with knowledge of your specific situation, and determine which drainage solution(s) is right for you.
1. Add Internal Curbs
Adding curbing within the boundaries can help redirect water flow through the asphalt surface. This approach effectively limits standing water, guiding it towards the perimeter where it can naturally seep into the ground.
Additionally, curbs offer aesthetic benefits. They provide opportunities for light landscaping, enhancing the overall appearance of your business area and lending it a more professional look.
2. Correct The Parking Lot Slope
Water pooling signifies that the area either lacks a proper slope or is sloped incorrectly. To remedy this, adjusting the slope is necessary so that the area gradually inclines towards the lot’s perimeter, ensuring efficient water runoff and preventing accumulation.
This will help prevent any water from pooling on the asphalt by directing it to flow off the premises instead.
To most effectively drain water off your parking lot, the slope of the asphalt should be between 2% and 5%.
3. Install Drainage Ditches And Grates
Another effective solution for drainage issues is the addition of runoff drains and trenches throughout the parking lot. This approach is particularly beneficial for larger spaces, where redirecting water effectively can pose a significant challenge.
By installing drainage ditches and grates in your parking lot, you’ll ensure the water is directed out of your parking area and into a sewer or other municipal waterway.
To make sure the standing water runs into drainage gutters, the grade of the drainage grate should be at least 3% but preferably closer to 5%.
4. Standard Catch Basins
Standard catch basins play a crucial role in mitigating parking lot drainage problems and ensuring effective water management. These basins are designed to capture and redirect surface water, making them particularly vital in areas prone to frequent heavy rain. Their strategic placement allows them to intercept water at key points, effectively reducing pooling and contributing to a drier, safer parking surface.
5. Concrete-Encased Drainage Basins
Concrete-encased drainage basins offer enhanced durability and longevity, especially suitable for high-traffic commercial parking lots. These robust structures withstand heavy loads and frequent use, efficiently managing large volumes of water and mitigating the risk of flooding and surface damage.
6. Trench Drainage Basins
Trench drainage basins are an excellent solution for extensive water management in vast parking areas. Their design allows for the effective channeling of water over large surfaces, significantly reducing water pooling and the risk of flooding, and ensuring a safe and dry parking environment.
7. French Drains
French drains are an effective subsurface drainage solution, ideal for areas with underground water issues. These drains redirect water away from the parking lot’s foundation, protecting the structural integrity and preventing water-related damage such as sinking or cracking of the asphalt.
8. Trench Drain
Trench drains are highly effective in managing water across elongated stretches. They create a continuous channel, facilitating efficient drainage over expansive areas. This system plays a crucial role in preventing water accumulation, thereby maintaining the overall health and integrity of the area.
9. Slot Drain
Slot drains provide an aesthetically pleasing and efficient drainage solution where appearance is paramount. Their slim profile blends seamlessly with the surface, ensuring effective water management while maintaining the area’s visual appeal.
By tailoring these solutions to specific requirements, you can effectively resolve parking lot drainage issues, ensuring safety, functionality, and visual appeal for your business’s outdoor space.
What Causes Parking Lot Drainage Problems?
Uneven ground is generally the culprit behind poor parking lot drainage. When the ground slopes unevenly in your parking lot, rainwater and water runoff follows the path of the slope, which causes pooling.
Sometimes this can be the fault of a previous paver’s oversights, but more often than not it’s simple wear and tear on the asphalt over the years or an issue with the evenness of the underlying earth.
Regardless of the reason, it’s important to identify and resolve drainage issues as soon as possible.
How Do You Identify Drainage Problems?
The telltale signs of poor parking lot drainage are:
Leftover debris like sand or pebbles in random places on the pavement
Residual, dusty-looking patches throughout the lot where the pooling water has evaporated
If you notice one or more of these signs occurring on your asphalt, it’s highly likely that you have parking lot drainage problems. To prevent problems with your asphalt in the future, you should start preparing to remedy the situation.
Indications of Existing Damage Due to Poor Parking Lot Drainage
Unfortunately, it’s possible that the poor drainage is already affecting your lot. The following are signs that the standing water is already causing damage to your asphalt:
You see cracks in the asphalt surface. This is caused when water puts pressure on the asphalt.
The top layer of asphalt has started to “ravel.” This happens when water erodes the top layer of your parking lot over time.
The asphalt looks like it’s bleeding. This means that the asphalt binding agent has risen to the surface of the pavement, indicating aggregate separation.
Frequently traveled sections of the lot are starting to rut. This looks like the asphalt is sinking in slightly on itself, and will occur in sections of the lot where people drive most often. Commonly, asphalt rutting looks like tire impressions.
If you notice these issues and warning signs, be sure to speak with a parking lot drainage expert as soon as possible. Not taking action could result in severe consequences, which we’ll explain in detail next.
What Are The Consequences of Not Having Proper Drainage?
If your parking lot is retaining water, it’s best to deal with the situation sooner, rather than later.
If the lot is part of a newly purchased property, you might not know how long drainage has been an issue. Speak with a professional to evaluate the extent of the potential damage and get a quote for what a drainage solution might cost.
As mentioned earlier, there are various reasons why ensuring effective drainage is crucial for your parking lot. When these considerations haven’t been integrated into the initial design, you may encounter both direct and indirect consequences.
In general, we can break these consequences down into two categories: damages and expenses.
Damages From Parking Lot Drainage Problems
A good asphalt pavement will hold up for 12-15 years before it needs maintenance. However, if your pavement collects a lot of standing water due to poor drainage, that timeframe could be significantly reduced.
Standing water can seep into and exacerbate existing cracks and holes in your asphalt. Such damage can occur both during the paving process, as well as long after its completion.
Damages Possible After Paving
While addressing any potential drainage problems before your lot is constructed is important, you won’t be out of the woods just because the asphalt has been laid.
If pooling water recurs frequently or is left unattended for extended periods of time, the water can seep down to the pavement base, causing long-term damage. Once the base course of your parking lot is damaged, its ability to withstand regular traffic will decrease, causing further potholes and cracks.
Not only do such eyesores look unseemly to customers, but they can be expensive to fix. This brings us to our second category of poor drainage consequences: the price to fix them.
Warning Signs Before Paving
Before construction and paving begin on your parking lot, you can assess how likely your lot is to encounter drainage problems by looking at the would-be lot’s location. If your parking lot is located at the base of a hill or on low-lying land, it’s likely that you’ll have drainage problems.
Additionally, aside from problems caused directly by flooding, land that has experienced heavy water retention over the years is likely to have less stable soil, which can indirectly impact your parking lot over time. Unstable soil has a tendency to settle and shift over the years, which could result in uneven dips in your asphalt, even if the initial paving was done correctly.
While relocating the site may not be feasible, early awareness of this information will help you determine how crucial drainage solutions will be for you and your customers.
Cost of Parking Lot Drainage Problems
Category
Details
Estimated Cost Range
Drainage Pipes
Type, size, quantity
$500 – $2,000
Gravel or Aggregate
For permeable surfaces or drainage
$300 – $1,200
Catch Basins
New/additional units
$200 – $800 per unit
Geotextile Fabric
For soil erosion control and drainage
$0.50 – $2.00 per square foot
Concrete or Asphalt
For repairs or reconstruction
$3 – $10 per square foot
Excavation and Grading
Site preparation and terrain reshaping
$1,500 – $5,000
Installation of Drainage
Installing pipes, basins, etc.
$1,000 – $4,000
Pavement Repair
Removal and replacement of existing pavement
$2,000 – $10,000
Professional Fees
Engineering/design consultation and planning
$500 – $3,000
Ignoring parking lot drainage issues can lead to substantial financial implications. Simple asphalt repairs at a residential property can range from $979 to $3,521, but the costs for commercial parking lots are significantly higher due to larger areas and heavier usage.
Commercial pavers often charge based on the area that requires repaving. With average repaving costs ranging from $3 to $10 per square foot, as per the detailed cost breakdown provided earlier, a large parking lot with extensive drainage-related damage can incur expenses well over $10,000.
A 2019 estimate suggests that repairing an entire asphalt lot plagued with drainage issues could potentially cost thousands of dollars. Additionally, the indirect costs associated with an unattractive and poorly maintained parking lot can be detrimental to businesses. For instance, a 2017 INRIX report highlighted that 40% of U.S. drivers avoid locations known for parking difficulties.
To prevent drainage issues from escalating into costly repairs, timely and efficient improvements in your parking lot’s drainage system are crucial. Implementing solutions such as proper grading, installation of adequate drainage systems, and regular maintenance can save significant expenses in the long run.
Why You Should Fix Your Drainage Problems
Your customers may not actively notice an area that has no problems, but you can be sure that they’ll notice if it’s full of cracks, potholes, and standing water.
Presenting a smooth, evenly paved surface to your customers starts off their experience with your business on the right foot.
By identifying and addressing your drainage problems, you can ensure that your customers have a good experience with your brand from the moment they pull up in front of your building.
Not only will a consistently professional experience encourage patrons to become returning customers, but having good parking lot drainage will also save you future headaches and maintenance costs.
FAQs about Parking Lot Drainage Problems
Parking lot drainage is a crucial aspect of maintaining the functionality and safety of any commercial or public space. Understanding common issues and their solutions helps in effectively managing these areas. Here are some frequently asked questions that shed light on common drainage concerns:
Why Do Parking Lots Tend to Have a Lot of Puddles And Standing Water?
In short, it all comes down to poor water drainage.
Have you ever pulled up to your grocery store, dentist’s office or local gym on a rainy day, only to find the entire lot flooded with standing water? While this may initially seem like a minor inconvenience, the truth is that all that water is bad for business.
Unfortunately, many businesses have these parking lot drainage problems, and many consumers have experienced something like this at one location or another.
Why Parking Lot Drainage Matters
Adequate drainage in your parking lot is important because it prevents water from pooling on the pavement. Having a water-free parking lot:
Keeps parking spaces free from puddles so employees and customers can park easily
Keeps customers and employees safe from potential slips and falls
Prevents unsanitary standing water from lingering in your parking lot
Shows detailed consideration and planning on your part
Having a properly draining parking lot will not only keep your business property in good condition, but will also enhance opinion about your business in your customers’ and employees’ eyes.
What’s more, not addressing potential drainage problems as soon as you notice them can lead to expensive, time-consuming remedial work later. The sooner you resolve your drainage problems, the better off your business will be.
What is the slope for parking lot drainage?
The recommended slope for parking lot drainage typically ranges between 2% and 5%. This gradient is sufficient to enable water runoff without causing excessive water flow that might lead to erosion or pose a hazard. The precise slope depends on the specific layout and requirements of the parking lot, including local climate conditions and expected rainfall intensity.
What is the runoff coefficient for a parking lot?
The runoff coefficient for a parking lot varies based on the surface material and design. Generally, for asphalt or concrete parking lots, the coefficient is high, typically in the range of 0.7 to 0.9. This indicates that a large percentage of rainfall becomes surface runoff, as these materials do not allow significant water infiltration. The exact coefficient can be influenced by factors such as the lot’s age, condition, and any permeable paving materials used.
Improve Your Parking Lot Drainage Problems Before They Get Worse
Poor drainage in parking lots is a compounding problem. That is, the damage caused by your drainage issues will only continue to get worse until you resolve them.
Now that you know the ins and outs of how to identify drainage issues, what causes them and what solutions you have at your disposal, get in touch with one of our experts today to stop further water damage before it starts.
James has over two decades of experience in the paving industry and has worked on a wide variety of projects, from large-scale commercial installations to small residential repairs.
Concrete Parking Stops Installation – an essential step in creating a safe, efficient parking experience for homes and businesses. Discover their significance in enhancing parking lot safety and order.
Concrete parking stops play a crucial role in maintaining order and safety in parking lots. They guide vehicles, ensuring orderly parking and preventing accidents by creating a barrier between parking spaces, walkways, and structures. Installing these stops is vital for protecting vehicles, pedestrians, and property, contributing to a positive first impression and a safer environment for visitors, customers, and staff.
Learn more about the practical benefits of concrete parking stops, installation techniques, and how they contribute to a safer, more organized parking area for your property.
5 Steps to Install Concrete Parking Lots
You can install concrete parking lots’ stops (once they have been built) with Lag Bolts & Anchors following the below steps:
Place the parking stop in the spot where you want to mount it.
Use a high-speed hammer drill to drill (a 4″ to 4 1/2″) deep hole in the concrete with a 3/4″ masonry bit at each specified place.
Use a hammer to attach a lag anchor (with the wide round hole drilled into the anchor pointing up) into every hole.
Shift the parking stop such that the holes you drilled pair up upwards with the molded-in holes.
Place the wedge bolts into the parking block via the holes and screw up the bolts with a 3/4′′ socket. Complete the tightening of each bolt until cozy.
1. Positioning the Stop
Start by accurately placing the concrete parking stop at the intended spot in your parking lot. This initial positioning is crucial as it dictates the final location of the stop. Ensure it’s aligned correctly with the parking space boundaries and at a suitable distance from walls or pavement edges to accommodate vehicle sizes and parking patterns.
2. Drilling Holes
Use a high-speed hammer drill equipped with a 3/4″ masonry bit to drill holes into the concrete at each marked location. The holes should be 4″ to 4 1/2″ deep to ensure a secure anchor. Precision is key in this step to ensure that the holes align perfectly with the mounting points on the parking stop.
3. Inserting Anchors
Insert a lag anchor into each drilled hole. The anchor should have a wide round hole facing upwards for securing the bolts. Use a hammer to firmly set each anchor into place. This step is vital for creating a strong foundation for the parking stop, ensuring it stays securely anchored and can withstand the wear and tear of daily use.
4. Aligning the Stop
Carefully shift the parking stop so that the holes drilled in the concrete align perfectly with the molded-in holes on the parking stop. Proper alignment is essential to ensure the parking stop is mounted straight and in the correct position. This step requires attention to detail to ensure the stop will be effectively secured in the next step.
5. Securing with Bolts
Place wedge bolts through the aligned holes of the parking block and into the anchors in the concrete. Using a 3/4″ socket, tighten each bolt until it is snug and secure. This final step solidifies the parking stop’s position, ensuring it is firmly attached to the ground and capable of withstanding the pressures of parked vehicles and environmental factors.
Important Considerations when Installing Concrete Parking Stops
Ensuring a successful installation of concrete parking stops requires careful consideration of various factors. Below are important considerations that play a crucial role in the process
DIY Challenges
If you intend to handle the installation yourself, you may find it challenging and time-intensive due to the heavy weight of concrete. It’s not just that; they typically need a specialized tool like lifting slings to put them in place.
Distance and Orientation
First, you will need to estimate the critical distance from the pavement or wall to the stop and consider whether the park is labeled as rear-in or front-in. Concrete parking stops installation requires the right tools and equipment. You will be needing tools such as fixing pins or screw bolts to fix the stops in place and a drill with the correct masonry bit.
Surface-Specific Installation
You will also require some epoxy to add to the holes of the drill if you want to install it on an asphalt or gravel surface.
These concrete slabs are weighty since they weigh at least 100 lbs. Each parking stop would require 2 to 3 individuals to have it installed. This can tend to be time-intensive in a parking lot with at least 50 spaces. Heavy equipment could be needed to ship and install all parking stops required in a bigger facility with hundreds of parking spaces.
It’s a daunting process, and you’re going to be needing appropriate tools and equipment to have them installed and the help of skilled installers, or at least many people who can assist you.
Are concrete parking stops suitable for your parking lots?
Concrete parking stops are recommended for every parking area due to their significant advantages. They can be laid both outdoors and indoors. One big pro of concrete stops is that they are heavier compared to other materials. As a result of this, they are very robust and can do a very fantastic job of restricting vehicles from moving beyond their allocated parking spaces once set in place.
What are parking stops?
Parking stops are also referred to as parking blocks, wheel stops, or truck stops. They are commonly found in parking lots, rental garages, medical facilities, shopping areas, and some other facilities providing temporary and lengthy parking to keep vehicles from going above their assigned parking space, preventing damages or injuries.
Parking stops are an important safety feature for community parking lots, hospitals, college campuses, churches, office parks, shopping malls, etc. Parking stops are dependent on, in tightly populated, head-on parking centers, to restrict drivers from moving into sidewalks or other parked vehicles.
Versatile protection
It is often used to protect fixed items, such as garbage containers, shopping carts, utility poles, and signs. Parking stops are placed as obstacles for pedestrian walkways, sidewalks, and motorcycle lanes, offering extra protection from moving vehicles.
Concrete parking stops installation is well recommended for every parking lot-at home or business for safety purposes. Although there are other types of parking stops available, concrete stops are commonly used due to their durability and flexibility.
Why does your lot need parking stops?
Below are the reasons why your lot needs parking stops:
They help to prevent fender benders in your lot
They help to boost traffic flow
They help to improve your commercial parking lot’s overall appearance
Parking stops are necessary for all parking lots to mark the parking area’s boundary and protect landscaping from vehicle intrusion. They are needed in a highly dense parking lot.
They help to prevent fender benders in your lot
Parking stops are installed in lots to restrict cars from parking on sidewalks or other restricted areas. They prevent drivers from pulling through parking spots or trying other dangerous movements by physically restricting a vehicle’s wheels.
This helps to prevent houses, roads, fragile landscapes, and other vehicles from being damaged. In addition, concrete parking stops installation is necessary as they can protect other motorized vehicles (like forklift trucks) when working in warehouses and factories.
They help to boost traffic flow
As a property owner, there is a high probability that your parking lot will always be busy, especially during rush hours of the day. This involves both staff and customers driving in-and-out of the facility. Parking stops are required to organize your parking lot in the most effective way to help direct the flow of traffic while observing both state and federal safety codes.
It helps to improve your commercial parking lot’s overall appearance
Customers highly value the aesthetic importance of a well-operated and well-maintained parking lot. A perfect way to improve the overall appearance of your parking lot is to add parking stops. Parking stops are typically used for enclosing parking lots and help preserve the look of your parking lot landscape.
Other common types of parking stops
Below are other common types of parking stops to consider:
Rubber Parking Bumper
Plastic Parking Stop
Metal Bollard
It is vital to consider customers’ safety, whether you have a single row of parking spots or a separate lot for your commercial property. Also, you have to consider your building’s safety. Parking stops are perfect if you consider making your lot or storefront more convenient. Below are other common types of parking stops to consider:
Rubber Parking Bumper
Most businesses today prefer rubber parking bumpers since they are easy to fit with asphalt, which most companies use as a pavement option to improve the look and also save money. Rubber parking bumpers are more efficient than some alternatives because recycled tire rubber is usually made from them.
A rubber parking bumper is also malleable and is less likely to be broken or cracked. They have less weight than concrete stops. This makes their installation very easy. Although concrete parking stops installation is still a preferred choice for most people, they are more sturdy and last longer.
Rubber parking bumpers are robust enough to prevent slow-moving cars from moving too far forward. However, if they lack translucent paint or the paint disappears, they can not be as easy to see.
Plastic Parking Stop
The main drawback of this option is that plastic is not eco-friendly. Many businesses, however, are making reliable parking stops from recycled plastic. One advantage of choosing plastic is that it is cost-effective. Also, the installation of plastic stops is effortless enough that one person would generally do it alone. They are parking lot fixtures with low maintenance, and they are extremely resistant to chemicals and severe weather conditions.
Metal Bollard
Metal security bollards resemble that of small/thick poles that project from the ground. One benefit of bollards is that they are easily visible, and you can use reflective paint to coat them for enhanced night vision. It is more costly to use high-quality steel bollards in individual parking spaces. They are, however, perfect for putting on corners or row ends in a lot.
How Are Concrete Parking Stops Made?
Most concrete parking stops are precast, which means that they are manufactured in one piece with molding and left to set and dry prior to turning out. They often have inner steel rods integrated for greater strength, but this also contributes to their already large amounts of weight.
There are various concrete mixes, based on the manufacturer, to obtain the longest – lasting blend. When you are considering parking stops, you may likely think of concrete parking stops installation, but sadly, concrete mostly struggles to hold up with time and can quickly crack and chip.
The Advantages and Disadvantages of Adding Parking Stops to Your Lot
Properly used parking stops can offer your parking lot or garage a good deal of utility. Sadly, many lots feature parking stops used at awkward times or poorly mounted, which contributes to a lot of discomfort for drivers on the lot who see more harm coming from the stops than good.
The below are some essential things to consider, ensuring that you get the best possible outcome if you are considering installing parking stops to your property:
Advantages
A parking stop that is being appropriately utilized should be in place to prevent more significant harm from happening than the parking stop would trigger on a vehicle that strikes it. There are three basic conditions in which the installation of a parking stop is incredibly beneficial:
Installing a parking stop when a parking space is up against a wall minimizes the likelihood of a vehicle hitting the wall. This offers protection to the vehicle, the building, and any person inside the building.
Permanent structures, such as metal poles, are often protected by parking stops. If the pole is robust, it can create immense damage to the vehicle or elements connected to the pole. Hence, installing stops is often beneficial.
Concrete parking stops installation is an important safety feature to decrease the risks of a vehicle unintentionally striking a person when a parking space nears a pedestrian walkway.
Disadvantages
The primary worry when it comes to the installation of parking stops is a potential error during the installation process.
Parking stops that are poorly aligned can pose more risk than they can prevent. Laying stops with narrow gaps between them produces a pedestrian lane that is too small, which is a hazard.
Another thing that poses a safety risk is choosing the wrong size for your stops. While it is almost certain that too big stops will decrease pedestrian access, a parking stop that is not wide enough for the anticipated vehicles may not stop the vehicle appropriately.
FAQs about Concrete Parking Stops Installation
Dive into a comprehensive exploration of frequently asked questions and detailed answers surrounding the intricacies of installing concrete parking stops, providing valuable insights into the various aspects of this crucial process.
How do you install a parking stopper?
Installing a parking stopper involves several steps. First, ensure the surface is clean and level. Position the stopper at the desired location and mark the anchor points. Drill holes for anchors, insert them, and secure the stopper in place using appropriate tools. Double-check alignment and ensure a secure fit for effective parking guidance.
How do you anchor concrete parking blocks?
Anchoring concrete parking blocks is crucial for stability. Start by marking anchor points on the surface. Drill holes corresponding to these marks and insert anchors securely. Place the concrete blocks over the anchors and tighten them down, ensuring a strong and stable connection. Proper anchoring prevents shifting and ensures long-lasting durability.
What are concrete parking stops called?
Concrete parking stops go by various names, including wheel stops, parking curbs, or bumper blocks. These terms are often used interchangeably to describe the structures placed at the end of parking spaces to prevent vehicles from overhanging or encroaching onto sidewalks, landscaping, or adjacent areas.
How do you install wheel stoppers?
Installing wheel stoppers follows a similar process to parking stoppers. Begin by selecting the appropriate location and marking anchor points. Drill holes for the anchors, place the wheel stoppers over them, and secure them tightly. Confirm proper alignment and spacing to ensure effective delineation of parking spaces and protection of surrounding areas.
What is the distance between parking wheel stops?
The ideal distance between parking wheel stops depends on factors such as the size of vehicles and the layout of the parking lot. Generally, a standard spacing ranges from 6 to 8 feet, allowing for effective vehicle positioning and maximizing space utilization. Consider local regulations and specific project requirements when determining the optimal distance between parking wheel stops.
Conclusion
Parking stops are mostly used in commercial and industrial parking lots (both small and large). They are vital because they prevent vehicles from colliding with other cars and with buildings, gardens or disrupting pedestrian lanes.
Some concrete parking stops can not endure the elements outside; hence, they are best suitable for indoor use only. The first step in the parking stop installation is to select the correct stop for the job. There are also various types of methods of installation to consider.
You can hire a professional installer to efficiently get the job done for you if you are not sure what type of parking stops to choose for your business parking lots.
James has over two decades of experience in the paving industry and has worked on a wide variety of projects, from large-scale commercial installations to small residential repairs.
https://pavingfinder.com/wp-content/uploads/2021/02/Concrete-Parking-Stops-Installation.jpg455782admin123https://pavingfinder.com/wp-content/uploads/2020/10/logo.jpgadmin1232023-12-07 11:33:072024-03-07 14:29:57Concrete Parking Stops Installation – Quick and Simple
A well-striped parking lot is crucial for safety and aesthetics in commercial or public spaces. Knowing the costs for striping or restriping is essential for your project’s budgeting and planning.
Parking lot striping cost varies based on several factors, including the size of the lot, the type of paint used, the complexity of the layout, and geographic location. On average, you might expect to spend anywhere from $400 to $700 for a standard parking lot with 30-50 spaces. However, this figure is a starting point, and prices can fluctuate depending on your specific needs and the unique characteristics of your parking area.
Next, we’ll delve into the factors influencing parking lot striping costs, encompassing material types, labor, special markings, and maintenance. Our guide is designed to assist you in managing parking lot striping costs effectively, whether for a small business lot or a larger facility. Continue reading for a deeper understanding and valuable tips for a smart investment.
Parking Lot Striping Costs
After completing the paving of your parking lot, the next vital step is striping, crucial for ensuring safe and organized vehicle movement. The pricing for parking lot striping generally falls into two categories: per linear foot and per individual parking stall line
Cost Per Linear Foot
Cost Type
Price Range
Factors Influencing Cost
Cost Per Linear Foot
$.20 to $1.00 per linear foot
Paint Quality, Line Thickness, Geographic Location
This widely-used calculation method ranges from $.20 to $1.00 per linear foot, with the price variation dependent on several factors. The quality of the paint plays a significant role in determining the cost. Opting for higher quality, long-lasting paint results in a higher price. The thickness of the lines also influences the cost. Standard line thickness is about four inches, but requiring thicker lines for enhanced visibility can push the price up. Another contributing factor is the geographic location, as labor and material costs vary regionally.
Cost Per Parking Stall Line
Cost Type
Price Range
Factors Influencing Cost
Cost Per Parking Stall Line
$4 to $5 per stall
Special Markings, Number of Stalls
Alternatively, striping a single parking stall typically costs between $4 to $5. This price can increase based on specific requirements. Special markings, such as handicap spaces, no-parking zones, and directional arrows, involve additional costs due to their complexity and the need for specific types of paint. The total number of stalls also impacts the overall cost. Striping a larger number of stalls might offer some discounts for bulk work, but in general, more stalls equate to a higher total cost.
Factors Influencing Parking Lot Striping Costs
Factor
Impact on Cost
Specialized Markings (Logos, Arrows, Zones)
Increases due to complexity and materials
Curb Marking
Around $1 per linear foot
Use of Color in Markings
Higher due to special paint
Scale of the Parking Lot
Larger lots incur higher costs
When determining the cost for parking lot striping, several additional factors come into play that can influence the final price. Understanding these elements is crucial for a more accurate budget estimation.
Specialized Markings and Additions
One of the primary factors that can increase costs is the need for specialized markings. If your parking lot requires custom elements such as company logos, directional arrows, loading zones, or designated fire lanes, these additions will elevate the overall cost. These specialized markings often require extra time, precision, and sometimes different types of paint or materials, which can be more expensive.
Curb Marking Costs
Another aspect to consider is curb marking. If your project includes marking curbs, this is typically charged at about $1 per linear foot. The cost can vary depending on the complexity of the markings and the type of paint used.
Use of Color in Markings
Incorporating colored paint for certain markings can also impact your budget. Color-specific paint is often required for features like handicapped spaces or specific directional indications. These paints can be more costly than standard white or yellow paints, both in terms of material costs and the additional labor required for application.
Scale of the Parking Lot
The overall size of your parking lot plays a significant role in the cost calculation. Larger parking lots not only require more striping but may also necessitate a greater number of specialized additions such as handicapped spaces or specific visitor parking areas. The larger the area, the more materials and labor hours are needed, leading to higher overall costs.
By considering these factors, you can gain a more detailed understanding of what influences the costs of parking lot striping and how these elements might affect your specific project. This insight is valuable for planning and budgeting effectively for your parking lot maintenance or renovation.
The Cost Of Different Parking Lot Lines
There are different costs for different types of lines that you’ll need to keep in mind. These line markings can vary in price, though are often anywhere from $20 to $30. Here are some of the different lines you might expect to pay for and their average costs:
Parking Lot Line Type
Cost Range
Single Line for Parking Lot Stall
$4 to $5
Stop Line
$20 to $30
Stenciled Parking Space Letters
$2 to $4 per space letter
Stenciled Parking Space Numbers
$1.50 to $3.50 per number
Handicapped Stalls
$25 to $30 per stall
Arrows
$10 to $20 per arrow
Pedestrian Crosswalks
$50 to $75 per crosswalk
Pricing and Recommendations for Painting Angled Stalls
If you decide to paint angled stalls, note that you will likely pay more than you would be painting regular stalls.
Keep in mind that these costs will vary depending on the number of lines that you need in your parking lot, the types of lines that you require, and the amount of paint that you need to use to finish the job.
A professional painting company will often pay anywhere from $80 to $150 for a five-gallon tub of paint. The parking lot striping company will usually provide you with this cost upfront in your initial quote.
We highly recommend using water-based acrylic if you want your parking lot to look its best and last the longest.
Parking Lot Restriping Cost
Parking lot restriping is a crucial maintenance task that not only enhances the appearance of your parking area but also ensures compliance with safety standards. The cost of restriping a parking lot is generally comparable to the initial striping costs. For a standard-sized parking lot with 30 to 50 spaces, the price range typically falls between $300 to $700. However, several factors can influence the final cost, making it essential to consider these variables for a more accurate estimate.
Factors Affecting Striping Costs
Condition of Existing Lines: If the existing striping is heavily faded or worn, more preparatory work and materials may be needed. This ensures the new paint adheres properly and is visible, potentially increasing costs.
Changes in Layout or Design: If you plan to alter the layout of the parking lot during restriping, this could involve additional planning and labor, impacting the overall cost. This includes adding or removing spaces, changing the flow of traffic, or modifying space sizes.
Type of Paint Used: The choice of paint for restriping can significantly affect the price. High-quality, durable paints that last longer and offer better visibility might be more expensive but can be more cost-effective in the long run due to reduced frequency of restriping.
Regulatory Compliance: Ensuring compliance with local regulations, including the Americans with Disabilities Act (ADA) for handicapped spaces, can influence the cost. This might include adding specific markings or modifying existing ones to meet current standards.
Additional Markings: Like initial striping, any extra features such as directional arrows, no-parking zones, or custom logos will add to the cost. These require more time and specialized paints.
Size and Complexity of the Parking Lot: Larger parking lots or those with a more complex design will naturally incur higher restriping costs due to the increased amount of labor and materials needed.
Geographic Location: Labor and material costs can vary depending on your location, which can influence the overall cost of the restriping project.
Importance of Regular Restriping
Regular restriping is not just about maintaining aesthetics; it’s also about safety and compliance. Clear and visible parking lot lines are essential for the orderly flow of traffic and pedestrian safety. Furthermore, well-maintained parking lots can leave a positive impression on visitors and customers, reflecting the professionalism of your business or facility.
By understanding these factors, you can better budget for your parking lot restriping project and ensure that your parking area remains functional, safe, and visually appealing.
How Much Time Is Needed To Stripe or Restripe a Parking Lot?
The duration required to stripe or restripe a parking lot is influenced by several key factors, each playing a crucial role in the efficiency and effectiveness of the project.
Size and Complexity of the Parking Lot
The overall area and layout of your parking lot significantly impact parking lot striping costs. Larger lots with more spaces or complex designs (like those with numerous directional markings or specialized zones) naturally require more time to complete, affecting the overall parking lot striping cost.
Workforce and Equipment Efficiency
The number of workers assigned to the project and the type of machinery used are significant factors. More workers and advanced striping equipment can expedite the process, whereas fewer workers or basic tools might prolong it. The experience and skill level of the crew also play a part in determining how quickly the job can be done efficiently.
Paint Drying Time
After the paint is applied, drying time is a crucial consideration. On a hot summer day, paint can dry enough for light traffic within an hour. However, to ensure durability and proper curing, a minimum of four hours is often recommended. The type of paint used (water-based vs. solvent-based) also affects drying time, with some formulations drying faster than others.
Weather Conditions
Weather plays a significant role in striping projects. Ideal conditions include a dry, warm day with ample sunlight, which aids in quicker drying and curing of the paint. Conversely, cooler temperatures, high humidity, or lack of sunlight can significantly extend drying times. In colder weather, using solvent-based traffic paint is advisable as it tends to dry faster and more effectively in such conditions.
Pre-Striping Preparation and Post-Striping Care
Prepping the parking lot surface before striping, including cleaning and making necessary repairs, can add to the overall project time. Moreover, consider sealcoating your parking lot before striping. Sealcoating not only protects the asphalt but also provides a smooth, uniform surface that can enhance the adherence and longevity of the striping job.
Each of these factors should be considered when planning a parking lot striping or restriping project. This ensures a smooth process and minimizes downtime for your parking facility. By understanding and managing these elements, you can more accurately predict the timeframe needed to complete the job effectively.
How Much Does It Cost To Remove Parking Lot Striping?
Understanding the cost implications of removing parking lot striping is crucial. This is especially true when planning for repaving, restriping, or redesigning your parking area. While the average cost typically ranges between $200 to $500, several factors can influence the final price. It is essential to consider these aspects for a more precise estimate.
Key Factors Impacting Striping Removal Costs
Size and Scope of the Project: The larger the area with striping to be removed, the higher the cost. This is due to the increased labor and time required to remove the lines from a larger surface area.
Type of Striping Material Used: Different striping materials (paint, thermoplastic, tape, etc.) have varying levels of difficulty for removal. Some materials may require more intensive labor or specialized equipment to remove, impacting the overall cost.
Removal Method Employed: There are several methods for striping removal, including grinding, blasting (with sand or water), and chemical treatments. Each method has different equipment and labor cost implications. For example, grinding might be more time-consuming and labor-intensive compared to blasting methods.
Condition of the Pavement: The existing condition of the pavement can affect the removal process. Rough or damaged surfaces may complicate the removal. This complication can potentially increase costs. This is due to the need for more careful or repeated processes to avoid further damage to the pavement.
Disposal of Removed Materials: The cost of properly disposing of the removed striping materials can also factor into the overall cost. Environmental regulations and local disposal fees can vary, impacting the total price.
Geographic Location: Labor and equipment rental costs can vary significantly based on the location, which can influence the total cost of the striping removal project.
Additional Considerations
Timing and Accessibility: Projects with tight deadlines or those in areas with limited accessibility might incur higher costs. This is due to the need for expedited work or additional logistics planning.
Post-Removal Surface Treatment: If the removal process leaves behind any damage or noticeable marks on the pavement, additional surface treatments may be required. This could add to the total expense.
By taking these factors into account, you can gain a more detailed and accurate understanding of what to expect in terms of costs for removing parking lot striping. This enables better budgeting and planning for your project.
Final Thoughts
We hope that you now have a better idea of what you can expect from your parking lot striping cost. Once done, it’s a good idea to restripe your parking lot every 18 to 24 months to keep it looking fresh and new.
Of course, the amount of time you can leave in between restriping depends on whether or not you have high-volume traffic and what kind of climate you live in. Here at Paving Finder, we’re consistently looking for new ways to help people find the best paving services for their needs. We highly recommend joining our pro network if you want to get in touch with top-rated paving professionals in your area.
James has over two decades of experience in the paving industry and has worked on a wide variety of projects, from large-scale commercial installations to small residential repairs.
https://pavingfinder.com/wp-content/uploads/2022/09/parking-lot-striping-cost-featured.jpg455782admin123https://pavingfinder.com/wp-content/uploads/2020/10/logo.jpgadmin1232023-11-24 09:51:062024-02-16 09:13:45Parking Lot Striping Cost – Comprehensive Budgeting Guide