How Long Before You Can Drive On Pavers?
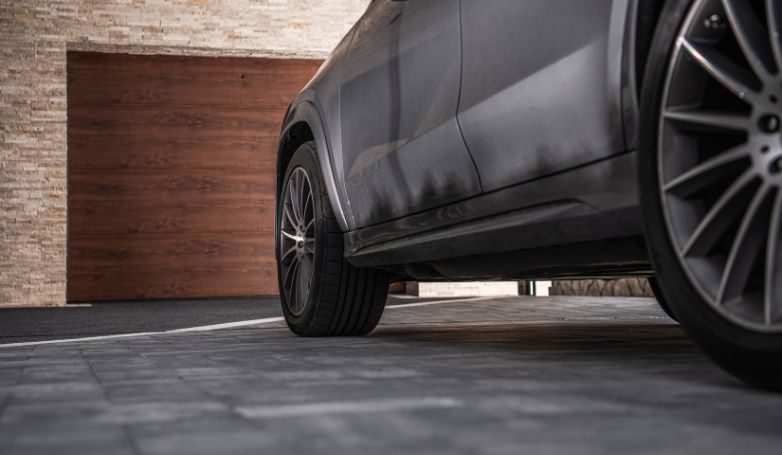
When it comes to paving, a common question arises: How long should you wait before driving on pavers? This crucial step ensures their longevity and aesthetic appeal.
Typically, you should wait at least 48 to 72 hours before driving on newly installed pavers. This waiting period allows the pavers to settle and the joint sand to solidify, creating a stable and durable surface. Factors such as weather conditions, the type of pavers, and the installation method can influence this duration. For heavy vehicles or high-traffic areas, a longer waiting period may be necessary to ensure the pavers are fully set and able to withstand the load.
Explore more about the factors that can extend or shorten this waiting period and tips for maintaining your pavers’ integrity and appearance after installation.
What are Pavers?
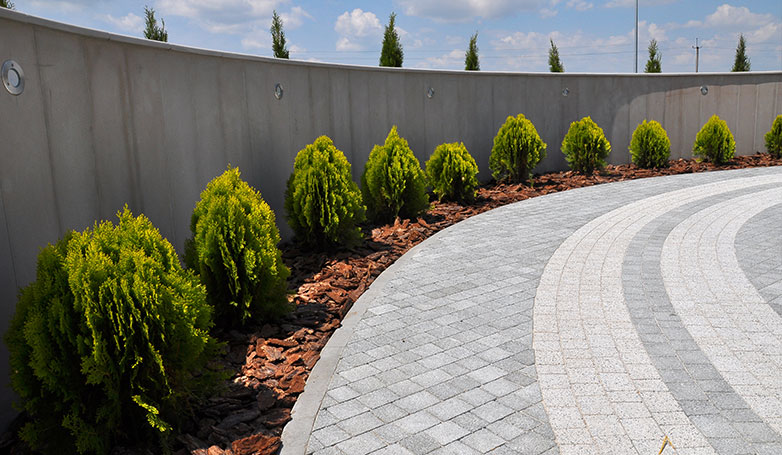
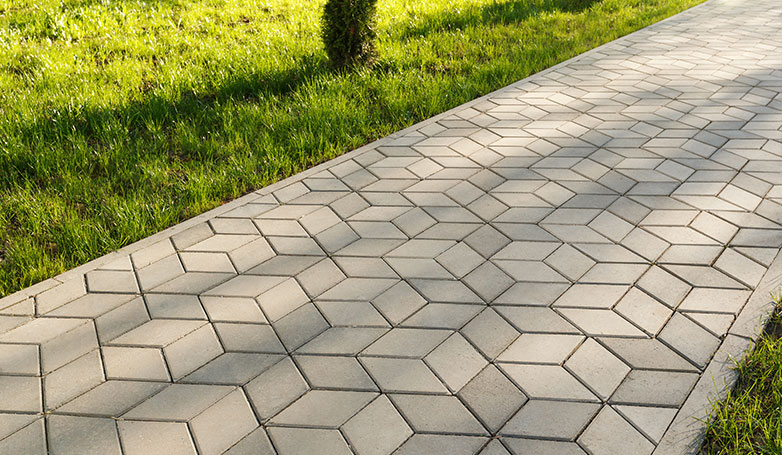
Pavers in their most common and simplest form, are square or rectangular shaped blocks, made of concrete, brick or natural cut stone. These are the ones that you will see most often. Either they are in the form of an INTERLOCKING or ARCHITECTURAL SLAB. The interlocking block design is much more durable and longer-lasting, withstanding high traffic. Its edges create uniform lines and patterns.
The interlocking blocks withstand extreme temperatures much better than that of architectural slab.
The slab design features a delicate and thin structure, comprising actual soft concrete formed to mimic natural stone. While it is primarily intended for foot traffic, it is used for driveways, but it won’t withstand extensive wear and tear. Despite the common use of concrete or stone in most pavers, recent industry advancements have led to the development of pavers made from recycled products, providing an eco-friendly option for everyone to contribute to planet care.
How to Install Pavers in 10 Steps
There are several steps involved in installing pavers, and most of the work requires a very strong, muscular back and is pretty hard physical labor. It’s recommended to hire a professional to ensure you get the best results, so once you find out how long before you can drive on pavers, and then drive on them, they don’t get ruined.
Here are the steps of how pavers are installed:
1. Excavate the area to the desired depth
In this initial step, dig out the area where you will lay the pavers, ensuring it is deep enough to accommodate both the base material and pavers. The required depth varies depending on the application but usually falls within the range of 7 to 10 inches. A thorough excavation is essential to establish a level and stable foundation.
2. Compact the soil for a stable base
Once the area is excavated, the underlying soil must be compacted. This step is essential to prevent shifting or sinking of pavers over time. A plate compactor or hand tamper is used, depending on the size of the area, to create a firm and level base.
3. Add and compact a layer of base material (e.g., crushed stone)
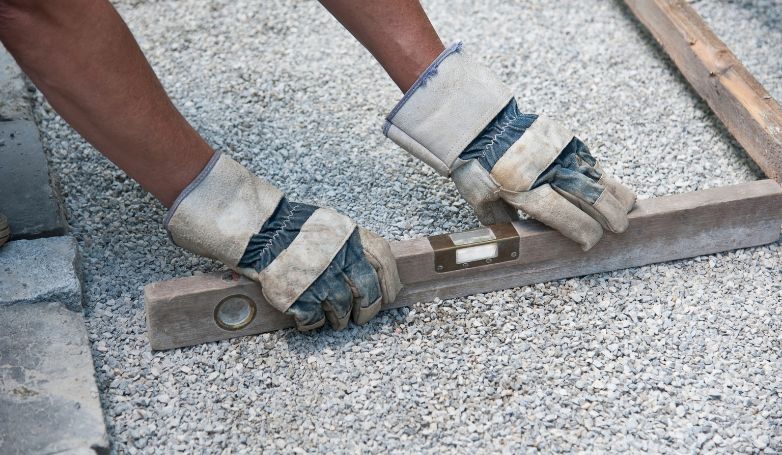
A layer of base material, usually crushed stone or gravel, is spread over the compacted soil. This layer is then compacted to provide a sturdy foundation for the pavers. The thickness of this layer depends on the expected load on the pavers.
4. Establish proper slope for drainage
It’s important to ensure proper drainage by establishing a slight slope in the paver installation. This slope, typically a drop of 1 inch per 4 feet, helps direct water away from buildings and prevents pooling on the surface.
5. Install edge restraints to keep pavers in place
Edge restraints are crucial for maintaining the integrity of the paver’s edges. They prevent shifting and spreading of pavers, especially in areas of vehicle traffic. These can be made of metal, plastic, or concrete, depending on the project requirements.
6. Spread and screed a layer of sand for a level surface
Evenly distribute fine sand across the firmly compacted base material in this step. Screed or level this layer to create a smooth surface for laying pavers. The sand plays a crucial role in adjusting the height and leveling individual pavers during the installation process.
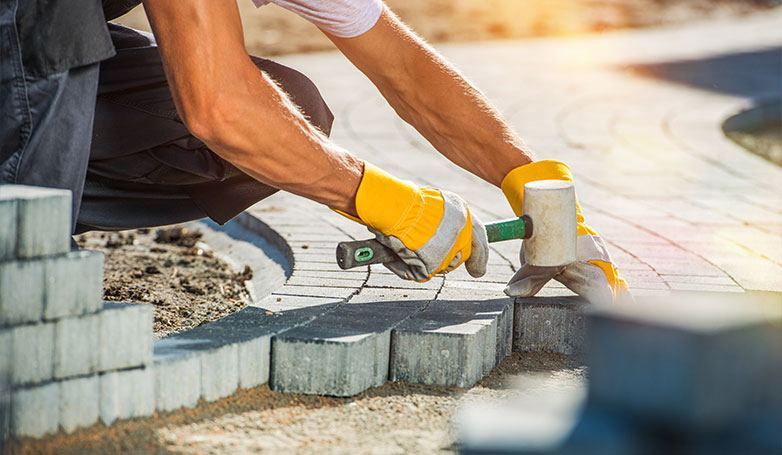
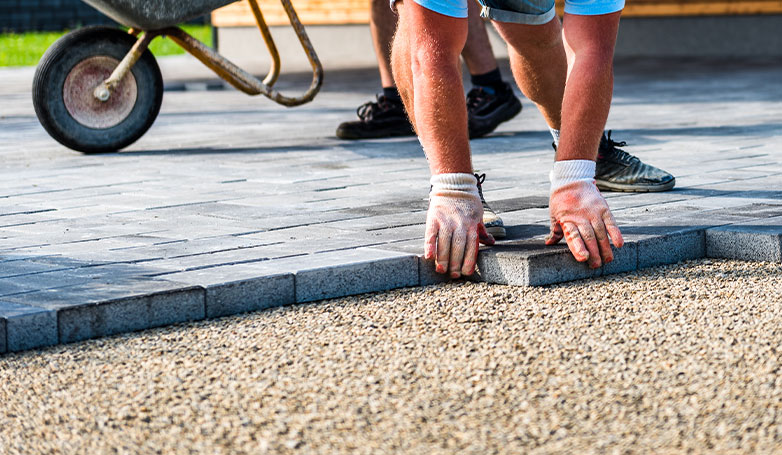
7. Begin laying pavers in the desired pattern
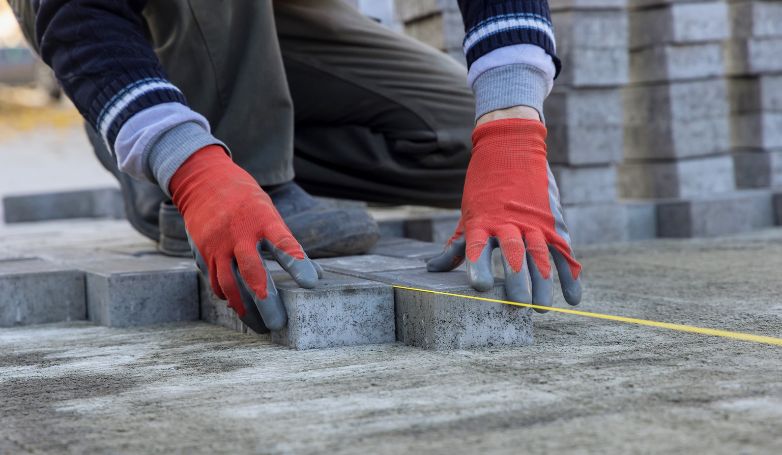
Pavers are then laid on the sand base, following the desired pattern. Careful placement is key to achieving an aesthetically pleasing and uniform appearance. It’s important to keep pavers tight against each other to minimize movement and gaps.
8. Cut pavers as needed using a saw or splitter
To fit pavers along the edges or around obstacles, they are cut using a masonry saw or a splitter. Precision in cutting ensures a professional finish and maintains the pattern flow.
9. Fill joints with sand or polymeric sand
After all the pavers are in place, the joints between them are filled with sand or polymeric sand. This sand stabilizes the pavers and prevents weed growth and insect intrusion. Polymeric sand also hardens to prevent erosion from rain or wind.
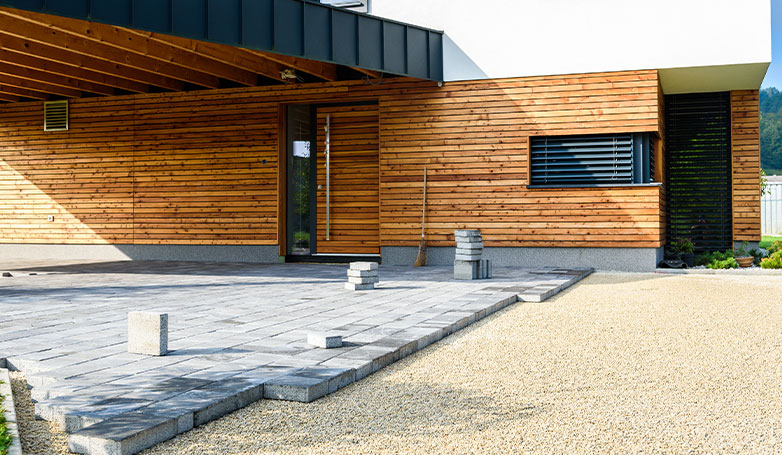
10. Compact the entire paved surface and clean off excess materials
Finally, the entire area is compacted using a plate compactor. This helps to secure the pavers into the sand base. The surface is then cleaned to remove any excess material, leaving a neat and tidy finished appearance.
How much do pavers cost to install and maintain?
The overall cost of how much it is going to cost you to install your dream paver driveway or patio depends on many different factors; one key point being the choice of material for the pavers. Depending on the contractor you hire and how many estimates you received, you will most likely be around $10-$19 per square foot for installation. Make sure the estimate you are getting is including all the base materials, preparations, labor and pavers needed to do the installation.
Maintenance Considerations
Maintaining your new pavers should be relatively inexpensive if you hired a reputable contractor, the job was done correctly, and you knew the waiting period before driving on them. Typical maintenance costs are very minimal compared to other driveway applications and include only:
- Occasional Stone\brick\block modular replacement
- Occasional weed pulling or treatments to keep weeds\grass out
That’s a relatively low cost list for maintenance, versus an asphalt, concrete or tar and chip driveway that requires resurfacing, resealing, pot-hole repair, crack repair and other maintenance requirements. This is one reason that the initial costs to install pavers are so expensive. It’s an INVESTMENT for your property and requires little-to no maintenance over the years.
Comparative Advantage of Pavers
Many people choose to install some form of paver system as their driveway for several reasons:
- The main one is that pavers can be permeable. This simply means that rain\moisture will seep and drain THROUGH it.
- A non-permeable driveway, such as an asphalt or resin surface is usually graded and sloped with drainage in mind. If you live somewhere that gets a lot of rain, pavers are a great choice. Due to them being permeable, the water will drain through, extending the life of the driveway significantly since there is never any standing water on it.
- Aesthetic appeal
- The endless variety of materials\colors
- Offer’s better traction in rain and snow
- Yes, you can use a snow plow on them, as long as there is some clearance for the plow not to hook the blocks.
Paver Selection and Benefits
Being that the choices in pavers almost endless, it is important to that you have hired a reputable contractor to go over with you all the different product types and options available to you. The standard and most common choices of pavers are:
- Plastic
- Bluestone
- Travertine
- Flagstone
- Cobblestone
- Rubber
- Brick
- Concrete
Things to consider when choosing a paver driveway
Here are some considerations you should make before choosing the paver driveway.
- Interlocking Pavers and Design Patterns: Decide if you want interlocking pavers, known for their stability and durability. The design pattern also plays a crucial role in the driveway’s aesthetic appeal. From herringbone to basketweave, each pattern offers a unique look and feel.
- Drainage and Climate Considerations: In areas with heavy rainfall or snow, choosing permeable pavers is vital. These pavers allow water to seep through, reducing runoff and the risk of pooling. This feature is particularly important for maintaining driveway integrity in wet climates.
- Maintenance Requirements: Consider how much time and effort you’re willing to invest in upkeep. Some paver materials require more maintenance than others. Opt for low-maintenance options if you prefer a hassle-free driveway.
- Homeowners’ Association (HOA) Guidelines: If your home is part of an HOA, check their guidelines. HOAs may have specific rules about driveway materials, colors, and styles, which can significantly narrow down your choices.
- Aesthetic Preferences: Style and color are important factors. The driveway should complement your home’s exterior. With a wide range of colors and styles available, select pavers that align with your personal taste and home’s architecture.
- Durability for High Traffic: If your driveway will endure high traffic, choose materials known for their strength and longevity. High-quality pavers can withstand the wear and tear of frequent use, maintaining their appearance over time.
- Cost-Effectiveness: Budget is always a consideration. While higher-quality pavers might be more expensive upfront, they can offer long-term savings due to their durability. Also, consider the installation costs and potential long-term maintenance expenses.
- Climate-Adaptive Features: For colder climates, consider installing a heating system beneath the pavers. This system can melt snow and ice, reducing winter maintenance and improving safety.
By carefully weighing these factors, you can select a paver driveway that not only enhances your home’s curb appeal but also meets your practical needs and preferences.
The Benefits of Choosing Pavers
Here are some compelling reasons why pavers stand out as an excellent choice
Aesthetic Versatility
Pavers offer a wide range of design possibilities, allowing for diverse patterns, colors, and arrangements. This versatility enables homeowners to create unique and visually appealing surfaces tailored to their preferences.
Permeability for Effective Drainage
This material is permeable, meaning they allow water to seep through the surface. This quality promotes effective drainage, preventing water pooling and ensuring a longer lifespan for the driveway or patio.
Diverse Material Options
Pavers come in various materials such as plastic, bluestone, travertine, flagstone, cobblestone, rubber, brick, and concrete. This diversity provides homeowners with the flexibility to choose materials that complement their aesthetic preferences, budget, and functional requirements.
Enhanced Traction, Especially in Rain and Snow
This material offer improved traction, making them a suitable choice for driveways or pathways in areas prone to rain or snow. The surface texture and permeability contribute to better grip, reducing the risk of slips and slides during adverse weather conditions.
Minimal Maintenance Requirements
Pavers require minimal maintenance compared to other driveway surfaces like asphalt or concrete. The occasional replacement of individual stones or bricks and routine weed control are typically the extent of maintenance, making them a cost-effective and time-saving choice over the long term.
FAQs related to How long before you can drive on pavers
Here are some frequently asked questions related to ‘How Long Before You Can Drive on Pavers
How soon can you drive on block paving?
Generally, it’s recommended to wait at least 48 to 72 hours before driving on newly installed block paving. This allows time for the pavers to settle and the jointing material to harden, ensuring the surface is stable and capable of withstanding vehicle weight.
Can you walk on pavers right away?
While light foot traffic is generally okay after 24 hours, it’s best to wait a bit longer before walking on newly installed pavers. This precaution helps prevent shifting of the pavers and disturbance to the joint sand.
How long does it take for pavers to settle?
Pavers typically take about 48 to 72 hours to settle properly. This settling period is crucial for the pavers to firmly embed into the base sand and for the joint sand to solidify, creating a stable and level surface.
What happens if it rains when installing pavers?
Rain during or shortly after paver installation can affect the settling process. It may wash away the joint sand and hinder its solidification, potentially leading to uneven surfaces or paver misalignment. In such cases, reapplication of joint sand and additional time for settling might be necessary. It’s best to cover the area during rainfall if possible, to protect the integrity of the installation.
How long do you have to stay off new pavers?
For pedestrian traffic, it’s usually safe to walk on new pavers after about 24 hours. For vehicle traffic, it is advisable to wait for 48 to 72 hours to ensure the pavers and jointing material fully settle and harden.
Conclusion
Now that you learned how long before you can drive on pavers, you can pass that knowledge on and share everything else you learned as well. When choosing your driveway surface, factor in your return on investment (ROI).
Yes, pavers are much more expensive to install, but if you are not under a tight budget, many contractors advise going the route of installing them. It’s longer lasting, lower maintenance costs and has great curb-side appeal. All the while, it adds value to your home and provides great traction in snow, rain, and ice. Once installed, you don’t have to wait long before you can drive on your pavers.