Is 2 inches of Asphalt Enough For a Driveway

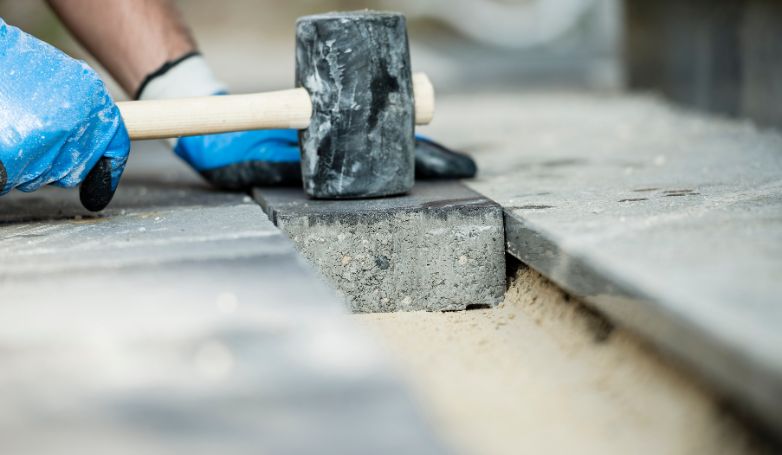
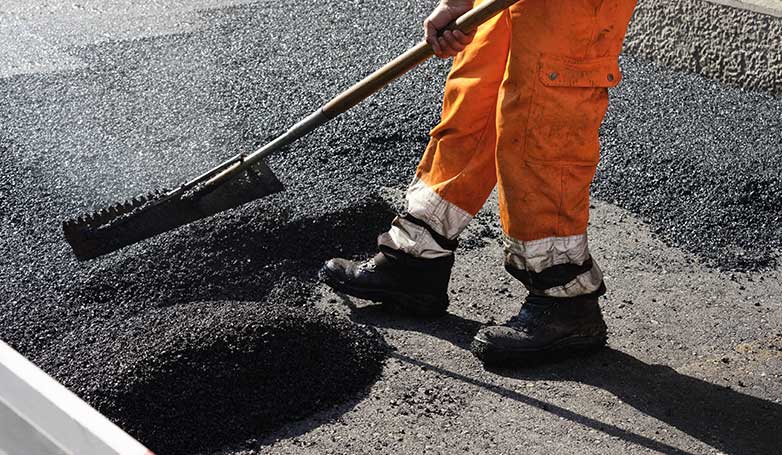
When planning a new driveway or renovating an existing one, the thickness of the asphalt is a crucial decision. Amidst varying professional opinions, homeowners often grapple with determining if 2 inches of asphalt is adequate for their needs.

While 2 inches of asphalt may work for light-traffic residential driveways in moderate climates, it’s typically insufficient for enduring heavier vehicles or harsh weather. For most home driveways, a thickness of 3-4 inches is advisable to balance cost with longevity and performance. In commercial settings or for driveways bearing frequent heavy loads, opting for a thickness of 6 inches or more ensures greater durability and resistance to wear and tear. Understanding your driveway’s usage and exposure to elements is key in deciding the right asphalt thickness.

Explore further to understand the intricacies of asphalt thickness and how it impacts the durability and functionality of your driveway. Learn to make informed decisions that align with your specific requirements and environmental conditions.

Ideal Asphalt Thickness for Your Driveway

Workers are making an asphalt road that is 2 inches taller

When considering the thickness of asphalt for a driveway, it’s essential to weigh several factors to arrive at the best decision. One common question homeowners ask is, “Is 2 inches of asphalt enough for a driveway?” This depends on various elements that define your driveway’s requirements, such as the type of vehicles it will support and the expected traffic volume.

  1. Usage and Longevity: The primary factor is the intended use of the driveway and how long you expect it to last without major repairs. Different usage intensities call for varying thicknesses to ensure durability.
  2. Residential Driveways: For most residential properties, a 2-inch thick asphalt layer can be adequate. However, investing in a 3-4 inch thickness offers better longevity and value for money. This extra depth provides a stronger foundation, better withstanding the rigors of daily vehicle traffic.
  3. High Traffic and Load: In cases of driveways that experience high traffic or bear heavier vehicles, such as in commercial settings, a minimum of 4 inches of compacted asphalt is recommended. This thickness is crucial to withstand the increased wear and tear, ensuring the driveway remains functional and aesthetically pleasing for a longer period.

Professional Guidance in Asphalt Thickness Decision

Consulting with a professional paving contractor is vital in this decision-making process. They can offer tailored advice based on the specific conditions and usage patterns of your driveway, ensuring that you choose the right thickness for your unique situation. A professional assessment helps in balancing cost, functionality, and longevity, ultimately leading to a more informed and effective paving choice.

Critical Role of Asphalt Thickness in Pavement Durability

The engineer is explaining the role of the thickness of the asphalt and its importance

The thickness of asphalt plays a pivotal role in determining the durability and performance of pavement. Here, we explore key factors such as the foundation, sub-base quality, and the importance of seeking expertise from professional paving contractors in ensuring the longevity of asphalt pavement.

The Foundation of Asphalt Pavement: Usage and Sub-Base Considerations

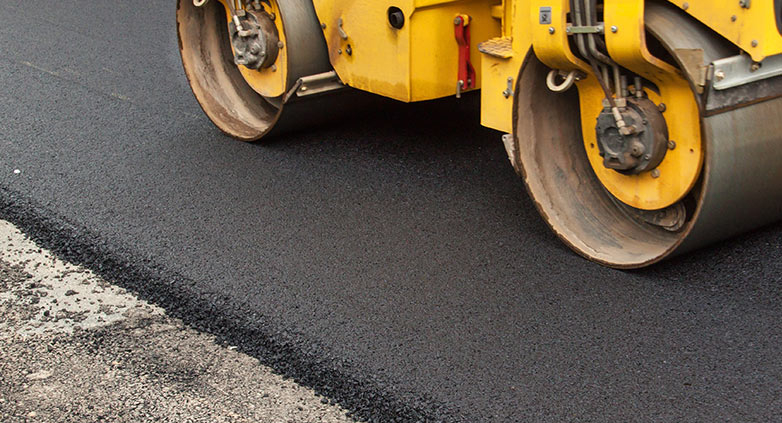
The thickness of your asphalt pavement is a key factor in its longevity and performance. This decision hinges on the intended usage of the driveway and the type of vehicles it will support. For light vehicles, a thinner layer of asphalt may be sufficient, but for heavier commercial vehicles, a thicker layer is essential to withstand the increased load.

The Impact of Sub-Base Quality

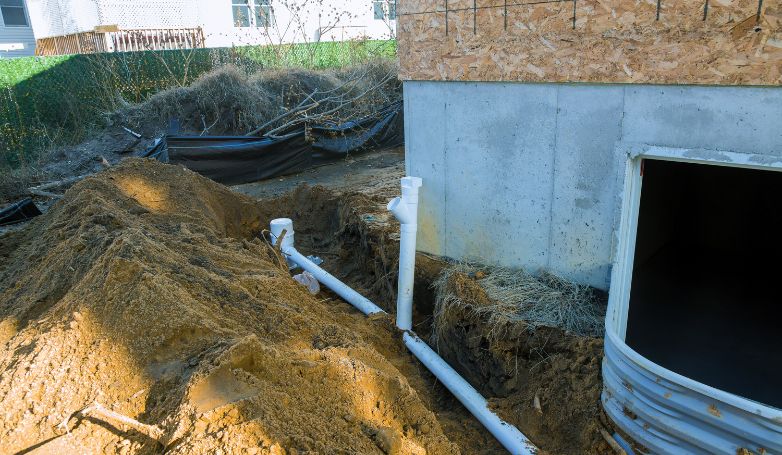
A solid and well-prepared sub-base is fundamental for the longevity of your asphalt driveway. If the sub-base is weak or improperly constructed, even a sufficiently thick asphalt layer can degrade quickly, leading to frequent and costly repairs. Ensuring a robust sub-base is crucial for the asphalt to maintain its integrity over time.

Seeking Expertise from Professional Paving Contractors

Consulting with a professional paving contractor is crucial in determining if 2 inches of asphalt is enough for a driveway. Local experts understand the unique environmental and usage factors of your area. They can recommend the ideal asphalt thickness and ensure a solid sub-base is prepared, setting the stage for a long-lasting and durable driveway.

Asphalt Thickness for Commercial Use

When it comes to commercial driveways or parking lots experiencing heavy traffic, the thickness needs to reflect this increased demand. Heavier vehicles and continuous usage necessitate a thicker layer of asphalt to prevent rapid wear and tear. The exact depth will depend on the expected volume and type of traffic, a calculation where professional input is invaluable.

Arming Yourself with Information

It’s essential to be well-informed about the importance of asphalt thickness. An adequate depth is crucial to prevent sudden and unexpected deterioration, ensuring durability and extending the service life of your pavement. A well-thought-out decision on thickness will lead to a high-quality, durable, and long-lasting driveway or parking lot, aligning with your specific needs and expectations.

Advantages of Thicker Asphalt in Pavement Construction

The workers are asphalting the road with very thick layers of concrete

When planning a paving project, one of the key decisions is the thickness of the asphalt layer. This choice has far-reaching implications for the pavement’s performance, maintenance requirements, and overall lifespan. Many wonder, “Is 2 inches of asphalt enough for a driveway?” as they consider the benefits of a thicker asphalt layer. These benefits directly contribute to the pavement’s long-term success and functionality. Understanding these advantages can help in making a more informed choice, ensuring that the pavement meets both current needs and future demands.

Enhanced Durability and Longevity

Choosing a thicker layer of asphalt for your driveway or parking lot construction is a decision that significantly impacts its durability and longevity. This thickness makes the asphalt less prone to common forms of wear and tear, such as cracking, which is especially beneficial in high-traffic areas. Thicker asphalt can withstand daily vehicle stress better, leading to a reduced frequency of repairs and ultimately lower maintenance costs over the pavement’s lifespan.

Superior Weather Resistance

The thick asphalt withstood the cold winter temperatures very well

A thicker layer of asphalt demonstrates a stronger resistance to weather conditions. It copes better with temperature fluctuations, which means it is less likely to crack in cold conditions or soften in extreme heat. This feature is crucial in areas experiencing severe or varying climates. Additionally, the thicker the asphalt, the better it protects against water infiltration, which can cause structural damage like potholes, further extending the pavement’s service life.

Improved Load-Bearing Capacity

The load-bearing capacity of a pavement is significantly enhanced with thicker asphalt. This quality is essential for surfaces expected to support heavy or commercial vehicles. Thicker asphalt distributes the weight of these vehicles more efficiently, reducing the risk of rutting and structural damage. In high-traffic commercial or industrial settings, the extra thickness provides necessary stability and endurance. This helps in maintaining the pavement’s structural integrity under various traffic conditions and ensuring continued functionality and safety.

In conclusion, a thicker asphalt layer requires a higher initial investment. However, the long-term benefits in durability, weather resistance, and load-bearing capacity justify this choice, making it a practical and cost-effective solution for many paving projects.

The factors that affect how thick asphalt needs to be

New asphalt on the road with leaves at the surface

You may sometimes question how thick the asphalt pavement should be when contemplating full-depth construction. Sadly, the answer is not straightforward because various factors influence the depth of an asphalt driveway or parking lot. Before determining the suitable thickness, asphalt paving contractors typically consider multiple variables.

The factors that affect how thick asphalt needs to be for a perfect driveway or parking lots include:

  • The Type of Soil
  • Traffic Volume and Composition
  • Layers of Asphalt

The type of soil

In asphalt thickness, data gathered about the soil plays a significant role. Subgrade material will most of the time be rock or soil, which needs to be thoroughly grasped before constructing pavement. 

If the soil is gravelly or sandy, it should compact correctly and offer good drainage. Conversely, it will be more challenging to achieve appropriate compaction if the soil is either clay, loamy or other soft types.

It is required that the soil provide a solid, stable base for the finished pavement.

To accomplish this, the engineers grade and compact the soil to create the subgrade. It may be important to remove and substitute some soil. If your contractor cannot obtain sufficient compaction, the use of an aggregate subbase becomes necessary. The level to which the soil can be compacted can influence the asphalt depth required to provide the best outcomes.

Traffic volume and composition

How heavy the vehicles that will be using the pavement, the average number of cars that will use the pavement daily, and the frequency they will be traveling are all factors that need to be taken into account. 

Areas often used by trucks will need thicker pavement to withstand heavier vehicles. While the typical suburban driveway probably won’t need the same modifications. 

For instance, a residential driveway where about three to four cars will drive on at a low-speed per day does not have to be as dense as the pavement on a major highway carrying hundreds of articulated trucks and thousands of cars daily.
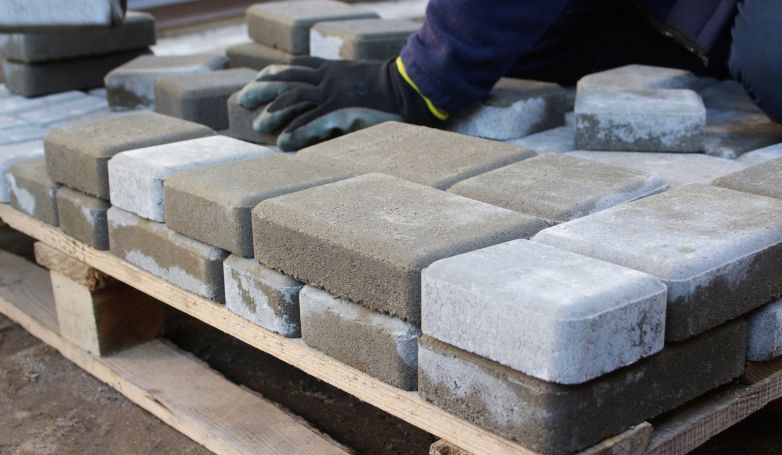
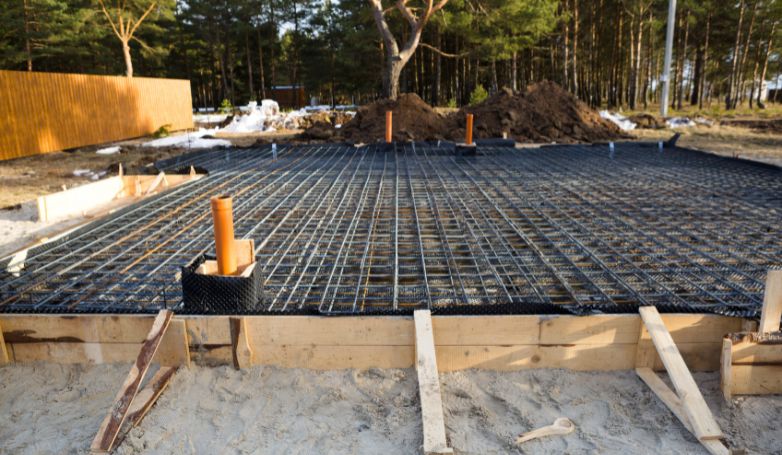
Layers of asphalt

There are various types of asphalt mix available, such as open-graded and conventional asphalt pavement. The asphalt pavement’s thickness can be affected by the size of the aggregates. 

For instance, the general rule is that each layer’s thickness must be at least three times higher than the aggregate’s nominal maximum size; a standard asphalt mix may be the lower layer, but the surface layer may use a thinner layer of a mix with smaller aggregates to provide extra aesthetic appeal without compromising strength. 

The Risks of Inadequate Asphalt Thickness in Driveways and Parking Lots

The asphalt driveway has a cracks

Before delving into the specific risks, it’s essential to understand the pivotal role that asphalt thickness plays in the overall performance of a driveway or parking lot. This leads many to ask, “Is 2 inches of asphalt enough for a driveway?” The thickness of the asphalt is not merely a construction detail; it’s a critical factor that determines how well the pavement will hold up against the challenges of daily use and environmental factors. A proper thickness ensures the pavement can withstand the weight of vehicles, resist weather-related damage, and maintain its structural integrity over time.

Structural Integrity at Stake

The thickness of an asphalt driveway is not just a measurement—it’s the backbone of the driveway’s structural capacity. An inadequately thick asphalt layer can lead to significant issues. If the asphalt is too thin for its intended use, it will be prone to random cracking. Over time, these cracks can expand, leading to the complete breakdown of the driveway’s surface. This deterioration not only affects the driveway’s appearance but also compromises its functionality and safety.

Impact on Durability and Lifespan

The thick asphalt of a driveway has maintained itself very well despite the passage of many years

Durability is a key consideration for any paving project. If the asphalt layer is insufficient for the expected traffic, especially heavy commercial vehicles, the surface will wear down much faster than anticipated. This accelerated degradation means more frequent repairs and a shorter overall lifespan of the driveway or parking lot. For commercial purposes, where large trucks and heavy equipment are common, at least 4 inches of asphalt thickness is essential to withstand such demands.

Heavy-Duty Requirements for Commercial Lots

In full heavy-duty commercial lots, where the traffic volume and vehicle weight are significantly higher, an even greater thickness is required. This additional thickness is critical to providing the necessary durability to withstand the constant stress from heavy vehicles. It’s not just about handling the immediate load but ensuring the longevity and continual performance of the asphalt surface under extreme conditions.

Avoiding Early Deterioration

The consequences of an insufficiently thick asphalt driveway are not limited to aesthetics. If heavy vehicles like big trucks frequently traverse a driveway that’s not built to support such load, early deterioration is inevitable. This not only leads to increased maintenance costs but also poses safety risks. The surface can become uneven, leading to potential hazards for vehicles and pedestrians alike.

Ultimately, ensuring the correct thickness of your asphalt driveway is crucial for its long-term performance and sustainability. It’s an investment in the safety, functionality, and aesthetics of your property. Avoiding the pitfalls of an inadequately thick asphalt layer will save you from future headaches and unnecessary expenses.

Cost Considerations in Thicker Asphalt Pavement Construction

The worker is laying a thick layer of asphalt at a cost affordable to the homeowner

In any paving project, the thickness of the asphalt significantly influences both the initial installation costs and long-term financial commitments for maintenance and repairs. It’s essential to consider these costs carefully to understand the full financial implications of choosing a thicker asphalt layer. When discussing your project with a professional contracting company, make sure to delve into the specifics, including the optimal thickness for your driveway. Questions like “Is 2 inches of asphalt enough for a driveway?” often arise in these discussions, prompting a thorough examination of the balance between upfront expenses and the durability of the asphalt layer over time.

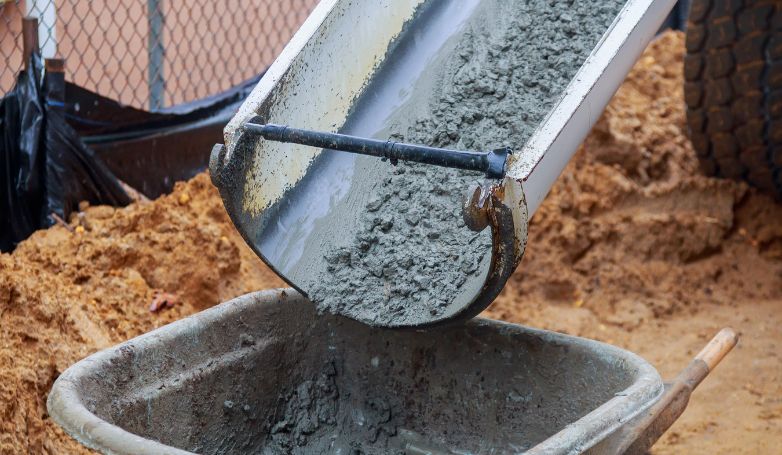
Initial Installation Costs

The initial financial outlay for installing a thicker layer of asphalt is an important consideration. This involves more than just the cost of additional asphalt material; it also encompasses the associated labor and potential equipment costs. A thicker layer typically requires more material, which directly increases the cost. Additionally, the process of laying and compacting a thicker layer can be more labor-intensive and may require specialized equipment. These factors combined can lead to a higher initial investment. However, it’s essential to balance these upfront costs against the long-term benefits, such as reduced need for repairs and longer intervals between major resurfacing projects.

Long-term Maintenance and Repair Expenses

When considering the long-term financial impact of thicker asphalt pavement, the reduced frequency of repairs and the extended lifespan play a crucial role. Thicker asphalt is less susceptible to damage and wear, translating to fewer repairs over time. This can significantly lower the long-term maintenance costs associated with the pavement. Furthermore, the extended lifespan of a thicker asphalt layer means that major resurfacing or replacement projects can be spaced out further apart, leading to considerable cost savings over the years. In high-traffic or commercial areas, where pavement is subjected to more intense use, the cost-efficiency of a thicker layer becomes even more pronounced. The higher initial investment can be offset by the reduced need for frequent, costly repairs, making it a financially sound choice in the long run.

Wrap Up

In conclusion, while the initial cost of installing a thicker layer of asphalt may be higher, the long-term savings in maintenance and repair expenses often make it a more cost-effective option, leading to the question: is 2 inches of asphalt enough for a driveway? Thicker asphalt proves to be a wise investment for projects where durability and long-term performance are key priorities.

What causes asphalt driveway damages?

The red car leaks oil, and it flows into the parking lot.

Apart from improper thickness of a driveway or parking lot, other things cause asphalt driveways to deteriorate quickly. There are:

  • Poor drainage
  • Lack of maintenance
  • Poor subgrade load-bearing ability

Poor drainage

Poor drainage causes damage to the asphalt driveway. To build a proper asphalt driveway, you need to carry out good drainage. There needs to be no humidity; ensure the water is drained away entirely before you can begin to pave.

Lack of maintenance

The workers are doing maintenance on the asphalt

It is common for asphalt pavement to crack as it ages due to continuous exposure and weather patterns. Fortunately, you can detect and fix several cracks with a yearly checkup. Pavement seal coating and crack sealing are a good maintenance practice to prevent water damage.

Poor subgrade load-bearing ability

It is commonly reported that inadequate subgrade results in pavement damage. This happens when the soils below the asphalt base layer are clay-based rather than stone-based. If you observe ruts appearing in your parking lot or driveway after a round of rain, it could be a sign that the subgrade is unable to support the weight.Related Articles:

Conclusion

The thickness of an asphalt driveway plays a critical role in its longevity. The purpose of designing a driveway is also to determine how thick it should be. When consulting with a professional contracting company about your driveway project, it’s essential to discuss specifications, including the appropriate thickness. This ensures that the asphalt layer meets the necessary standards for durability. A common question that arises in such discussions is, “Is 2 inches of asphalt enough for a driveway?” This consideration is vital to achieving the right balance between cost and longevity for your specific project.

Tim Dawson's Avatar

About the Author: James Brennan

James has over two decades of experience in the paving industry and has worked on a wide variety of projects, from large-scale commercial installations to small residential repairs.

Oil and Stone Driveway

In today’s world, homeowners are often overwhelmed by the multitude of choices available for driveway surfaces. These range from traditional options like loose gravel to modern alternatives such as resin-based solutions. However, amidst this wide array of choices, the oil and stone driveway stands out as a unique and appealing option for those seeking an economical and low-maintenance solution. 

The oil and stone driveway, also known as a gravel drive surfaced with asphalt (bituminous oil) and loose stone, offers a rustic yet sophisticated appearance. This method involves laying fresh asphalt and then embedding loose stones into it using a heavy roller. If this process sounds familiar, it’s because oil and stone surfacing has a rich history.  Originating in England during the 1830s, this technique was initially used with coal tar before the advent of crude oil distillation. As automobiles began to replace horse-drawn carriages, this surfacing method gained popularity across the USA, England, Australia, and New Zealand. Known by various names such as “tar and chip,” “chip-seal,” and “macadam” (a term you might encounter in old British spy novels), oil and stone driveways have stood the test of time as a reliable and cost-effective surfacing option.

To fully grasp the essence of this driveway style, a dive into its historical roots is essential, along with a comparison to other similar surfacing techniques. Our comprehensive guide will illuminate the unique aspects of this enduring option, enabling you to make a well-informed choice for your property. Keep an eye out for our thorough analysis, where we blend historical insights with modern practicality to explore this traditional yet practical surfacing method.

What Exactly Is An Oil And Stone Driveway Made From?

Some homes with an oil and stone driveway

A driveway with both aesthetic and practical appeal, commonly known as an oil and stone surface, primarily uses bituminous oil as a binder. Delving into the distillation of crude oil reveals the origin of this component. During this process, crude oil is separated into various fractions based on the weight of its hydrocarbons. The gases move to the top, while intermediate-weight hydrocarbons like fuel oil and diesel are in the middle. The heaviest, bituminous oil, settles at the bottom of the distillation column.

Bituminous Oil vs. Asphalt: Understanding Their Roles in Driveway Surfaces

Often confused with asphalt, bituminous oil is a thick, viscous material derived directly from crude oil distillation. In contrast, asphalt results from blending bitumen with aggregates such as gravel and sand. This mixture, heated to a malleable state, is commonly used for laying driveways and roads.

Texture and Durability: Key Attributes of Different Driveway Materials

The method of application and the resulting texture set these two materials apart. Asphalt driveways, known for their uniform black color and smoothness, are a staple in the United States. They require a sealant to maintain their integrity due to their relative brittleness. Conversely, driveways utilizing bituminous oil and stone offer a unique aesthetic and a durable surface without the need for frequent sealing. This distinction is important for homeowners looking for a driveway that combines visual charm with functionality.

Differentiating Between Asphalt, Bitumen, and Tar in Driveway Surfacing

The Stones Used in Oil and Gravel Driveways

The stone used in this type of driveway can be almost any stone depending on the desired look and feel. Popular options include granite, flint, magnesian limestone, slate, or river rock.10 mm is the most popular average stone size, but the size can vary from about 5 mm up to 20 mm. Stones larger than 20 mm bind less effectively and are more likely to become loose over time.

A seminal study of oil and stone surfacing conducted in New Zealand in 1935 established that the ideal ratio of oil to chips should result in the bitumen reaching 2/3 the height of the average stone and that roughly cubical stones are preferable to flat or round rocks.

These basic principles are still the gold standard today.

Advantages of Oil and Stone Driveways

A home is enjoying the benefits of Oil and Stone driveway

The oil and stone driveway, a charming and practical option, often gets overlooked by homeowners for two common misconceptions:

  1. The assumption that it only offers a monotonous black stone appearance reminiscent of old backroads.
  2. The belief that newer driveway materials must inherently offer better solutions.

Contrary to these beliefs, modern oil and stone driveways offer a rich diversity in both color and texture. This versatility enables homeowners to select a driveway that not only complements their home’s exterior but also reflects their personal style. Far from being a relic of the past, these driveways have evolved to suit contemporary tastes and requirements.

Additionally, this driveway type stands out as one of the most economically advantageous and visually striking options available. Its blend of long-lasting quality and aesthetic adaptability makes it an intelligent selection for homeowners looking to harmonize traditional charm with contemporary style in their property’s landscaping.

Aesthetics

The modern oil and stone driveway offers extensive customization, allowing homeowners to select the color and size of the stones for the top layer. This flexibility in design ensures that the driveway can seamlessly integrate with the home’s exterior, existing landscaping, or the natural stone in the surroundings. The result is a driveway that not only complements the property but also enhances its overall curb appeal.

Further adding to their aesthetic appeal, these driveways strike a charming balance with their country house feel, positioned perfectly between the simplicity of gravel and the more industrial appearance of black asphalt or concrete. The inclusion of paver borders offers a functional and stylish upgrade, helping to maintain the driveway’s neat appearance by keeping loose stones in place and protecting adjacent grass and plant areas.

The installation cost

The worker is placing the stones at the edges of the driveway

The cost-effectiveness of oil and stone driveways is partly due to their long-standing history and the simplicity of the materials used. The main components – bituminous oil and stone – are not only abundant but also don’t require specialized equipment for storage, transport, or installation.

While these driveways are more costly than basic gravel options, they are significantly more affordable than asphalt driveways. They offer a cost-effective alternative, approximately half the price of installing concrete or paver driveways. This makes them an attractive choice for homeowners seeking a balance between affordability and aesthetic appeal.

Ease of Installation

Although installing an oil and stone driveway is not a typical do-it-yourself project, finding a qualified professional for the job is straightforward. The installation process is relatively quick and less complex compared to other driveway materials. This ease of installation contributes to their cost-effectiveness and makes them a practical choice for homeowners who want a durable and attractive driveway without enduring a lengthy or disruptive installation process.

The Layers

As with any drive, your contractor will begin by excavating, grading, and compacting the soil. Then he will deposit a layer of gravel. It is crucial to resolve any slope or drainage issues before installation.

A driveway is only as good as the surface beneath because oil and stone follow the underlying layers’ contours.

If you are installing over a previously existing driveway, ensure that the substrate is not severely cracked and no potholes are present. Oil and stone cannot be used to repair those kinds of defects.

The contractor will then spay a ¼ inch layer of bitumen heated to 190º F over the gravel. Your contractor will need to schedule the spraying on a dry day with an ambient temperature of at least 55º F.

While the asphalt is still hot, the contractor dumps loose stone on top of the bitumen. A crew will then spread the stones by hand using wooden lutes. They will need to do this quickly since bitumen hardens relatively fast. 

A special-purpose roller truck or hand-roller presses the loose stones into the hot asphalt, essentially gluing the loose stones together with bitumen. It’s essential to use a roller with rubber wheels. The heavy steel rollers used in highway construction will crush the stones, which radically changes the aesthetics.

The Double-Chip Seal

The machine is fixing the asphalt of the driveway

Some homeowners opt to do a second layer of stone, called a double-chip seal. There is also a process called a “cape-seal,” in which a standard oil and stone driveway is covered by a slurry comprised of bituminous oil, fine aggregate, water, and cement. 

A cape seal will extend a driveway life by as much as 50%. However, the look is much closer to that of asphalt, which may not be desirable to many homeowners.

Another benefit of a driveway is it may be installed over an existing drive, provided the current driveway is in reasonable condition.

Ease of Maintenance

Once you’ve laid down your driveway, there’s little maintenance required.  

Unlike asphalt driveways, oil and stone don’t need to be sealed (or resealed on an annual basis.)  During the warm days of Summer, the asphalt naturally softens a bit and effectively reseals itself.

The stones due tend to wander, especially in heavy rains. In the Spring, the homeowner may need to rake up the loose stones and redistribute them. 

During warmer days, the loose respread stones are pressed back into the asphalt by the owner’s cars’ normal weight.

Some people opt to spray a sealant to “lock’ the stones in place. This is called a fog seal or “enrichment.”

Several higher-tech options are available for oil and stone driveways using either polymer-modified bitumen or an asphalt “emulsion” (which results from blending liquid asphalt, surfactants, and water). 

These modified binding materials reduce the release of volatile organic compounds, may help water resistance, and reduce cracking.  

However, these higher-tech options are not available from most contractors. They also may add substantially to the cost and do not dramatically increase the driveway’s lifetime.

A typical driveway made with oil and stone will last for seven to ten years with little or no maintenance. 

Safety

Safety of oil and stone driveways

These types of driveways present a coarse surface. Unlike concrete, the homeowner needn’t worry about the drive becoming slippery when wet or icy. 

You can safely take the trash down the drive to the curb, and getting up the drive in cars is rarely a problem.

On the flip side, the surface is rough, and some of the stones are sharp. Falls on the rough stone can result in cuts and scrapes. If you have kids, they’ll want to do things like skating or skateboarding someplace else.

Eco-Friendly

A final plus is that they are made entirely from natural materials. Unlike asphalt, the bituminous oil used in oil and stone drives is an all-natural petroleum byproduct. Of course, stones are as natural as it gets.  

If you are doing new construction, you may even have the option of recycling the material removed from your foundation for your driveway stone.

These types of driveways do not retain heat from the sun as much as many other driveway surfaces, which can be a real boon to surrounding landscaping.

Potential Disadvantages of an Oil and Stone Driveway

Some stones ready to be placed in the driveway

Certain drawbacks may need consideration when opting for an oil and stone driveway; it’s essential to be mindful of the following factors:

Runoff and Drainage

Oil and stone driveways can be problematic in areas with heavy rainfall or flooding. If your driveway is on a steep incline or in a location prone to water accumulation, the stones can easily become loose and gather in runoff areas. This often leads to uneven surfaces and bare patches on the driveway. Additionally, such conditions can cause erosion under the driveway, compromising its structural integrity over time. Proper drainage solutions must be implemented during installation to mitigate these issues. Regular maintenance, such as checking for and repairing erosion, can also help prolong the driveway’s lifespan.

Snow Plowing

The bulldozer is clearing snow off the driveway

Snow management on oil and stone driveways requires careful strategy. If the snowplow blade is set too low, it can scrape and dislodge the stones, leading to an uneven surface. It’s advised to set the snowplow shoes about half an inch above the surface and leave about an inch of snow for traction. Furthermore, frequent snow plowing can gradually displace stones over time, necessitating occasional replenishment. Using a snowblower or a broom for lighter snowfalls can be a gentler alternative to plowing. In areas with heavy snowfall, installing markers along the driveway edges can help guide snow removal without disturbing the stones.

Local Ordinances

Before installing an oil and stone driveway, it’s essential to check local ordinances, as they may be prohibited in some areas. These restrictions could stem from various reasons, such as environmental concerns, aesthetic standards set by the community, or specific maintenance requirements. Non-compliance with these regulations can lead to penalties, including fines or the need to reconstruct the driveway using approved materials. Additionally, in locales with stringent stormwater management rules, such driveways might necessitate special construction methods to meet compliance. Consulting with local authorities or a knowledgeable contractor is recommended to ensure you’re fully informed about these regulations.

Requires a Qualified Contractor

Installing an oil and stone driveway is not a DIY project and requires a skilled contractor. Finding an experienced professional who can demonstrate a substantial portfolio of successful projects is key. Ideally, you should find contractors who have completed projects in your area so you can visit and speak to the owners. It’s also important to ensure the contractor is licensed, insured, and familiar with local building codes and regulations.

Checking online reviews and asking for references can offer additional insights into their reliability and quality of work. Lastly, a good contractor should be able to provide a clear and detailed quote, outlining the costs, timeline, and scope of the project.

Oil and Stone Driveway Cost

Cost ComponentPrice Range per Square Foot
Materials (Stone)$10 – $50
Materials (Bituminous Oil)$1 – $5
Labor and Installation$2 – $8
Preparation and Additional Work$5 – $15
Total Cost Estimate (Basic)$12 – $30
Total Cost Estimate (High-End)$30 – $70

When evaluating options for a new driveway, cost is typically a significant consideration for homeowners. Driveways using a combination of bituminous oil and stone are often recognized for their balance of rustic appeal and lasting quality, presenting a budget-friendly alternative to other materials. Being aware of the different cost factors associated with this type of driveway installation is essential in making a well-informed choice.

Material Costs

The primary components of an oil and stone driveway are bituminous oil and the chosen stones. The cost of these materials can vary depending on the type and quality of the stone and the regional availability of bituminous oil. Higher-quality or unique stone types can increase the cost, while more common stone varieties are typically more budget-friendly.

Labor and Installation Charges

The cost of labor is another significant component. This varies depending on your location and the complexity of the driveway installation. Labor costs can be influenced by factors such as the size of the driveway, site accessibility, and the need for any additional groundwork or drainage solutions.

Preparation and Additional Work

Preparation work, such as removing an existing driveway, grading, or adding a base layer, can add to the overall cost. If your property requires significant preparation or landscaping work to accommodate the driveway, these costs can accumulate quickly.

Long-term Maintenance

An oil and stone driveway has held up very well after many years of use

While oil and stone driveways are low maintenance, occasional upkeep such as re-spreading loose stones or addressing drainage issues may be necessary. These long-term maintenance costs are generally low compared to other materials but should be factored into the overall budget.

Regional Variations

Costs can also vary significantly based on your geographic location. Factors like local labor rates, material availability, and even weather conditions can influence the total cost of an oil and stone driveway in your area.

Estimating Your Driveway Cost

To get an accurate estimate for your oil and stone driveway, it’s advisable to consult with several local contractors. They can provide detailed quotes based on your specific requirements, property layout, and local cost factors. Comparing these estimates will give you a clearer idea of the potential investment and help you budget accordingly for your new driveway.

Overall Recommendation and Conclusion

When selecting a driveway material, this particular style offers versatility and suitability for various property types. However, the overall aesthetic of your property is a key consideration. These driveways tend to have a rustic charm, but the wide range of stone colors and textures available allows for significant customization. This flexibility enables you to match the driveway with your home’s style, be it modern, traditional, or something in between.

If you’re contemplating installing a new driveway or thinking about rejuvenating your existing one, it’s worth exploring the oil and stone option. Its combination of aesthetic appeal, customization possibilities, and practical benefits makes it a strong contender in the world of driveway materials. With the right design choices, an oil and stone driveway can not only enhance the curb appeal of your home but also serve as a durable and cost-effective solution for your driveway needs.

Tim Dawson's Avatar

About the Author: James Brennan

James has over two decades of experience in the paving industry and has worked on a wide variety of projects, from large-scale commercial installations to small residential repairs.

How To Build A Concrete Catch Basin

Catch basins are an integral component of urban water management systems, playing a vital role in preventing flooding and ensuring efficient water runoff control. These structures are particularly critical in areas prone to heavy rainfall or where water accumulation can cause significant issues. The process of constructing a concrete catch basin involves careful planning, precision, and a basic understanding of construction principles.

The process of building a durable concrete catch basin begins with careful site selection, ensuring it’s strategically placed for maximum efficacy. In the next step of constructing your basin, you’ll create a sturdy form using plywood, serving as the mold. The installation of a drainpipe is a critical step, ensuring proper water flow and drainage. Pouring concrete forms the core, followed by reinforcing it with rebar for added stability and durability. Lastly, a metal grate is placed atop the basin, serving not only for safety but also to prevent debris from clogging the system.

Embarking on a project to build a concrete catch basin can initially appear challenging. However, with the right tools, materials, and guidance, it becomes a highly achievable task that can significantly enhance your property’s water management system. Continue reading to uncover detailed steps, expert tips, and best practices that will transform this seemingly daunting project into a rewarding and successful endeavor.

Tools You’ll Need To Get Started

A worker ready to build a concrete catch basin

Before starting the construction process, it’s essential to assemble all necessary tools and materials for your concrete basin. Equipping yourself with the right tools not only simplifies the task at hand but also guarantees the durability and effectiveness of the structure. This preparation is key whether you’re experienced in DIY projects or embarking on your first construction endeavor. Having everything ready beforehand will contribute to a smoother, more efficient workflow.

  • Metal Grate
  • Sand
  • Flat Trowel
  • Small Shovel
  • Concrete Mixing Container
  • Concrete Mixing Hoe
  • Garden Hose
  • Concrete 
  • Rebar
  • Drain Pipe
  • Hammer or Drill
  • Screws or Nails
  • Circular Saw
  • 2×4 Lumber and Plywood
  • Shovel

8-Step Guide to Building a Concrete Catch Basin: A Detailed Process

Building a concrete catch basin is a meticulous process that requires careful planning and execution to ensure optimal functionality. This 8-step guide provides a detailed walkthrough of the process, from excavation to the finishing touches.

#1 Dig Your Hole

The worker is digging the hole to collect the water inside the concrete basin

The first step in building a concrete basin is the careful excavation of a suitable hole. This hole should ideally be positioned next to your foundation or in an area of your lawn that is prone to water collection. For a standard two-foot design, the excavation needs to be at least 32 inches wide in both length and width, providing enough room not only for the basin but also for the surrounding concrete walls. The depth of this excavation is critical too, as it must be deep enough to accommodate the structure and its connection to the drainage system. Using tools like a square shovel or spade will aid in achieving the precise edges and uniform depth required for optimal functionality.

#2 Form Your Concrete

Creating a sturdy form is crucial for the structural integrity of your catch basin. To shape its interior, use high-quality plywood cut to the necessary dimensions. Attach 2×4 lumber to the interior corners of the plywood form using reliable fastening methods like nailing or screwing to ensure a secure fit. The space between the edge of the hole and the plywood, typically 4 to 6 inches, will dictate the thickness of the basin’s walls. This thickness is vital for providing the necessary support and durability. If the basin is located next to your home, consider integrating the house’s foundation into the form, which can eliminate the need for an additional side.

#3 Install the Drain

The workers installed the water drainage system towards the tank for collection

For your catch basin to function effectively, proper drainage installation is key. Install the drain pipe at the base of one of the side walls before pouring the concrete. This pipe should slope slightly towards a dry well or curb, facilitating efficient water flow. It’s important to consider the recommended floor thickness of 4 to 6 inches to ensure the drain is positioned correctly. This careful planning will help prevent future drainage issues and maintain the basin’s functionality.

PRO TIP: When trying to determine the height of your drain, make sure to consider how thick your concrete floor will be. Ideally, you’ll want it to be around four to six inches thick, the same as your walls. 

#4 Use Rebar to Reinforce

Reinforcing the concrete with rebar significantly enhances the structural strength of your catch basin. Position rebar at strategic locations within the designated pour area, ensuring to drive each piece at least four inches deep into the ground. Distribute the rebar evenly, placing a piece every eight inches, but without protruding above the surface.Consulting local building codes is crucial to ensure compliance with regulations regarding rebar length and placement, ensuring your catch basin meets safety and durability standards.

#5 Pour Your Concrete

The workers poured the concrete

The pouring of concrete is a critical phase where precision and adherence to instructions are key. Fill the space between the hole’s edge and the plywood form with concrete, mixed according to manufacturer’s guidelines. While there are various methods for mixing concrete, hand mixing is often the most practical and cost-effective for small-scale projects. For larger projects, consider renting a concrete mixing truck for efficiency and consistency in the concrete mix.

PRO TIP: While there are many ways to mix concrete, we recommend doing it by hand. It’s the most cost-efficient way unless you want to spend money on hiring a big mixing truck from a concrete company. 

#6 Remove Your Form

After the concrete has set and cured, which typically takes several days, carefully dismantle the plywood form and any other temporary building materials. This step requires delicacy to avoid damaging the newly formed concrete walls of the catch basin. The removal process should be done methodically, ensuring the integrity of the basin’s structure is maintained.

#7 Pour The Bottom

Some sand was poured over the concrete

Before pouring the concrete base, a layer of sand, about three inches thick, should be spread evenly across the base of the hole. This sand layer acts as a cushion, reducing the risk of the concrete settling and cracking over time. After laying the sand, pour the concrete for the base and use a trowel to smooth it out, ensuring a level and even surface. This step is crucial for creating a solid foundation for your catch basin.

#8 Attach Your Grate

Finishing your catch basin with a secure metal grate is vital for safety and functionality. You can either custom-build a grate to fit your basin or opt for a pre-made one. The grate should be robust enough to support the weight of an adult or animal, preventing accidental falls into the basin. Ensure the grate is firmly attached and sits flush with the basin’s edges for optimal safety and effectiveness.

Where Should I Build My Catch Basin?

A small house with newly asphalt driveway.

A catch basin should sit at the lowest point on your property. You want it to be a place where water pools or puddles after a rainstorm. Of course, before that, you’ll want to analyze the foundation of the home

Remember, your home’s foundation will likely be one of the four walls of your catch basin. If the foundation of your home is not in good condition, you could end up diverting water into it, which would be an absolute nightmare. 

As a rule of thumb, you want to find a spot along your home’s perimeter that not only looks aesthetically pleasing but is out of the way of most foot traffic. 

How Large Should My Catch Basin Be?

A fairly wide basin in concrete

For most residential properties, a 2×2-foot catch basin should do the trick. The drain should be anywhere from four to six inches. The only reason you’d go larger is if you were building a commercial catch basin. 

If you don’t have serious water management requirements, you may even consider going smaller with a 1×1-foot catch basin. It’s up to you to consider how much rainfall you get along with your roof’s surface area when building a catch basin. 

What Are The Different Types of Residential Catch Basins?

If you’ve done any research prior to stumbling upon this article, you may have seen that there are numerous options for catch basins out there. Let’s take a look at some of the most popular choices for residential catch basins.

  • Plastic Catch Basin: If you’re building a smaller catch basin, plastic is a great option! These types of catch basins are typically made out of PVC or high-density polyethylene.
  • Polymer Concrete: This type of concrete is far more durable than regular concrete, as it uses a unique polymer binder with natural mineral aggregates.
  • Pre-Cast Concrete: A pre-cast concrete catch basin is very common and won’t often cost you very much. However, you will need a backhoe or a small crane to install one.
  • Cast-In Concrete: A cast-in concrete basin will be a good choice if you can’t deal with a heavy pre-cast basin. With a cast-in concrete basin, you will have to dig a hole, plot your meal frame, and sturdy with rebar.

How Much Does It Cost To Build a Concrete Catch Basin?

A simple house with clean concrete driveway.

Understanding the cost involved in building a concrete catch basin is crucial for budgeting and planning. The total expense varies based on several factors, including the size of the basin, the quality of materials used, and whether you opt for a professional installation or a do-it-yourself approach. Here’s a breakdown of the costs to consider:

Professional Concrete Catch Basin Installation

  1. Cost Range: For a professionally installed concrete catch basin, prices generally range from $2,500 to $5,000. This cost variance primarily depends on the size of the catch basin and the complexity of the installation process.
  2. Size Factor: The larger the catch basin, the higher the cost. This is due to increased materials and labor required for larger basins.
  3. Material Quality: High-quality concrete and reinforcement materials will add to the cost but are essential for durability and longevity.

DIY Alternatives: Plastic Catch Basins

  1. Cost-Effective Option: If you are working with a tight budget, a plastic catch basin might be a feasible alternative. These can be purchased from local hardware stores for under $100.
  2. Durability Considerations: While plastic catch basins are more affordable, they are significantly less durable than concrete. They are typically suitable for areas with minimal water management needs.
  3. Long-Term Investment: It’s important to consider the long-term implications of choosing plastic over concrete. While the initial investment is lower, the need for replacements or repairs could make plastic more costly over time.

In summary, when deciding on the type of catch basin to install, consider both the immediate financial outlay and the long-term implications on durability and maintenance. A concrete catch basin, though more expensive upfront, offers greater durability and effectiveness for comprehensive water management. On the other hand, a plastic catch basin can be a cost-effective solution for minimal water management needs, but it may lack the longevity and robustness of a concrete structure.

Benefits of a Well-Built Concrete Catch Basin

A well-built catch basin is bringing many benefits to the homeowner

The implementation of a well-built concrete catch basin is a pivotal decision for any paving project. Whether it’s for residential driveways, commercial parking lots, or urban roadways, the inclusion of a catch basin significantly impacts the area’s overall water management and integrity. In this section, we delve into the key benefits of integrating a concrete catch basin into your paving project. These advantages not only highlight the importance of proper water drainage but also underscore the catch basin’s role in preserving the long-term health and safety of paved surfaces.

Efficient water drainage

A well-constructed concrete catch basin serves as a critical component in managing surface water. Its primary role is to efficiently collect and redirect rainwater and melting snow, preventing water accumulation on surfaces like driveways, parking lots, and roads. The design of these catch basins allows for the quick and effective channeling of water into the drainage system. This process is essential for maintaining dry and safe surfaces, particularly in areas prone to heavy rainfall or snow. By ensuring proper water flow, a concrete catch basin significantly reduces the risk of water damage and enhances the overall functionality of the paved area.

Prevention of flooding and erosion

One of the most significant advantages of installing a concrete catch basin is its role in preventing flooding and erosion. By effectively capturing excess water, these structures help to maintain the integrity of the surrounding landscape. This is particularly important in preventing soil erosion around driveways and parking lots, where the stability of the ground is crucial for safety and longevity. A properly functioning catch basin mitigates the risk of flooding, which can be costly and disruptive for property owners. By directing water away from vulnerable areas, these basins play a vital role in preserving the landscape and preventing potential damage to nearby structures.

Long-term durability and structural integrity

Concrete catch basins are renowned for their durability and structural integrity. When built using high-quality materials and proper construction techniques, they can withstand harsh environmental conditions and heavy traffic. This resilience translates into a long lifespan, making them a cost-effective solution for water management in paved areas. The robustness of concrete ensures that the catch basin remains functional and maintains its shape and structure over the years, requiring minimal maintenance. This long-term durability is a key benefit for property owners looking for reliable and low-maintenance solutions for water drainage and management.

Final Thoughts

In conclusion, constructing a concrete catch basin is a manageable task that yields significant benefits. With the right tools and techniques for framing and pouring concrete, you can effectively tackle this project. The rewards of this endeavor extend far beyond immediate water management solutions. A well-built catch basin enhances your property’s value, safeguards against future drainage issues, and ensures a robust, long-term solution for water control. By investing in a concrete catch basin, you are not just addressing current needs but also proactively securing the health and integrity of your property for years to come.

Tim Dawson's Avatar

About the Author: James Brennan

James has over two decades of experience in the paving industry and has worked on a wide variety of projects, from large-scale commercial installations to small residential repairs.

Patio drainage options

Anyone who’s ever dealt with a flood knows the value of proper drainage. Whether from a downpour, a burst pipe, or another type of flood, drainage, including patio drainage options, will eventually be an issue. When it comes to your patio, ensuring a fully functioning drainage system will keep the water where it should be and protect your home’s foundation from water damage.

Patio drainage options are the choices you make about the direction of stormwater and runoff on your property. Improper drainage can leave standing water on your patio and cause long-term damage. Avoid future damage and maximize the use of your outdoor space by including a patio drainage system in your construction plans.

Read on to delve into various effective solutions for managing water flow in your outdoor spaces. Learn about innovative techniques and materials that can enhance the functionality and beauty of your patio while safeguarding your property’s foundation. Discover how integrating the appropriate water management system can transform your outdoor area into a thriving, inviting, and well-protected extension of your home.

Why does your patio need a drainage system?

In the backyard, there is a green and clean patio that is well maintained.

Whether you have an existing patio with standing water after a storm or you’re planning to construct the patio of your dreams, proper drainage should be a priority. If you wanted standing water on your patio, you’d have built a pool. 

Ensure the health and longevity of your patio and home by installing and maintaining a proper drainage system. Your foundation benefits from the protection, and your wallet is spared expensive repair costs to fix avoidable damage. When you question whether your plan is sufficient, consult the experts. 

whatConsequences of Poor Patio Drainage
ErosionWithout a system to keep water in the right place, it can erode the soil under your patio. If too much soil washes away, your patio may become unstable and dangerous to use.
Water DamagePoor drainage allows water to seep into your foundation, crawlspace, or basement, creating the potential for water damage. A damaged foundation puts your entire home at risk.
Insect InvasionStanding water attracts insects, particularly mosquitos, which are enough to ruin any outdoor experience.
MoldPoor drainage seeping water into basements or crawlspaces will create mold, leading to poor air quality and damage to structural elements. It also causes mildew, which could damage your pavers.
Drowned PlantsPlants need water, but too much will kill them. Poor drainage can cause root rot and plant death.

What are the main patio drainage options?

Here are some options for draining water from your patio. Be sure to watch the videos for better understanding!

Slope 

Why not use nature’s advantages when designing your outdoor space? If you set a proper slope and grade of at least a quarter-inch per linear foot, water should flow away from the areas you need to protect naturally without much more work on your part.

French drain

If your patio site doesn’t have enough natural drainage, consider adding a French drain, one of the effective patio drainage options, to channel the water where you want it. A French drain is a covered trench holding a perforated pipe and aggregate (gravel) to redirect water.

A French drain is an excellent option if you’re concerned about the aesthetics of your patio. You can match the aggregate to the rest of your patio, and the drainage trench adds an attractive border to your outdoor area.

Permeable pavers

For your patio, permeable pavers are another way to integrate drainage into your aesthetic design. Take advantage of the land’s natural water absorption for sustainable landscaping choices. You also have the option to use permeable grass pavers, which incorporate living plant material to help harvest and recycle rainwater while preserving green space. You can also include permeable pavers in French drains.

Common patio drainage problems and solutions

There is a patio surrounded by green grass and trees

These are some patio drainage problems you may have.

Improper pitch

A level patio may seem appealing, but it can become a haven for water accumulation and subsequent damage. This standing water not only poses a risk of water damage but can also lead to the growth of mold and algae, making the surface slippery and unsafe. To counter this, during the design phase, it’s crucial to integrate a gradual slope away from your home and other structures. This subtle inclination, often imperceptible to the eye, is a key design feature that facilitates proper drainage, directing water away from your patio and home foundation. 

Clogged drain system

Drainage systems in older patios are particularly susceptible to clogs from leaves, twigs, and sediment buildup. Over time, these obstructions can significantly impede water flow, leading to surface water accumulation. Regular inspection and cleaning are essential, especially after storms or seasonal changes. In severe cases, professional cleaning or even system upgrades may be necessary. It’s also important to consider the surrounding landscape – trees and plants that shed leaves or needles can contribute to frequent clogs, necessitating more frequent maintenance.

Badly placed downspouts and roof overhangs

Example of a roof overhangs that acts as a drain for water

The positioning of downspouts and roof overhangs relative to your patio can dramatically affect drainage efficiency. Incorrectly directed downspouts can funnel water directly onto your patio, overwhelming the drainage system. To mitigate this, it’s essential to consider redirecting downspouts away from the patio or integrating them into the existing drainage plan. This might involve extending downspouts, installing diverters, or even incorporating rainwater collection systems that can be used for gardening purposes, turning a problem into an eco-friendly solution.

Sinking pavers

Paver erosion and sinking are telltale signs of underlying issues, often indicating the need for better patio drainage options. This is usually due to an inadequate base or sub-base that fails to provide proper support and drainage. To address this, it’s necessary to excavate the affected area, removing not just the pavers but also the top layer of soil, which may have become saturated and unstable. Replacing this with a well-compacted layer of gravel or crushed stone creates a more stable base, facilitating better water dispersion and preventing future sinking. This process not only addresses the immediate issue of sinking pavers but also enhances the overall drainage efficiency of your patio area.

10 Patio drainage ideas

Efficient patio drainage is essential for preventing water accumulation, erosion, and potential damage. Explore these 10 patio drainage ideas to enhance both functionality and aesthetics in your outdoor space.

1. Dry creek bed xeriscaping

Dry creek bed xeriscaping not only directs stormwater efficiently but also enhances your garden’s aesthetics with minimal water usage. By arranging rocks in varying sizes, you create a visually pleasing and functional channel for rainwater. This method offers a natural, low-maintenance solution that controls water flow and reduces erosion risk. Incorporating solar lights adds a captivating element to your landscape, making it a feature that shines both day and night.

2. Build a yard drain

The worker installed a yard rain to drain the water and dry the patio faster

A yard drain, especially in flood-prone areas, is an effective water management solution. By installing a network of underground pipes, you can redirect excess water, thereby protecting your lawn and patio from water damage and erosion. This system can be designed to blend with your landscape, maintaining the aesthetic appeal while ensuring functionality. It’s an essential measure for areas with heavy rainfall or poor natural drainage.

3. Build a French drain

French drains offer a reliable, low-maintenance solution for patio drainage. Constructed with a trench, perforated PVC pipe, and gravel, they effectively divert water away from problem areas. Their design ensures longevity and resistance to clogging, making them an ideal choice for areas with persistent water accumulation. Additionally, French drains can be disguised under landscaping, preserving the aesthetic integrity of your outdoor space.

4. Replace concrete with drainage materials

Replacing impermeable surfaces like concrete with permeable pavers is a strategic move to combat waterlogging. These pavers allow water to seep through, reducing surface runoff and promoting natural water absorption. This approach not only resolves drainage issues but also enhances the visual appeal of your patio, offering a practical and aesthetically pleasing alternative to traditional paving materials.

5. Install a rain barrel

Rain barrels used to collect water, an excellent drainage system for the patio

Utilizing rain barrels is an eco-friendly way to manage excess water from downspouts. By collecting and repurposing this water for your garden, you conserve resources and reduce runoff. However, it’s important to verify local regulations regarding rainwater collection, as some regions have restrictions. When implemented correctly, rain barrels can be a practical and sustainable addition to your home’s water management system.

6. Install a catch basin

Incorporating a catch basin near gutter downspouts is a practical patio drainage option to manage stormwater effectively. It captures and redirects excess water into a drainage system, preventing pooling and protecting your home’s foundation. This solution is particularly useful in areas with heavy rainfall, ensuring that water is efficiently channeled away from your property, thereby minimizing the risk of water damage.

7. Build a dry well

For properties experiencing high volumes of stormwater, a dry well serves as an excellent drainage solution. This underground structure, filled with rocks, acts as a natural reservoir, absorbing and dispersing water gradually into the soil. It’s an effective way to manage large amounts of water, preventing flooding and soil erosion, and is particularly useful in areas with limited surface drainage options.

8. Use downspout extensions

A downspout extension is draining the water into the grate

Downspout extensions are a simple yet effective way to enhance your home’s drainage system. By extending the reach of downspouts, they effectively divert water away from the foundation, reducing the risk of water damage. This solution is particularly useful in areas where the existing downspouts are insufficient to handle the volume of stormwater, providing an easy and cost-effective way to improve water management.

9. Add a channel drain

When considering patio drainage options, channel drains emerge as a highly practical solution for redirecting water flow, particularly in situations where the current drainage proves insufficient. These drains offer a versatile choice, allowing strategic placement to guide water away from problematic zones, thereby safeguarding your patio and garden against potential water damage. Channel drains can seamlessly integrate into your existing drainage system, providing an effective enhancement to ensure optimal water management for your outdoor spaces.

10. Use permeable pavers on paths as drainage

Incorporating permeable pavers over a French drain system is an innovative way to manage patio and lawn drainage. These pavers allow water to percolate through, reducing surface runoff and protecting your foundation from water damage. This method not only improves drainage but also adds aesthetic value to your outdoor space, creating functional and attractive walkways that complement your landscape design.

Popular patio drains and drainage products

A modern patio can be found in the backyard of the house.

Paver size drain grate

This 6”x6” insert fits 3” and 4” drainpipes and is perfect for adding a drain to any drainage system. Reviewers gave overwhelmingly positive ratings, saying they liked the look and the ease of installation. The design also allows easy grate removal to clean and maintain your drain. 

Easy trench drain channel with stamped steel grating

This easy 3-inch interlocking trench system is a popular choice for anyone wanting to add a channel drain to their yard or patio drainage system. The kit has five pieces, including two end caps and the bottom outlet adapter. Customers said it was easy to use and worked well. 

Geo grid permeable base

The geogrid design is perfect for either sloped or flat land. The pockets allow you to choose loose aggregate or soil and grass seed. The recycled polyethylene grid virtually eliminates erosion and is an excellent choice for poor or unstable soil areas.

Interlocking patio deck tiles

Ensure your patio works with your drainage system with these interlocking patio deck tiles. They allow water to drain underneath, and customers love how fast and easy it is to use them. The set contains nine 11.75”x11.75” tiles. 

Catch basin drain kit

Why worry about designing a catch basin when you can use this ready-made option? Convenience meets function with this catch basin drain kit. Reviewers said it was easy to use and worked as expected. 

Maintenance Tips for Patio Drainage

A very clever system for draining water outside the patio

To ensure your patio drainage system remains effective and prolongs its lifespan, regular maintenance is crucial. It not only prevents major repairs but also keeps your outdoor area safe and aesthetically pleasing. Here’s a breakdown of essential maintenance practices:

Regular Cleaning and Inspection

Maintaining a clean and functional drainage system is vital for its longevity. Regular cleaning prevents blockages, while routine inspections can identify potential issues before they escalate into major problems. Here are some steps to follow:

  1. Debris Removal: Regularly clear leaves, dirt, and other debris from your patio surface and drainage outlets. This prevents blockages and ensures smooth water flow.
  2. Inspect Drain Channels: Regularly inspect drain channels and grates for any signs of damage or obstruction. Cracks or breaks can hinder the functionality of your drainage system.
  3. Check for Clogs: Use a plumber’s snake or a high-pressure hose to clear any clogs within the drainage pipes. This helps maintain optimal water flow.
  4. Surface Assessment: Regularly assess the patio surface for any pooling water, which can indicate issues with the slope or drainage efficiency.

Seasonal Maintenance Checklist

Seasonal changes can significantly affect your patio’s drainage system. Each season brings its unique challenges, requiring specific maintenance tasks to keep the system in optimal condition. Here’s what you should focus on each season:

  1. Spring: Post-winter, check for any damage caused by freeze-thaw cycles. Clear winter debris and ensure that all components are functioning properly.
  2. Summer: Ensure that the system is free from blockages and can handle summer storms. This is a good time for a thorough cleaning.
  3. Fall: Clear leaves and other fall debris that can cause blockages. Preparing for winter, ensure that the system is in top condition to handle melting snow and ice.
  4. Winter: Protect exposed pipes from freezing. Inspect the system before the first freeze and conduct any necessary repairs.

Troubleshooting Common Issues

The worker is solving a common problem in patio drainage systems

Even with regular maintenance, issues can arise with your patio drainage system. Being able to identify and troubleshoot common problems helps maintain the system’s effectiveness and prevents long-term damage. Here are some common issues and their solutions:

  1. Water Pooling: If water is pooling on your patio, check for clogged drains or improper slope. Adjust the slope or clean the drains as necessary.
  2. Slow Drainage: Slow drainage may indicate a clog or a problem with the patio’s slope. Clean the drainage system and reassess the slope.
  3. Odor Issues: Bad odors can arise from stagnant water in the drainage system. Regular cleaning and ensuring proper flow can mitigate this issue.
  4. Visible Damage: Cracks or damage to drainage components require immediate attention. Replace or repair damaged parts to ensure continued functionality.

Adhering to these maintenance practices will help you avoid common pitfalls and ensure that your patio drainage system continues to function effectively for years to come.

Conclusion

It’s important to know your patio drainage options and to pick one that suits your location. Proper patio drainage will help protect your home’s foundation and basement from water damage while giving you full use of your outdoor space. No matter what style you choose for your patio, there are drainage options to fit seamlessly with your design.

A porous surface allows water, vapor, or liquid to pass through. When used on paving, porous surfaces allow water to pass through, reducing the probability of standing water or puddles forming on the driveway or parking lot. But what exactly is a permeable material, and what are the common examples?

A permeable material contains pores that allow water, vapor, or liquid to seep through. The presence of pores or empty spaces allows external matter like particles, air, and water to penetrate the surface. Some common examples of porous surfaces used in paving include porous asphalt, porous pavers, permeable concrete, permeable interlocking concrete pavers, grasscrete, and porous gravel. Natural stone, turf blocks, permeable bricks, and resin-bound paving also contain permeable surfaces.

In this article, we compare porous to non-porous surfaces to help you choose the best one for your paving needs. We’ll also review some of the most popular types of porous surfaces used for paving, paying close attention to their pros, cons, and cost. Let’s get started.

What Is A Porous Surface?

The worker spread the porous asphalt on the road.

A porous or permeable surface is a medium or material containing voids or pores. Porous surfaces allow water, vapor, or liquid to pass through, which makes them ideal for use in areas prone to flooding.

The presence of empty spaces and pores means external matter will penetrate the object, reducing the amount of water that accumulates after heavy downpours. Some of the main characteristics of porous surfaces include low density and large surface areas to store molecules.

What Is a Non-Porous Surface?

Non-porous surfaces are hard, rigid surfaces that don’t have pores. These materials are impervious to air and water and tend to be easier to wipe or clean compared to their porous counterparts.

Compared to porous surfaces, non-porous materials tend to be smoother. Common examples of non-porous surfaces include plastics, glass, varnished wood, and metals.

Porous Surface Vs. Non-Porous Surface

The main difference between porous and non-porous surfaces is their ability to hold air, water, or other liquids. Porous surfaces are characterized by their pores that allow things to seep or flow easily. On the other hand, non-porous surfaces have compact cell structures that prevent ease of flow.

Perhaps the main advantage of porous materials is their ability to absorb water, effectively reducing the chances of puddle formation and flooding. They tend to be rough, which makes them ideal for use on walking and driving surfaces.

However, these surfaces tend to be rough due to the pores and, therefore, difficult to clean compared to non-porous surfaces. Common examples of porous materials include drapes, untreated wood, cardboard, and carpet.

On the other hand, non-porous surfaces tend to be smoother due to their tight cell structures. They’re a lot easier to clean but tend to be slippery.

10 Types of Porous Surfaces

Keen to set up a porous paver for your driveway? If so, then you’ll need all the inspiration you can find. Let’s take a look at 10 types of porous surfaces you can use on your driveway or outdoor space.

1. Porous Asphalt

A porous asphalt driveway or parking consists of a top filter course, a porous asphalt course, a bottom filter course (optional), a reservoir course, a filter fabric, and subgrade material (or existing soil).

Using porous asphalt as a paver comes with several benefits, top of the list being improved drainage. Asphalt  is also known to be durable and can have a useful life of over 20 years if properly installed and maintained.

The main challenge with porous asphalt is the high initial costs, as it’ll need special features like a stone bed. On average, you may end up spending between $8-$15 per square foot when dealing with porous asphalt.

2. Permeable Concrete

Permeable concrete, also called pervious concrete, is a porous surface commonly used in flatwork applications. It allows water to pass through, effectively reducing runoff while allowing groundwater recharge. This type of concrete is commonly used in residential streets, parking areas, driveways, and areas with light traffic.

The main advantage of permeable concrete is improved drainage due to its porous structure, which allows it to act as a natural flood management system. It is also durable if properly installed and maintained. The main disadvantages of permeable concrete are its relatively high cost ($8 to $20 per square foot) and inability to hold heavy vehicles.

3. Porous Pavers

Porous pavers are made from porous stones that allow water to seep and drain into the ground beneath. These pavers allow water to percolate through the paving into a gravel layer that acts as a filter and removes any pollutants.

Permeable pavers come with tons of advantages, such as reduced pollution, reduced local ambient temperatures, and controlled erosion. However, the main disadvantages of porous pavers are their high initial costs and inability to withstand heavy traffic. You may end up paying anywhere between $10 to $30 per square foot, depending on your preferred paver type.

4. Permeable Interlocking Concrete Pavers

Another great porous surface to try out is permeable interlocking concrete pavers, which are easy to install as they don’t require mortar. Interlocking concrete pavers that are permeable are ideal for rain-prone areas and tend to last long when properly installed.

The main disadvantage of permeable interlocking concrete pavers is that they can become easily dislodged if improperly installed. On average, you’ll pay about $4-$12 per square foot for porous interlocking concrete pavers.

5. Grasscrete

Grasscrete is a type of reinforced concrete pavement containing hollows that allow grass or other vegetation to grow. You can set up grasscrete in a variety of spaces, from driveways to patios and even walkways.

You’ll appreciate that grasscrete has a high loading capacity, is frost-resistant, UV-resistant, and slip-resistant, features that contribute to its overall durability. Disadvantages of grasscrete include installation challenges and risk of breeding insects and tiny critters. Grasscrete is generally a lot cheaper than other porous materials like concrete and asphalt.

6. Porous Gravel

Permeable gravel is an ideal porous surface for people living in flood-prone areas. The paving material is highly durable, aesthetically appealing, and easy to maintain. What’s more, porous gravel’s permeable properties make it ideal for your lawn or garden.

The main disadvantage of porous gravel is they aren’t as strong as pavements like asphalt and concrete. Proper installation is vital for porous gravel to last long and serve its purpose. On average, you’ll need to pay between $1-$3 per square foot to purchase porous gravel.

7. Turf Blocks

When looking for a porous surface that’s eco-friendly and suitable for driveways, then you need not look any further than turf blocks. Also known as grow-through pavers, turf blocks are great alternatives to traditional pavers as they’re both durable and appealing to the eye.

The main issue with turf blocks is the need for regular maintenance. You will need to mow and water the grass between the pavers and also remove weed that grows in between. On average, turf blocks can cost anywhere between $4-$20 per square foot.

8. Permeable Bricks

Porous brick is one of the best permeable surfaces to use on your outdoors. In addition to being easy to install, permeable bricks are durable and work by absorbing water until it reaches soil level. It’s among the best options if you’re looking for a pocket-friendly way to mitigate the effects of flooding on your yard.

Unfortunately, permeable bricks don’t work well on all surfaces, more specifically sloped land. They can also prove challenging to set up for people with little to no experience in paving. On average, you can expect to pay around $10 to $30 per square foot for permeable bricks.

9. Natural Stone

Natural stone is a timeless material that’s guaranteed to give your driveway or parking lot a much-needed spark. It’s relatively easy to install and readily available, while its permeability allows for improved drainage. Natural stone is also among the most durable paving materials out there and can serve you for several decades.

Unfortunately, natural stone requires a bit of care and can get slippery when wet. It’s also costlier than most paving materials, with the average cost standing at $15 – $25 per square foot, depending on the design.

10. Resin-bound Paving

Resin-bound paving is a top-quality porous surface made from mixing UV-stable resin aggregates. The porous resin performs the all-important task of filtering water that seeps through the sand base. In addition to giving your driveway a classy touch, resin-bound paving is ideal for flood prevention.

Weed growth is a common issue affecting poorly maintained resin-bound paving. Colors may also fade if you use a cheap resin that isn’t UV-stable. On average, you can expect to pay about $45 per square foot of permeable resin-bound paving.

Where to Use Porous Surfaces

Porous surfaces come with tons of benefits, especially when used as paving materials. Here are some common examples of where you can use porous surfaces.

  • Driveways
  • Pavements
  • Parking lots
  • Pedestrian routes
  • Courtyards
  • Garden paths
  • Recreational areas
  • Cycle paths

Wrapping Up

Since porous materials come in different designs, it’s advisable to choose one that best meets your preferences and budget.

The trick is to invest in high-quality porous materials and ensure they’re well-installed. While some materials are easy to install on a DIY basis, outsourcing to professionals is highly advisable if you want to minimize and eliminate the margin of error.

Tim Dawson's Avatar

About the Author: Tim Dawson

Tim is a seasoned paving expert with 30+ years of experience in the industry. He has worked on countless projects, from small residential driveways to large commercial parking lots.

How To Paint Concrete Patio

To get the best out of your DIY concrete patio projects, you must know how to paint the concrete patio seamlessly. A dirty and dull concrete patio can be an eyesore in your home. Painting your concrete outdoor the right way can boost its durability and revitalize your patio.

Before figuring out how to paint your concrete patio, you have to know that not all paints are suitable. But products that contain binders will allow the coating to expand and contract along with the concrete. This makes them the best choice for your DIY paint job. Paints generally don’t penetrate your concrete surface so wear and tear over a period can cause peeling particularly if you don’t prepare the surface properly. So you must start by checking for moisture and complete your painting by removing the masking tape.

Painting your concrete patio is the perfect way to preserve its integrity. But knowing how to paint your patio is the real deal. There is a lot of misinformation on painting concrete patios, but in this article, our experts explain all the myths and how you can achieve an outstanding patio layout with unique paint designs. Let’s get to it!

Can I paint a concrete patio?

Painting is a good option for adding colors to your home. You can paint almost any building made up of concrete and achieve the look you desire. With concrete patios, you can explore different colors and layouts. However, before you start painting, you must ensure that the patio surface is free of debris or any existing coating that can ruin your painting. Concrete paints come in different colors and grades. You can choose a vibrant and unique look when you are ready to turn your patio into a relaxing space.

Does Painting Outdoor Concrete Last?

Concrete is known for its toughness and durability. It is one of the most widely used paving materials for walkways, driveways, patios, and parking lots. Painting outdoor concrete has proven to add to its durability over a long time. No matter where you’ve installed your concrete, be rest assured that painting the floor or surface can help your concrete patio withstand harsh weather and wear.

There are two types of concrete paint; this includes latex-based paint and an oil-based paint. Both products have different unique features and layouts. However, latex-based concrete paints are the most used on patio floors and other building surfaces. Latex paint is more common because of its ease of use, and it also helps first-timers or DIY enthusiasts to achieve a good finish. With oil-based paint, you can achieve a shiny finish that can withstand low temperatures.

A worker is painting the concrete patio of his customer.

How to Paint Your Concrete Patio

Before you paint your concrete patio floors, you must first decide which paint and layout best suit your patio needs. In most cases, many homeowners prefer to use a color that matches the exterior of their buildings. If you decide to go for something different, you can choose a latex, oil-based, epoxy, or a garage floor coating. Once you have decided on the paint color to use, you can follow this simple guide to paint your concrete patios.

Step One

Remove any furniture on your patio surfaces. Cover furniture, plants, and landscapes that are too heavy to be moved and clear off any debris, leaves, or dirt.

Step Two

If you are painting an old concrete patio, you will need to repair cracks and fix any damages on the surface before you proceed. Fill each crack with masonry crack filler and ensure the surface is dried for the fillers to set in.

Step Three

Scrub tough stains with a brush or pressure wash your patio concrete surface to remove any stain, moss, grass, or bacterial growth. Use a mild cleaning solution and ensure all the surfaces are clean and debris-free. Then etch the patio floor. Etching is done with chemicals like muriatic acid or phosphoric acid and a stiff brush.

Step Four

After etching, rinse the surface properly and seal your concrete floor with a good sealant. Apply about two coats of concrete sealant; this will help your paint absorb better and last longer.

Concrete patio cleaning with a pressure washer before painting it.

More Like This:

Step Five

You can also consider using a primer to make the painting easier and to help your concrete absorb more paint and stick better. Make sure the primer you choose is specially formulated for concrete surfaces. Apply your primer and let your primer dry before you apply your paint.

Step Six

Pour your paint into a portable tray and apply it on your patio floor. Use a paintbrush to go over surfaces a paint roller can’t reach. After applying your first layer, allow the surface to dry before you apply a second and third coat.

Step Seven

Allow the paint to dry for a day before moving your furniture back in.

The Best Products To Paint a Concrete Patio

When it comes to painting concrete patios, oil-based paints are your most reliable option. Although it is not so easy for first-timers or DIYs to navigate, oil-based paint covers concrete surfaces seamlessly. Still, if you prefer latex-based paint, ensure you purchase only the best products. Here is a list of some quality latex and oil-based paint you can use for painting concrete patios outdoors, concrete floors, and patios.

  • BERH PREMIUM. Berh premium Porch and Patio Anti-slip Floor Paint is an excellent floor paint for patios and other surfaces. It is slip-resistant, provides a great texture, and an efficient floor coverage.
  •  BXC-55 Concrete Sidewalk Gloss Enamel. This acrylic latex paint is best used for interior and exterior concrete floors, decks, and patios. It is easy to clean and maintain with just soap and water. It also resists cracking and fading.

How Much Does It Cost to Paint a Concrete Patio?

Many homeowners frown away from painting concrete patio floors because of the cost. However, concrete patios are very affordable when it comes to painting, sealing, and maintenance. The cost of painting a concrete patio will depend on the location, the quality, the quantity, and the size of your patio. On average, it will cost between $2 and $6 per square foot to paint concrete patio floors.

How To Clean a Painted Concrete Patio

Dirt, stains, or molds can cover your concrete patio and ruin its appearance. You will need to observe basic routine maintenance to keep the atmosphere clean and relaxing for you and your loved ones. To clean a painted patio, you will need to get cleaning solutions that are healthy for your patio floors and those that won’t cause any harm or damage to your concrete paints. An eco-friendly cleaning solution and method is the best way to clean your concrete surface. Let’s take a look at an easy step that will leave your patio spotless;

  • Remove any furniture and clear off loose dirt and debris from your patio.
  • Mix a few drops of dish soap and warm water in a bucket, pour it over your patio surface, and allow it to sit for 10 minutes.
  • Mop the patio surfaces and make sure you clean all the parts.
  • Rinse with clean water and repeat the process until you are satisfied with the result. Ensure that all tough stains are out and clean.

When you find it difficult to remove any tough stain, you can use natural cleaners to remove stains. Mix vinegar, baking soda, or bleach on the patio surface and allow it to sit for some minutes. Then mop the surface and rinse with clean water.

Simple house with stone wall and concrete floor in the outside

Related Articles:

How to paint a concrete patio – FAQs

What Happens If You Don’t Prime Concrete Before Painting?

Priming is an important step when it comes to painting concrete. This step should be done carefully to ensure a perfect finish. If you skip priming and go straight to painting, your concrete surface will still be able to breathe and leave pin holes or

cracks behind after painting. Primers help keep your concrete surface wet and allow your patios to absorb enough paint product that covers the surface seamlessly.

How Many Coats Of Paint Do I Need For A Concrete Patio?

If you want an outstanding finish, be ready to apply at least two to three coats of paint. You don’t want to ruin this process if you have come this far.Take your time and coat the surfaces excellently before using your patio. You will also need to allow the layers dry for a day before you cost more layers on top.

Should I Pressure Wash Concrete Before Painting?

It is recommended that you pressure wash your concrete before painting. This is to help you effectively remove any stain, debris, or dirt from the surface. However, when you decide to pressure wash after painting, you will have to be careful or hire a professional who can carefully do the job for you. It is important to soft-wash painted concrete when using pressure washers to avoid any damage. If you use the wrong pressure washer, you will end up peeling your paint off the concrete surface.

Conclusion

Painting a concrete patio add to your home’s curb appeal, boosts the value of your property, and makes the environment relaxing for you. To get the best out of your concrete patio, you will need to get all the painting steps right and use the best product, and you might need to hire a professional who can carry out the paint job for you.

Tim Dawson's Avatar

About the Author: Tim Dawson

Tim is a seasoned paving expert with 30+ years of experience in the industry. He has worked on countless projects, from small residential driveways to large commercial parking lots.

How To Clean Brick Patio

Introduction

There are many ways to maintain your pavement, but how to clean your brick patio effectively depends on your cleaning methods. Brick patios enhance curb appeal and boost the value of your property; they also have a calming effect. But the atmosphere becomes less exciting when they are covered in dust or dirt.

Brick patio is a strong and attractive paving option. It’s sometimes the first choice for driveways, garden paths, and pool surrounds. But it needs to be maintained, your brick patio needs cleaning every two months. Although frequent sweeping will remove specks of dirt, but it won’t clear the mold, oil stains, food spills, and weeds surrounding your patio.

Here’s a free tip – cleaning your brick patio doesn’t require much time and energy. In this simple guide, we explain the best cleaning options for your brick patio. If you want to achieve a spotless brick surface and a relaxing environment safe for you, your plants, and the soil, this step-by-step guide is for you!

The worker cleaning the bricks patio with high pressure water nozzle.

How to Clean Your Brick Patio

Pressure washers offer the best cleaning practices for strong stains and build-ups. Here is a step-by-step guide for pressure washing your brick patio without destroying the surface.

Step One

Remove your furniture and any object on your patio that can get dirty while trying to clean. Sweep the surface with a broom to remove dirt, and it’s from the surface of your deck.

Step Two

Connect your pressure washer to a garden hose and use a cleaning solution specifically formulated for pressure washers. Turn on the water supply and set the pressure washer; start with the lowest pressure and test on a small area.

Step Three

Start cleaning from the edge of the patio and to the center; you can increase the pressure when you get to areas of tough buildup or stains.

Step Four

When you are done pressure washing with a cleaning solution, empty the cleaning solution and rinse the patio surface with clean water.

Step Five

Ensure your brick patio dries off completely before you return any furniture to your patio.

Further reading: How to Clean Brick Patios & Walkways with a Pressure Washer

How to Clean a Brick Paved Area

How to Clean a Brick Patio Without a Pressure Washer

A pressure washer makes cleaning patios effective and fast; however, if you can’t afford to purchase or rent one, you can clean your patio with a scrub brush or a sponge. Our step-by-step brick patio guide will help you achieve a spotless wash without a pressure washer. 

Further reading: How to Clean Pavers – Tips for cleaning Patio or Driveway

Step one

Start by removing any furniture and sweep the floor. Ensure you clear off every debris; leaves; dirt, dust, and leaves before washing.

Step Two

Spray the patio with a garden hose and pretreat any build-up. You can do this by mixing water with any safe cleaning deter. Allow it to sit for about ten minutes before you scrub it.

Step Four

Scrub out the entire patio, including crevices and corners, to ensure you are not leaving dirt behind.

Step Five

Rinse the patio with a garden hose. Ensure your patio is spotless; if you spot any dirt or drains. Repeat the process in that area and rinse again.

Step Six

Most patios are sealed immediately after installation. If you haven’t sealed yours, you can do it after your patio has dried. Sealing will protect it from stains and buildups. If you have sealed your patio before, but you keep seeing stains, the first sealing didn’t sit well. Seal it again and allow it to dry before you return your patio’s furniture.

Patio bricks need to be cleaned in order to look good.

How to Clean Your Brick Patio With Vinegar

It doesn’t take much to get your brick patio, parking lot, or walkway back to its best form. Vinegar can help you achieve your cleaning goals and work on a budget. To start cleaning your brick patio, you must first;

  1. Move furniture away and sweep the entire floor. Clean off cobwebs, dirt, or grime away from your patio surface.
  2. Mix one cup of vinegar and a gallon of water in a bucket.
  3. To start cleaning, dip a sponge or scrub brush in the bucket and scrub the floor. Start from the edge of the patio and gently walk in.
  4. If you find stains or buildup on the brick, Soak the build-up with a washing solution to allow it to sit in for ten minutes.
  5. When you are done scrubbing the entire brick surface, rinse the surface with a garden hose and allow it to dry before you return your patio furniture in.

Further reading: How to Remove Oil Stains from an Asphalt Driveway

How to Clean Your Brick Patio with Bleach

Contrary to popular belief, removing debris and dirt from your brick doesn’t have to cost so much. Simple kitchen cleaning solutions can help you get rid of stains without causing any harm to your patio surface. With bleach and a few steps, you can get a spotless surface.

  1. Begin by sweeping the brick patio. Remove dirt and loose debris from the surface.
  2. In a bucket, mix a solution of 1:1 ratio of bleach and warm water. You may need several buckets to clean the entire floor before you start.
  3. Pour your bleach and water solution over the surface and allow the bleach to sit in for some minutes.
  4. Using a sponge or scrub brush, scrub the entire surface. You can start from the edge and find your way to the end. Get into the nooks and crannies, and don’t miss any spot.
  5. Rinse the patio with a garden hose and allow it to dry.

How To Clean Mold Off Brick Patio

To begin, you will need to prepare your cleaning solution. A pressure washer is the quickest and easiest method of removing mold from your brick patio. However, you can still achieve an effective removal when you do it manually.

  1. After removing the dirt and objects from your patio, scrub the affected surface until you clear the mold away. 
  2. When you are done scrubbing, connect a garden hose and rinse the debris and cleaning solution away.
  3. You will need a substance that can kill the organism from the surface and prevent them from growing again. We recommend using bleach if you can’t get your hands on any other good solution. Mix one part bleach and four part water in a bucket.
  4. Spray the solution on the floor, allow it to sit for some minutes, and then scrub the brick surface again.
  5. Rinse the surface and check for any area that hasn’t been cleaned thoroughly. If you find any, repeat the process and rinse all over again.
  6. Finally, allow the surface to dry.
Old patio and wall bricks that need to be clean.

Related Articles:

How To Clean An Old Brick Patio

Basic routine cleaning will keep your brick patio clean for an extended period. However, you will need to increase your cleaning frequency when it starts to mature. These few steps will leave your old patio looking new again.

  1. Start by sweeping the surface of the patios with a broom. If weeds grow in the joint, pick it out before you clean. Remove any form of debris from your patio surface.
  • In a bucket, mix warm water and any mild cleaning solution thoroughly. Dip a scrub or brush in the prepared solution and scrub the floor gently. Ensure you clean every crevice and edge well.
  • Turn on your water source and connect a garden hose. Rinse your patio and ensure you rinse off every dirt.
  • Apply a sealant on your old brick patio to protect the surface from stains and boost the integrity of the brick surface. A sealant will add to the brick curb appeal of your deck.  

How to Clean Brick Patios Without Harming Plants

To clean your bricks effectively without harming your plants, pets, or kids, you will have to use an eco-friendly cleaning solution. Vinegar not distilled with petroleum, baking soda, or dishwashers is mild and safe for your plants and soil.

  • Sweep the surface of your patio and ensure you remove any loose dirt or debris. 
  • Mix warm water and your dishwater in a bucket if you choose vinegar.  Mix the cleaning solution in water and mix thoroughly.
  • Dip your scrub brush or sponge into the bucket and scrub the surface of your patio. For stain or buildup, spray baking soda and mix with water and allow to sit for ten minutes before scribing.
  • Rinse the brick and allow the patio to dry before use.

Further reading: How to Clean a Concrete Patio

Best Products To Clean a Brick Patio

Here are list of our recommended cleaning products for your brick patios.

  • Artisan 1-gal. Poly Haze Remover: does not contain hydrochlorides acid, muriatic acid, nitric, or sulphuric acid. It’s effective in removing stubborn poly haze and restoring the natural color of your pavers in no time.

Conclusion

If you want to increase the value of your property, you will have to keep up with routine maintenance. Your brick patio doesn’t require much effort to make it spotless, but it doesn’t require your commitment. Make sure you thoroughly sweep the brick surface before you begin washing and allow your patio to dry before you return your furniture.

Tim Dawson's Avatar

About the Author: Tim Dawson

Tim is a seasoned paving expert with 30+ years of experience in the industry. He has worked on countless projects, from small residential driveways to large commercial parking lots.

Concrete patio cleaning ideas.

Knowing how to clean a concrete patio without causing any damage to the surface is essential for you as a homeowner. The suitable cleaning method and maintenance can boost your home’s curb appeal, restore concrete surfaces and preserve your patio’s lifespan.

Concrete patios, also known as cement patios, are robust, customizable, and cheaper, making them one of the most outstanding options for landscape projects. However, with time, the porous surface of the concrete can accumulate dirt and grime and begin to discolor. Experts say concrete patios should be cleaned at least once a year to maintain their pristine condition.

In this comprehensive guide, our experts explain how to clean your concrete patio without damaging the surface and the best cleaning product to preserve your patio’s aesthetics.

How to Clean Your Concrete Patio

A power-pressure concrete washer comes in handy for cleaning concrete patios, driveways, or walkways that are dirty, stained, or have bacterial growth. For a concrete patio, you will need a pressure washer of at least 3000 PSI with a suitable nozzle type that will allow water to flow through effectively. Pressure washers are reliable and make cleaning concrete surfaces fast and enjoyable. This simple guide will help you power wash your concrete patio without damaging it.

How to pressure wash a concrete patio

Step One

Prepare to clean your concrete patio by clearing the area. Remove furniture, toys, plants, and loose debris from your patio. Take a broom and sweep the surface clean so you don’t get obstructed by obstacles when cleaning.

Further Reading: Concrete Maintenance – 11 Factors to Make Your Pavement Last

Step Two

Mix your solution into the pressure washer. Use the best solution or commercial product to help you get rid of any stain. Wear protective clothing before you mix or start cleaning.

Concrete patio cleaning with a pressure washer.

More Like This:

Step Three

Select a pressure washer; pressure washers come in electric and gas-powered models. You must choose the model and pressure that best suit your concrete patio needs. When using a pressure washer, you can choose between different nozzles; this nozzle will determine the flow rate of your mixture. When you’re ready to start cleaning, connect the pressure washer to a hose. Rotate the spigot valve clockwise to allow water flow, and hold the pressure washer trigger down.

Step Four

Test the pressure washer on a small area to ensure everything is good before proceeding. If your concrete patio is flat, you can start on any part, and if it’s sloped, position yourself in the center of the top part of your patio and start power washing. Repeat soaping and washing until the area is cleaned and all stains removed.

Step Five

Rinse away the detergent into your patio drain and allow your concrete to dry before you return any of your furniture.

Further Reading: How to Clean Pavers – Tips for cleaning Patio or Driveway

Best Products to Clean a Concrete Patio

The concentrated ZEP 128 oz. Driveway, Concrete, and Masonry Cleaner offer quick and effective cleaning. It effectively cleans concrete, brick, asphalt, and quarry tile of grease, filth, and oil.

This is a potent, concentrated formula. ZEP 128 oz restores the concrete’s original appearance while removing dirt, stains, filth, and oil.

Rust-Oleum 1 gal. Concrete Etch and Cleaning is a cleaner and etch mixture that allows coatings to properly adhere to concrete surfaces by opening the pores of the concrete surface.

This cleaner utilizes microbes for effective results. When the microorganisms are finished, the stain evaporates, leaving your concrete with a fresh and rejuvenated look.

This concrete cleaner’s potent bleach-based composition kills mold and mildew while cleaning and brightening the driveway outside your house.

How to Clean a Concrete Patio Without a Pressure Washer

In the absence of a pressure washer, there are many ways you can effectively clean your concrete patio. Surface degradation and damage to the mortar are some effects that might result after pressure washing your driveway. Below are a few steps you can employ to clean a concrete driveway without pressure washing it.

Remove Debris

Most times, the cleaning solution our patios need is to clear and get rid of loose debris and dirt. This can be done by hand picking or sweeping the surface. Sweeping off the dirt and grime from your concrete patio will reduce build-up.

Clean with Commercial Cleaning Products

Commercial cleaning solutions come in different forms. Some are mild, harsh, or even harmful to patio surfaces, and you can use commercial cleaning products to wash out any stain after clearing the surface. When cleaning with commercial products, you will need some essential items to make the work easier. Vinegar, baking soda, bleach, or muriatic acids are mild commercial cleaning solutions you can employ when cleaning.

To create a cleaning solution with baking soda, dilute a half cup of baking soda with one gallon of water or one part with one vinegar to make a cleaning solution with water.  When there is a deep stain on your concrete patio, you can pour the cleaning solution into that area and wait for it to absorb for some minutes.

Further Reading: How to Remove Oil Stains from an Asphalt Driveway


Woman cleans concrete patio with a brush.

Read More:

Scrub with Sponge or Brush

Pour your cleaning solution over your concrete patio and let it settle for ten minutes. Scrub hard into the concrete and brush off every stain from your patio. If the stain does not go off after using the vinegar solution, you can pour baking soda directly on it and allow it to sit in for not more than ten minutes, then scrub again.

Rinse

The last stage is important; always rinse off every cleaning solution from your concrete patio. After rinsing, allow your patio to dry before you return your furniture.

How to Clean Dog Urine From Concrete Patio

Dog urine can stain your patio and leave behind an ugly stench. And sometimes, it never goes away no matter how hard you scrub with vinegar or bleach. When dog urine seeps into the concrete, getting rid of the smell can take a long time. Once you have noticed dog urine on your patio or perceive the smell, you should immediately clean it off. To get rid of dog urine, you must first:

  • Clear the area and remove any dirt or debris from the patio surface.
  • Use a garden hose to wash urine away from your patio surface. Make sure to keep pets away from the area when working.
  • Apply an odor eliminator to clear urine odor from the environment.
  • Apply a commercial cleaning product on the spot and allow it to sit for at least ten minutes before you scrub. It takes ten minutes for vinegar, baking soda, or bleach to penetrate through concrete. Apply more odor eliminators on the urine spot and scrub well.
  • Rinse your concrete patio and allow it to dry.

Cleaning your concrete patio properly after your dog urinates will remove the smell and leave the spot clean. However, if you don’t teach your pets to use the toilet or the spot you have made available for them, they will keep using your patio area. You can consider waterproofing your patio after eliminating the urine space. It is best to be on the lookout for your pet and guide them.

How to Clean a Concrete Patio Without Killing Grass

Concrete is a tough paving material and requires an effective cleaning solution to eliminate dirt and stains. Some of these cleaning solutions might be harsh on your plants and vegetation. To clean your patios without killing or destroying your grass, you must first saturate the concrete surface and your grass with water. Watering helps lower the absorption rate of the surrounding plants and vegetation. After watering, you can apply your cleaning solution and follow the concrete patio cleaning guide. Scrub your concrete patio and rinse carefully. Spray your grass with water to wash away any residual chemicals or solution on your grass.

Further Reading: Patio Drainage Options – Installation, Maintenance, and Ideas

A clean and glossy stamped concrete patio

Related Articles:

How to Clean a Stamped Concrete Patio

Stamped concrete comes in different designs, colors, and textures. Cleaning stamped concrete is different from cleaning an ordinary concrete patio.

  • Start by removing dust or lose debris from the area with a broom.
  • Use a wet mop to clean the surface of your stamped patio. Rinse the mob regularly to ensure you are doing a clean job.
  • For stained areas, use a mild cleaning solution. Laundry detergent, dish soap, and commercial cleaning solutions will help clean off stains or solutions explicitly formulated for cleaning concrete.
  • Rinse and make sure you remove

Further Reading: How to Clean a Brick Patio

How to Clean Black Mold Off Concrete Patio

A patio overrun with black mold or other bacterial growth can be frustrating. If your patio is covered by shade or in a damped location, you will have to deal with cleaning mold off your concrete patio all the time. To reduce the effort and time it takes to clear off bacterial growth, scrub the mold with bleach. Bleach will disinfect the affected area and kill all bacteria. Another alternative is to use a pressure washer. Pressure washing your concrete patio with mold and mildew house and siding detergent will leave it spotless. With a powerful tip and turbo nozzle, hold the pressure washer inches away from the concrete and pressure wash the entire area. The mold will break up and wash out.

Conclusion

Before cleaning your concrete patio, you will need a few things. Rubber gloves, bucket, garden hose, push brush, and chlorine bleach. Ensure you have all your essential items and are well-dressed for the job. We recommend sealing the entire area to protect your patio from stains.

Tim Dawson's Avatar

About the Author: Tim Dawson

Tim is a seasoned paving expert with 30+ years of experience in the industry. He has worked on countless projects, from small residential driveways to large commercial parking lots.

Granite paving

Granite pavers are used to beautify both indoor and outdoor locations. They can be used on driveways, patios, pathways, and even indoor areas that need robust, long-lasting pavers to withstand heavy usage. Granite paving driveways can withstand heavy foot traffic and last a very long time, provided they are laid over a durable foundation. 

Granite paving is exceptionally long-lasting. It is made from granite, a natural rock created by magma crystallization within the earth’s crust. Granite driveways are popular for their strength, hardness, and durability. At the same time, the beauty of granite will make your home more valuable and appealing.

Granite paving can be used anywhere from the internal and outside walkways, patios, courts, and the interiors of homes and businesses. It is guaranteed that they will last a lifetime with little upkeep. That’s why we created this article, to explain how to install your granite paving, ideas, and the proper maintenance to keep your driveway’s aesthetic appeal.

Is granite a good paving stone?

Granite paving is a natural stone that stands out amongst many others because of its composition and color. Granite pavers are natural paving slabs made from natural products. They have straight machine-cut edges and a textured surface that adds to their beauty. Also, it varies in composition and comes in different colors; black, rose, gray, and yellow are some standard colors you will find around. 

Granite slabs are among the best paving materials for indoor or outdoor use. They can be polished to achieve a smoother appearance or flamed for a rustic touch. This paving material creates an exciting paving style when used at home or in business areas. 

5 Steps to install granite paving

When granite is probably installed, it can withstand heavy weight and traffic for an extended period. Here’s how to lay your granite driveway.

1. Choose The Depth

Before you start working on installing your granite pavers, you need to determine the area you want to pave. Determine the desired height for your pavers and continue by measuring the thickness of your paver and the thickness of the bedding mix. Your measurements will help you decide the excavation depth you need for your pavement. For driveways and walkways, your pavement depth must be thicker to withstand traffic and pressure. 

2. Lay The Base For Your Slabs

For your pavement base, there are a few options you can consider. You can use gravel, stone, mortar, or crushed base to lay your slabs. Ensure your base is leveled evenly across the surface; take time to apply it layer by layer until it’s evenly compacted. Outline the areas with a garden hose and then mark the areas with spray paint before digging the ground. 

3. Add a Sand Layer

Ensure everything you need is ready before you lay your natural granite slab. Fine sand, such as paver sand or play sand, is suitable for your layer. Add a sand layer and level with a plate compactor to set your base into place and ensure stability. To settle the sand after compacting, you can spray it with water.

4. Place an Edge Restraint on your stone Slab

To prevent your stone slabs from moving or scattering, use polyvinyl or lumbar for the edge restraint. Place your granite slab gently and close to each other: ensure that your granite slab stays within each other. If the sides of your slabs are unequal, you can use a masonry saw to trim off or cut the pavers into your desired size or shape so they can all fit in. 

5. Fill The Gaps

You might find wide joints between the pavers when you place slabs. You can fill this joint with mortar or grout. Also, you should allow your new pavement to set in before driving in. 

Granite Pavings Benefits

Transform your outdoor spaces with the enduring charm and durability of granite pavings. From timeless elegance to versatile design, explore the numerous benefits that make granite paving the ideal choice for both homes and businesses.

Timeless Aesthetic Appeal

Granite’s timeless aesthetic appeal stems from its natural beauty and the unique patterns formed by mineral deposits over millions of years. This enduring elegance ensures that granite remains a sought-after choice in design, standing the test of changing trends and maintaining its allure for generations to come.

Durability and Longevity

Some granite tiles used for the floor

The robustness of granite is derived from its dense and hard composition, making it highly resistant to the rigors of heavy traffic, extreme weather conditions, and the passage of time. Its durability not only ensures a long-lasting paving solution but also minimizes the need for frequent repairs or replacements, making it a wise investment in the longevity of outdoor spaces.

Versatility in Design

Granite’s versatility in design is a key attribute, offering an extensive array of colors, patterns, and finishes. Whether seeking a modern, sleek appearance or a more rustic, natural aesthetic, granite provides the flexibility to cater to diverse design preferences. This adaptability allows for the creation of unique and personalized outdoor spaces that reflect individual style.

Low Maintenance Requirements

The low maintenance requirements of granite make it a practical and convenient choice for homeowners and commercial spaces alike. With minimal upkeep, such as regular cleaning and occasional sealing, granite preserves its appearance and functionality, allowing property owners to enjoy a beautiful outdoor space without the burden of extensive maintenance tasks.

Resistance to Stains and Scratches

Granite’s innate resistance to stains, scratches, and general wear and tear enhances its practicality in high-traffic areas. This feature not only contributes to the stone’s aesthetic longevity but also ensures that the surface remains pristine and resilient even under daily use and exposure to various elements.

Environmentally Friendly

some granite pavers

As a natural stone, granite is inherently environmentally friendly. Its extraction involves minimal processing, and it is not manufactured with harmful chemicals or additives. This eco-conscious choice aligns with sustainable building practices, making granite a responsible option for those who prioritize environmental considerations.

Increased Property Value

The incorporation of granite paving into residential or commercial properties enhances curb appeal, contributing to increased property value. The aesthetic appeal, durability, and reputation of granite as a premium material add a desirable quality to the property, making it an attractive investment for potential buyers or tenants.

Suitability for Various Applications

Granite’s adaptability extends beyond outdoor spaces, making it suitable for various applications. From driveways and patios to walkways and interior spaces like flooring and countertops, the versatility of granite ensures its seamless integration into diverse design schemes. This broad applicability makes it a versatile and multifunctional material for both residential and commercial projects.

Granite pavers for patio and driveway

Here are some options you could choose.

Gravalock permeable paver

22 in. x 22 in. x 1 in. Black Slim Grid Plastic Pavers (12-Pavers/40.5 sq. ft.).
These granite pavers are durable plastic of the highest caliber, suitable for your driveway. They can support the weight of light residential cars.

Techno Earth

19.7 in. x 19.7 in. x 1.9 in. Black Permeable Plastic Grass Pavers for Parking Lots, Driveways (4 Pieces/11 sq.ft.).
Techno Earth’s permeable pavers were built for granite parking lots and grassy roads. They help curb flooding and prevent water from getting near your front door.

Vevor

Gravel Grid 9 ft. x 17 ft. x 2 in. Geocell Ground Grid 153 sq. ft. Patio Ground Grid Paver for Slope Driveways.
Vevor’s Gravel Grid is made of HDPE – A sustainable material that is easy to cut and attach for DIY. It has enough tensile strength to support your granite driveway for ages.

How do you maintain granite paving?

Granite paving material is very durable and sustainable. It has many benefits, but it needs maintenance to avoid looking horrible. Cleaning granite pavers will help maintain your driveway or outdoor landscaping.

The cleaning frequency of driveways is affected by traffic volume, weather conditions, and dust. Cleaning of granite pavers in driveways that don’t experience so much traffic should be done once a month. While cleaning your driveway, refrain from using harsh chemicals or acid, and be careful when cleaning around the pavement joints. 

Should you seal granite paving?

A penetrating seal gets absorbed into your pavement and protects it from damage, stains, and extreme weather conditions. Sealing also prevents the settling of dirt and other harsh substances. The sealant also helps restore your pavement’s color and protect your black granite. A sealed granite driveway will last longer and enhance the beauty of your driveway.

How to clean granite pavers

Granite paving: cleaning and maintenance

Granite is a strong material and does not require much maintenance. Keep it on your pavement for a short time when cleaning with a cleaning solution. You can clean your driveway with a pressure washer or a garden hose. 

  • For your granite, avoid using abrasive solutions because they will scratch the surface and disfigure the look. 
  • Avoid acids and alkaline solutions not specifically formulated for natural granite pavers. 
  • Bleach, vinegar, and ammonia are dangerous for your granite. Avoid using these substances and purchase proper cleaning solutions for your driveway. 
  • For stains, spills, or harsh substances, clean immediately. Your granite pavement can easily absorb these spills if left for too long. 

How to remove oil stains from granite paving

Various oils can leave unsightly stains on paved surfaces. A vehicle’s oil leak on a stone driveway is a common cause. However, paver patios near a grill or outdoor kitchen can have oil and grease deposits.

  • Garages and outdoor kitchens should have paper towels, rags, and oil-absorbent materials.
  • If oil or grease just got there, use a clean rag or paper towel to blot (don’t rub) the area lightly. Most oil stains on pavers can be taken off with dish soap or laundry detergent. Put the soap right on the stain and let it sit for 20 to 30 minutes. Then scrub it with a brush with nylon bristles and wash it with hot water. If you need to, do this step again.
  • If you want to get rid of oil stains on pavers that have dried and soaked in, soak up as much oil as you can. Gather up the stuff. Granular materials should be left in the area for about 6 hours. Follow the steps above for stains that just happened.

Granite paving ideas 

Exploring granite paving ideas is invigorating, yet the abundance of choices in granite pavers can be quite overwhelming. The sheer diversity of colors, textures, and patterns available might feel exhausting at first, but it also provides a rich canvas for unleashing your creativity. Within this array of options lies the exciting potential to fashion a distinctive outdoor space that authentically mirrors your individual style and preferences.

Black Granite Sett Paving Blocks

Elevate the aesthetic of your home or business driveway with the exquisite Black Granite Sett Paving Blocks. These traditional stone setts boast not only timeless beauty but also robust durability, making them ideal for high-traffic areas or handling heavyweight loads. Experience the perfect blend of elegance and resilience with these striking paving blocks.

Granite Cobblestone

For those aiming to achieve a sophisticated rustic ambiance for their driveway, the Granite Cobblestone presents an excellent choice. Crafted from natural granite, these slabs come in a variety of styles and shapes, offering versatility in design. Create an upscale, classic look for your driveway with the timeless appeal of granite in various aesthetic configurations.

Silver Granite

Unveil a touch of sophistication with the Silver Granite slab. Featuring a light grey tone accented by subtle black nuances, this slab adds a refined quality to any outdoor space. Whether used for pathways, patios, or other landscaping projects, the Silver Granite brings a harmonious blend of color and texture to your design, creating an inviting atmosphere.

Dark Grey Granite Paving

Achieve a sleek and modern appearance with Dark Grey Granite Paving slabs. These granite slabs in a deep, dark grey shade not only exude contemporary charm but also offer durability and ease of maintenance. Ideal for various outdoor applications, these paving slabs contribute to a sophisticated and enduring landscape design.

Beige Granite Pavers

Transform your outdoor spaces with the timeless charm of Beige Granite Pavers. Perfect for driveways, patios, walkways, gardens, and more, these pavers offer versatility and elegance. The beige hue adds warmth to your outdoor paving projects, creating a welcoming and aesthetically pleasing environment. Experience both functionality and beauty with these adaptable granite pavers.

FAQs about Granite Paving

Let’s address some commonly asked questions about this enduring and versatile paving material.

Is granite paving expensive?

Granite paving can be relatively more expensive compared to some other paving materials due to its durability, aesthetic appeal, and natural composition. However, its long-term benefits often outweigh the initial cost, making it a worthwhile investment for those seeking lasting quality.

What are the disadvantages of granite paving?

While granite paving offers numerous advantages, it’s essential to consider potential drawbacks. Some disadvantages include the initial cost, as granite can be more expensive than alternative materials. Additionally, its weight may require professional installation, and its hardness can make it challenging to modify or repair.

Are granite pavers good?

Yes, granite pavers are highly regarded for their durability, resistance to stains and scratches, and timeless aesthetic appeal. They are suitable for various applications, including driveways, patios, and walkways. The robust nature of granite makes it a good choice for areas with high foot traffic or heavy loads, contributing to long-lasting and visually appealing outdoor spaces.

Conclusion 

Granite pavers add character to your homes and business space. This paving option is safe and stylish. It’s durable and appears vibrant because of different tones and colors. It’s easy to maintain and has proven to be a worthy investment.

Tim Dawson's Avatar

About the Author: James Brennan

James has over two decades of experience in the paving industry and has worked on a wide variety of projects, from large-scale commercial installations to small residential repairs.

Rainbow Sandstone

Homeowners all across the United States are beginning to appreciate the beauty and uniqueness of natural stone paving. Granites, limestones, flagstones, sandstones, marble, bluestones, and travertines increase the aesthetic of patios, walkways, and driveways. They are also low-maintenance, durable, and offer versatile styles.

Natural stone paving is a more prestigious, durable, and stylish hardscape option than colored concrete because it was created by minerals that took thousands of years or longer to form. It is a choice for creating a genuinely distinctive outdoor living environment. Instead of requiring high-energy, fuel-burning processes that release significant volumes of CO2 into the environment, it can be extracted from the ground and processed using low-energy technology. This means natural stone pavers are recyclable in a way that concrete ones aren’t; in our eco-friendly world, this is a big deal.

Outdoor paving made of natural stone is often used for patios, driveways, and sidewalks. The materials are made by the forces of nature, as the name suggests. Choosing between natural stone and concrete would become even simpler because, in this article, we explore how to lay your natural stone paving, the benefits and why it is better than concrete.

What is natural stone paving?

Natural stone paving involves using slabs made from natural rocks to pave outdoor areas. So what are natural stone pavers? 


Stone pavers are made from rocks, and they have different characteristics. Natural stone pavers include but are not limited to granite, sandstone, limestone, flagstone, travertine, bluestone, and rainbow sandstone. Natural pavers come in various colors, shapes, textures, and sizes.

How to lay natural stone paving?

Below is a step-by-step guide on how to lay your natural stone paving.

Choose Your Natural Stone paver

The first step to laying your natural stone paving starts with a choice. Deciding on the best natural stone paver can be stressful. You might be caught in between limestone or granite, sandstone or flagstone. The first step to laying your natural stone paving starts with making a choice.

The first step to laying your natural stone paving starts with making a choice. Mark The Area You Want To Pave 

When you have decided on the paving stone to use, the next step is to define the area to be paved. You can do this with spray paint, grade stakes, or a string. 

Dig Out The Area

The next step is digging out the area to be paved. Before digging, ensure you take out all obstacles. Ensure you dig a good and well-leveled hole. 6-8 inches of topsoil is needed to give it a base.

Lay your base material

Crushed rocks or gravel with moisture makes your work easier to carry out. Use crushed rocks about 3-4 inches for workable surfaces. When laying a base for a driveway, you need 5 inches or more.

Prepare Your Sand Base

The next step is to pour your second layer, the sand base. Your sand base is the strata between your base and your pavers. Pour about half an inch of sand on your rock and lay it out smoothly. 

Lay Your Pavers

The final step is to lay your pavers gently. It’s good to start laying your stone slabs on a straight edge. Keeping your edges straight will determine the result.

If you notice a depression after laying your pavers, fill it up with more sand and if the stone pavers look a little bit higher than the rest, use a rubber mallet to level it carefully. A hammer, chisel, or diamond blade will help you do the work. 

Restrain The Edges

The moment you are done laying your pavers, you will need to restrain the edges. This process is done with plastic, concrete, or steel strips. They prevent your stones from sliding apart.

Natural stone paving: how to clean and how to lay it

How to clean natural stone paving?

Simple cleaning routines will help your natural stone pavers stand the test of time, look beautiful and remain clean. The number of times you will need to clean your natural stone paving depends on several factors, including the season you are in. In the fall, your stone pavers need to be cleaned regularly to reduce the number of fallen leaves and ensure they don’t decompose on your stones. 

Use the Right Cleaning Product

Using the right cleaning substance is the first step in cleaning your natural stone paving. Avoid harsh substances in the quest to get your natural stone pavers looking neat and spotless. Go for a cleaning agent that has a neutral pH level.

Regular Sweep

A good sweep once a week will boost the lifespan of your landscape. Clean off the debris and keep fallen leaves away from your patios or driveways.

Clean Up Spills

Stone pavers are susceptible to damage from high or low-pH; when you spill juice or food, ensure that you clean it off. Also, clean off any stain before it settles on your natural stones. If your stone paving is installed over a large area, employ ride-on cleaning machines or pressure cleaners to do the job for you and remove debris where your brooms can’t reach.

Seal Your Patios Or Driveways Regularly

Sealing your natural stone paving will do more good to your driveways. Sealing protects your pavement from cracking easily and prevents moisture from settling into your stone pavers. 

Replacement 

Sometimes, the only choice you will be left with is to replace the severely damaged or stained areas or stones. Replacing just an area or stone won’t cost a hand and a leg. 

Should natural stone be sealed?

Like other materials, sealing helps maintain and protect your patios or driveways from cracks, dirt, and stains. Sealing also improves the aesthetic of your paved surface and prolongs the lifespan of your natural stones.

Natural stone pavings should be sealed?

How to seal natural stone paving?

Using a sealant can improve the lifespan of your natural stone pavers and your patios, driveways, or walkways. Ensure that you choose the most suitable sealant for your natural stone pavers. Once you’ve purchased your sealant, you can carefully follow these steps to seal your pavement

Clean The Surface To Be Sealed

To seal your natural stone, you must ensure that your walkways, patios, or driveways are clean and free from debris. 

Check Your Weather Forecast

Sealing must be done on a dry surface. An unexpected rain will destroy your work. It would help if you had a temperature range of 5°c – 20°c.

Protect yourself

If you easily get upset by smell, wear a mask and protective clothing. 

Test your sealant

Using a small area, seal gently to ensure you have a suitable sealant. Once you have confirmed that you have a suitable sealant, apply the first coat of sealant around the paved area. This is the impregnation coat. 

Apply the second coat 

Apply the second coat of sealant, surface protection; you must let it dry. To get a fine finish, walk back in the opposite direction and ensure you don’t seal any patches or debris.

Allow To Dry

Allow drying for 3-4 hours. And your natural stone paving is dried and ready for use. 

Natural Stone Vs. Concrete

There is no doubt that choosing between concrete and natural stone can be a bit confusing for many. Although concrete is inexpensive and appears colorful, they have several backlashes that make natural stone paving stand out. 

Maintenance 

Maintaining stone pavers is less difficult compared to concrete. Stone pavers barely develop cracks; they are easy to fix if they crack. The repair cost is not as expensive as the cost of repairing concrete. 

Style choices and Aesthetic

Because stone pavers are natural rocks that come in different natural colors, sizes, and shapes, you wouldn’t have to worry about installing a boring style. Your style choices are versatile to fit the project you have in mind. 

Easy Installation 

Installing concrete is quite demanding; labor, grading, and backfilling will stress you out. And because concrete easily cracks, you must be super careful and diligent. On the brighter side, stone pavers will always save the day. You can install your stone pavers by yourself. The time and effort it takes are enough to allow you to have fun on your patio. 

Durability 

Natural stone pavers or rocks are eco-friendly and 100% sustainable. Stone pavers look beautiful as they age. 

Limestone is a natural stone used for paving

Is natural stone cheaper than pavers and concrete?

Concrete is less costly than natural stone. This is because they require fewer resources to manufacture and are more affordable per square foot. 

Natural stone is more expensive than concrete and other paving materials. Stone pavers require more time and resources to manufacture; however, the overall cost of natural stone paving depends on the size of the space to be covered and your budget. 

The average cost to install natural stone pavers is between $17.17- $22:89 per square foot, and the total cost will depend on other factors. Location, area covered, e.t.c. 

Conclusion

Natural stone paving is one of the best methods of paving your patios, walkways, or driveways. Natural stone pavers will stand the test of time when it comes to your patio, walkway, or driveway lifespan.

Tim Dawson's Avatar

About the Author: Tim Dawson

Tim is a seasoned paving expert with 30+ years of experience in the industry. He has worked on countless projects, from small residential driveways to large commercial parking lots.