Driveway Apron – Materials, Installation, & Costs Unveiled

Are you curious about what a driveway apron is and how it can transform your home’s curb appeal? Let’s explore the essentials of design, installation, and benefits.
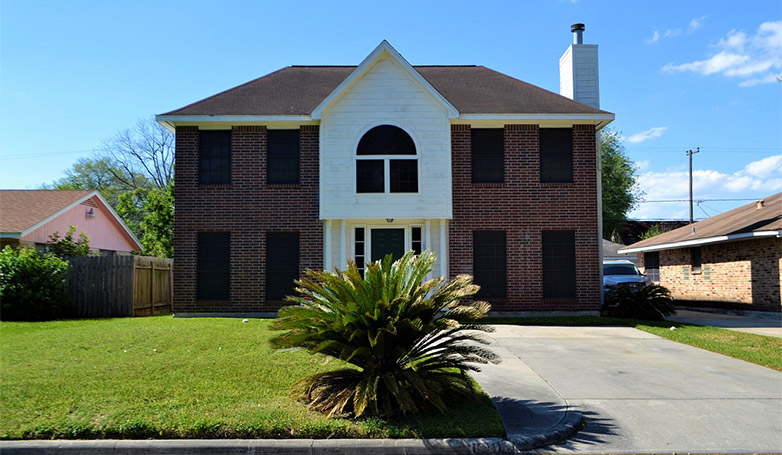
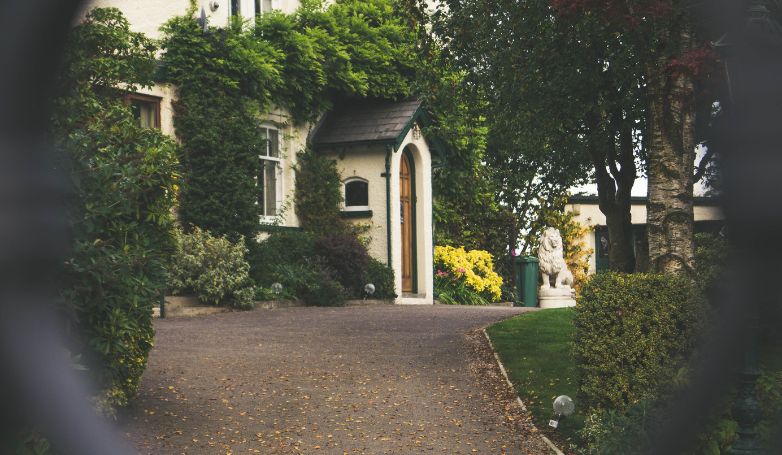
A driveway apron serves as the critical transition between the public road and your private driveway, blending functionality with aesthetics. It’s designed to withstand traffic and environmental conditions, offering durability and a polished look to your home’s entrance. Whether you opt for concrete, asphalt, pavers, or gravel, choosing the right apron material and style can significantly impact your property’s curb appeal and accessibility.
Explore more about selecting materials, installation processes, and maintenance tips to make your driveway apron both attractive and enduring.
Types of Driveway Aprons
Driveway aprons can be constructed from various materials, each offering unique benefits and aesthetic appeal. Whether you’re looking for durability, affordability, or design flexibility, there’s an apron material to suit your needs. Let’s explore the most popular types.
Concrete Aprons
Concrete aprons are a durable and sturdy choice for homeowners looking for a long-lasting solution. Known for their strength and versatility, concrete aprons can be finished in various textures and colors, offering a sleek appearance to your driveway entrance. This material is particularly effective in areas with heavy vehicular traffic, providing a smooth transition while maintaining its integrity over time, making it a practical choice for those prioritizing durability and aesthetics.
Asphalt Aprons
Asphalt aprons offer a seamless look for driveways, especially when the main driveway is also paved with asphalt. They are cost-efficient, easy to install, and can be quickly repaired if damaged. Asphalt’s flexibility makes it less susceptible to cracking under temperature fluctuations, ensuring a smooth transition for vehicles for years. Its black color aids in snow melt during winter, making it a functional choice for colder climates.
Paver Aprons

Paver aprons bring a customizable and high-end look to your driveway, with a variety of patterns, colors, and materials to choose from. They are ideal for creating a visually appealing entrance and can easily match the architectural style of ment capayour home. While pavers require a higher upfront investment, their individual replacebility offers a cost-effective long-term maintenance solution. Pavers also provide excellent drainage, adding to their functionality.
Gravel Aprons

Gravel aprons are the most economical option, offering a natural aesthetic that blends well with various landscapes. They require minimal installation effort and can be a DIY project. Gravel allows for effective water drainage, reducing erosion risks at the driveway’s entrance. However, gravel aprons may need regular maintenance to keep the area level and replenish the material lost to displacement or weather conditions, ensuring a well-maintained appearance.
Benefits of Installing a Driveway Apron
Considering a driveway apron for your home not only elevates its exterior charm but also brings a multitude of functional benefits. Here’s how:
Improved Curb Appeal
By choosing materials and designs that complement your home’s exterior, you can create a cohesive look that stands out. A well-designed apron acts as a visual transition, enhancing the overall aesthetic of your property and potentially increasing its market value. It’s an effective way to make a strong first impression on visitors and passersby.
Enhanced Durability
A properly installed driveway apron adds an extra layer of durability to your driveway, protecting the entrance from wear and erosion. It serves as a barrier against the elements, heavy traffic, and the constant wear of turning wheels. This reinforcement extends the lifespan of your driveway by preventing common issues like cracking and potholing at the point where driveway and roadway meet, ensuring a smoother, more durable surface for years to come.
Safety and Accessibility
Driveway aprons improve the safety and accessibility of your property by providing a smooth transition between the road and your driveway. This is particularly important in areas where the curb might present a barrier to vehicles or where the driveway material differs from the roadway. An apron minimizes the risk of vehicle damage and enhances accessibility for vehicles, bicycles, and pedestrians, including those with mobility issues, making your entrance safe and welcoming for all.
How to Install a Driveway Apron in 11 Steps
Installing a driveway apron is a practical way to enhance your property’s curb appeal and functionality. Here are the detailed steps to guide you through the process:
1. Obtain Necessary Permits
Secure all required permits by consulting your local building authority. This step ensures your project adheres to zoning laws and building codes, preventing future legal complications. Permit requirements vary, so check with your municipality to understand the specifics, including fees, paperwork, and inspection schedules. This proactive approach facilitates a smooth project flow and ensures compliance with local regulations, safeguarding your investment.
2. Mark the Area

Precisely delineate your project’s boundaries using spray paint or stakes, establishing a clear area for excavation and construction. This accuracy is crucial for aligning the apron with your driveway and property lines, ensuring a seamless transition. Accurate marking guides the excavation process, helps in estimating material requirements, and prevents encroachment on public or neighboring property, maintaining good relations and legal compliance.
3. Excavate the Site
Excavate to the recommended depth, considering the thickness of your base material and the apron itself. This foundation is vital for a stable, durable apron capable of withstanding vehicle weight and weather conditions. Remove debris, vegetation, and topsoil to prevent future settling or heaving. Proper excavation creates a level base, essential for the longevity and performance of your driveway apron, minimizing future maintenance.
4. Grade and Compact the Base
This step ensures proper drainage and prevents water pooling, essential for the apron’s durability. Use a compacting machine for uniform solidity, creating a stable base that resists shifting and cracking. Proper grading directs water away from the apron and driveway, safeguarding the structure against water damage and extending its lifespan.
5. Install Edge Restraints
Edge restraints are crucial for maintaining the shape and integrity of your apron, especially for pavers or gravel. They prevent spreading and shifting, keeping materials in place. Install restraints along the marked edges, securing them deeply enough to offer support but not visible above the finished surface. This step ensures a neat, defined boundary for your apron, contributing to its aesthetic appeal and structural stability.
6. Add a Sub-base Layer

Lay a sub-base layer of crushed stone or gravel to improve drainage and add stability. This layer should be evenly spread and compacted to create a firm, level surface that supports the top material. The sub-base acts as a buffer, distributing weight evenly and preventing sinking or cracking, essential for the apron’s longevity. Its depth and composition vary based on soil type and expected load, requiring careful consideration.
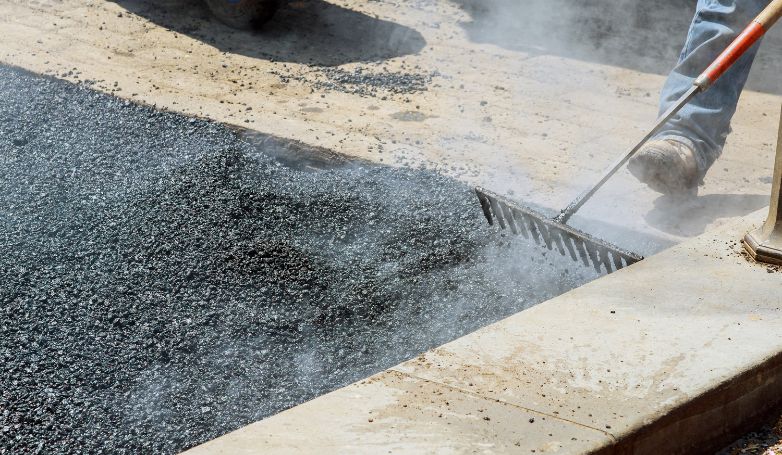
7. Pour and Level Concrete/Asphalt/Pavers
For concrete or asphalt, pour the material into the prepared area, spreading it evenly to achieve the desired thickness. For pavers, lay them according to your design plan. Ensure levelness and uniformity, using tools like trowels or screeds for concrete and asphalt, or rubber mallets for pavers. This precision impacts the apron’s appearance and functionality, providing a smooth transition and preventing water accumulation.
8. Finish the Surface
Smooth or texture the surface according to your preference and the material’s specifications. For concrete, use a trowel for a smooth finish or a broom for texture. For asphalt, a roller ensures even compaction. Pavers may require sand filling in the joints for stability and weed prevention. This finishing touch defines the apron’s final appearance and usability, affecting traction and water runoff.
9. Cure the Material
Allow the material to cure properly to achieve maximum strength and durability. Concrete requires keeping the surface moist for several days, while asphalt settles more quickly but benefits from a curing period before heavy use. This step is crucial for the material’s longevity, ensuring it withstands the rigors of weather and vehicle traffic without damage.
10. Install Expansion Joints
For concrete aprons, install expansion joints to prevent cracking due to temperature changes and material expansion. These joints allow for movement without compromising the apron’s integrity. Place them at strategic intervals, typically every 4 to 6 feet, to segment the apron and protect against cracking. This preventive measure is essential for maintaining a smooth, intact surface over time.
11. Clean Up
Finish your project by cleaning the site, removing tools, excess materials, and debris. This step not only leaves your property tidy but also prevents potential hazards. Proper cleanup ensures the safety of your household and visitors, and showcases the beauty of your new driveway apron. Take pride in a job well done, knowing you’ve enhanced both the functionality and curb appeal of your home.
Design considerations for a Driveway Apron
When planning the installation of a driveway apron, it’s important to consider several design elements that will not only ensure its functionality but also enhance its aesthetic appeal. These considerations will help you create an apron that complements your property’s overall look and meets practical requirements:
- Material selection: Choose a material that suits your climate, budget, and the aesthetic of your home.
- Slope and gradient considerations: Ensure proper drainage by factoring in the slope of your driveway.
- Dimensions and layout: Determine the appropriate size for your driveway entrance.
- Curbing and edging options: Consider adding curbs or edges for a polished look and to reinforce the apron.
- Surface texture and finish: Decide on a texture and finish that provide the desired appearance and traction.
- Expansion joints: Include expansion joints in concrete aprons to prevent cracking.
- Lighting and visibility: Incorporate lighting for aesthetics and to enhance nighttime visibility.
- Landscaping and green elements: Plan for landscaping that complements the apron and integrates it with your property’s overall design.
Maintenance and Care for Driveway Aprons
Here’s how to keep it in top condition:
Regular Cleaning
Keep your apron clean by regularly sweeping away debris, dirt, and leaves. For tougher stains such as oil or grease, use a degreaser or a mild detergent mixed with water. This not only maintains its appearance but also prevents surface damage over time.
Repair and Replacement
Inspect your apron periodically for any signs of wear, such as cracks or potholes. Small cracks can often be filled with a suitable sealant, while larger damaged areas might require patching or, in some cases, complete replacement to restore the apron’s structural integrity and appearance.
Sealcoating and Protection
Applying a sealcoat to asphalt and concrete aprons can significantly extend their lifespan. This protective layer wards off moisture, UV rays, and chemical spills, all of which can degrade the apron material over time. It’s recommended to sealcoat your driveway apron every few years, depending on the level of exposure to traffic and the elements.
Proactively addressing maintenance needs not only keeps your driveway apron looking great but also helps avoid more costly repairs down the line. Regular upkeep ensures that your apron continues to enhance the curb appeal and functionality of your property.
Driveway Apron Cost
| Cost Factor | Description | Estimated Cost Range |
| Material Choice | – Concrete<br>- Asphalt<br>- Pavers<br>- Gravel | $3 – $5/sq. ft.<br>$2 – $4/sq. ft.<br>$10 – $20/sq. ft.<br>$1 – $3/sq. ft. |
| Labor | Professional installation costs | $5 – $10/sq. ft. |
| Size & Complexity | Based on apron dimensions and design | Varies with project scope |
| Additional Features | Curbing, edging, decorative finishes | $500 – $2000 total |
| Permits & Inspections | Required by local municipalities | $50 – $200 |
When considering the installation of a driveway apron, it’s vital to account for all potential costs to ensure you can budget effectively. This overview will help you navigate the expenses, from material selection to labor and additional enhancements.
Material Costs
The choice of material significantly impacts the overall cost of your driveway apron project. Concrete and asphalt are popular for their affordability and durability, while pavers and gravel offer unique aesthetics at varying price points. Your material choice should balance cost with the desired appearance and longevity of the apron.
Labor and Installation
Professional installation is key to ensuring that your driveway apron is not only aesthetically pleasing but also compliant with local building codes and regulations. Labor costs can vary widely depending on the complexity of the project and the rates of the contractor you choose. It’s often worth investing in skilled labor to avoid costly repairs or adjustments down the line.
Size and Complexity
The total cost of your driveway apron will also depend on its size and any design complexities. Larger aprons or those requiring intricate patterns and detailing will necessitate more materials and labor, increasing the overall expense. Consider the scope of your project carefully to manage costs effectively.
Additional Features and Considerations
Adding curbing, edging, or decorative finishes can significantly enhance the curb appeal of your driveway apron but will increase the project’s cost. Additionally, necessary preparation work such as excavation and grading, as well as compliance with local permits and inspections, may incur further expenses. Planning for these can help avoid unexpected costs.
By understanding these key cost factors, you can better prepare and budget for your driveway apron project, ensuring a smooth process and a beautiful result that enhances your property’s value and appeal.
FAQs about Driveway Apron
Here’s a concise guide addressing some of the most frequently asked questions to help you navigate your driveway apron project:
who is responsible for driveway apron
The responsibility for a driveway apron typically falls on the homeowner. However, since aprons often bridge the property to public roadways, local government regulations may dictate specific requirements or permissions. It’s essential to consult with local authorities to understand your obligations and ensure compliance with municipal standards.
What is the best material for driveway aprons?
The best material for a driveway apron depends on several factors including durability, aesthetic preference, climate, and budget. Concrete and asphalt are popular for their longevity and low maintenance, while pavers offer customizable designs, and gravel provides a cost-effective, permeable option. Evaluate your needs and consult a professional to determine the most suitable material for your situation.
What is the purpose of a concrete apron?
A concrete apron serves to provide a stable, durable transition between the driveway and the adjacent roadway or garage. It helps to prevent erosion at the driveway’s entrance by directing water away, reducing the risk of damage to the property. Additionally, it enhances curb appeal and can improve the overall value of the property.
How thick should a driveway apron be?
The thickness of a driveway apron should be sufficient to support the weight of vehicles without cracking or shifting. For residential properties, a concrete apron should typically be at least 4 inches thick. If the apron will support heavier vehicles or frequent traffic, a thickness of 5 to 6 inches may be recommended for added durability. Always follow local building codes and guidelines when determining the appropriate thickness for your project.
Conclusion
In conclusion, a driveway apron is not just a functional element of your property but also a significant aesthetic feature that enhances curb appeal and value. Whether you’re deciding on materials, considering the thickness, or understanding the purpose and responsibility, it’s clear that careful planning and adherence to local regulations are key. By addressing these considerations and frequently asked questions, you can ensure a successful driveway apron project that meets both your practical needs and design aspirations.