Blacktop Sealcoating – Everything You Need To Know
Explore the critical role of Blacktop Sealcoating in protecting and enhancing asphalt driveways and parking lots, ensuring longevity and aesthetic appeal.
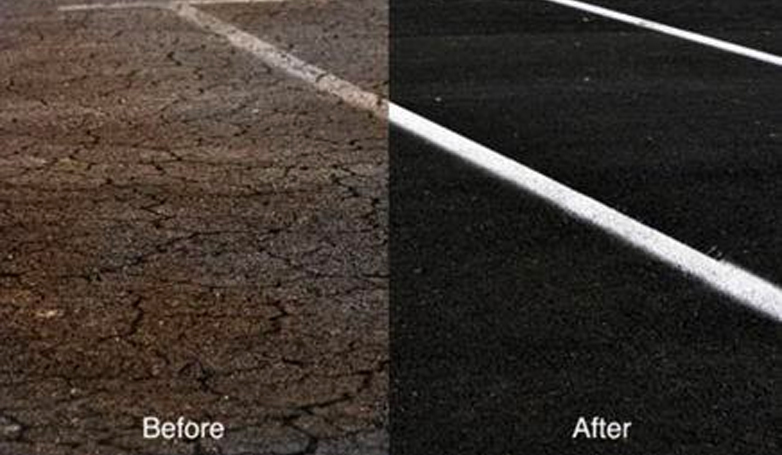
Blacktop sealcoating is crucial for safeguarding asphalt surfaces from environmental elements. This process involves applying a mixture of asphalt or refined coal tar, clay, water, and fillers. As the water evaporates, the emulsion hardens, forming a protective layer. This not only extends the lifespan of driveways and parking lots but also enhances their appearance with a sleek, black finish. It’s a cost-effective method to maintain both residential and commercial asphalt areas, ensuring durability and visual appeal.
Discover the benefits and techniques of blacktop sealcoating, and how to choose the right contractor for optimal results.
Why You Should Sealcoat a Blacktop Driveway or Parking Lot
An asphalt driveway could last up to 30 years if the driveway was installed correctly and regularly maintained. Regular maintenance includes filling cracks annually and blacktop sealcoating when needed.
Driveway cracks as a result of age and weather, especially in unsealed driveways. When water from snow or rain seeps through the asphalt or concrete, it creates pools of water underneath it, which leads to cracking, especially when that moisture freezes and thaws repeatedly. This seepage occurs because most driveways are made from porous materials.
Blacktop Sealcoating offers numerous benefits:
- Driveway sealing closes off the pores so that water can’t penetrate the paving material.
- Most seal coatings protect your driveway color from fading by protecting it from heat and UV damage.
- Asphalt driveway seal coat sits on top of the driveway and acts as a barrier. That barrier prevents water, ice, oil and car fluids, sun, salt, and chemicals from eating away at the driveway or parking lot surface.
- Driveway sealing helps extend the life of an asphalt driveway or parking lot by preventing the asphalt from hardening and crumbling.
- Sealants also make cleaning oil or other leaked fluids from your vehicle much easier because the liquid can’t seep into those tiny pores on the driveway.
- Seal coating is a cost-effective method of repairing or surfacing the existing pavement, extending the pavement and driveway’s life. Without sealer, the asphalt could require an overlay in as little as five to six years, costing thousands of dollars.
The 6-step blacktop sealcoating process
Depending on the manufacturers’ recommendation, the right time of the year to seal coat is when temperatures are expected to remain above 55 degrees. That temperature will ensure that the product cures appropriately.
1. Clean and prepare your paved surface
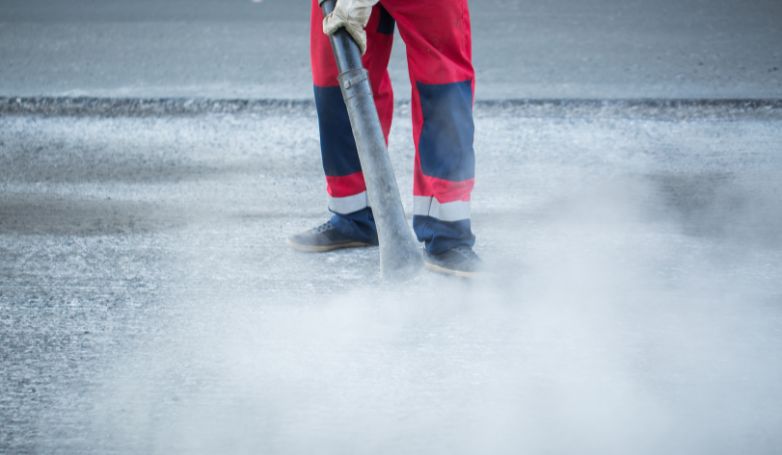
Be sure the driveway is as clean as possible before you seal it. If you trap any oils between the asphalt and sealant, it can eat away at the asphalt and ruin your driveway.
Pull weeds and remove the debris with a push broom. Use a pressure washer to clean the surface, especially any large cracks or potholes. Clean up oil spots with a strong asphalt cleaner specifically designed to remove oil stains. Scrub the driveway with detergent and water.
Rinse the soap and dirt residue with a power washer nozzle or a strong stream of water from your garden hose. Fully rinse the driveway with clear water. Let the driveway dry completely before you apply the seal coat. Do a final sweep with a push broom.
2. Repair cracks before you start
Sealing a cracked or chipped driveway will defeat the purpose of seal coating, so be sure to repair asphalt before you begin. Seal coat products can be used to cover cracks as wide as 1/8 inch, but don’t try to use it on wider cracks.
More significant cracks should be filled with a product designed for such use before the surface seal coating is applied. A rubberized crack sealer is ideal for repairing such cracks.
Older driveways will require you to use a combination of patching compound for small cracks and dents and a blacktop patch for deep potholes.
Be sure to schedule for a few extra days before you seal the driveway to give these patches time to dry.
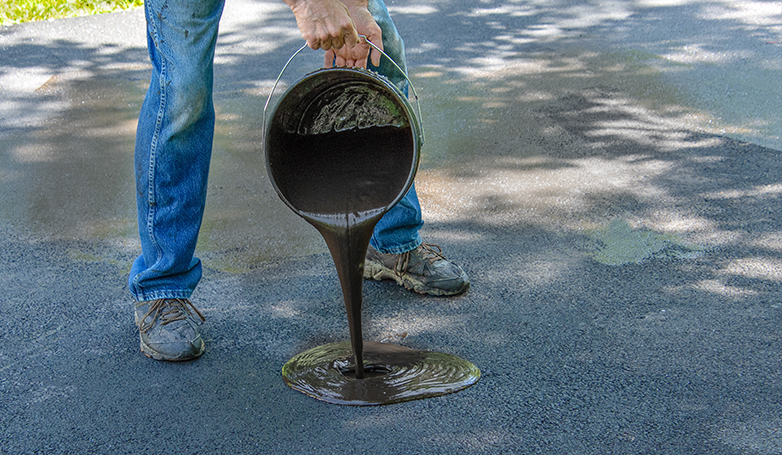
3. Mix the sealcoat product
A few days before you plan to sealcoat the driveway or lot, you should buy the sealant and turn the buckets upside down. Turning them upside down will help mix the sealer and give it a more consistent color. When one bucket is down to about one-third full, mix most of the second bucket with it. Mixing the two will help keep your asphalt sealer uniform in color.
Sand can be mixed in with the product to create a non-slippery surface and provide a little more consistency to the sealcoating product.
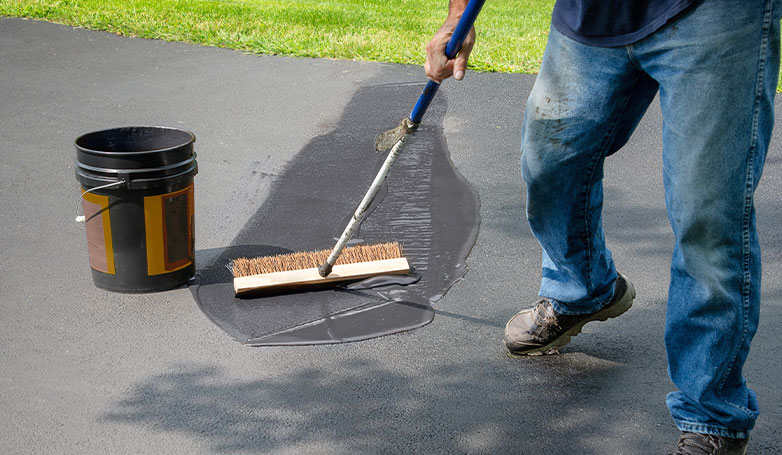
4. Apply the asphalt sealer
A thin layer of sealant works best. Applying excess sealer doesn’t help, so using a thick coat wastes money. Two thin seal coats are enough to ensure complete coverage without wasting money on too much sealer.
Dip a dashing brush in the sealer and apply a coat to all four edges of the driveway or lot. Be careful not to spread it too thin. You want the sealer to fill in all the pores and small cracks. Cut in the four edges of the driveway or lot with the large dashing brush.
Pour a gallon on the driveway or lot and work in small areas. You want to make sure the sealer doesn’t dry too fast while you spread it out. The job goes smoother if you use a squeegee or brush broom to apply the seal coat in overlapping lines across the driveway or parking lot. With the squeegee or brush broom, pull the sealer carefully to the edges.
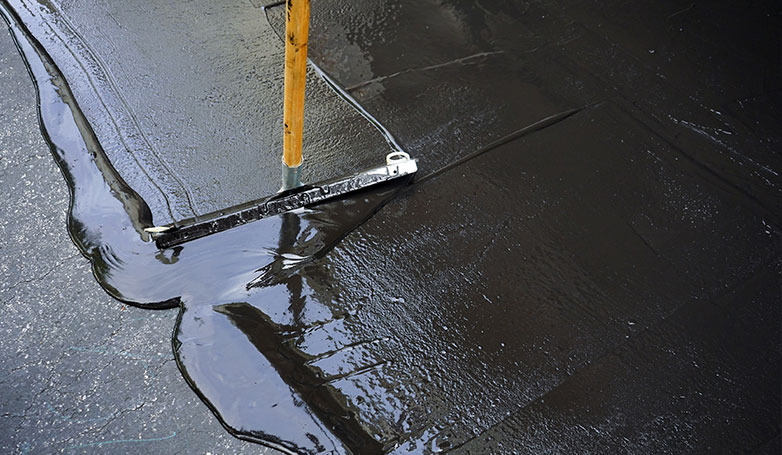
5. Lay down the first coat in long, horizontal lines down your driveway.
Before you use up one bucket of sealcoat, blend in the next bucket. There can be differences in colors between buckets, and this method helps you maintain color uniformity over the entire surface.
After the first sealcoat has dried (about 6 to 12 hours), apply the second coat in vertical stripes.
6. Protect the surface while it dries
Don’t use your driveway or parking lot at all until the second coat completely dries.
- If you apply sealer on your asphalt driveway during summer when there will be full sunlight exposure in the high heat of the day, you can walk on it within 2 to 4 hours.
- Sealed asphalt can be driven on after 12 to 24 hours in the heat of the summer. However, we recommend you allow 48 hours to maintain an excellent looking finish.
- If you carry out the application of sealer under cloudy, humid weather conditions, or the winter season, we recommend you wait for at least 72 hours before using your asphalt driveway.
Section off the front of the driveway or place empty sealer cans at the entrance to prevent anyone from accidentally driving on it until it’s dry.
Choosing the Right Blacktop Sealcoating
Pavement sealcoat products come in a variety of standards. There are three types of pavement sealers.
- Refined tar-based seal coat offers the best protection against water penetration and chemical resistance. Tar-based sealcoating offers the best wear characteristics (typically 3–5 years). Coal tar sealers are not considered environmentally friendly, and some states and communities have banned their use.
- Asphalt-based sealer typically offers inadequate protection against environmental chemicals and harsher climates. Asphalt-based sealer may last up to 6 years.
- Petroleum-based sealer offers protection against water and chemicals somewhere between the other two sealers.
How Often Should you Blacktop Seal coat?
It is best if a commercial lot or residential driveway is sealed not less than six months after it has been installed, Thereafter, it should be regularly maintained by seal coating every two to three years.
Extending the life of your seal coating
You can get the most from your sealcoating by a few simple tricks to make it last longer.
- Don’t drive on the edge of the blacktop. Sealcoating is weakest at the edge, so stay about a foot clear of the edge.
- Periodically hose down the blacktop. Washing debris off the surface prevents build-up and erosion of the sealcoat.
- Avoid leaving heavy or sharp objects on the blacktop. Heavy or pointed objects can dig into and weaken the seal coat. A weak seal coat can crack and allow moisture and other erosion to set in.
What does Blacktop Sealcoating cost?
Sealing costs are primarily determined by where you live and the square footage of your driveway or parking lot. Warmer climates such as Florida or Arizona do not require sealcoating as frequently as colder climates such as Wisconsin or Minnesota.
Measure your driveway or parking lot to determine the square footage. Most seal coating contractors will quote your job based on your square footage. In warm climates, the cost per square foot is higher than in colder climates because the sealcoating is done less frequently.
Finding the Right Balance: DIY vs. Professional Sealcoating Costs
| Type of Service | Cost Range |
|---|---|
| DIY (Materials Only) | $0.40 per sq. ft. (average) |
| DIY (Low-end Sealants) | $6 to $9 (per 5-gallon pail) |
| DIY (Top-graded Sealants) | $25 (per 5-gallon pail) |
| Professional Contractor | $200 to $500 or more |
| Homeadvisor Asphalt Sealing Costs | $140 to $1,500 |
| Homeadvisor Typical Range | $251 – $698 |
| Homeadvisor National Average | $472 |
According to Homeadvisor, Asphalt Sealing Costs can range from $140 to $1,500. The typical range is $251 – $698, with the National average at $472.
Some people or small businesses opt to seal coat their blacktop surface themselves. The average cost for the necessary materials to sealcoat a driveway or parking lot is approximately 40 cents per square foot for individuals doing the work themselves. However, these costs can be higher depending on the equipment you need to purchase. Low-end sealants range from $6 to $9 for a 5-gallon pail covering about 400 square feet, while top graded products will cost around $25 for a 5-gallon pail that can cover up to 300 square feet.
Hiring a professional contractor to seal a driveway can cost $200 to $500, or more, according to CostHelper. In addition to doing the job right, a contractor will be aware of what products work best in your area, what sealers to avoid altogether, how to make sure the sealer doesn’t pool accidentally and how often the driveway will need to be resealed.
For most people, the benefits of getting the job done professionally will far outweigh the savings generated by doing the job themselves.
How to Find the Best Blacktop Sealcoating Contractor
When it is time to have sealcoating done on your driveway or parking lot, you want to make sure you get a reputable, dependable contractor experienced in sealcoating. Here are seven steps to follow to ensure you get the right contractor for your job.
The best companies typically get their business by word-of-mouth, referrals, and marketing. Ask a friend or a neighbor who has had their driveway paved, who they used. Did they like the quality of the job?
Your property’s blacktop driveway or parking lot is likely one of the most significant investments you have made. Blacktop Sealcoating is one of the most effective ways to keep your driveway or parking lot in the best possible condition for many years.